
Move a View to its Own File
Build an App Like Lego, with SwiftUI — Tutorial 9

1. Introduction
Xcode provides a menu command to Extract Subview from a larger view or scene (which we did in Tutorial 7). But that extracted view still resides in the same file as the original super view. It is best practice to separate each view into its own file.
We need to “refactor” our existing code by “separating the concerns” into separate files. “Refactoring” changes the code under the hood without changing the runtime functionality of the app. Separating the concerns makes the code reusable and maintainable and is a fundamental principle of good architecture. This makes it easier to maintain, test, preview and join different views together.
In this short Tutorial 9, we will move the NewsCell view into its own NewsCell.swift file, out of the parent ContentView.swift file.
We’ll pick up here where the last tutorial left off. Ideally, you have completed the previous tutorials in this series. Or, you can download the prepared project, ready to start this tutorial.
2. Move NewsCell to its own file
At the end of the previous Tutorial 8, we had the ContentView and NewsCell code structures (or “structs”) both in the same ContentView.swift file. Let’s move NewsCell into its file so that we can maintain them separately.
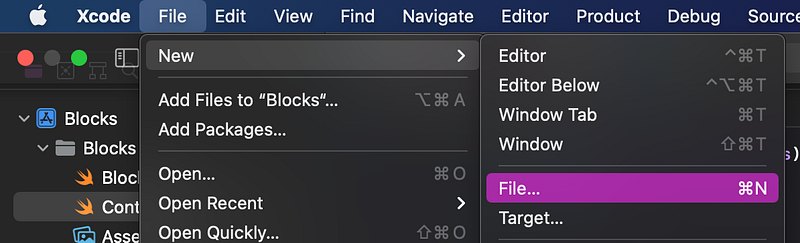
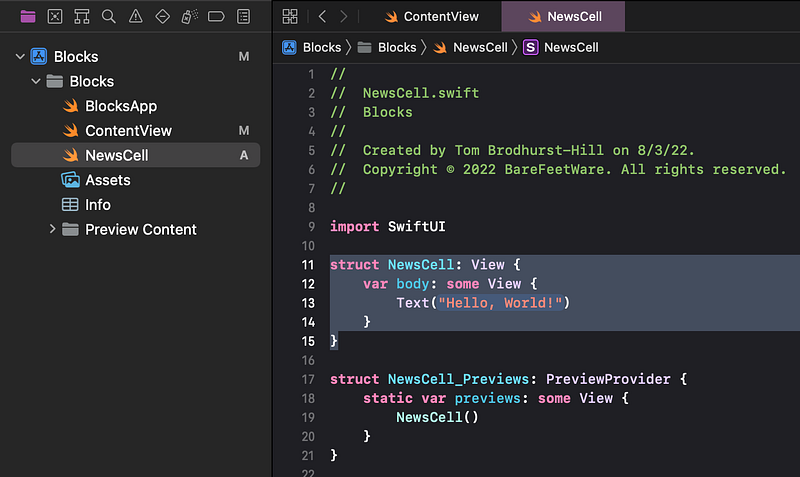
👉 In Xcode, in the File menu, select. New > File....
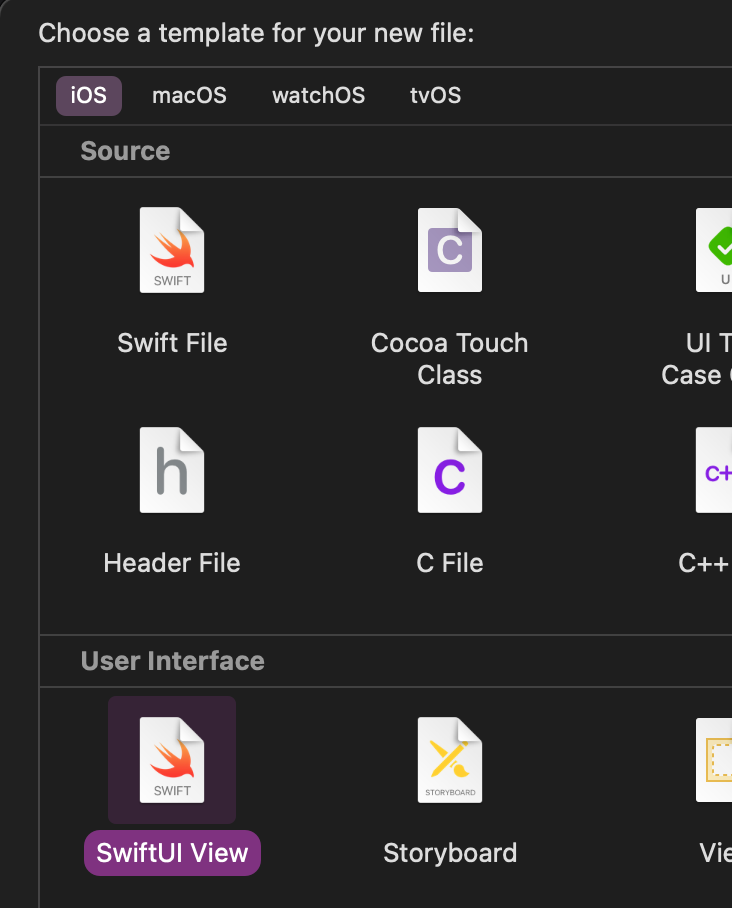
👉 Make sure that iOS is selected in the top bar. Choose the SwiftUI View option from the template. Click Next.
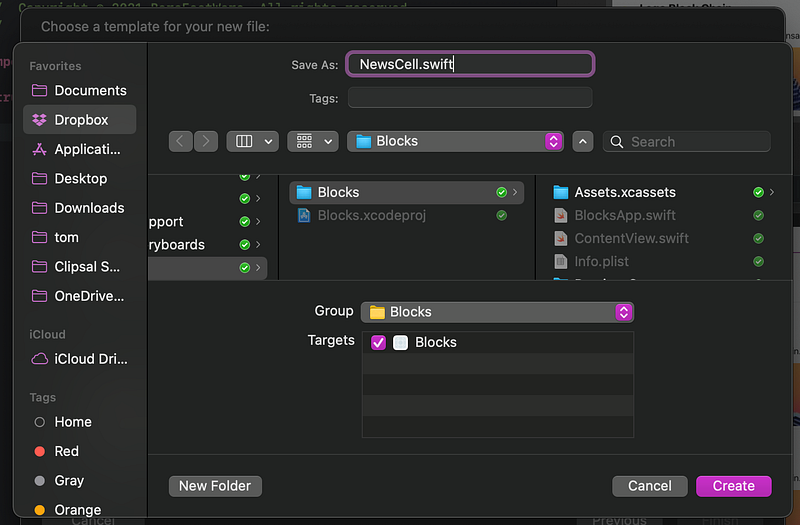
👉 In the Save As dialog, change the name of the new file from SwiftUIView.swift to NewsCell.swift. Ensure that the file will be saved into the same folder as the ContentView.swift file. Click Create.
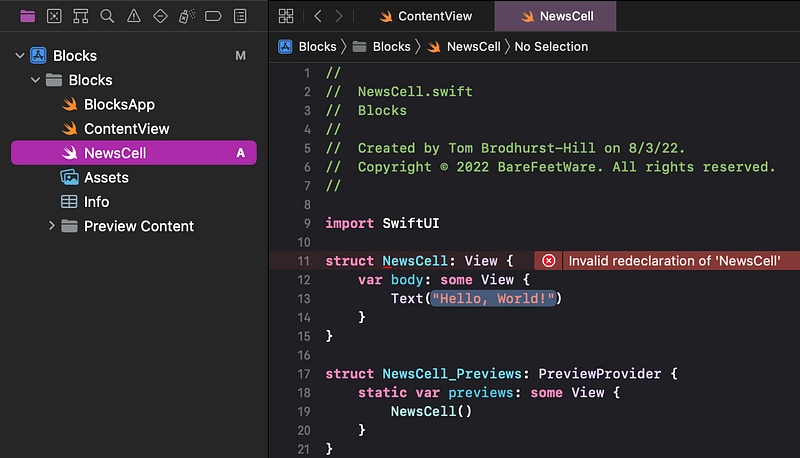
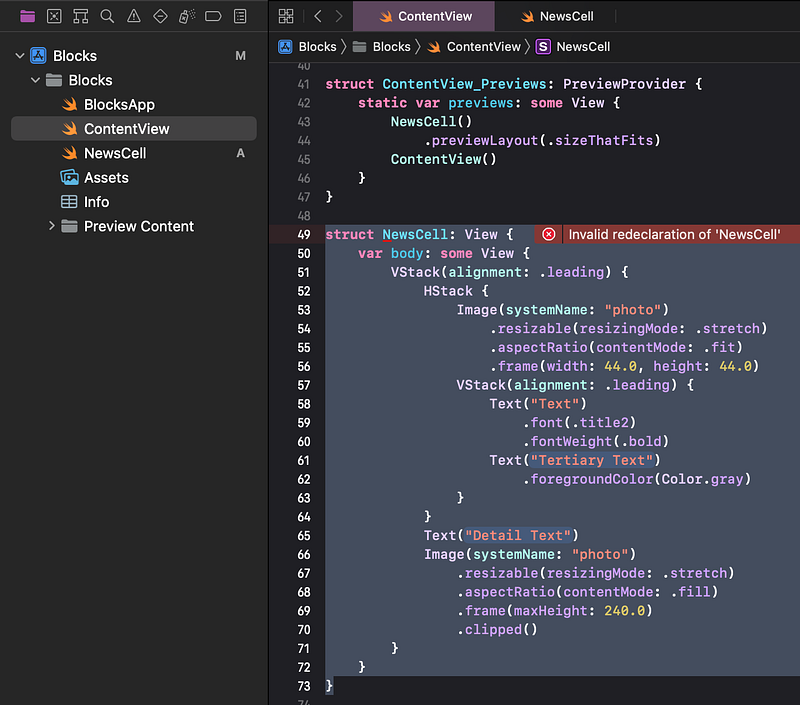
👁 Xcode creates new struct NewsCell code, with a placeholder Text view. Note that Xcode complains that now there is an Invalid redeclaration of 'NewsCell' since we have previously created struct NewsCell in the ContentView.swift file.
Let’s move the struct NewsCell code from the ContentView.swift file, to this new dedicated NewsCell.swift file.
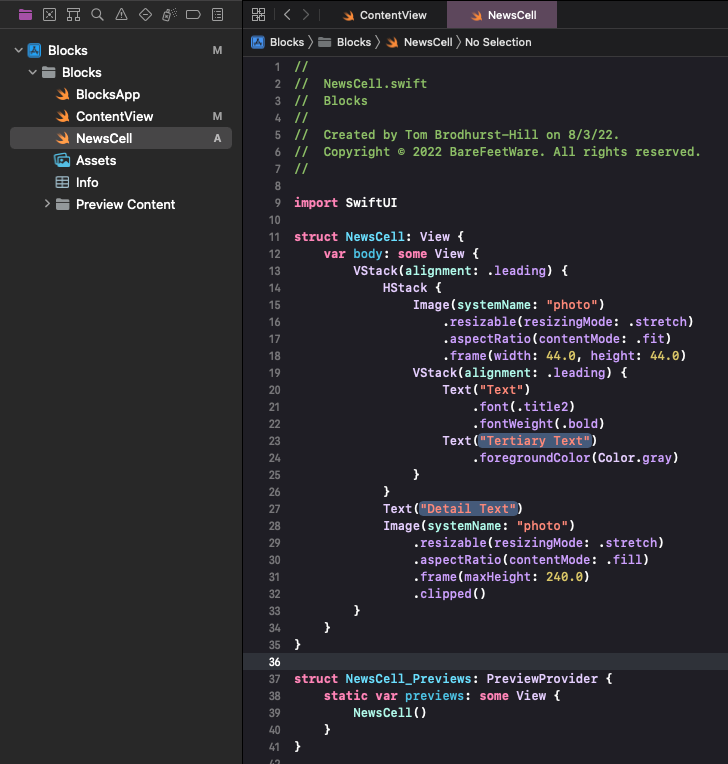
👉 In the Project navigator (on the left), click on the ContentView.swift file. Select all of the code in the struct NewsCell block of code.
👉 Cut the struct NewsCell code (such as by using the Edit menu’s Cut command).
👉 Select the NewsCell.swift file (in the Project navigator). Select the placeholder struct NewsCell code.
👉 Paste the struct NewsCell code over the template code.
3. Move the preview code
Our original ContentView.swift file and the new NewsCell.swift file both contain a preview of the NewsCell. We should move the preview to only be in the same file as our moved NewsCell code.
👉 Back in ContentView.swift, select the NewsCell() in the preview, including the .previewLayout(.sizeThatFits).
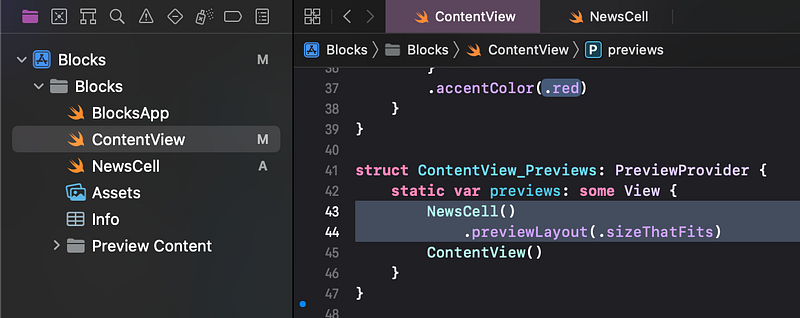
👉 Cut it (such as by choosing Cut from the Edit menu).
👉 Switch to NewsCell.swift. Select the NewsCell() in the preview. Paste to replace it.
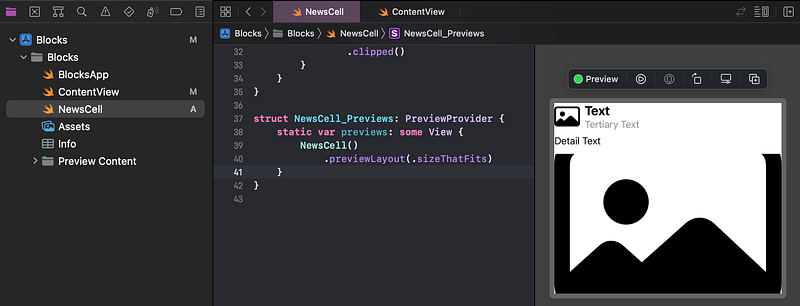
👁 Xcode shows the preview of the NewsCell in the NewsCell.swift file and no longer in the ContentView.swift file. You might need to refresh using the Resume button in the preview.
👉 Run the app to confirm that there are no errors.
4. Commit changes
As you’ve done before:
- 👉 Choose
Commitfrom theSource Controlmenu. - 👉 Enter a description such as:
NewsCell: moved to separate file - 👉 Click on the
Commitbutton.
5. Next…
Our NewsCell code is now in its own NewsCell.swift file. We will create a separate file when we start to build each new view instead of extracting it.
Next, in Tutorial 10, we will extract the text and image properties to create different instances of the NewsCell.
See upcoming tutorials in the table of contents. Follow the author to be notified of more articles.
⁉️ If you have any questions or comments, please add a response below.
This series is released via Next Level Swift. Subscribe to keep updated and never miss a new Tutorial of this series!

We are always looking for talented and passionate Swift developers! Check out our writer’s section and find out how you can share your knowledge with the Next Level Swift Community!


