
Using animations to make a simple chest system (Godot 4/C#)
Let’s discover the power of Godot’s embedded animation events!
Wanna learn how to create simple animations in Godot 4, and how to embed powerful method calls in them to trigger some C# logic at a specific moment in the timeline?
Well, in this tutorial, we’re going to see how to implement a little chest system where players can open the chest, and then get a reward inside once the lid has lifted up — all this using animations and animation events!
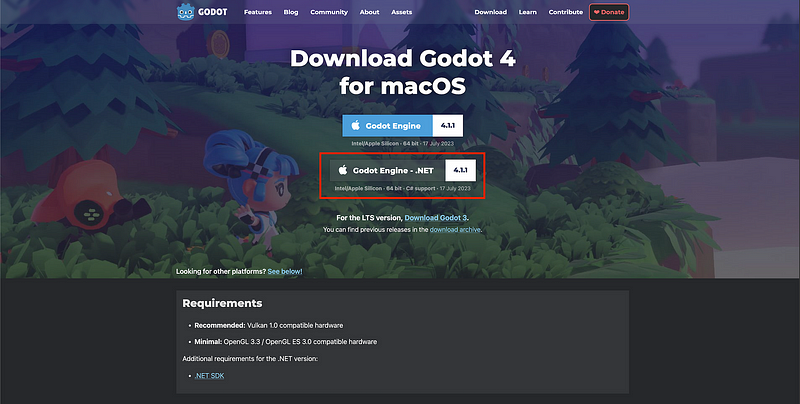
As usual, since we’ll be coding our logic in C#, make sure that you have a version of Godot with .NET enabled.
And of course, don’t forget that you can get the demo scene and all the assets from this demo on my Github 🚀 with all my other Godot tutorials.
The tutorial is also available as a video — text version is below:
But now, with all that said, let’s dive in and discover the basics of creating animations with events in Godot and C#!
Creating a simple animation
Alright, first of all, let’s see how to make a basic animation in Godot. Our goal will be to have the lid of the chest rotate up, to open the chest and give a reward to the player.

For now, you see that I’ve prepared a simple scene with my chest model inside.
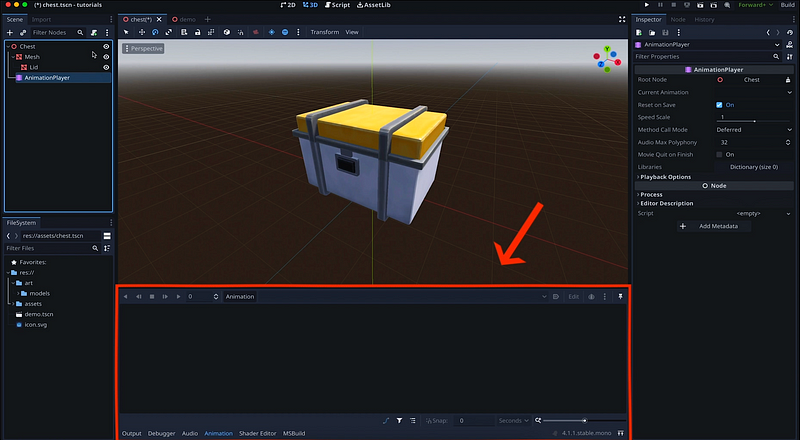
So, now, to create the animation, the first step is to add a new node to our hierarchy of type AnimationPlayer:
You see that as soon as we create this node, Godot opens a new panel at the bottom of the editor to edit the animation inside this player:
Now, to create our animation resource, we can simply go to the Animation button at the top of the animation editor, and click on the New button. We can then choose a name for our anim — for example here let’s call it “chest-open”:
Like in many game engines, this editor works by stacking one or more tracks next to one another, to control various properties on the objects you want to animate. The nice with Godot’s AnimationPlayer node, though, is that you can actually control any property you want on any node in the hierarchy of your scene.
Typically, here, we can very easily animate the lid of our chest! To do this, we can do the following:
- First, while making sure that you keep the animation editor active at the bottom, select the “Lid” object in the hierarchy.
- You see that now, in the Inspector, every property has a little key icon next to it, which allows us to add a new animation key for this property inside our animation at the current frame.
- So, for example, we can scroll down to the Transform component of our “Lid” node, and add a keyframe for its rotation at the beginning of our animation with its current rotation of zero on all axes. Also, because it’s the first keyframe we’re adding for this property, Godot offers to auto-create the track for us in the animation resource, and then adds the keyframe as expected.
- Then, we simply need to drag the timeline head to a later time to place our second keyframe… except you see we’re blocked quite quickly cause, for now, our animation only lasts 1 second! To expand it, we need to use the input field in the top-right corner of the editor and increase this number. (Note that if you prefer to work in frames than in seconds, you can change the mode with this dropdown in the bottom-right corner.)
- And now that we have more room, we can add our second keyframe with the top lifted up, by changing the rotation value and re-clicking on the key icon to set the second frame.
And that’s basically it! If we click on the play icon in the animation editor, you see that we now have a basic rotation animation that opens the chest by moving the lid :)
But, just as a little bonus: if you want the move to be slightly more realistic, it can be neat to play around with the animation curve and, instead of using the default linear behaviour, have some ease-in or ease-out effect.
Note: If you’re not too familiar with this concept, I’ve talked about it in the context of Blender animations in this tutorial — but the idea is totally transferrable to other software like Godot, too :)
And so here, if we select both our keyframes, you see that in the Inspector, we have an easing property that shows us how our keyframed value evolves between the two keyframes:
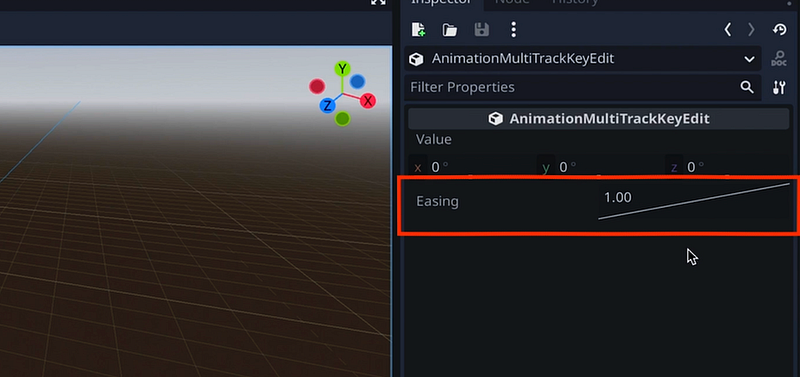
For now, it’s linear, meaning that it increases at a steady rate.
But if you click and drag on this curve, you see that you can pull it to a side, and make some different custom easing for your keyframes:
(For example, by making this kind of exponential curve, you get a slow beginning and a fast end!)
Or you could even right-click on the easing block and pick something like an ease-in-out, to have a slow down at the start and at the end of the animation, which is a bit more realistic:
Ok! And now, with this animation in place, let’s see how to actually start this animation when we press some input…
Playing an animation using C# code
In this second part, we’re going to see how to play our animation when we press some interact action key.
Now, of course, in a real game, you’d probably also limit the opening of the chest to a certain range, meaning that the player should be close enough to the item to interact with it. But here, we’ll just suppose that we don’t have this range issue, and look only at the input to trigger the opening.
So, here, we first need to define our new input action in the project, simply by going to the Project Settings panel and adding it to the list:
Note: Don’t forget that I discussed this concept of input actions in details in this previous tutorial, if you want more info :)
Here, let’s call our action “interact” — and then, let’s add a new C# script on our “Chest” root node to implement the callback logic for this input.
Basically, in this Chest class, we’re going to use the _Process() function to check whether our action has just been pressed and, in that case, trigger the _Open() method:
using Godot;
using System;

public partial class Chest : Node3D
{
    public override void _Process(double delta)
    {
        if (Input.IsActionJustPressed("interact")) {
            _Open();
        }
    }
}
This private method in our Chest class will simply get back the reference to our AnimationPlayer component, and call it’s play function with the name of our animation — “chest-open”:
using Godot;
using System;

public partial class Chest : Node3D
{
    public override void _Process(double delta) { ... }

    private void _Open()
    {
        GetNode<AnimationPlayer>("AnimationPlayer").Play("chest-open");
    }
}
Also, as a little additional feature, let’s add a text in our 3D scene that says “Interact” while the action is available, and then disappears when we start to open the chest. This way, players will instantly know which chests still need opening :)
We can do this using a Label3D node, and in the Inspector we can set its text to “Interact” for example. Then we just need to bring it slightly above our chest model:
And finally, back in the game, we’ll say that in the _Open() method, we also remove this node from the chest’s hierarchy:
using Godot;
using System;

public partial class Chest : Node3D
{
    public override void _Process(double delta) { ... }

    private void _Open()
    {
        GetNode<AnimationPlayer>("AnimationPlayer").Play("chest-open");
        GetNode("Label3D").QueueFree();
    }
}
Alright — we now have a basic system that allows us to open the lid of our chest when we press a given input key! Now, to wrap up this tutorial, it’s time to discover how to boost our animation with some events to trigger our chest reward feature :)
Adding animation events
A very nice feature of Godot animations is that, in addition to setting keyframes for node properties, you can also add a really cool type of track, which is the Call Method Track type:
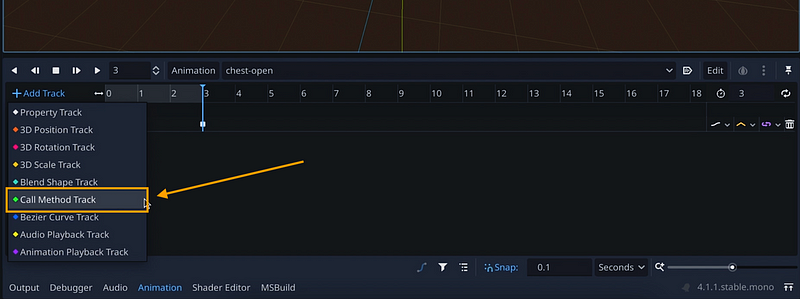
What this means is that you can actually have an animation call a specific method in your code at a very specific moment in the timeline.
For example, here, we can use this feature to bring up a little reward panel once the chest has finished opening.
So, before working on this function trigger per se, let’s first prepare our UI panel itself. We’ll make something quite simple — and by the way, don’t forget that if you want to learn more about the basics of UIs in Godot, you can have a look at this previous episode of the series where I discussed it in details :)
(Of course, since we’re focusing on the animation and animation events here, we can stick with a basic static panel — even though, obviously, in an actual game, you’d have some system behind this to generate the reward on-the-fly depending on the context.)
But anyway — for now, let’s just prepare our panel, and have its “OK” button at the bottom close it back, by creating a new function in our Chest C# script, and linking it from the Signals editor:
using Godot;
using System;

public partial class Chest : Node3D
{
    private Control _rewardPanel;

    public override void _Ready()
    {
        _rewardPanel = GetNode<Control>("RewardPanel");
    }

    public override void _Process(double delta) { ... }
    private void _Open() { ... }

    private void _CloseRewardPanel()
    {
        _rewardPanel.Visible = false;
    }
}
We’ll also make sure the panel is hidden when the chest is instantiated, using the _Ready() function:
using Godot;
using System;

public partial class Chest : Node3D
{
    private Control _rewardPanel;

    public override void _Ready() { ... }
    public override void _Process(double delta) { ... }
    private void _Open() { ... }
    private void _CloseRewardPanel() { ... }

    private void _ShowRewardPanel()
    {
        _rewardPanel.Visible = true;
    }
}
Now, at this point, we could of course just show the panel when we trigger the _Open() function… but if we do that, we’ll basically be masking our nice animation entirely!
So, instead, let’s rather extract this instruction to a new function in our script, called _ShowRewardPanel():
using Godot;
using System;

public partial class Chest : Node3D
{
    private Control _rewardPanel;

    public override void _Ready()
    {
        _rewardPanel = GetNode<Control>("RewardPanel");
        _rewardPanel.Visible = false;
    }

    public override void _Process(double delta) { ... }
    private void _Open() { ... }
    private void _CloseRewardPanel() { ... }
}
And then:
- we’ll go back to the animation editor and add a new track, of type Call Method Track
- and we’ll right-click on the track to insert a new key
You see that Godot shows a popup where we can choose the function to call at that keyframe — so we’ll just pick our new _ShowRewardPanel() method:
And here we are! If we run our game again, you see that now we can press our interact action to start the animation and then, when it ends, our method call triggers and the reward panel shows up.
Conclusion
So here you go: you now know how to create basic animations in Godot, and how to boost them using animation events to trigger C# script!
If you enjoyed the tutorial, feel free to clap for the article and follow me to not miss the next ones — and of course, don’t hesitate to drop a comment with ideas of Godot tricks that you’d like to learn!
As always, thanks a lot for reading, and take care :)
To read more of my content, and articles from many other great writers from Medium, consider becoming a member! Your membership fee directly supports the writers you read.


