
Creating a simple but full game loop (Godot 4/C#)
Let’s learn how to setup an entire game loop — from the splash screen to the replay panel!

Whenever you make a game, there’s a point where you’ll need to chain together all of your scenes to create some global experience for the player — what we call the main game loop.
And, actually, creating a simple game loop to learn this chaining logic is quite easy!
So, in this tutorial, let’s discuss how to setup the entire scene-switch process for a very basic game, from the splash screen to the replay UI, in Godot4 and C#…

We’ll also take this opportunity to talk about the basics of Godot’s UI system, as we’ll have several scenes focused on UI components, and about the power of Godot’s autoloads.
As usual, since we’ll be coding our logic in C#, make sure that you have a version of Godot with .NET enabled.

And of course, don’t forget that you can get the demo scene and all the assets from this demo on my Github 🚀 with all my other Godot tutorials.
The tutorial is also available as a video — text version is below:
But now, with all that said, let’s dive in and discover how to make a simple game loop in Godot/C#!
Getting an overview of our game loop
Alright — before diving in the implementation, let’s first get a bird’s-eye view of our entire loop, from start to finish.
Like in many games, our loop will be a 4-steps process:
- At the very beginning, we’ll have the splash screen of our game. That’s something that is almost always present when a game starts, and it’s typically where you put your logo, your team name, or even some warnings or extra info.
- Then, we’ll get to the main menu, which will just contain two buttons: a Play button, and a Quit button. Pretty self-explanatory :)
- Then, if we click on the Play button, we’ll get to the main game scene. That’s where our little game will really happen and, in an actual real-life game, you might actually have several levels that are chained and combined to make up the core gameplay. But here, we’ll keep things simple and have just a single game scene. The game in itself will be extremely simple: we’ll have a button to click in the middle of the screen. If we manage to click it before the time limit expires, we’ll get a win. If we don’t, however, we’ll get a game over.
- Both the win and game over screens will be fairly similar, and they’ll contain a Back button (to go back to the menu scene), and a Replay button to start a new game instantly.

Ok so — that’s the overview of our entire loop and, as you can see, it’s really basic. But, in truth, it sort of matches a lot of AAA games, too — it’s just that a prod-ready game has nicer visuals, and that the “game” chunk in the middle is way bigger :)
So now, with that in mind: let’s get to it and start by working on our splash screen…
Creating a basic splash screen
As we said before, in a real game, the splash screen is a way to show logos and team names; here, we’ll just use the pre-imported Godot logo for our demo.
And to do this splash screen, we’re going to create our first UI scene — so we’ll need to use the Control node type for the root.
Note: As we’ve said in the very first episode of this series, the Control node and its derived types (meaning all the nodes that have a green icon in the Godot editor) are used whenever you want to do UI in Godot.
Also, let’s rename this node to “SplashScreen”, just so we’re clear on what it does:

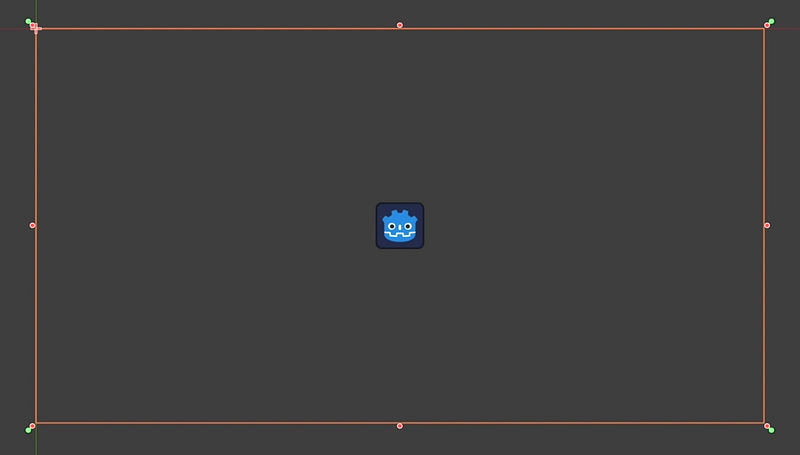
Now, you see that as soon as we create a Control node, in the 2D scene editor, we get this orange rectangle. This is the zone that our Control node expands to , the zone it fills— and here, it’s the full screen rect.
You can actually compare the size of the element to the size of the screen itself, shown with the very light blue stroke; and you can see the different available anchors and expansion modes in this menu over here (so for example we could have it spread just in one direction, or even stick to a corner):
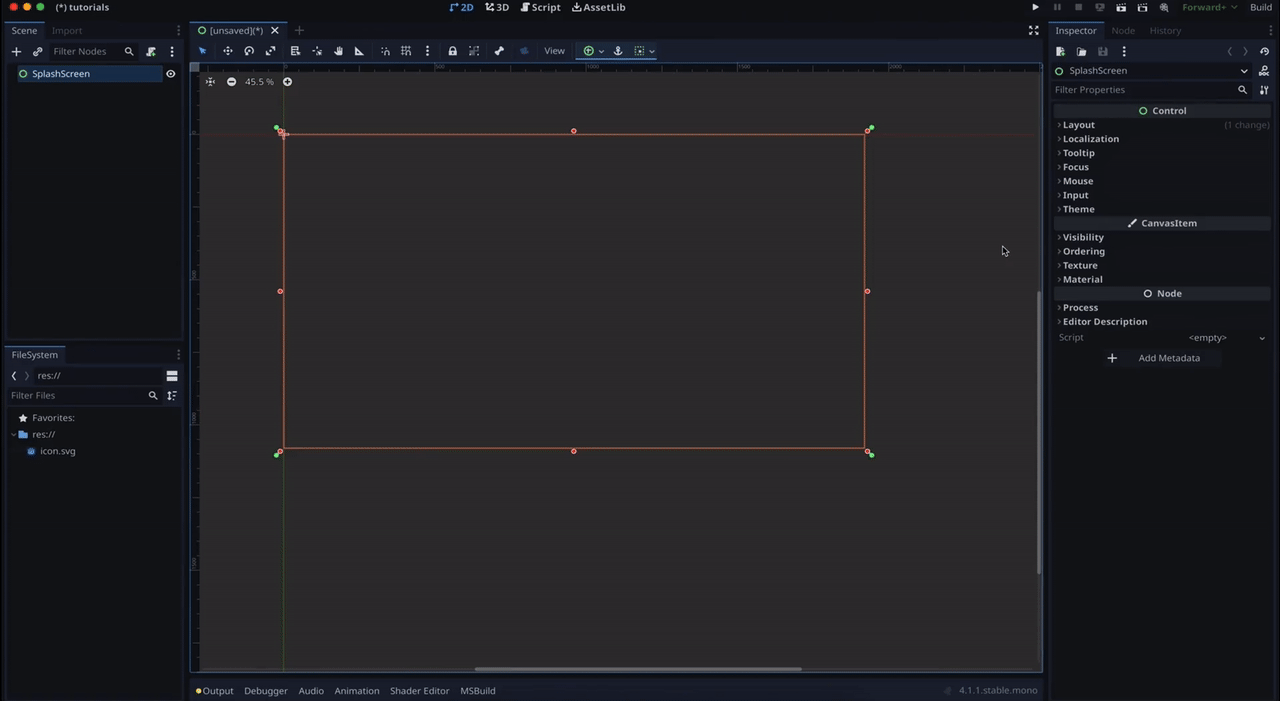
But, here, the full screen is actually what we need, because this Control node will be our global UI container.
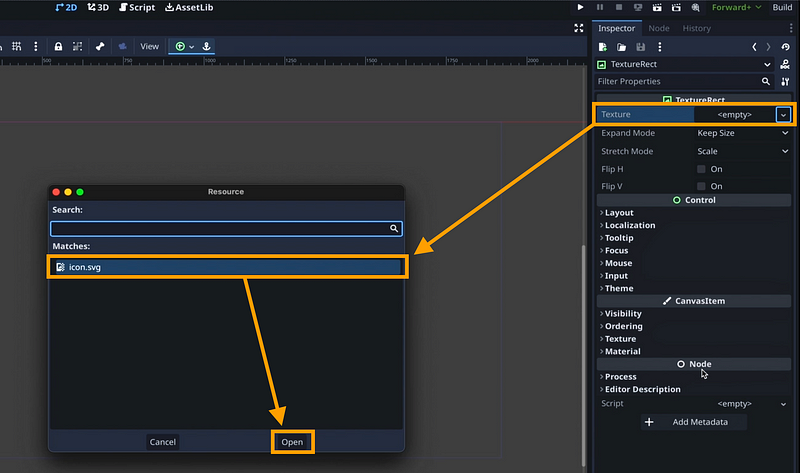
What we want is then add the Godot icon in the middle. So let’s right-click on our root node and add a new child node inside of type TextureRect, which will allow us to display an image.

To actually define the image to show, and use the little Godot icon in our UI, let’s just select our new node and, in its Inspector, set its Texture property to the icon file by using the Quick Load option.
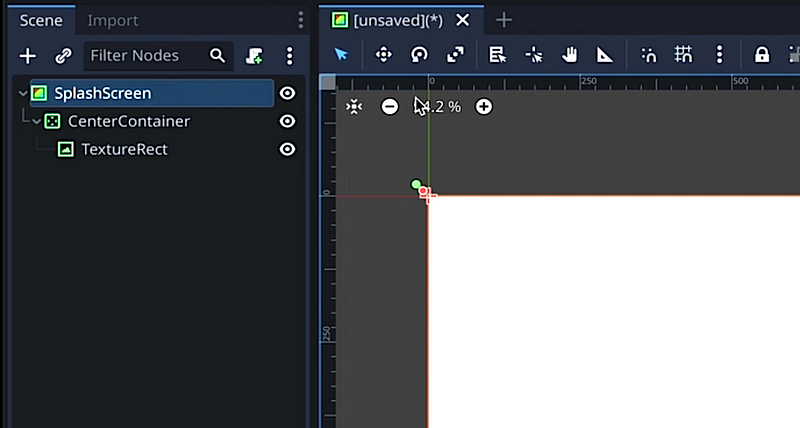
Ok that’s cool… except that, for now, the icon is pushed all the way to the top-left corner, which is really not great for a loading screen!
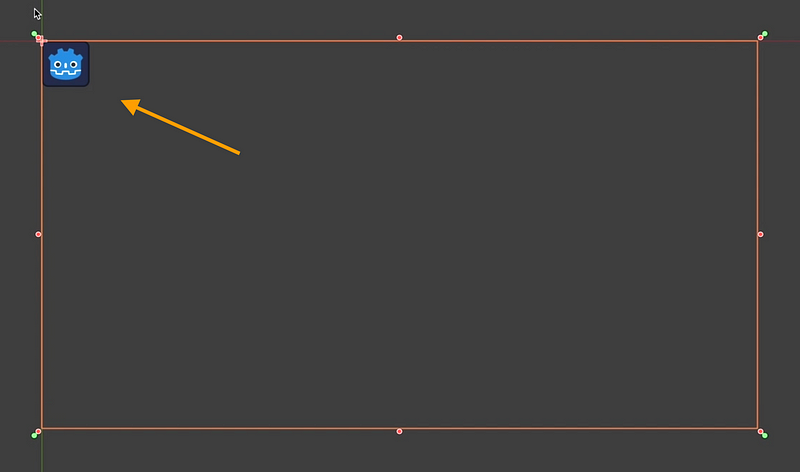
The problem is that, at the moment, our root node is just a very basic Control node. Which means that it can display its child nodes on screen, and it has some basic positioning options… but it’s really not that clever, or powerful.
In Godot, like in many other game engines, the UI relies on a system of nested layouts that recursively place the child nodes properly, according to various options, to fill in the whole interface. And so those parent containers are usually the best way to place the inner nodes in a flexible and responsive way. This allows your interface to adapt to the screen size dynamically, and be compatible with various platforms (desktops, tablets, mobiles…).
So, typically, here, let’s add a new intermediate node, just above our TextureRect, and in the new node popup start to type in “container”. You see that Godot has quite a few types for us to choose from:
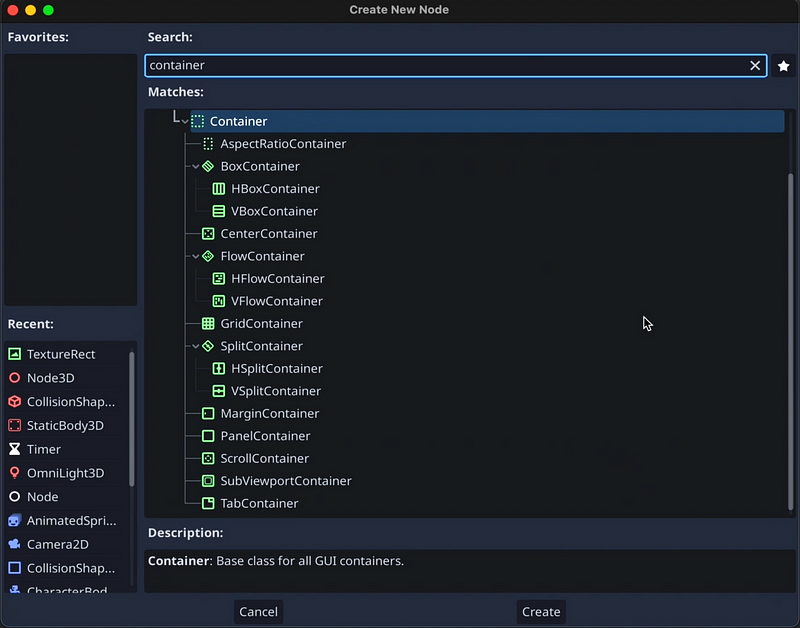
(Like a vertical or a horizontal box container, that stack all their children in one direction or the other; or a grid container; or even a more advanced scroll container.)
But somewhere in this list, there’s something that looks fairly promising: the Center Container.
Once it’s added, we’ll simply re-use the little anchor dropdown we saw earlier, and set it to full screen for this sub-container too… and sure enough, you see our icon is now properly positioned in the middle of the screen!
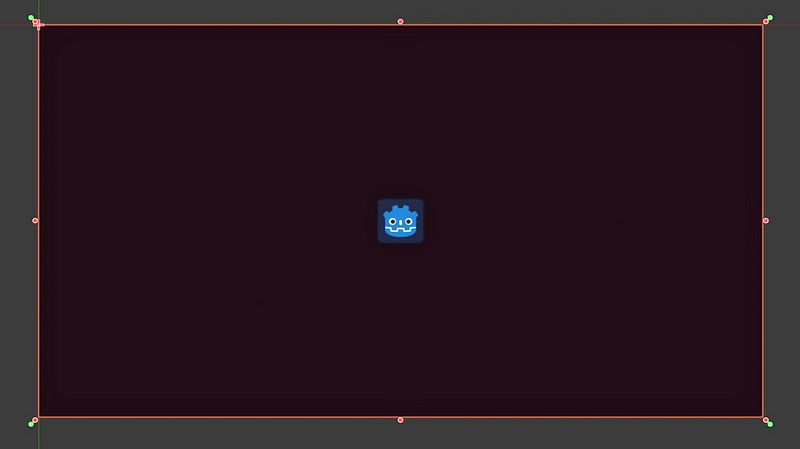
A last little improvement we could make is ensure that our splash screen has a custom background colour.
Because, for now, the background colour is actually defined at the project level, with the default clear colour… which is automatically shared between all of our scenes.
To set this colour the right way, we can just change the type of our root node to be a ColorRect:
This node is not a container, so it’s completely equivalent to a basic Control in terms of layout and organisation on the screen. However, in the Inspector, we’re now able to pick whatever colour we want for our background.

Godot doesn’t remember that we want this UI node to be full rect, so we’ll just re-set its anchor and there we go: we now have our basic splash screen!
With this basic knowledge of Godot UI, time to move on to the main menu :)
Making the main menu
Ok: now that we have the splash screen, let’s see how to make the main menu.
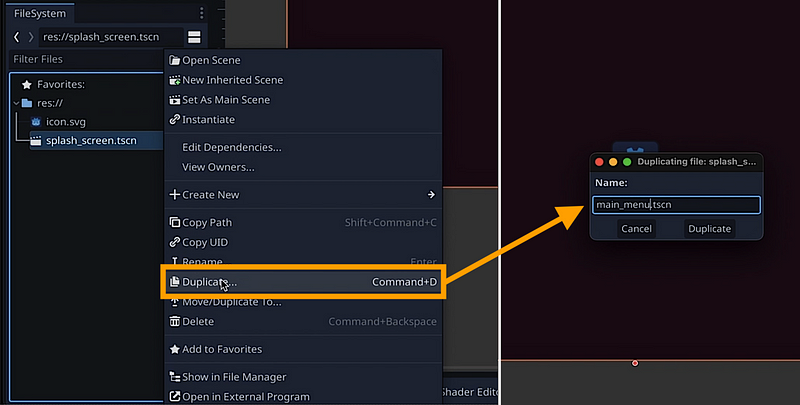
Since it’s actually fairly similar in terms of layout, let’s start by duplicating our splash screen scene and renaming it to “main_menu.tscn”:
Then we’ll open this new scene in the editor. (By the way, you should also rename the root node to “MainMenu”, and you can change the colour of the background to better identify each scene when the game runs :))
Now, of course, we don’t want to show the Godot logo anymore — instead, we want to have two buttons to either start the game, or exit. So let’s remove the TextureRect node and replace it by two new nodes of type Button.
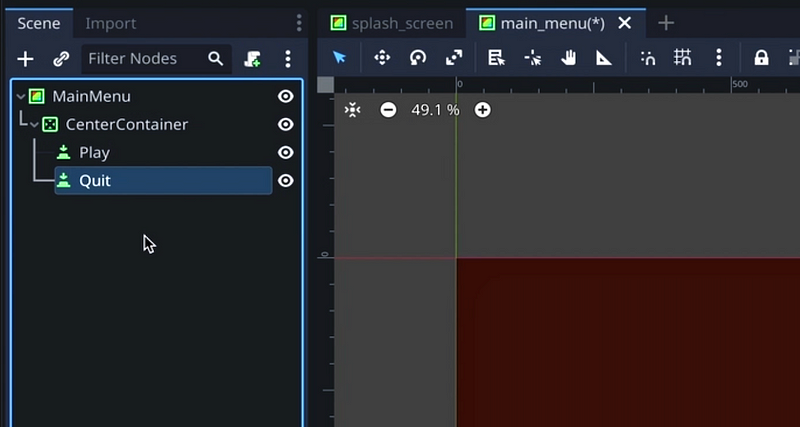
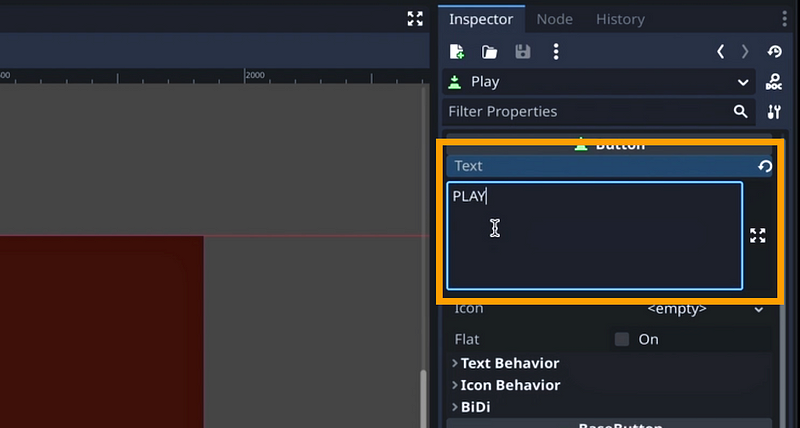
We can click on each to set their labels in the inspector, for example to “PLAY” and “QUIT”:
But if we zoom in… we see that there’s only one button! So what’s the problem?
Well actually, both buttons are here — you can see them in the hierarchy, and they’re indeed both in the scene. It’s just that, for now, they’re stacked on one another, because our CenterContainer forces everything to the middle! So, as we said in the first section, the trick is to nest containers to nest layouts. Here, we can use the VBoxContainer we saw earlier, and inject it between the center container and the button nodes.
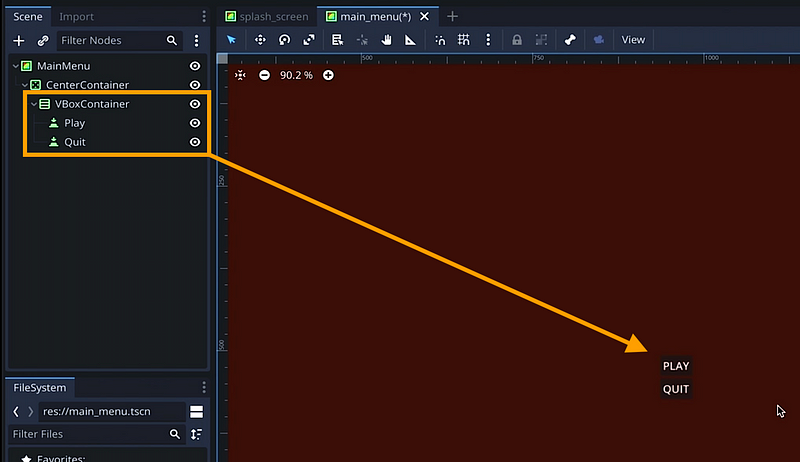
And that’s it: problem solved! The two buttons are now properly placed in a column :)
However, they’re still not super visible, because they’re small and on a dark background. To fix this, we can select both and then, in the Inspector, scroll down to the Theme Overrides section. This is where we can find some instance-specific options and typically, for a button, where we can set the colour of the label or the style of the background, the font size and more!
Here, let’s start by opening the Font Sizes section, enable the Font Size option override, and crank the value up to something way bigger.
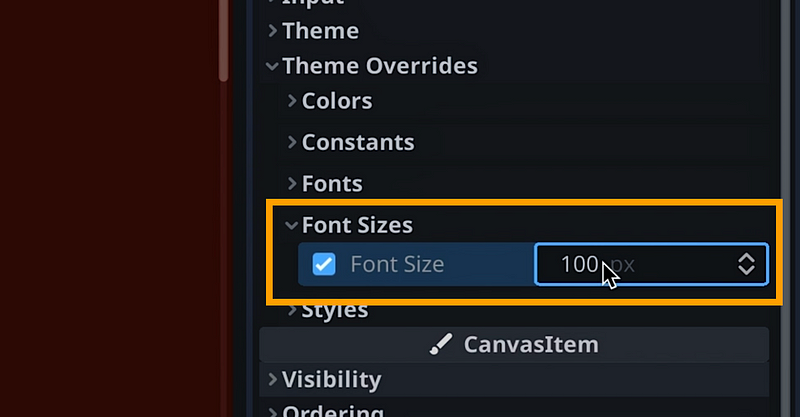
Alright — that’s way better! Our labels now really show in the middle of the screen :)
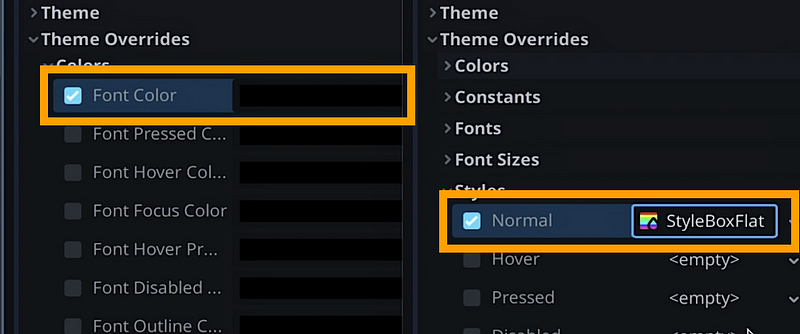
To change the colours of the buttons, we need to do two things — first, we’ll enable the override on the Font Color in the Colors section so that the labels are black; and then, in the Styles section, we’ll create a new sub-resource inside our buttons in the Normal style slot, of type StyleBoxFlat:
Now, the reason we don’t just have a background colour is because buttons are a somewhat complex concept, where you need to show players some feedback when you hover or click them. So Godot, like all game engines, gives buttons different states that may each have their own unique visual.
The normal style is the style that is shown by default, when you’re not hovering or pressing the button, and in our case we want to change the colour to white:
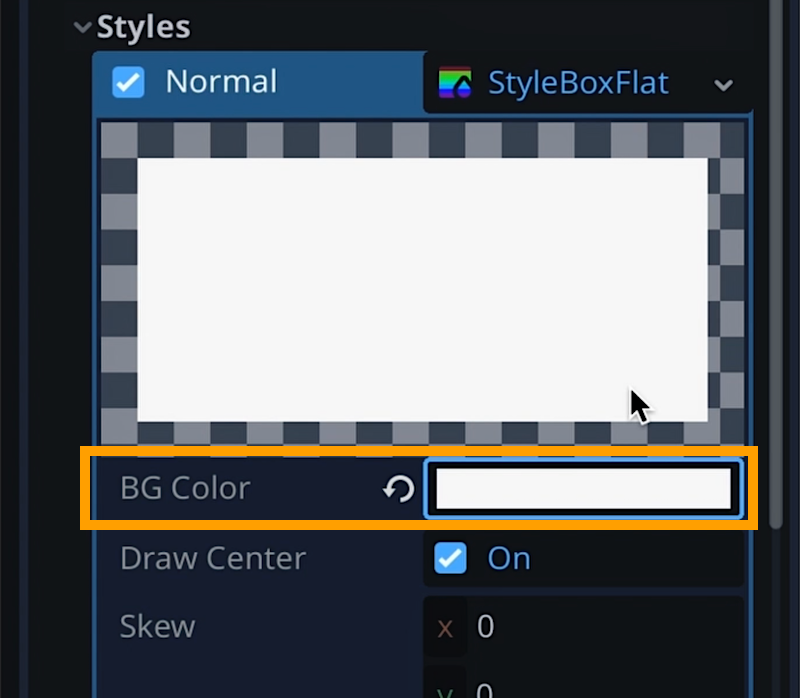
If you want, you can also use the options in the Content Margins section to add some space, what we call “padding”, around the text:

Of course, you can do something similar for the hover and/or pressed states, so that the button looks nice in all states :)
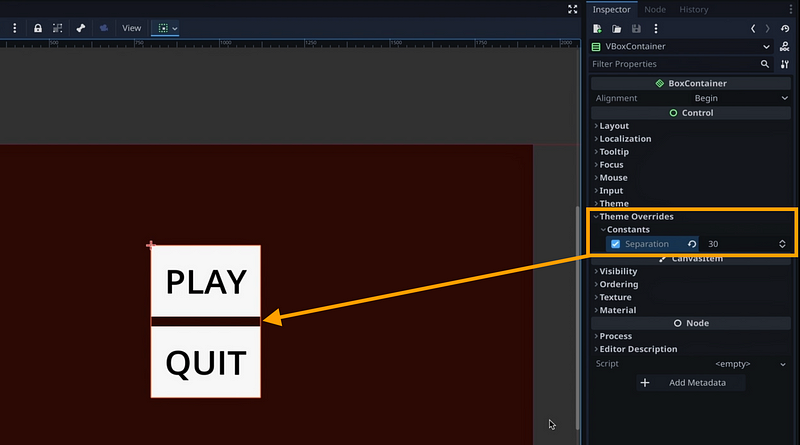
And also, it can be cool to edit our VBoxContainer and, in its ThemeOverrides section, set the Separation value to a number higher than 0 so there is some space between our two objects:
But anyway, there we go: we now have way more readable buttons!
And now, with these 2 UIs ready, the next step is to talk about how to chain them so that, when the splash screen is finished, the main menu appears. Cause for now, of course, if we set our splash screen as the main scene and play our game… it stays there, still forever!
Linking our scenes (the clever way)
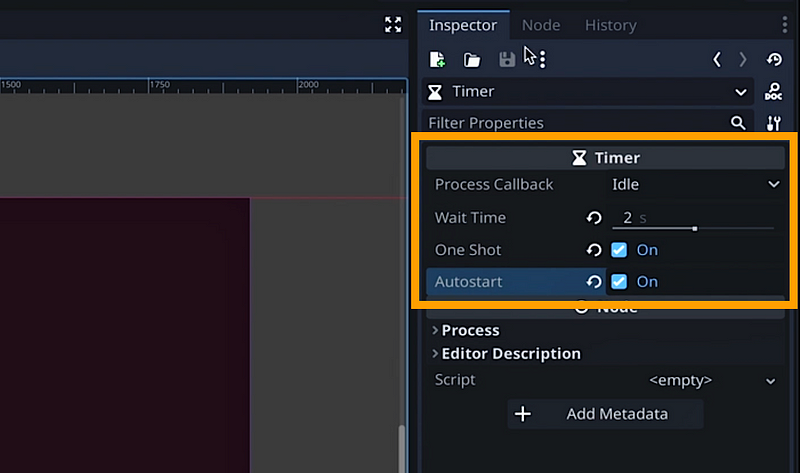
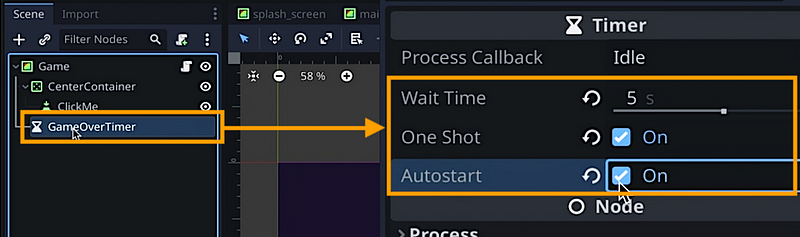
A splash screen is a temporary visual that usually doesn’t require interactions from the player — what we want is for it to auto-switch to the main menu after a given amount of time. To do this, we can of course use a Timer node.
Note: We actually talked about this node in details in a recent tutorial on finite state machines :)
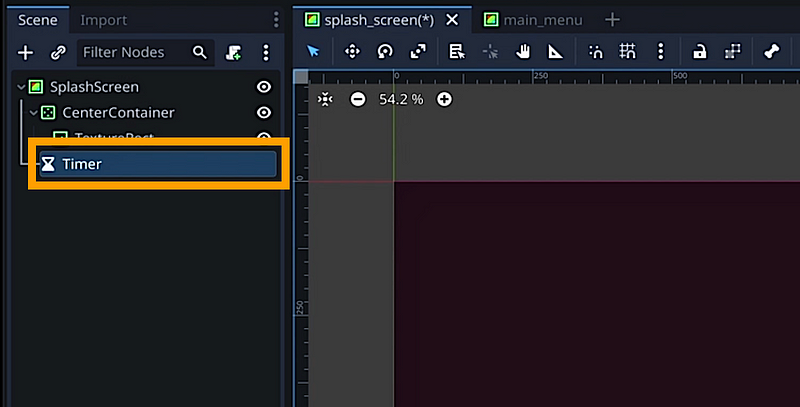
Here, we’re going to tell our Timer to run for 2 seconds, be a one-shot (meaning it doesn’t repeat) and automatically start when the scene is loaded:
But now, we’ve got a problem: what function exactly are we supposed to call, as a callback, when this timer ends and sends its timeout signal? Do we need to do a script to go the main menu, and then do similar scripts in all of our scenes to handle all the different transitions?
Well, we could — but a better solution is to use the power of Godot’s autoload feature.
In a nutshell, the autoloads are Godot’s equivalent of a static variable in C#, for example. Except that it can actually be anything, from a script to a real node. The idea is just to register an object from your project in the list of autoloads, and then Godot will auto-instantiate it when the game first starts, and keep it alive at all times, no matter what scene you’re currently in.
What’s nice with autoloads is that they’re an easy of sharing data or logic between all of your scenes at runtime, or make some elements accessible from anywhere in your codebase.
And you’ve probably guessed it: this makes them a great tool for doing a scene loader! So let’s see how to do it here :)
First, we’ll start by creating a brand new scene and, inside, make a root based just on the super simple Node type, called “SceneLoader”. We don’t need a more complx node type because this will just be a way of holding our C# logic.
Then, we’ll attach a new C# script on it, and open it.
This is the script that will handle all the scene transition logic, and we’ll use it at several times in our game loop to jump between our scenes. For now, we want to handle the “splash screen-to-main menu” transition.
A basic way of implementing this scene loader is to just have a public function that we can call from anywhere in our code base, and that takes in the name of the scene file to load. We can also add a little variable for the folder to make it easier to organise our project, but that’s optional. However, be sure to properly start the file path with the res:// prefix, because this tells Godot to search relative to your project folder.
using Godot;
using System;

public partial class SceneLoader : Node
{

    [Export] private string _sceneFolder;

    public void ChangeToScene(string sceneName) {
        string f = _sceneFolder == "" ? "" : $"{_sceneFolder}/";
        GetTree().ChangeSceneToFile($"res://{f}{sceneName}");
    }

}
Note that the Godot docs show an alternate solution where you code a bit more switch logic by hand. Also, the method we‘re discussing here changes the scene instantly, so you can’t do any cool transition effects and if you have heavier scenes than those ones, it may be block the game a little — so this is just a very simple technique.
But as always: if you’re curious and you want to learn more on how to switch scenes in a Godot/C# project, for example with cool transitions or async loading, go ahead and drop a comment down below :)
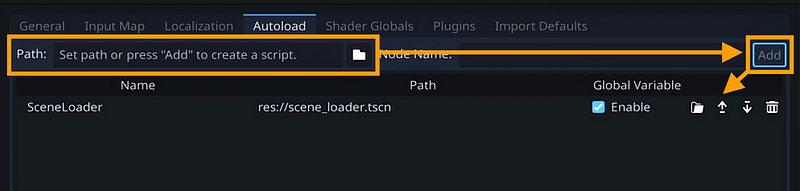
Anyway: now, we have a basic scene loader we can use to change to any scene we want. To actually make it an autoload, though, we have to open the Project Settings panel, go to the Autoload tab, and add this object to the list.

Finally, let’s go back to our SplashScreen and create another super simple script on its root node, called SplashScreen.cs.
We will use it to tell the Timer node to connect its timeout signal to a call of the ChangeToScene() function in our autoloaded scene manager when the scene first starts:
using Godot;
using System;

public partial class SplashScreen : ColorRect
{
    public override void _Ready()
    {
        GetNode<Timer>("Timer").Timeout +=
            () => GetNode<SceneLoader>("/root/SceneLoader").ChangeToScene("main_menu.tscn");
    }
}
So here, you see that we can retrieve the global reference to our singleton just by accessing the root of the current hierarchy (with /root) and then adding the name of our auto-loaded “SceneLoader” node.
And that’s it! If we relaunch our game, the game now starts, shows the splash screen for 2 seconds, and then moves on to the main menu :)
Everything is working great — and the good news is that we basically have all the knowledge we need to create the rest of our game loop, now!
Implementing the game
Ok, with our new scene loader, we can now very easily ensure that our main menu actually plays something when we click the play button.
Once again, we’ll attach a script on the root node of “main_menu.tscn” scene. And, in its _Ready() function, we’ll get the “Play” button child node in its hierarchy and have its Pressed signal call the ChangeToScene() function on our SceneLoader autoload:
using Godot;
using System;

public partial class MainMenu : ColorRect
{
    public override void _Ready()
    {
        GetNode<Button>("CenterContainer/VBoxContainer/Play").Pressed +=
            () => GetNode<SceneLoader>("/root/SceneLoader").ChangeToScene("game.tscn");
    }
}
Actually, while we’re at it — let’s also add a little function in our MainMenu script to handle the game exit process. We’ll simply call the GetTree().Quit() function which closes our game popup window:
using Godot;
using System;

public partial class MainMenu : ColorRect
{
    public override void _Ready()
    {
        GetNode<Button>("CenterContainer/VBoxContainer/Play").Pressed +=
            () => GetNode<SceneLoader>("/root/SceneLoader").ChangeToScene("game.tscn");
    }

    public void ExitGame() {
        GetTree().Quit();
    }
}
And then, we just need to rebuild our project in the MSBuild tab so that the engine compiles our code and knows about this new method, and then assign it in the Signals tab of our “Quit” button node:

Now of course, for now, our “game.tscn” resource doesn’t exist, so our “Play” button doesn’t really load anything. Let’s go ahead and create it!
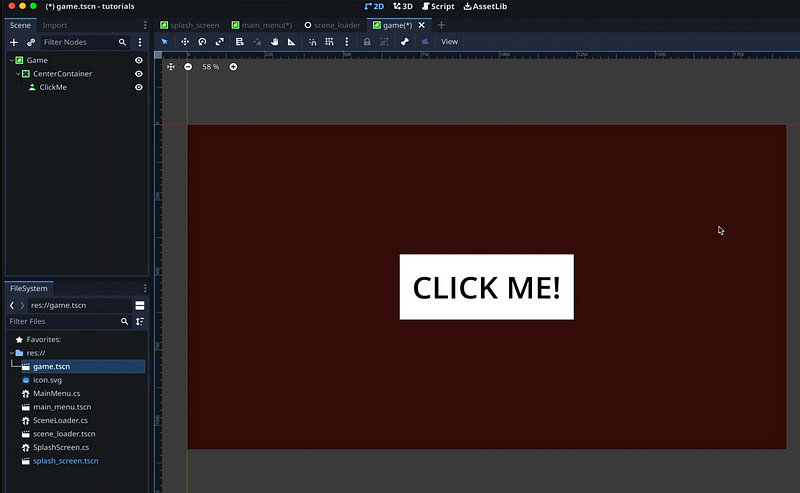
Since the game is quite similar to the menu, let’s duplicate it and rename our copy to “game.tscn” — again, don’t hesitate to rename the root node in this new scene, and change the background colour. Then, we’ll simply remove the second button and the VboxContainer (because we don’t need this nested container anymore) — and we’ll also change the label on the button to say “Click me!”:
On the root node, we’ll replace our script with a new one called Game.cs, and we’ll give a callback to our “ClickMe” button so that it triggers a function inside our script called _EndGame():
using Godot;
using System;

public partial class Game : ColorRect
{
    public override void _Ready()
    {
        GetNode<Button>("CenterContainer/ClickMe").Pressed +=
          () => _EndGame();
    }

    private void _EndGame() {
    }
}
This function will take a boolean parameter to say whether this game ended as a win or a game over, and so our button will call it with this win flag set to true:
using Godot;
using System;

public partial class Game : ColorRect
{
    public override void _Ready()
    {
        GetNode<Button>("CenterContainer/ClickMe").Pressed +=
          () => _EndGame(true);
    }

    private void _EndGame(bool win) {
    }
}
Parallel to this “button-and-win” scheme, let’s make a new Timer node in our scene, and link its timeout signal to our _EndGame() function, but with a false value for the win parameter — because if that timer times out, it means we didn’t click fast enough and we should get a game over.
using Godot;
using System;

public partial class Game : ColorRect
{
    private Timer _gameOverTimer;

    public override void _Ready()
    {
        GetNode<Button>("CenterContainer/ClickMe").Pressed +=
          () => _EndGame(true);

        _gameOverTimer = GetNode<Timer>("GameOverTimer");
        _gameOverTimer.Timeout += () => _EndGame(false);
    }

    private void _EndGame(bool win) {
    }
}
Now, in the _EndGame() function, we’ll make sure that our Timer is stopped — that’s because if we won, and we called this function from our button, then the Timer won’t really have finished, and it could re-call this function soon after for a game over! ;)
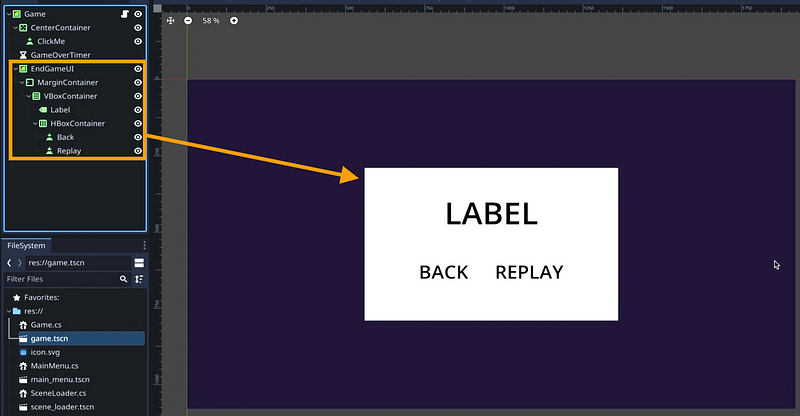
Then, we’ll show the end game panel. Depending on whether we won or lost, we’ll set a different text in the main label, but overall we’ll always have a label in the middle, and the two buttons to replay or go back to the main scene.
using Godot;
using System;

public partial class Game : ColorRect
{
    private Timer _gameOverTimer;
    private Control _endGameUI;

    public override void _Ready()
    {
        GetNode<Button>("CenterContainer/ClickMe").Pressed +=
          () => _EndGame(true);

        _gameOverTimer = GetNode<Timer>("GameOverTimer");
        _gameOverTimer.Timeout += () => _EndGame(false);

        _endGameUI = GetNode<Control>("EndGameUI");
        _endGameUI.Visible = false;
    }

    private void _EndGame(bool win) {
        _gameOverTimer.Stop();
        _endGameUI.Visible = true;
        _endGameUI.GetNode<Label>("MarginContainer/VBoxContainer/Label").Text =
            win ? "Victory!" : "Game over :(";
    }
}
For the replay button, we can actually create a new function in our Game script, that resets and restarts the timer, and hides the end game UI:
using Godot;
using System;

public partial class Game : ColorRect
{
    // ...

    private void _Replay() {
        _gameOverTimer.Start();
        _endGameUI.Visible = false;
    }
}
And then link it in the Signals tab of the “Replay” button.
For the back to menu button, we’ll link it in our script like we did previously for the other scene transitions:
public override void _Ready()
{
    // ...

    _endGameUI.GetNode<Button>("MarginContainer/VBoxContainer/HBoxContainer/Back").Pressed +=
        () => GetNode<SceneLoader>("/root/SceneLoader").ChangeToScene("main_menu.tscn");
}
I won’t go into all the details of how I setup my UI hierarchy cause it’s really just a remix of what we’ve seen before — but as always, don’t hesitate to check out the Github repo to see how I made this demo scene 🚀
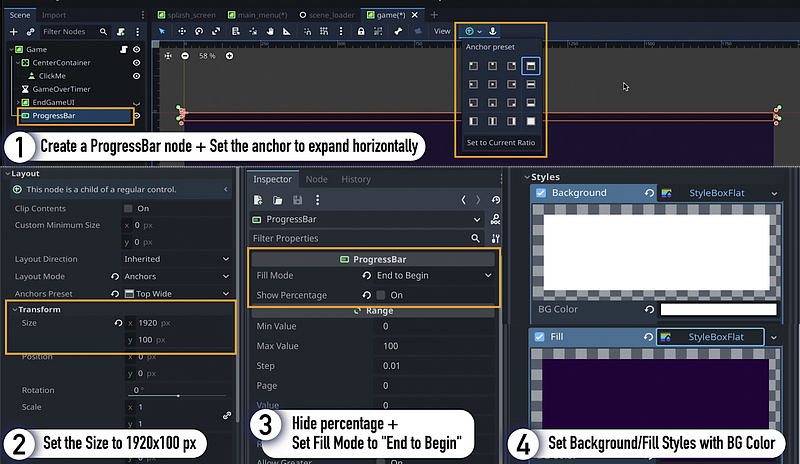
And now, for the final cherry on top — let’s add a progress bar at the top of the screen to clearly tell the players how long they have before the game over!
Here, Godot again provides us with some pretty cool built-in since we have a ready-made UI ProgressBar node that we can add to our scene, and edit slightly, like this:
Then, we can set it up in our script to match our timer delay, and update it continuously in the _Process() method of our Game script:
using Godot;
using System;

public partial class Game : ColorRect
{
    // ...
    private ProgressBar _progressBar;
    private float _gameTime;

    public override void _Ready()
    {
        // ...

        _progressBar = GetNode<ProgressBar>("ProgressBar");
        _progressBar.MaxValue = _gameOverTimer.WaitTime;
        _progressBar.Value = 0;
        _gameTime = 0;
    }

    public override void _Process(double delta) {
        _gameTime += (float) delta;
        _progressBar.Value = _gameTime;
    }
}
Of course, don’t forget to also reset the accumulated game time when you hit “Replay”, and use some boolean flag to check if the game is currently running, or paused in the end game UI panel.
Here’s the final Game script with all this logic in place:
using Godot;
using System;

public partial class Game : ColorRect
{
    private Timer _gameOverTimer;
    private Control _endGameUI;
    private ProgressBar _progressBar;

    private float _gameTime;
    private bool _running;

    public override void _Ready()
    {
        GetNode<Button>("CenterContainer/ClickMe").Pressed += () => _EndGame(true);
        _gameOverTimer = GetNode<Timer>("GameOverTimer");
        _gameOverTimer.Timeout += () => _EndGame(false);

        _endGameUI = GetNode<Control>("EndGameUI");
        _endGameUI.Visible = false;

        _endGameUI.GetNode<Button>("MarginContainer/VBoxContainer/HBoxContainer/Back").Pressed +=
            () => GetNode<SceneLoader>("/root/SceneLoader").ChangeToScene("main_menu.tscn");

        _progressBar = GetNode<ProgressBar>("ProgressBar");
        _progressBar.MaxValue = _gameOverTimer.WaitTime;
        _progressBar.Value = 0;
        _gameTime = 0;
        _running = true;
    }

    public override void _Process(double delta) {
        if (_running) {
            _gameTime += (float) delta;
            _progressBar.Value = _gameTime;
        }
    }

    private void _EndGame(bool win) {
        _gameOverTimer.Stop();
        _endGameUI.Visible = true;
        _endGameUI.GetNode<Label>("MarginContainer/VBoxContainer/Label").Text =
            win ? "Victory!" : "Game over :(";

        _running = false;
    }

    private void _Replay() {
        _gameOverTimer.Start();
        _endGameUI.Visible = false;

        _gameTime = 0;
        _running = true;
    }
}
And here we are!
If we re-run our game from the very beginning, you see that we now have the splash screen that auto-transitions to the main menu; then we can click on the “Play” button to start our game. We have our timer that autostarts and, if we don’t click on the button fast enough, we get a game over. But we can hit the “Replay” button to instantly start a new game, and click the button to get a win. Then, we can use the “Back” button to return to the main menu, and finally exit the game by clicking on “Quit”.
Conclusion
So here you go: you now know the basics of setting up a basic game loop in Godot and C#!
I hope you liked this tutorial and that it helped you understand the basics of Godot’s UI and autoloads. If you did, feel free to clap for the article and follow me to not miss the next ones — and of course, don’t hesitate to drop a comment with ideas of Godot tricks that you’d like to learn!
As always, thanks a lot for reading, and take care :)
To read more of my content, and articles from many other great writers from Medium, consider becoming a member! Your membership fee directly supports the writers you read.


