
Making a basic finite state machine (Godot4/C#)
Let’s discover how to implement a simple FSM in Godot!
State machines are one of the go-tool for game devs when creating AIs, or object behaviours. And, in fact, it’s not that complicated a pattern!
So, in this tutorial, let’s talk about how to make state machines in Godot 4 and C# using a hierarchy of nodes :)
However — we’re not actually going to make a character today. Rather, we’re going to focus on a simpler and less studied example, but that’s just as important, because it demonstrates how state machines can also be useful to environmental prop — we’re going to create a basic traffic light!
I know, might not sound like much; but trust me, it will teach us a lot, and it’s actually just one proof of the fact that your game environments should live and breath, too, even though they contain “inanimate” objects ;)
Of course, if you want to get this basic traffic light 3D model I made or the code for this tutorial, don’t forget to check out the Github repo with all my Godot tutorials over here :)
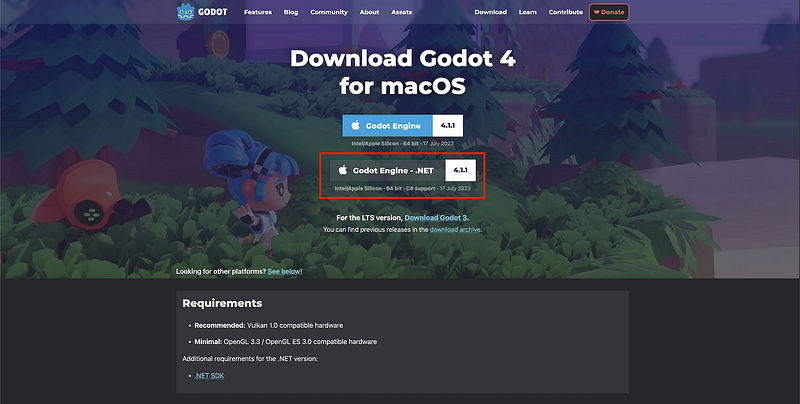
And as usual, since we’ll be coding our logic in C#, make sure that you have a version of Godot with .NET enabled.
As usual, don’t forget that you can get the demo scene and all the assets from this demo on my Github 🚀 with all my other Godot tutorials.
The tutorial is also available as a video — text version is below:
Now, with all that said, let’s discover how to setup our first finite state machine in Godot!
What’s a state machine?
Before we dive into the implementation, let’s briefly recap what a state machine is. Note that I won’t do a full in-depth explanation here, cause I’ve actually already discussed this topic several times on my channel and, although my past tutorials were using Unity, the core underlying concepts remain the same so you can check those out for some extra details.
Curious? Check out this tutorial :)
In short, a state machine is a programming design pattern where you chop down an entity’s behaviour into several states that each have their own context and logic, and are part of a big machine that can transition between all of those on specific events.
A finite state machine, or FSM, is a state machine with a finite number of states (which is usually the case in game dev, since modelling continuous and infinitely defined phenomenons is really an edge case!).
What’s nice with this model is that it is quite intuitive, and it can be useful for the behaviour of little AI characters, or special interactions with objects. That why it’s widely used in the video game industry — it’s been there for a long time, and it’s still here today.
In an FSM, you always have only one active state at any given point, which we often call the current state, and you also have an initial state, which is the state that will be active when the machine first starts. The transitions then take the machine from one state to the other.
Note that you may not have transitions in every direction between all of your states, and that these transitions can be triggered by a variety of events. For example, they can be linked to some physics checks, or just occur after a specific amount of time, or be explicitly called when the player does some action.
Then, inside each state, you have some logic that is specific to this state and is therefore only executed when the entity is in this state. Usually, this logic is chopped down into the common lifecycle hooks of the engine, ’cause the goal is to have the state machine proxy those calls to the active state. So in our case, typically we’ll have equivalents to Godot’s _Ready() our _Process(), to match a normal behaviour lifecycle.
And a state also has an Enter() and an Exit() function to initialise and clean up context-specific data for the state.
Of course, depending on your state machine, two states can be quite similar or really different — but usually, it’s important to try and avoid code redundancy, to avoid inconsistencies and ease code maintenance, and it’s also interesting to try and keep your states as decoupled as possible :)
Now, because of the structure of an FSM, there is almost always some minimal level of coupling between your states; in particular because, in most implementations, and in the one we’ll see today, states need to know about the other states they can transition two (at least, have a reference to them like a name).
But apart from that, the most isolated and scoped the data and the logic of your states, the better the encapsulation of your context in the project!
In Godot, there are three common ways of creating an FSM, as explained in the official docs:
- either you have one node per state in your entity’s hierarchy, and you enable and disable those according to the current state of your machine,
- or you have a manager script that switches between the code branches to run using an enum,
- or you dynamically toggle state scripts depending on the active state at runtime
Here, we’ll go for the first method, so we’ll basically have one node per state — in our case, the three green, orange and red states of a traffic light — and we’ll swap them out as our state machine updates.
Alright, now that we know what we want to do, time to jump into Godot and create our basic FSM :)
Setting up our state machine
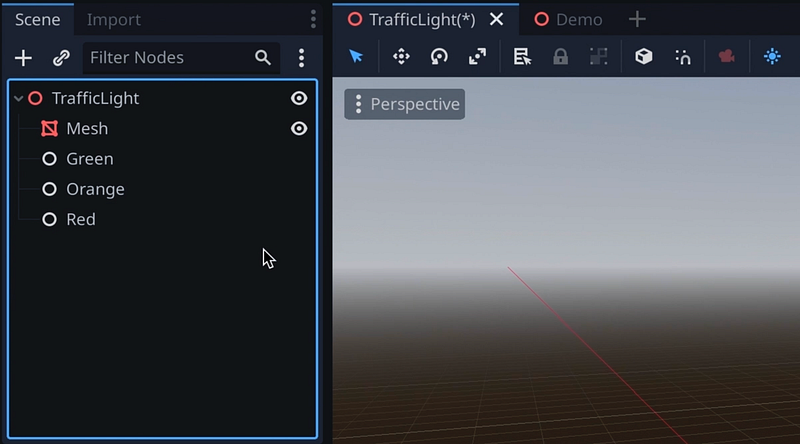
Ok so, let’s hop into Godot and work on our traffic light scene. You see that I’ve already imported my simple 3D model from Blender, and I gave it some materials.
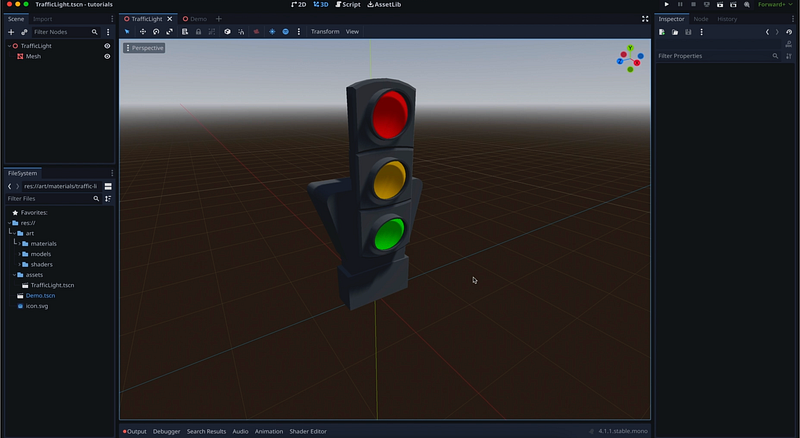
All we need to do is implement its behaviour thanks to a state machine.
As we said, our FSM will rely on nodes to define and toggle states. Since these states don’t really have a direct “meaning” in a Godot hierarchy, they’re just holding a branch of our state machine, we’ll use the simple Node type for those — and then, if we need specific features, we’ll add more specialised nodes as children:
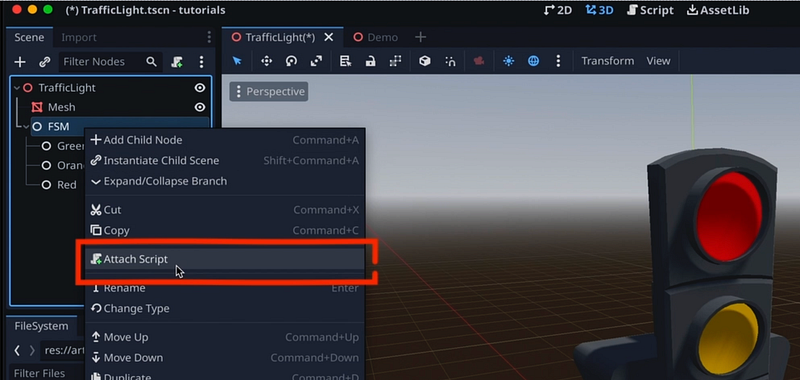
All of those nodes will be grouped another basic Node for the state machine itself — or in other words, the top manager that lists all the available states, and calls the right methods of the current state to run its logic while the machine is running:

Now, we need to create our C# scripts to actually give life to our FSM. Let’s start with the state machine itself. As we saw in this previous tutorial, we can do so directly by right-clicking on our node and clicking the Attach script option:
For the states themselves, it’s a bit more tricky cause we’re going to use an intermediate abstract class, called State, to implement the base structure and possibly default logic that is common to all our states. Basically, by having this base class and then creating sub-classes that inherit from it for each specific state, we’ll ensure that we have a shared model and C# type, and we’ll enforce our actual states have all the necessary elements to function properly.
This time, let’s create our base State script as a standalone resource in the project by right-clicking the FileSystem dock, and then open it in Godot’s built-in code editor.
This class will be quite simple, because it’s just meant to define the structure of a state. So we’ll simply fill it with some virtual functions for the important moments of our objects’ lifecycle: the enter and exit of this state, its initialisation, its update (be it the basic process routine, or the physics one with a fixed time delta) and the input events handler:
using Godot;
using System;

public partial class State : Node
{

    public virtual void Enter() {}
    public virtual void Exit() {}

    public virtual void Ready() {}
    public virtual void Update(float delta) {}
    public virtual void PhysicsUpdate(float delta) {}
    public virtual void HandleInput(InputEvent @event) {}

}
Now, we might not need all of this in this example, but at least it makes for a generic C# class that can be re-used to create more advanced states in the future ;)
Let’s also add a public reference to our parent StateMachine instance so that any state can trigger a transition to another state:
using Godot;
using System;

public partial class State : Node
{

    public StateMachine fsm;

    public virtual void Enter() {}
    public virtual void Exit() {}

    public virtual void Ready() {}
    public virtual void Update(float delta) {}
    public virtual void PhysicsUpdate(float delta) {}
    public virtual void HandleInput(InputEvent @event) {}

}
The reason I’m using virtual functions here is because I want them to be optional, so I need to give them some default empty code, to ensure it falls back to this null implementation if we don’t override it. But, at the same time, making them virtual will allow us to indeed overwrite some of them, which is of course essential since it’s how we’ll create our actual per-state logic!
Ok now that our base State class is ready and our codebase knows about this abstract type, we can take care of our StateMachine manager script.
To put it simply, this class will need to do four things:
- get the list of all available state nodes and keep references to their scripts
- keep track of the current state
- run the logic of this state by calling its various hooks
- handle transitions
Let’s start by defining the initial node as a NodePath, and give it the [Export] attribute:
using Godot;
using System;

public partial class StateMachine : Node
{
    [Export] public NodePath initialState;
}
This will make sure that we have a little slot in our state machine node’s Inspector where we can drag another node from our hierarchy to mark it as the initial state.
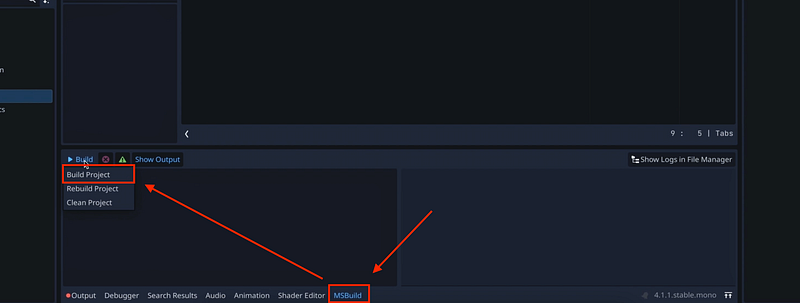
However, if you take a look you see that, for now… nothing’s appeared in the node’s inspector!
That’s because, contrary to GDScript, C# needs to be compiled before changes take effect. This is done automatically when we play our game, but not by default in the editor. Still, we can do it easily by going in the bottom panel, to the MSBuild tab, and opening the dropdown in the top-left corner to click on Build Project:
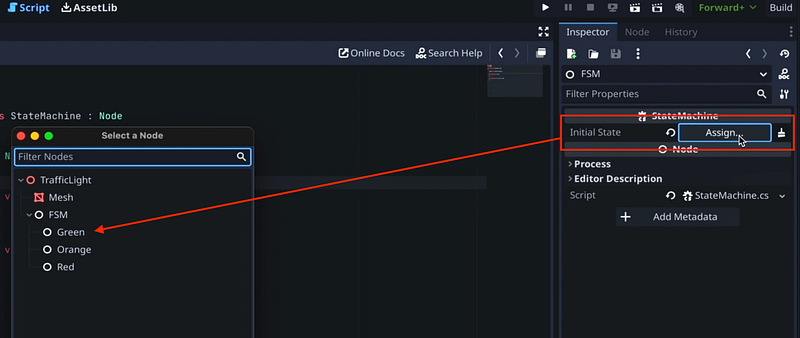
Once it’s done, you see our new input is available in the Inspector. So let’s assign the Green node to it, to mark it as the initial state:
Now let’s go back to our script and add a Dictionary for our list of states, and a State variable for our current state.
using Godot;
using System;
using System.Collections.Generic;

public partial class StateMachine : Node
{
    [Export] public NodePath initialState;

    private Dictionary<string, State> _states;
    private State _currentState;
}
Note: The Dictionary is a base C# data structure that allows you to match a key to a value, and requires the System.Collections.Generic library to be imported.
Our Dictionary of states will use the name of the node as key and the State-derived class instance as value, to make it easier for states to transition to one another.
In the _Ready() function, let’s initialise our machine by doing a couple of things. First of, we’ll go through our child nodes and fill in our dictionary. We’ll also take this opportunity to assign the reference to the state machine instance inside each state to our current script object:
using Godot;
using System;
using System.Collections.Generic;

public partial class StateMachine : Node
{
    [Export] public NodePath initialState;

    private Dictionary<string, State> _states;
    private State _currentState;

    public override void _Ready()
    {
        _states = new Dictionary<string, State>();
        foreach (Node node in GetChildren()) {
            if (node is State s) {
                _states[node.Name] = s;
                s.fsm = this;
                s.Ready();
                s.Exit(); // reset
            }
        }
    }
}
And then, we’ll set our _currentState to the initial state value by converting our NodePath variable, and enter our _currentState:
public override void _Ready()
{
    _states = new Dictionary<string, State>();
    foreach (Node node in GetChildren()) { ... }

    _currentState = GetNode<State>(initialState);
    _currentState.Enter();
}
The next step is to delegate all of the built-in hooks to the current state — so the _Process(), the _PhysicsProcess() and the events handler, called _UnhandledInput():
using Godot;
using System;
using System.Collections.Generic;

public partial class StateMachine : Node
{
    [Export] public NodePath initialState;

    private Dictionary<string, State> _states;
    private State _currentState;

    public override void _Ready() { ... }

    public override void _Process(double delta)
    {
        _currentState.Update((float)delta);
    }

    public override void _PhysicsProcess(double delta)
    {
        _currentState.PhysicsUpdate((float)delta);
    }

    public override void _UnhandledInput(InputEvent @event)
    {
        _currentState.HandleInput(@event);
    }
}
And last but not least, we just need to add our transition function which will:
- take in the name of the state to transition to (i.e. the key of this state in the states
Dictionary) - check the key is indeed in the list and we’re not already in this state
- exit the current state, update our active state to the new one and enter this new state
using Godot;
using System;
using System.Collections.Generic;

public partial class StateMachine : Node
{
    [Export] public NodePath initialState;

    private Dictionary<string, State> _states;
    private State _currentState;

    public override void _Ready() { ... }
    public override void _Process(double delta) { ... }
    public override void _PhysicsProcess(double delta) { ... }
    public override void _UnhandledInput(InputEvent @event) { ... }

    public void TransitionTo(string key) {
        if (!_states.ContainsKey(key) || _states[key] == _currentState)
            return;
        _currentState.Exit();
        _currentState = _states[key];
        _currentState.Enter();
    }
}
At that point, we have all the architecture we need to actually create states based on our abstract State C# class, and integrate them in our FSM to give life to our traffic light…
Implementing our states logic
Now that our overall structure is ready, let’s see how to create an actual state logic. We’ll start with our initial state: the green light.
We can create our class by right-clicking in the FileSystem dock, with the default options… but then of course we need to remember to have it inherit from our State class, and we can remove the _Ready() and _Process() functions:
using Godot;
using System;

public partial class GreenState : State
{
}
The logic of this state will be really simple: when we enter this state, we’ll turn a matching green light on and start a timer. Then, upon completion of this timer, we’ll turn the light back off and transition to the orange light state.
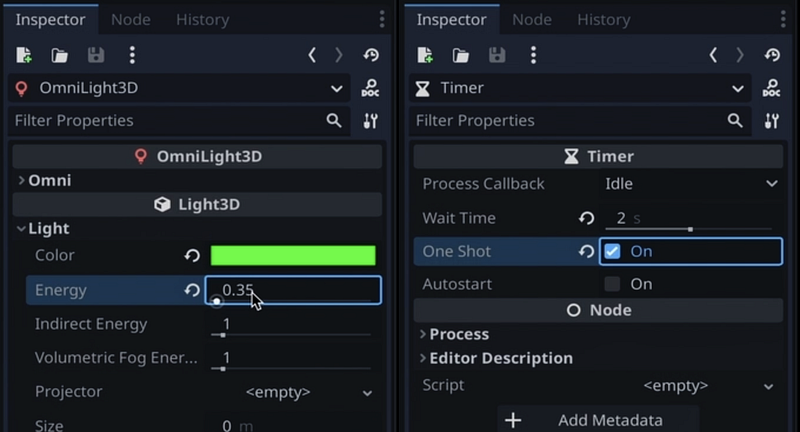
So let’s come back to our scene and prepare those additional elements. Inside the Green node, as children, we’ll add an OmniLight3D and a Timer node:

For the light, we can just change the colour and lower the energy. For the timer, let’s make it run for 2 seconds before timing out, and also make it a one-shot (cause once we transition to another state, we don’t want this timer to keep on running at the same time).
Now, in our GreenState class code, we can use GetNode to get those child nodes in our Enter() method and initialise our context properly. The light simply needs to be shown by setting its Visible property to true, and for the timer we have a self-explanatory Start() function we can call:
using Godot;
using System;

public partial class GreenState : State
{

    public override void Enter() {
        GetNode<Timer>("Timer").Start();
        GetNode<Node3D>("Light").Visible = true;
    }

}
But now the question is: how do we know when this timer is finished?
Well, in Godot, there’s this really great concept of signals — which are kinda Godot’s own “user-friendly” events. Basically, almost any node in Godot has signals that it can send on specific events, and you can super easily connect to them with your own callback functions to react to those events in your code.
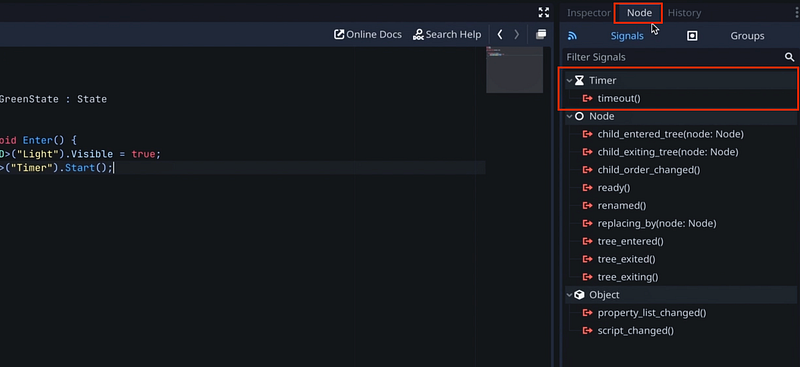
To see the signals available on a node, we just have to go on the right, where we have the Inspector, and switch to the Node tab. This shows us node-specific data and, in particular, all the signals available for our current one.
You see that, for this Timer node, we have a timeout signal at the very top, which will be triggered when the timer is finished.
To connect to it, we’ll simply double-click on it. Then, we’ll pick the node in the hierarchy with the script that should contain the callback the function, so our Green node. Let’s also change the name of the function to match more the usual C# casing, for example something like _OnTimerTimeout, and then click Connect.
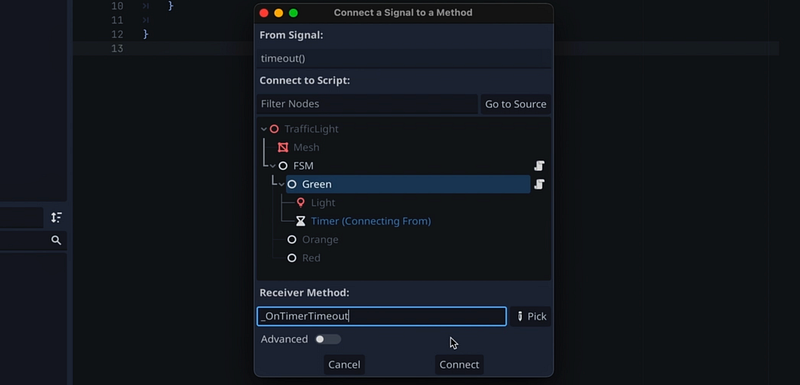
You see it just added a function at end of our GreenState script:
using Godot;
using System;

public partial class GreenState : State
{

    public override void Enter() {
        GetNode<Timer>("Timer").Start();
        GetNode<Node3D>("Light").Visible = true;
    }

}

private void _OnTimerTimeout()
{
    // Replace with function body.
}
Now, be careful because, with C#, Godot’s not yet completely perfect in terms of boilerplate, so we actually have to move this function back inside our class:
using Godot;
using System;

public partial class GreenState : State
{

    public override void Enter() {
        GetNode<Timer>("Timer").Start();
        GetNode<Node3D>("Light").Visible = true;
    }

    private void _OnTimerTimeout()
    {
        fsm.TransitionTo("Orange");
    }

}
But now, we simply have to transition to our "Orange" state in this callback. And in our overridden Exit() function, we’ll turn our light back off, stop our timer (just in case we exited our state because of something else and it’s still running):
using Godot;
using System;

public partial class GreenState : State
{

    public override void Enter() {
        GetNode<Timer>("Timer").Start();
        GetNode<Node3D>("Light").Visible = true;
    }

    public override void Exit() {
        GetNode<Timer>("Timer").Stop();
        GetNode<Node3D>("Light").Visible = false;
    }

    private void _OnTimerTimeout()
    {
        fsm.TransitionTo("Orange");
    }

}
And that’s it: our green light state is now ready :)
Of course, we’re now stumbling upon one of the disadvantages of state machines, which is that you can’t really test them until your states are ready, since they depend on each other.
But luckily for us, in this simple example, the other states are extremely similar, so we can just duplicate our script a couple of times, rename the file and the class to OrangeState and RedState, and then update the transition target states. Also, don’t forget to add light and timer nodes to the Orange and Red nodes, with the same kind of options as before, attach their scripts and connect their signals.
If you want to see how I setup my scene exactly, go ahead and have a look at my Github repo 🚀
And now, we can run our game and test this out!
I’ve prepared a little demo scene with a bit of environment to make it easier to see, so I’ll just drag my traffic light into it, and here we are: you see that we now have a very basic traffic light that cycles through green, orange, and red ;)
Except that, as we said before, those states are really similar. Actually, they’re sort of too similar. At this point, using state machines is really just bringing to complexity to model such a simple behaviour.
So, to wrap up this tutorial, let’s add some specificities to a few states and see how easy it is to do with state machines!
Adding per-state specificities
A first easy distinction we can make is, inside our node hierarchy, play around with the Timer node properties to change the duration of each colour. That’s an example of how our FSM system can be easily tweaked in the Inspector, no code required :)
But of course, we can also do more advanced stuff by extending our state classes!
For example, let’s say we’d like our orange state light to be a bit old and start to flicker when light it up. Well, we can do this easily thanks to a noise map and our Update() function!
As explained in this quick tutorial by PhonoForest, we can create a noise generator instance and then use it to modulate the alpha or the energy of our light. Note that, in Godot 4, the built-in random number generator is now the FastNoiseLite, so we’re going to make an instance of this class, set it up in our overridden Ready() function, and finally get a reference to our light component so we can change its energy in the overridden Update() method:
using Godot;
using System;

public partial class OrangeState : State
{
    private FastNoiseLite _noise = new FastNoiseLite();
    private Light3D _light;
    private float _energy;
    private const float _MAX_ENERGY = 100000000;

    public override void Enter() {
        GetNode<Timer>("Timer").Start();
        GetNode<Node3D>("Light").Visible = true;

        _energy = 0f;
    }

    public override void Exit() {
        GetNode<Timer>("Timer").Stop();
        GetNode<Node3D>("Light").Visible = false;
    }

    public override void Ready() {
        _light = GetNode<Light3D>("Light");

        // setup noise
        GD.Randomize();
        _noise.Frequency = 1f;
    }

    public override void Update(float delta) {
        _energy += 0.5f;
        if (_energy > _MAX_ENERGY) _energy = 0f;
        _light.LightEnergy = _noise.GetNoise1D((_energy + 1) / 4f) + 0.5f;
    }

    private void _OnTimerTimeout()
    {
        fsm.TransitionTo("Red");
    }

}
And that’s it: if we run our game again, you see that as soon as the traffic light goes to orange, it starts to flicker!

Another cool thing would be to be able to manually force a state. For example, having a big red button we can press to stop the traffic if need be!
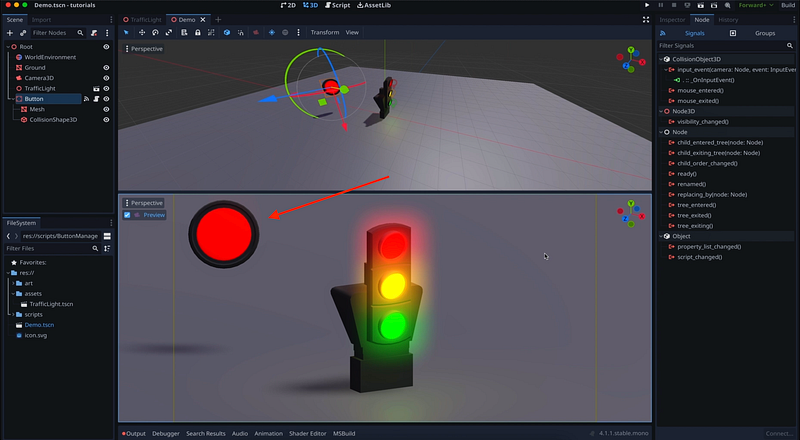
Now, I’m not gonna go in details on how to setup the button, or the events and signals that it emits and that we can react to, cause this tutorial is already really long, and some of the shortcuts Godot provides in GDScript aren’t totally transferrable to C#, so it requires a bit more work.
But let’s just assume that we have this big red button which, when we left click on it with our mouse, emits a global basic C# event in our game called RedButtonClicked, in a static Events class.
Then all we have to do in our RedState script is, in the Ready() function, register a callback for this event, and then define this callback below to force the transition to our own state:
using Godot;
using System;

public partial class RedState : State
{

    public override void Enter() {
        GetNode<Timer>("Timer").Start();
        GetNode<Node3D>("Light").Visible = true;
    }

    public override void Exit() {
        GetNode<Timer>("Timer").Stop();
        GetNode<Node3D>("Light").Visible = false;
    }

    public override void Ready() {
        Events.RedButtonClicked += _OnRedButtonClicked;
    }

    private void _OnTimerTimeout()
    {
        fsm.TransitionTo("Green");
    }

    private void _OnRedButtonClicked(object sender, EventArgs e) {
        fsm.TransitionTo("Red");
    }
}
Note: The sender and args parameters are required for this kind of C# event to work properly, even if we’re not using them.
And if we try this out, you see that we can now click our button to instantly jump to our stop red light, without having to go through the all cycle! But then, since we used a normal transition, the rest of the logic kicks in and our state eventually transitions back to green, then orange, then red, etc.
Conclusion
So here you go: you now know the basics of implementing finite state machines in Godot and C# using nodes and C# inheritance!
I hope you liked this tutorial and that it helped you learn the fundamentals of this tool. If you did, feel free to clap for the article and follow me to not miss the next ones — and of course, don’t hesitate to drop a comment with ideas of Godot tricks that you’d like to learn!
As always, thanks a lot for reading, and take care :)
To read more of my content, and articles from many other great writers from Medium, consider becoming a member! Your membership fee directly supports the writers you read.


