
Let’s Build: Cryptocurrency Native Mobile App With React Native + Redux — Chapter II

Welcome back! Here’s the chapter I.
We left off implementing the header but missing the styles. How do we implement them? As you remember from our previous chapter — we can import the StyleSheet prop from ‘react-native’. This gives us the possibility of styling our elements. A StyleSheet is an object — which contains a create() method. We pass an object which are our styles to the create() method.
Here’s the implementation. First, we import the StyleSheet. Secondly, we define our styles with StyleSheet.create() and pass our style object as n argument. Thirdly we deconstruct our props from the styles variable. And last we place style props to our elements via the style property. Hope this makes sense. Make sure you understand the concepts mentioned — make sure to read and understand the links I provided (underlined text). 😊

Fetching data from the API with Redux.
this one should be familiar. Setting Redux with RN is the same process as setting it up with React. Try to do it solo first, you will learn more this way! Here’s a guide on mostly Redux. You can do it!

Ready?
I start by installing dependencies. Here’s the list of dependencies we’re going to need.
$ npm i --save redux react-redux redux-thunk redux-promise && npm i --save-dev remote-redux-devtools remotedev-rn-debugger remote-redux-devtools redux-logger
Tooling explained:
redux — Redux library.react-redux — Glue for React and Redux.remote-redux-devtool remotedev-rn-debugger
These are Redux debugging middleware, allows us to use the Redux Chrome Devtools in Remote mode.
NB: Make sure you download this chrome extension!!
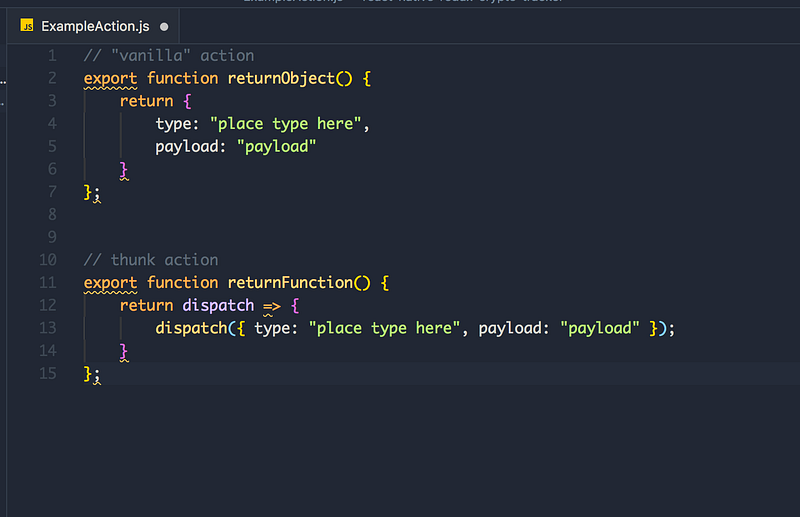
redux-thunk — Redux thunk lets us return a function inside an action instead of returning an object.
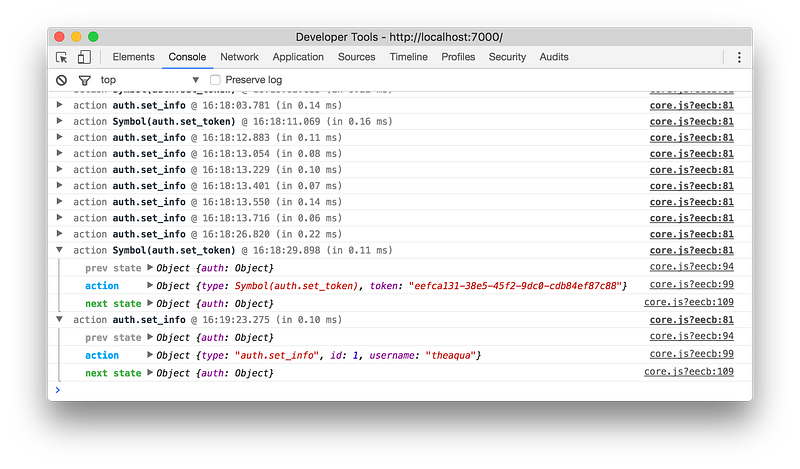
redux-logger— logs the previous state, action and the next state in the console.
Note: logger must be the last middleware in the chain, otherwise it will log thunk and promise, not actual actions (#20).
redux-promise — Allows us to resolve async actions (promises) with Redux. Example: Fetching data from an API.
I hope you’re fairly caffeinated — we’re gonna start playing around with our store.
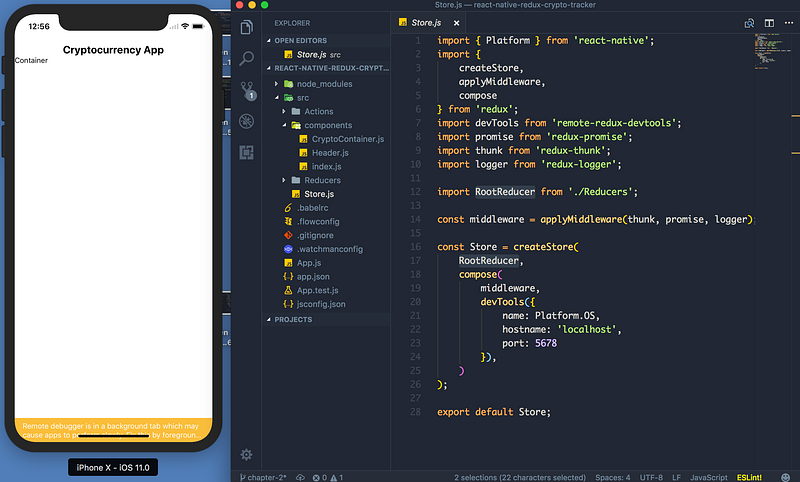
Creating the Store
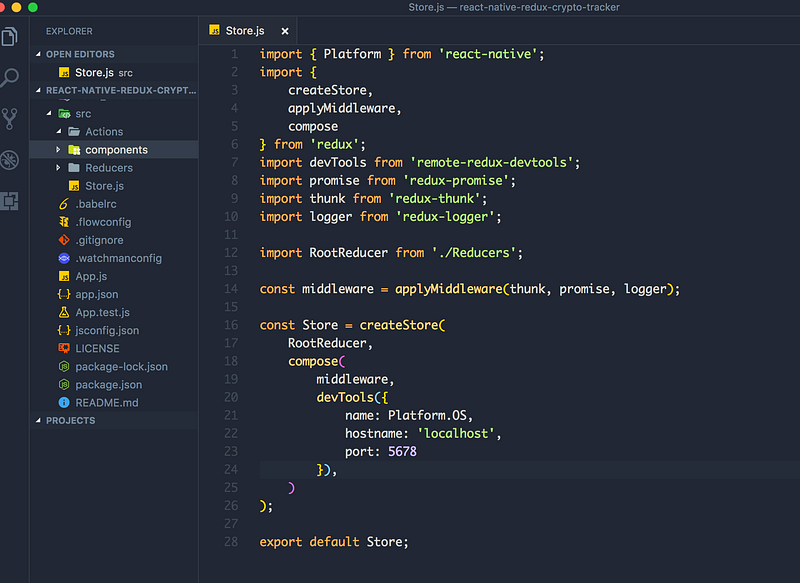
Create src/Store.js and add the following contents.
Note: I tried to simplify this as much as possible! Don’t get nervous, I will explain all the parts. There’s a lot of magic going on but we can grab the bull by the horns.
Starting from the top.
- import
Platform from‘react-native’
React Native provides a module that detects the platform in which the app is running. You can use the detection logic to implement platform-specific code. Use this option when only small parts of a component are platform-specific.
We need Platform for our remote dev tools.
createStore()is needed to create our initial store. We pass this store to the<Provider>
createStore() accepts the following arguments:
- reducer
- preloaded state
- enhancer
applyMiddleware()— Is for applying.. you guessed it… the middleware. Remember we are usingthunkactions,promiseandlogger.compose()— Composes functions from right to left.
This is a functional programming utility and is included in Redux as a convenience. You might want to use it to apply several store enhancers in a row. —More information.
We pass our middleware and devTools as the arguments for compose function.
- import our
RootReducerand pass it as the first argument to thecreateStore()function. - Lastly, we expose our store to the outside world.
It’s completely natural to be overwhelmed — in fact, if you’re not overwhelmed, congratulations for being a prodigy. Take some time to read this couple times.
Help: Head over here if it’s just not clicking.

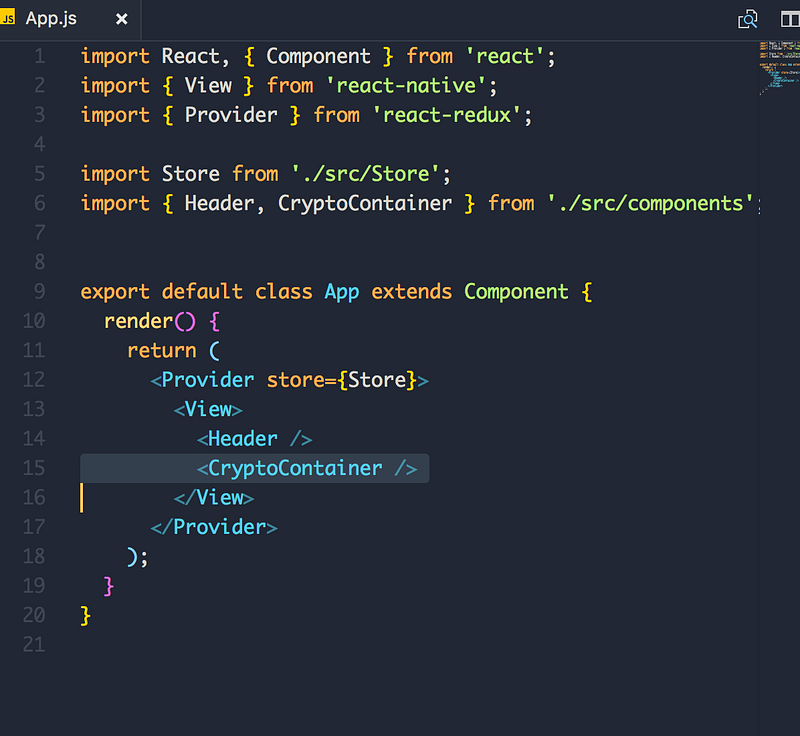
Adding the Provider
Head over back to App.js and import our Store.js and Provider from ‘react-redux’
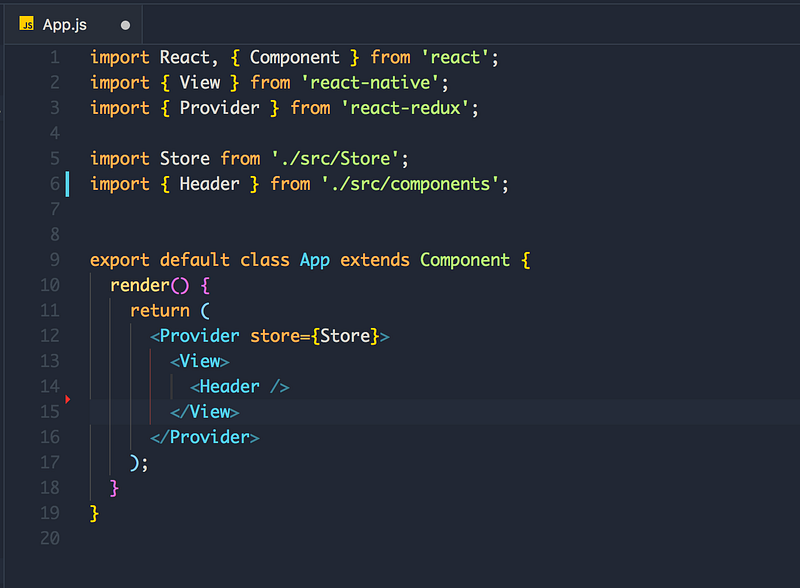
The Provider accepts one argument — which is our store. The Provider role is to glue React and Redux together.
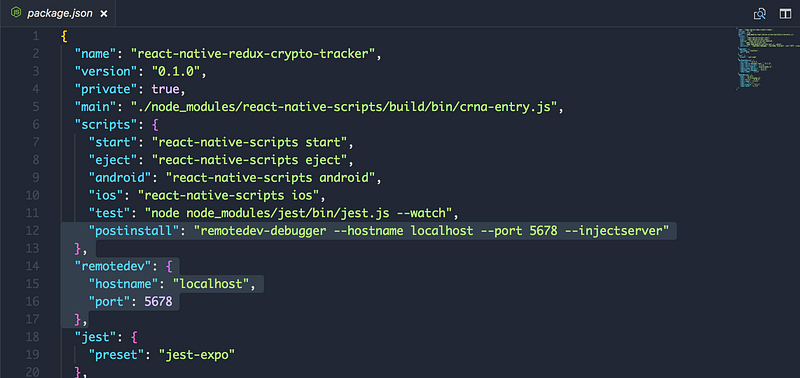
Final steps with tooling
Our final tooling step is to add a couple script to the package.json
- Add this line to the
scripts
“postinstall”: “remotedev-debugger — hostname localhost — port 5678 — injectserver”
- Add a new object called
“remotedev”with these two props:
"remotedev": { "hostname": "localhost", "port": 5678},
Creating our RootReducer
$ mkdir src/Reducers && cd src/Reducers && touch index.js && touch CryptoReducer.js
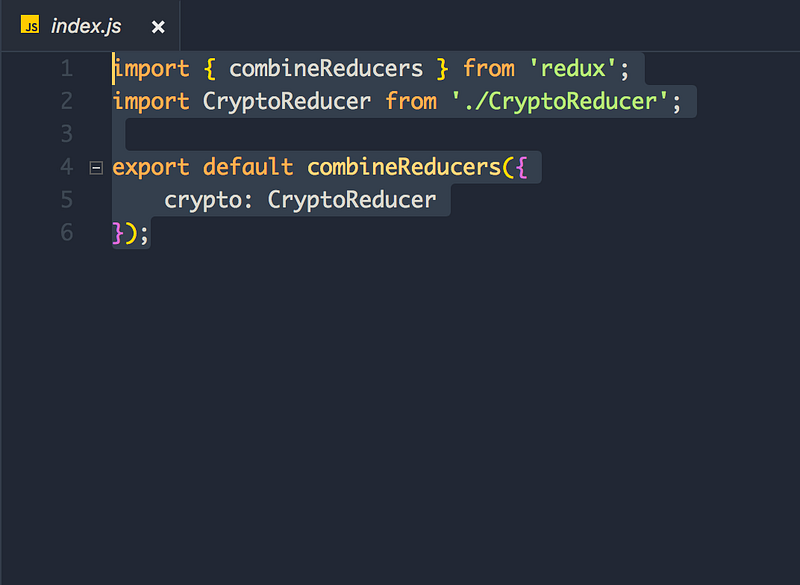
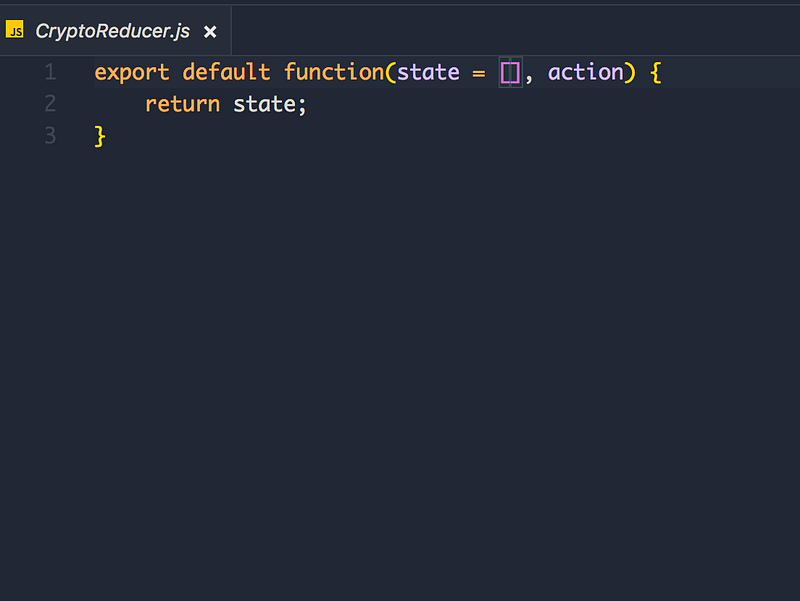
Remember reducers are async by default — that’s they are anonymous functions — all reducers get invoked after an action. That’s why we have the switch conditional to handle appropriate actions.
Create our crypto container and map it to the redux state
touch src/components/CryptoContainer.js
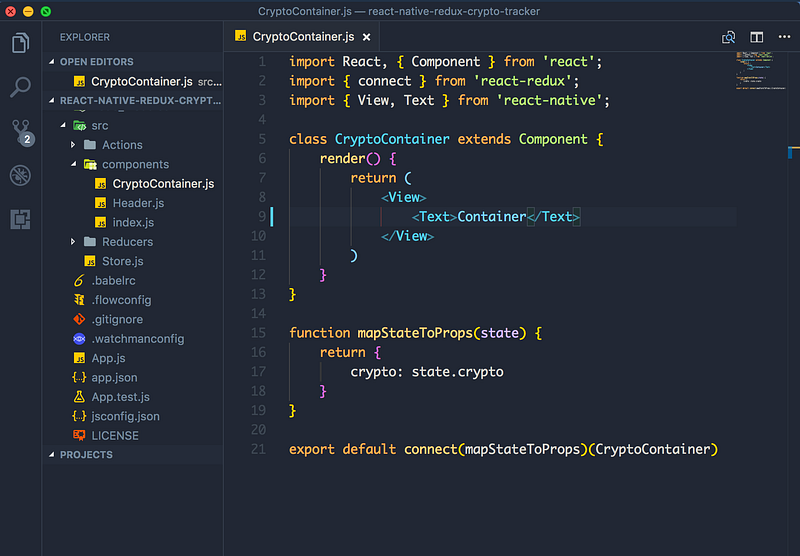
We use the connect method to hook React components with Redux state.
connect() accepts two arguments.
- The first argument is mapStateToProps. Does exactly what it’s called after. Maps the Redux state to our React props. We can access the
cryptostate underthis.props.crypto - Second argument is mapDispatchToAction. We will get there in the next chapter.
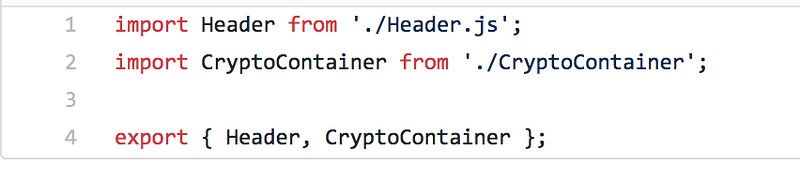
Make the Header.js and CryptoContainer exportable in src/components/index.js — like so
Finally, let’s add the CryptoContainer.js component to App.js like so:
Time to test!
Run our iOS/Android simulator.

This is what you should see:
Alright. So how do we debug? Great question! Press these keys:
Mac: cmd + d
Windows: Ctrl + M
This opens the options for our react native app.
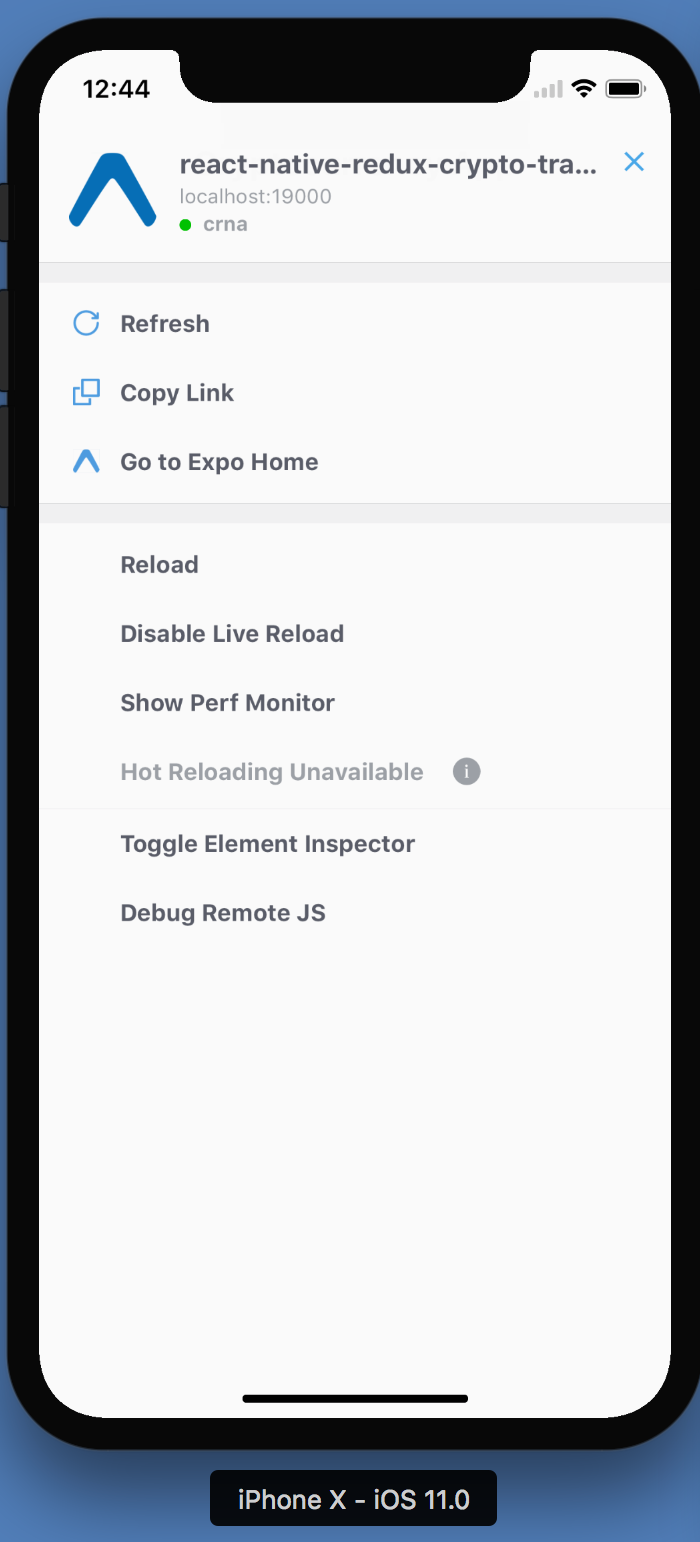
Click on Debug Remote JS. This pops up a browser in debug mode.
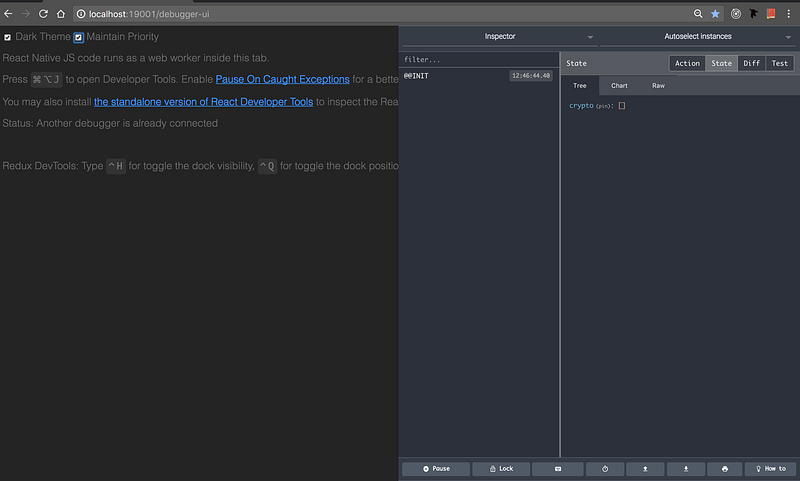
Works flawlessly. As we can see with our Redux Devtools —the crypto state being show (empty array).
Wow, that was a lot of boiler code and setup. I guarantee it’s worth it. Redux is cool.
This chapter went all on tooling and setup. Next chapter we will implement the actual data fetching and write some “non-pseudo” code.
Thanks for making it this far, you’re awesome! 😊
Continue here!
If you want to bring your JavaScript to the next level, start from this book, find the kindle version here.