Test Sending Traffic From a Load Balancer To A NAT Gateway
ACM.469 Spoiler Alert: Q told me I could do this but I can’t :( but this might help someone trying to set up a network load balancer
~~~~~~~~~~~~~~~~~~~~~~~~~~~~~~~~~~~~~~~~~~~~~~~~~~~~~~~~~~~
⚙️ Check out my series on Automating Cybersecurity Metrics. The Code.
🔒 Related Stories IAM | AWS Security | pfSense | Network Security
💻 Free Content on Jobs in Cybersecurity | ✉️ Sign up for the Email List
~~~~~~~~~~~~~~~~~~~~~~~~~~~~~~~~~~~~~~~~~~~~~~~~~~~~~~~~~~~
In the last post I set up a site to site VPN using pfSense and an AWS Virtual Private Gateway.
In this post, I show how I tried to deploy a load balancer to forward traffic to a NAT Gateway as a target.
TL;DR I asked Amazon Q if I could do this in a prior post and it told me I could. If you want to know why it doesn’t work, or you just want to understand how to create a load balancer (just don’t point it at a NAT Gateway) then read on. If you want a working solution to send traffic from your home network to an AWS NAT Gateway and don’t care about all this, read the other posts in this series involving a Transit Gateway.
A hypothetical architecture to send traffic from a Load Balancer directly to a NAT
I was pondering whether something like this would be possible. Don’t ask me why. I like to try different things just to see what happens.
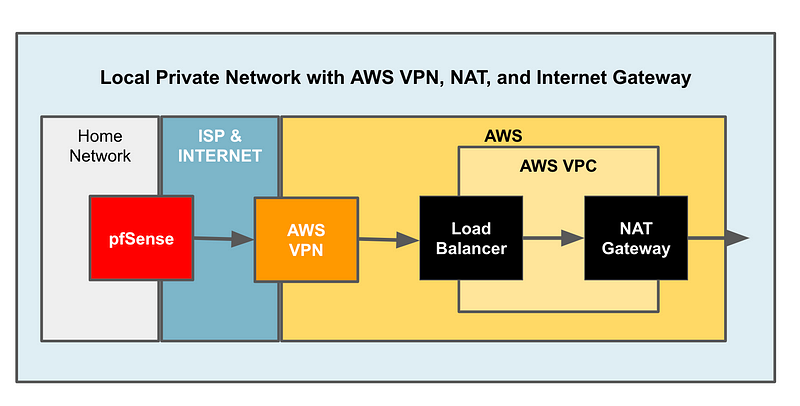
The AWS Load Balancer would be a target for pfSense VPN routes.
Will it work? Well, I looked up some information in the documentation and here’s what I found:
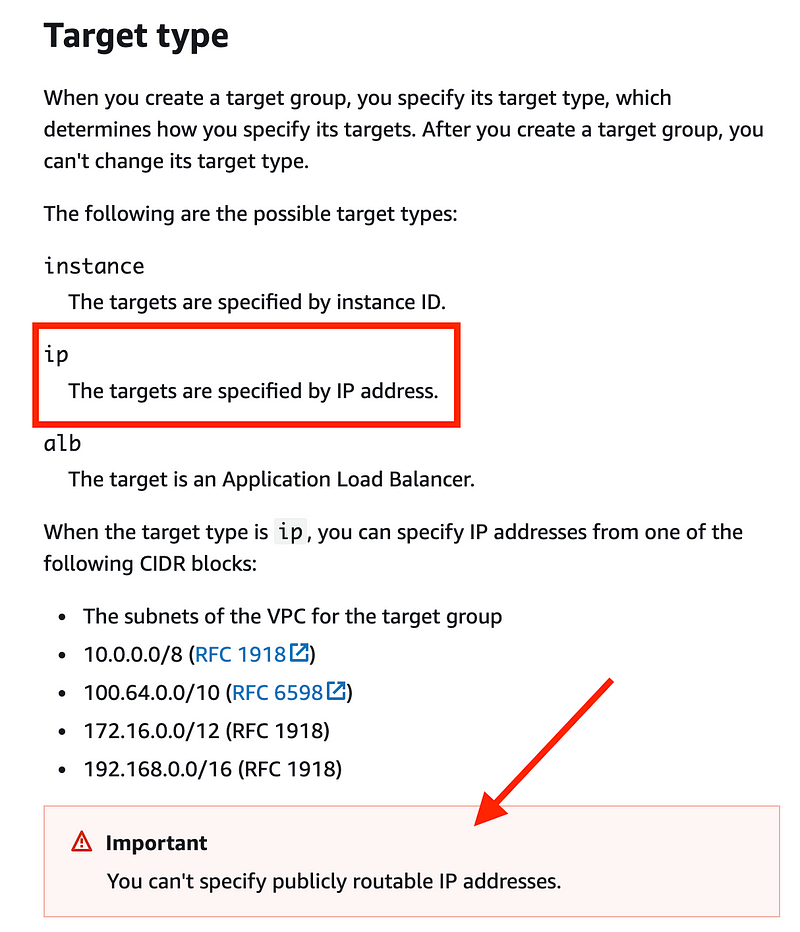
Well the NAT has a private IP address right? So in theory we can route traffic to it from the load balancer.
But somehow I knew this wasn’t going to work. So I looked for validation that it would before I started so as not to waste my time. It just felt like something that would not work for some reason.
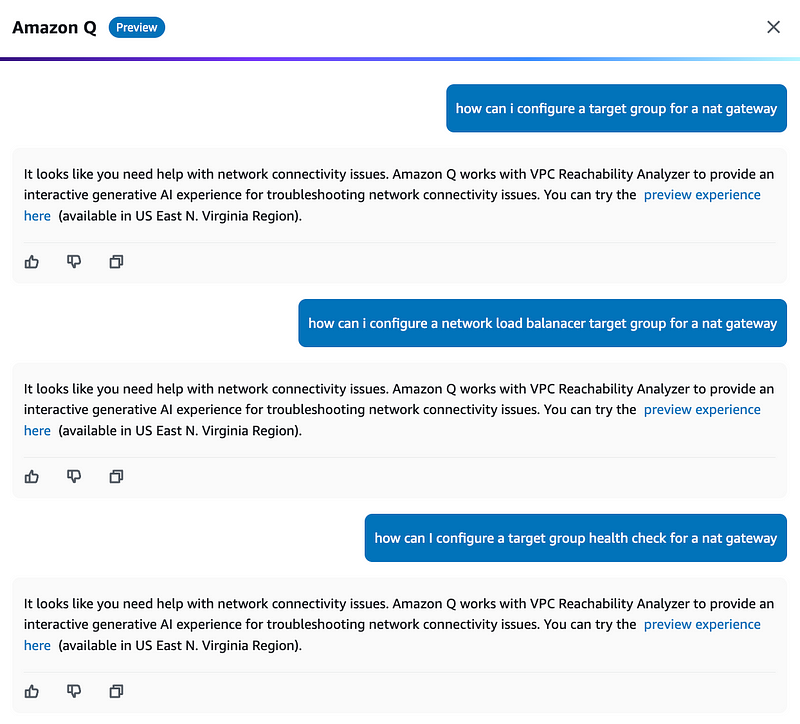
Well, why not ask Q? Amazon’s AI widget in the AWS Console.
Q didn’t understand my first question. It’s telling me to forward data from the Load Balancer to instances here and that’s exactly what I am trying to avoid for this first test. I want to see if I can avoid those charges and send the traffic straight to the NAT from a Network Load Balancer.
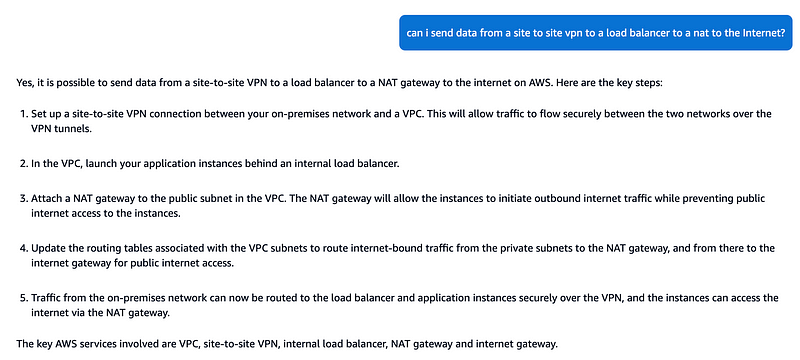
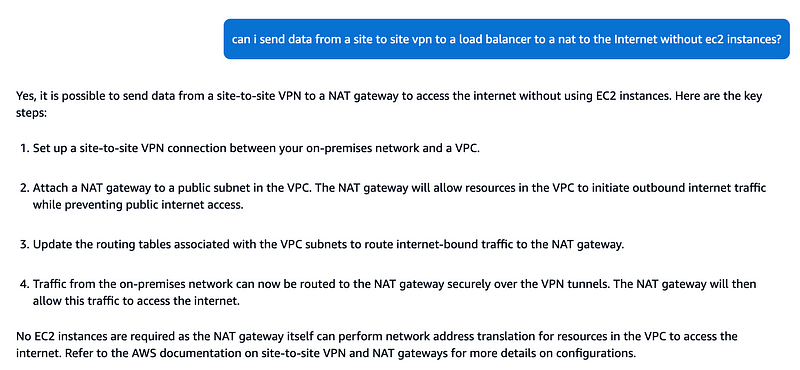
So I modified my question to say “without instances.”
4. Traffic from the on-premises network can now be routed to the NAT gateway securely over the VPN tunnels. The NAT gateway will then allow this traffic to access the internet.
Well, it sounds like it will work. Though this part is a little off:
No EC2 instances are required as the NAT gateway itself can perform network address translation for resources in the VPC to access the internet.
I’m sending the data from my local network. But I guess from the NAT perspective the traffic will be coming from the Load Balancer which is “in the VPC.”
Well, based on that information, I proceeded. This information will still be useful to anyone trying to create a load balancer so I’m publishing it anyway. I’ll also explain why it doesn’t work below.
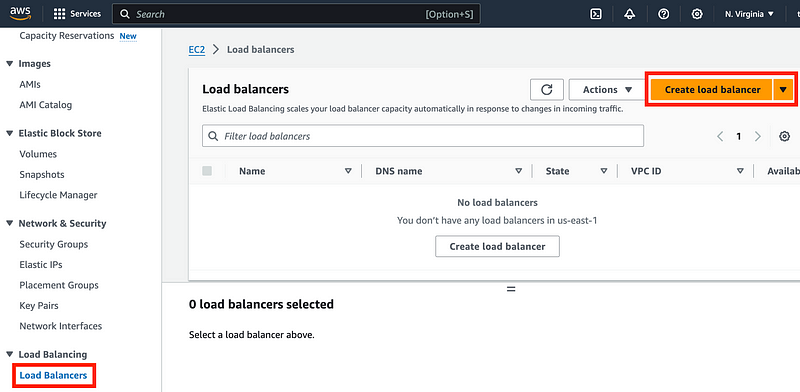
Create a Network Load Balancer
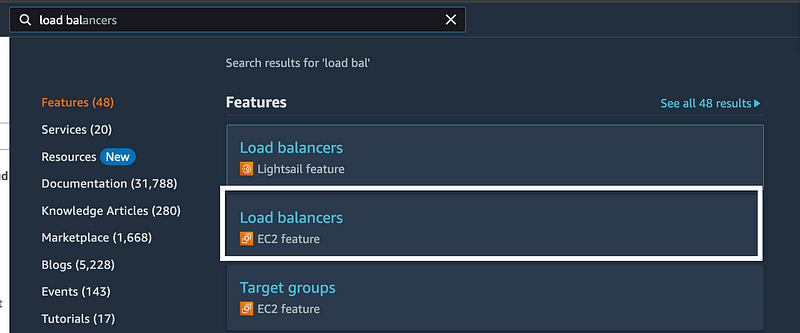
If you search for load balancers, you want the EC2 option.
Click Create load balancer.
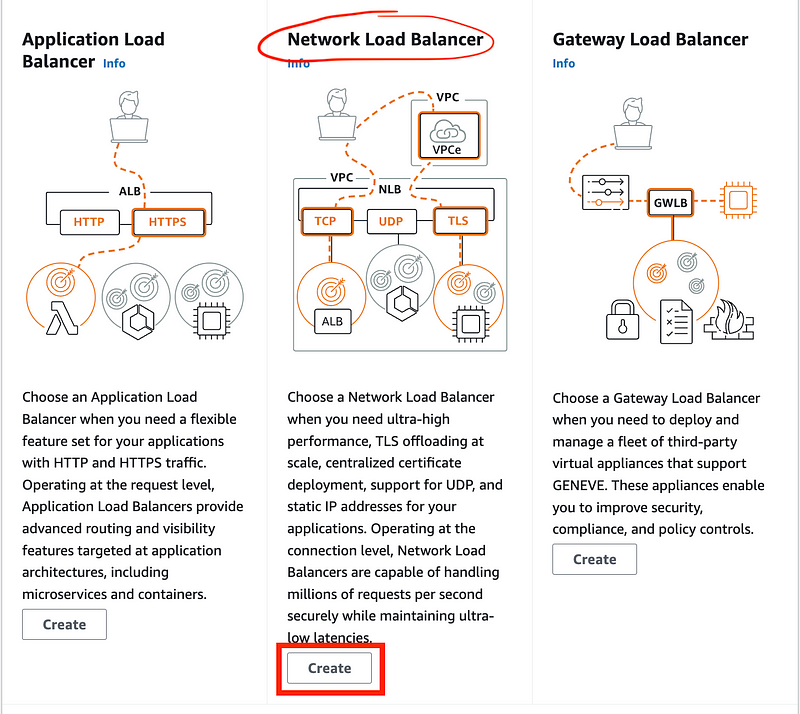
Click Create under Network Load Balancer.
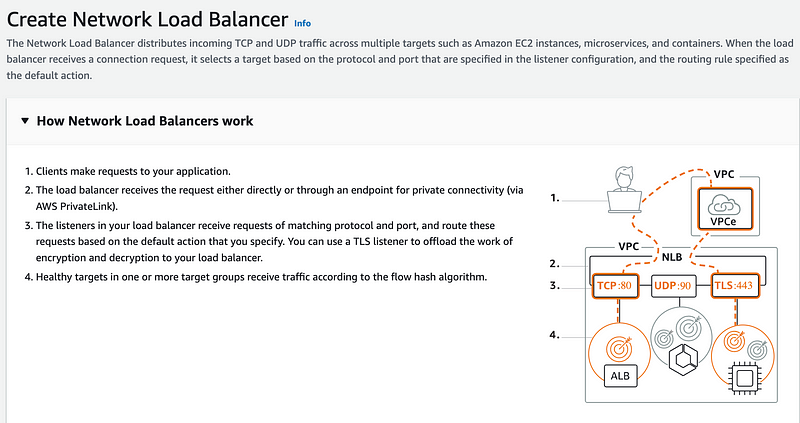
AWS explains what the load balancer does which is pretty cool:
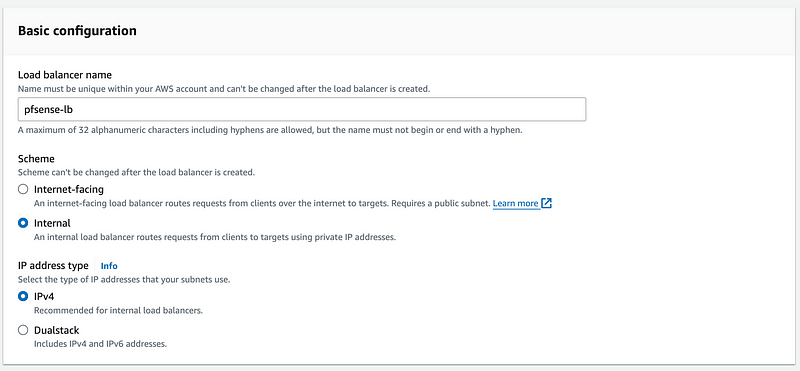
Enter a name. Choose internal. The load balancer will only be accessed via the VPN and private IP addresses. It will not be exposed to the Internet thanks to the NAT.
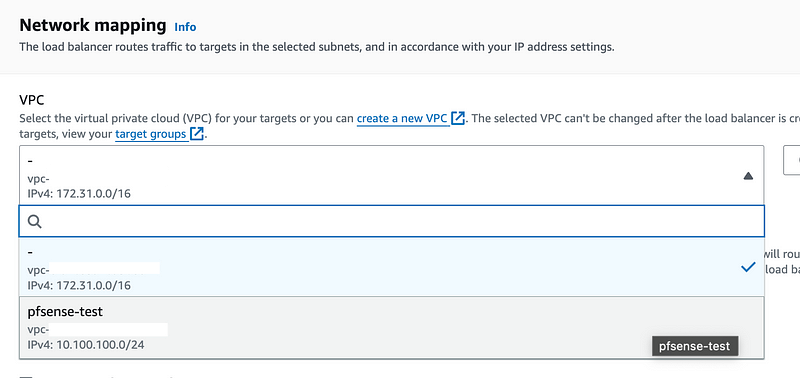
Choose the VPC we created.
Click the region. Choose the subnet.
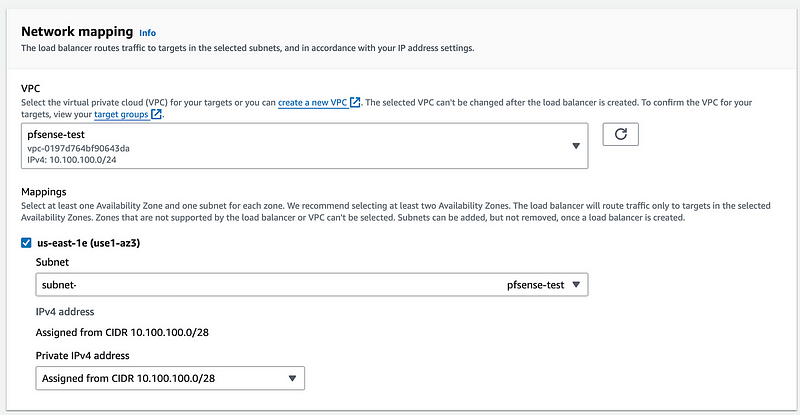
For high availability you’d possibly want more subnets but this is only a test.
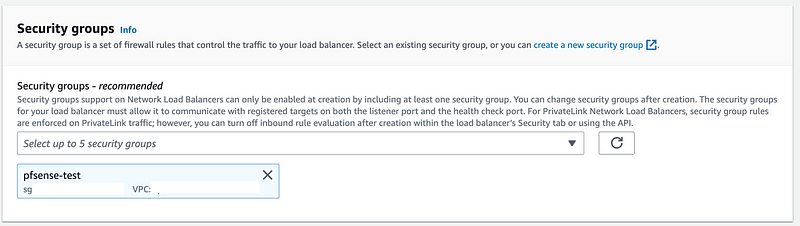
Choose the security group we created that allows our private IP range on the pfSense to ping a host in the AWS subnet with ICMP. We will need to add some additional rules in a bit.
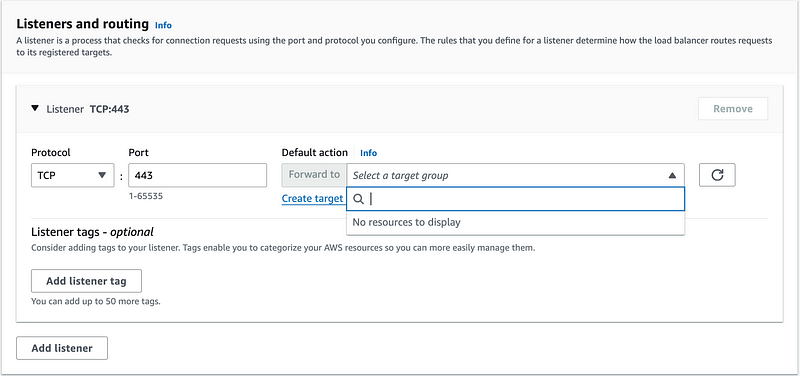
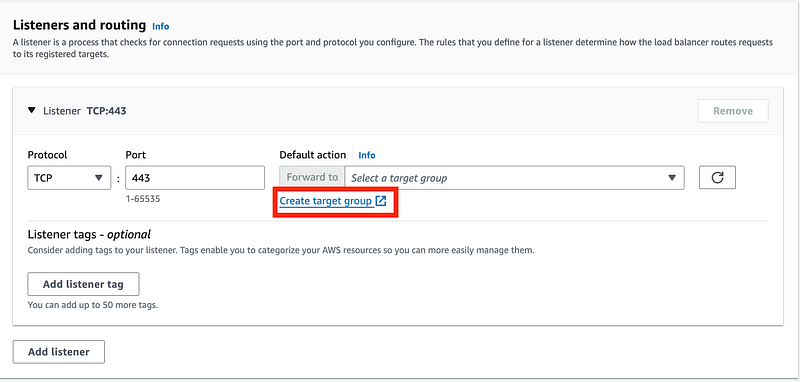
Next we need to add ports to listen for traffic from pfSense.
I’m going to start with 443. However, we don’t have any targets that we can select. So hold this thought.
Create a NAT
I’ve created a NAT with CloudFormation templates in prior posts. You can find those here:
For this test I’m going to do it manually.
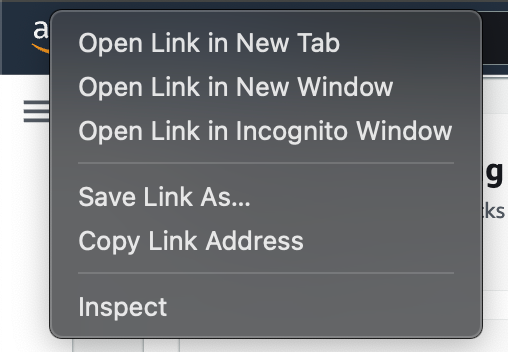
As in prior posts, I am going to right click on the AWS logo and choose Open Link in new tab (or similar if you are in another browser).
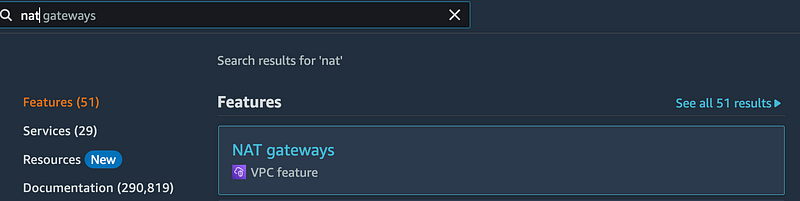
Search for and click on NAT gateways in the VPC Console.
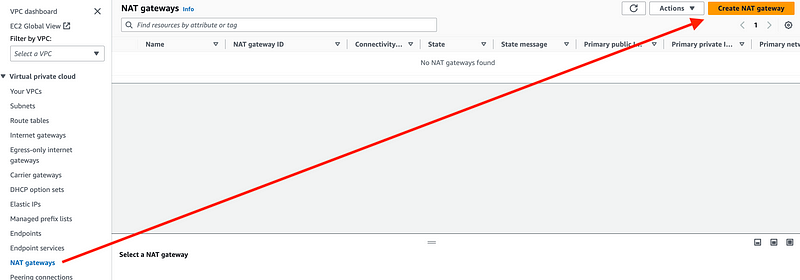
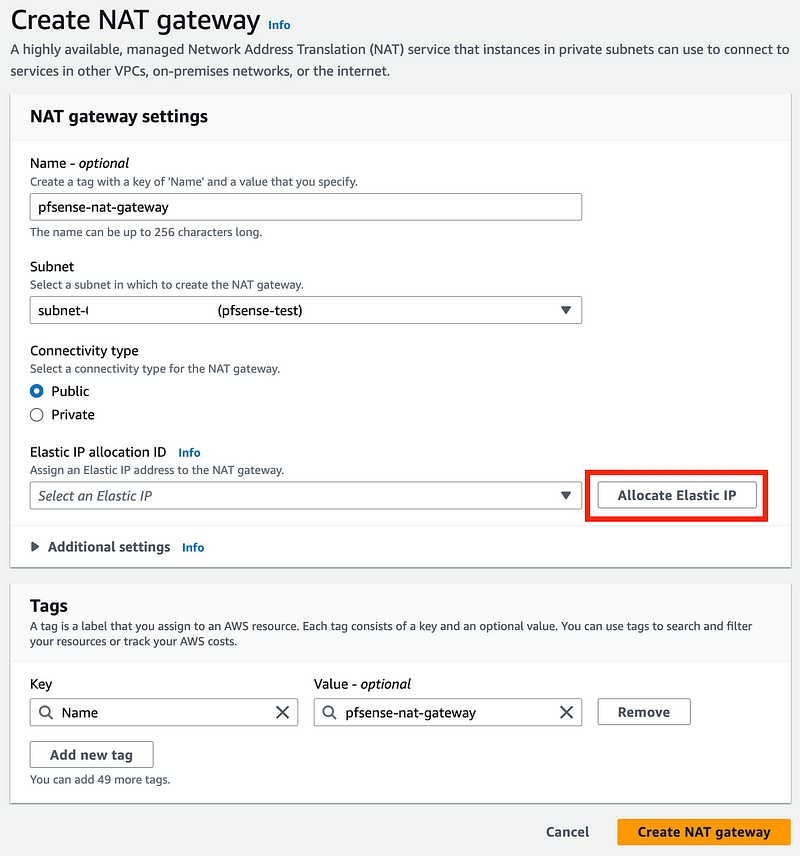
Click Create NAT Gateway.
Enter a name.
Choose the pfSense subnet.
Leave Public selected so it can reach the Internet.
Click Allocate Elastic IP and an IP address will appear in the drop down.
Click Create NAT gateway.
The state will initially be pending. The IP address shows up, which we need.
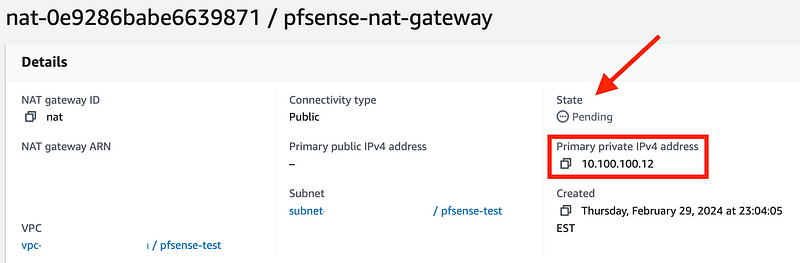
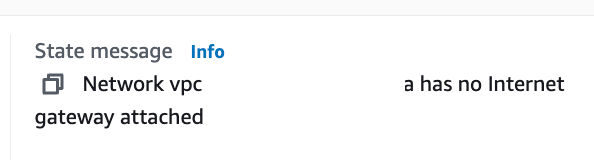
However, the deployment fails. Why? Because the VPC has no Internet Gateway attached.
So here I could do a couple of things. I could create a separate VPC with an Internet Gateway. Instead, I created a new subnet with a public route table (meaning it has an Internet Gateway). I tried to allow traffic from the private subnet to reach my public subnet via NACLs and security group rules.
Delete the NAT.
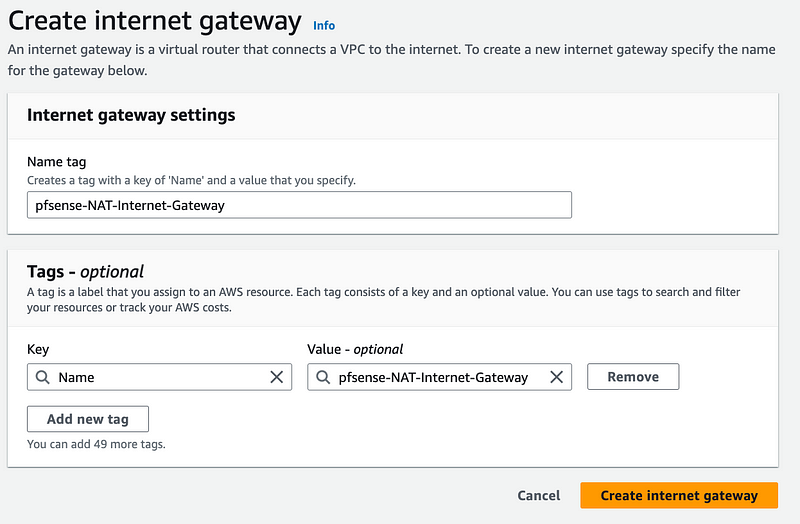
Create an Internet Gateway
Click on Internet gateways. Click Create Internet gateway.

Enter a name. Click Create internet gateway.
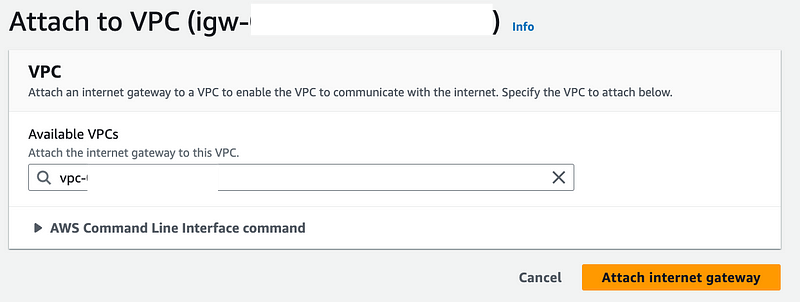
Click Actions > Attach to VPC.
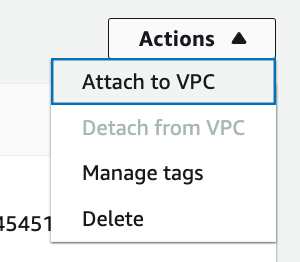
Select the pfSense VPC. Click Attach internet gateway.
Create a public route table
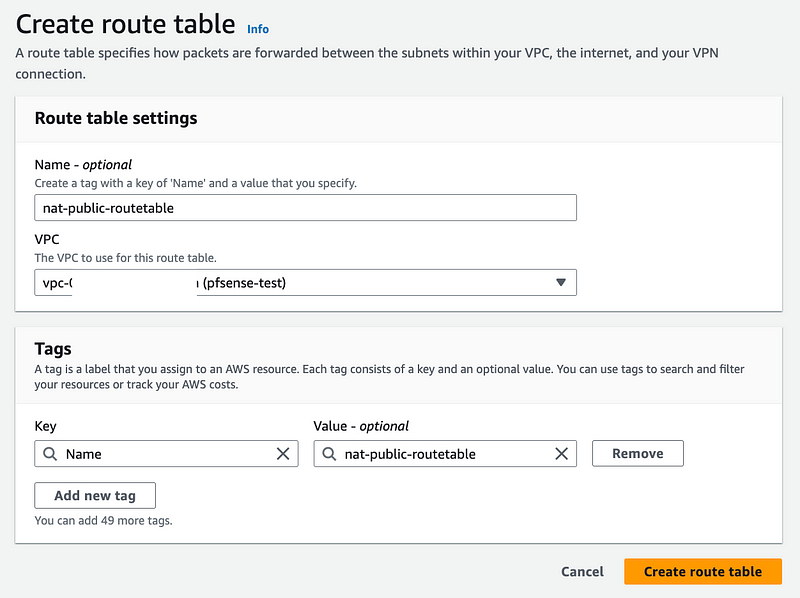
Click Route tables on the VPC dashboard and Create route table.

Give it a name. Select the pfSense VPC. Click Create route table.
Click on Routes. Click Edit routes.

Click Add Route first. That tripped me up because I was trying to select from the drop down above that and you can’t select Internet Gateway there as that drop down is associated with the existing route. For those of us who are used to the old console that is confusing.
After you click Add route it adds a new row and you can select Internet Gateway.
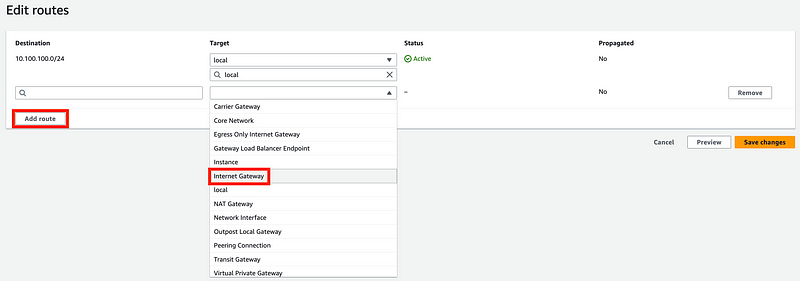
Then you can select the Internet Gateway.
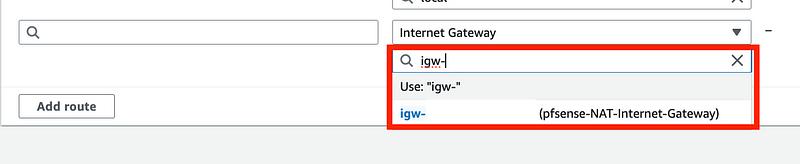
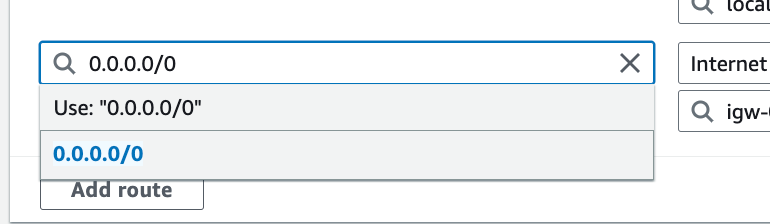
Next add the IP ranges you want the route to access, which in our case is the entire Internet (0.0.0.0/0).
Click Save changes.

I do not like this new screen. I wasted a bunch of time trying to figure out what it is doing.
Create the NAT subnet
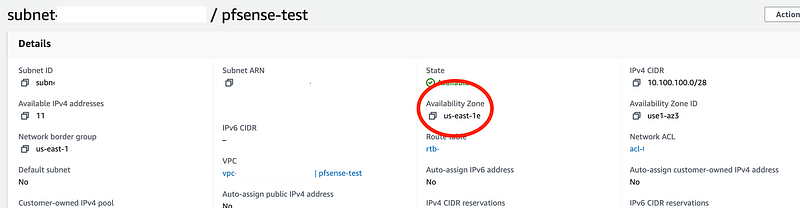
Click on Subnets on the left. Click on your pfSense subnet.
Note the Availability Zone.
Return to the list of subnets. Click Create subnet.

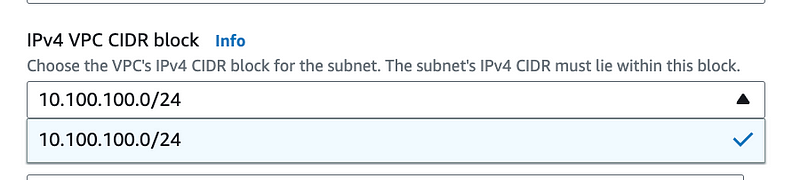
Here’s where I realized I used the entire VPC CIDR block on my last subnet. Thankfully we can do something you couldn’t do when I started working in AWS and it used to be so painful. Rather than delete my subnet and all it’s configuration, including the VPN we set up, or the entire VPC to create a bigger CIDR block — we can add a CIDR.
Head over to the list of VPCs in a separate tab.
Click on your pfSense VPC. Click Actions > Edit CIDRS.
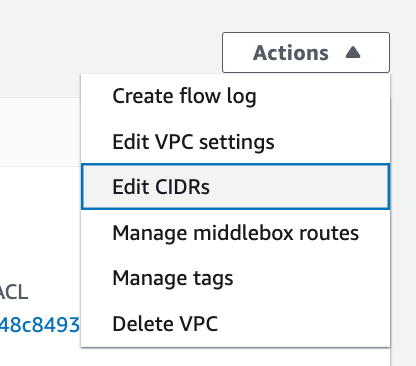
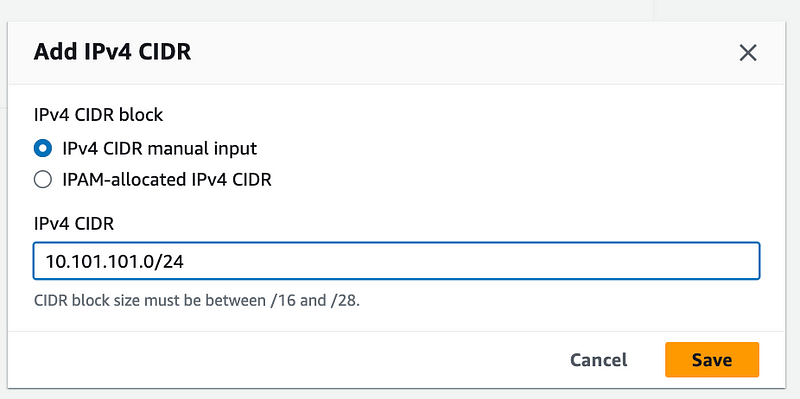
Click Add new IPv4 CIDR. (or IPv6 if you’re using that.)

Add a second CIDR. Click Save. Click Close.
Back over on our subnet, unfortunately there is no refresh button. (#awswishlist)
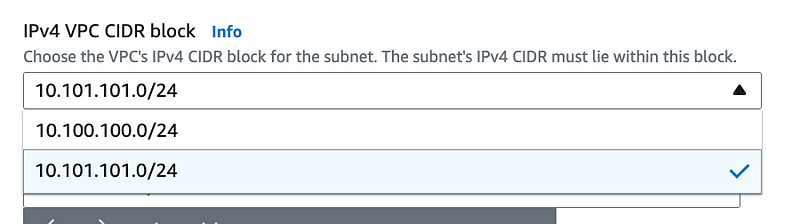
Refresh the screen and start over creating a subnet and selecting the new CIDR we just added above as the CIDR for the Subnet.
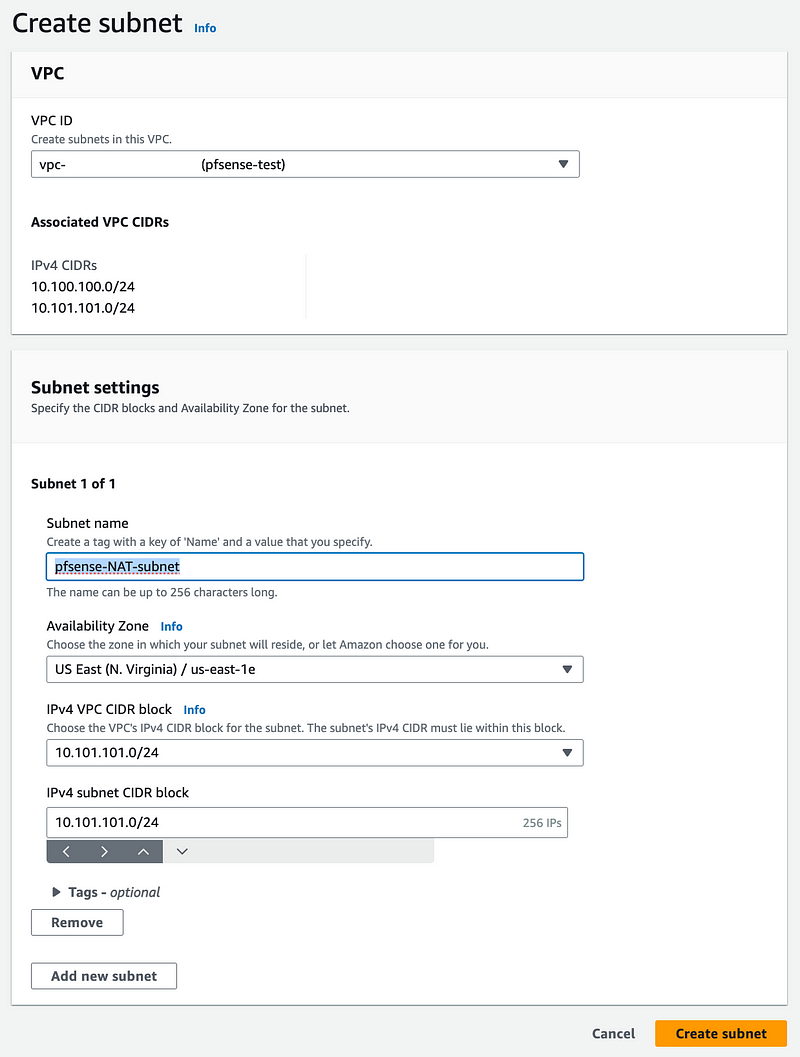
Choose the pfSense VPC.
Enter a name for the subnet.
Choose the same availability zone as the first subnet.
Choose the CIDR block we just added.
Use that same CIDR block for the subnet CIDR.
Click Create Subnet.
Recreate the NAT as we did above in the new Subnet.
Choose the existing Elastic IP instead of creating a new one.
Get the private IP address of the NAT.

Now we can use that to create a target for our Load Balancer.
Create a Load Balancer Target Group
Back on the Load Balancer Tab, click Create target group.
Enter Basic configuration.
Choose IP addresses.
Add a name.
Choose IPv4 (or IPv6 if you are using that).
Choose the pfSense VPC.
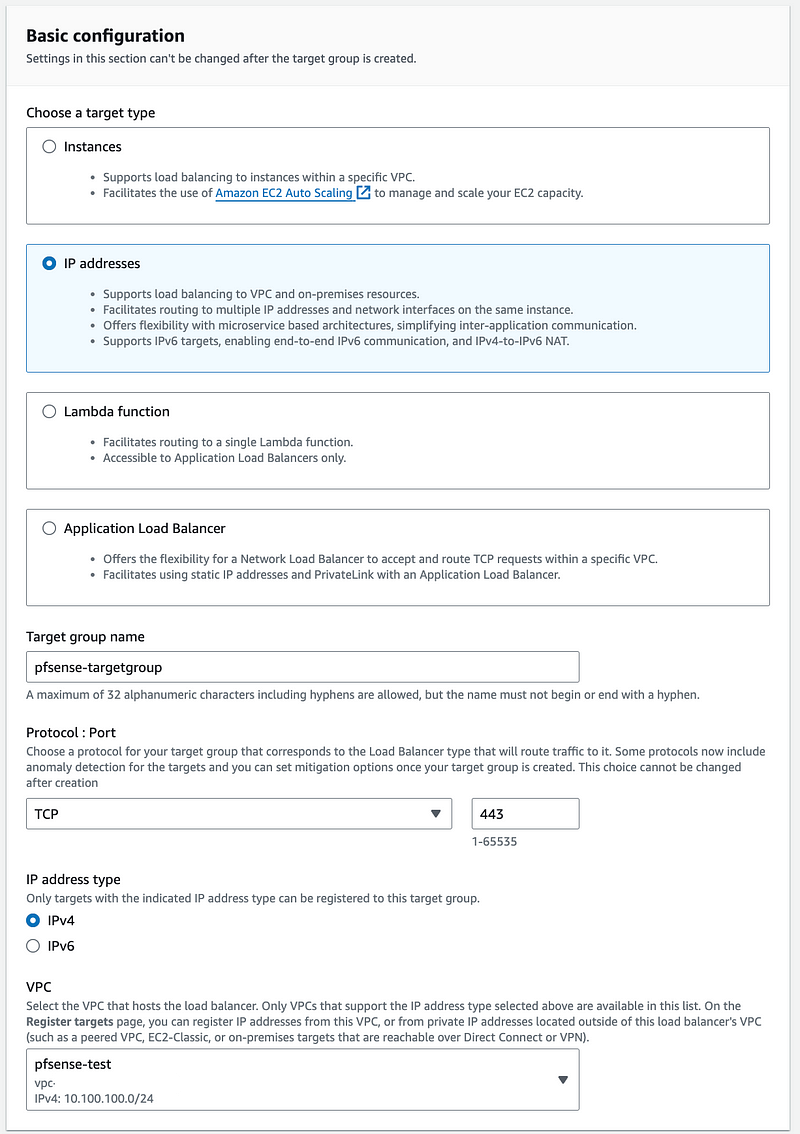
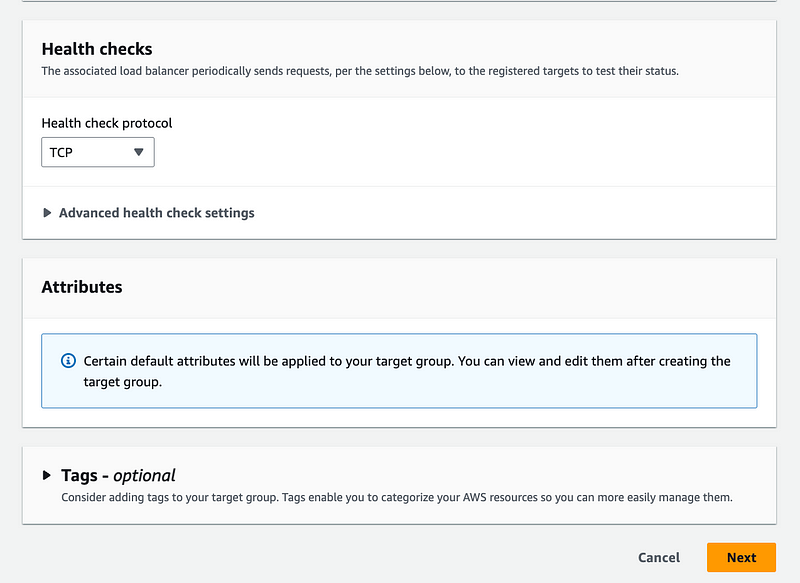
I left defaults for the rest. Click Next.
On the next screen choose Other private IP address.
Choose the Availability Zone we selected for both subnets.
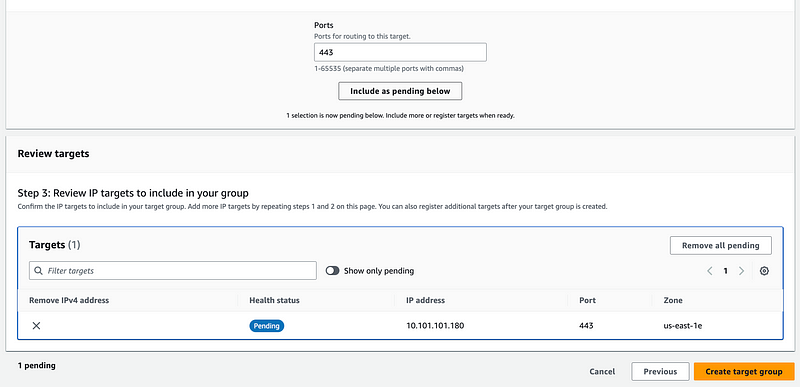
Enter the private IP address of the NAT for the target.
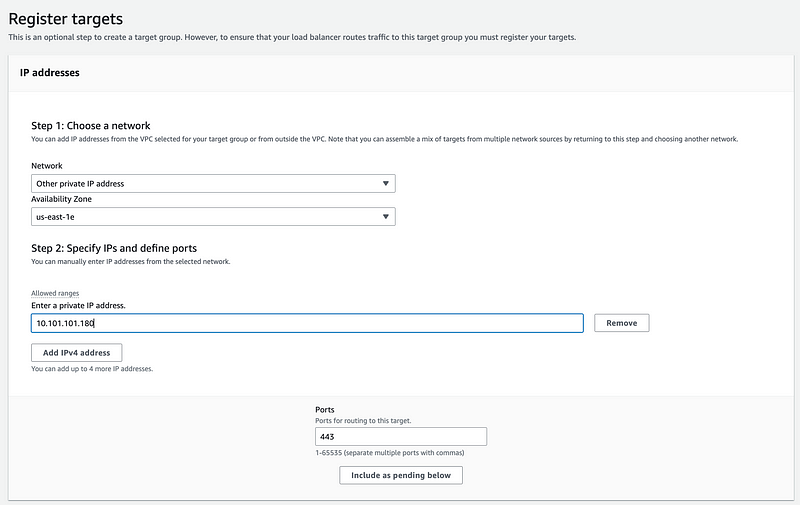
Click Include as pending below. Then Create target group.
Once that’s complete you can look at the details of the target group and see that our target is healthy.
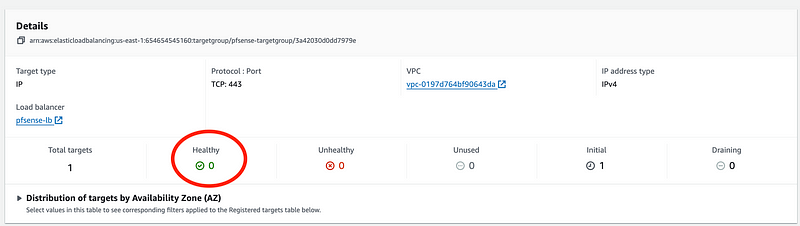
If you were creating some kind of system with multiple servers you could add multiple targets or servers to this target group. But the NAT Gateway is resilient and we only need one target.
Complete the Load Balancer Configuration
Now you can return to the Load Balancer.
Click the refresh button and select your new target group.
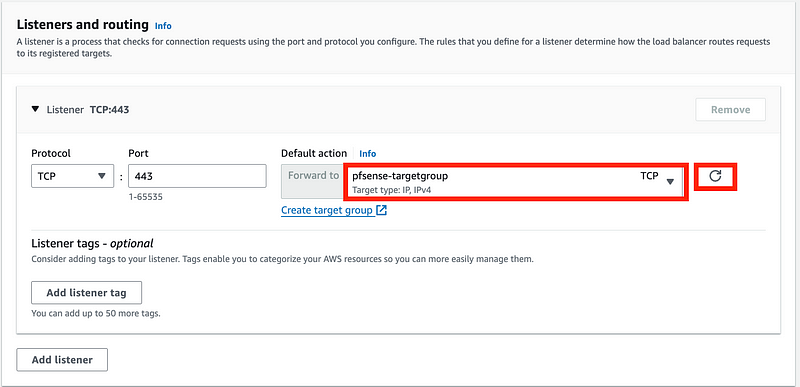
Click Create Load Balancer.
So now I check my target group again and it says my target is unhealthy. Why is that?

There’s nothing wrong with my NAT:

The problem is this. You can’t ping a NAT. In fact you can’t query a NAT in any way apparently. You can only pass traffic through it.
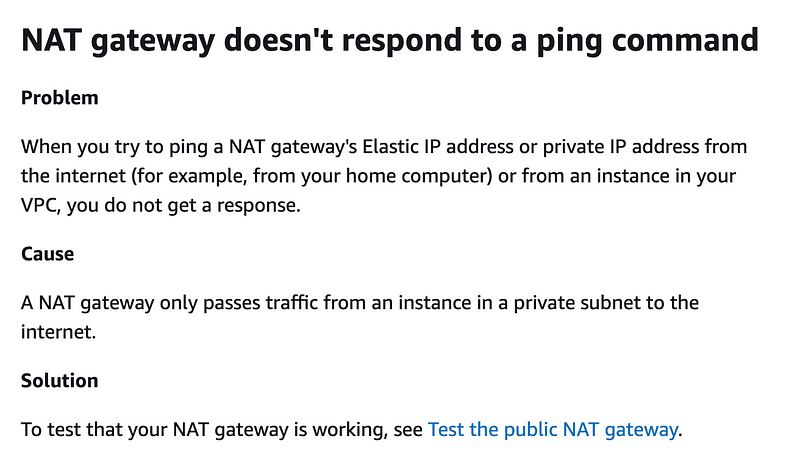
In addition to not being able to ping the NAT, there’s no way to override the health check on a target group as far as I can tell.
Even if I could override the health check, I was able to send HTTP requests to the NAT in a prior post to see if my routing was correct but the traffic got dropped at the NAT.
Well, Q told me I could do this. Can I get something from AWS for that like the person who got something from the Canadian airlines? 😆 JK.
I tried to ask Amazon Q if there’s any way around this to no avail. This is where you get into those tricky scenarios that AI can’t answer or gives you incorrect information as it did in a prior post. I’m sure someone will read this and fix it. But currently AI still takes human analysis.
So now what are my options?
What if I create a NAT instance? Yuck.
Do I even need the load balancer?
What if I could send traffic straight from the VPC to the NAT? Then I wouldn’t even have to configure or pay for the load balancer right?
Delete the load balancer if you’re following along. Leave the NAT.
See the next post in the series…
Follow for updates.
Teri Radichel | © 2nd Sight Lab 2024
About Teri Radichel:
~~~~~~~~~~~~~~~~~~~~
⭐️ Author: Cybersecurity Books
⭐️ Presentations: Presentations by Teri Radichel
⭐️ Recognition: SANS Award, AWS Security Hero, IANS Faculty
⭐️ Certifications: SANS ~ GSE 240
⭐️ Education: BA Business, Master of Software Engineering, Master of Infosec
⭐️ Company: Penetration Tests, Assessments, Phone Consulting ~ 2nd Sight Lab
Need Help With Cybersecurity, Cloud, or Application Security?
~~~~~~~~~~~~~~~~~~~~~~~~~~~~~~~~~~~~~~~~~~~~~~~~~~~~~~~~~~~~~
🔒 Request a penetration test or security assessment
🔒 Schedule a consulting call
🔒 Cybersecurity Speaker for PresentationFollow for more stories like this:
~~~~~~~~~~~~~~~~~~~~~~~~~~~~~~~~~~~~~~~~~~~~~~~~~~~~~~~~~~~~~
❤️ Sign Up my Medium Email List
❤️ Twitter: @teriradichel
❤️ LinkedIn: https://www.linkedin.com/in/teriradichel
❤️ Mastodon: @teriradichel@infosec.exchange
❤️ Facebook: 2nd Sight Lab
❤️ YouTube: @2ndsightlab