
Setup GitLab CI Runner with Docker Executor on Windows 10/11
If you are trying to use the GitLab.com shared runners, you may run out of minutes. Or you may have issues verifying your account. So, in this tutorial, I will show you how you can install your own GitLab Runner on your Windows 10 or Windows 11 machine.
Here is an overview of what we will do in this tutorial:
- install Git & Docker
- download & install the GitLab Runner
- configure the GitLab Runner to work with gitlab.com
If everything runs smooth, you should have this up and running in about 20–30 minutes.
This is a fully manual process that is ideal for beginners wanting to get started with GitLab CI. This is NOT a production-ready setup and should NOT be used as such.
Step 1— Installing Git
The GitLab Runner requires Git to run.
Open any terminal and check if you already have Git installed by typing:
git --version
If you are getting back an error message, you need to install Git. I would anyway recommend installing/updating Git anyway.

From the official Git download page for Windows, I will download the appropriate standalone Git installer.

I have detailed the installation steps in another post: How to install Git on Windows (step by step guide).
Step 2— Installing Docker
For Windows 10/11, the only way to install Docker is by downloading Docker Desktop.

I have detailed the installation steps for Docker Desktop in another post: How to install Docker on Windows (step by step).
Step 3— Preparing the folders
The GitLab Runner does not have an installer, so we need to do a few steps manually.
We need to create a folder on our system. The name and location given are just an example (call it a recommendation). I have used the name GitLab-Runner.

Step 4— Downloading the GitLab Runner
There are two versions, depending on your operating system. Download the right one for you, in most cases, you need the 64-bit version.
Download the GitLab Runner for 64-bit Windows. Download the GitLab Runner for 32-bit Windows.
Make sure to save the executable in the folder C:\GitLab-Runner. Since the name will be something like gitlab-runner-windows-amd64.exe , it is easier if we rename it to gitlab-runner.exe.

Step 5— Installing the GitLab Runner
Open your favorite command line tool as an Administrator. I will be using Powershell.

Go to the folder where you have moved the GitLab Runner executable and install it.
cd C:\GitLab-Runner
.\gitlab-runner.exe install
Step 6— Letting GitLab know that we want to use a dedicated runner
While you can assign a runner to a single project, it would it useful to assign it to all projects in a group. So we are essentially creating a group runner.
So go ahead and create a private group just for this runner. I want only projects that are in this group to use the runner on AWS.
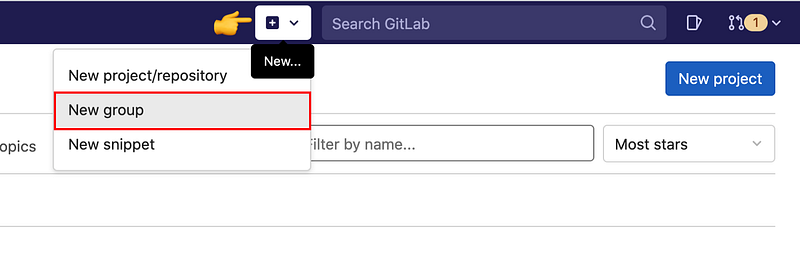
From the group, go to Settings > CI/CD and expand the Runners configuration.
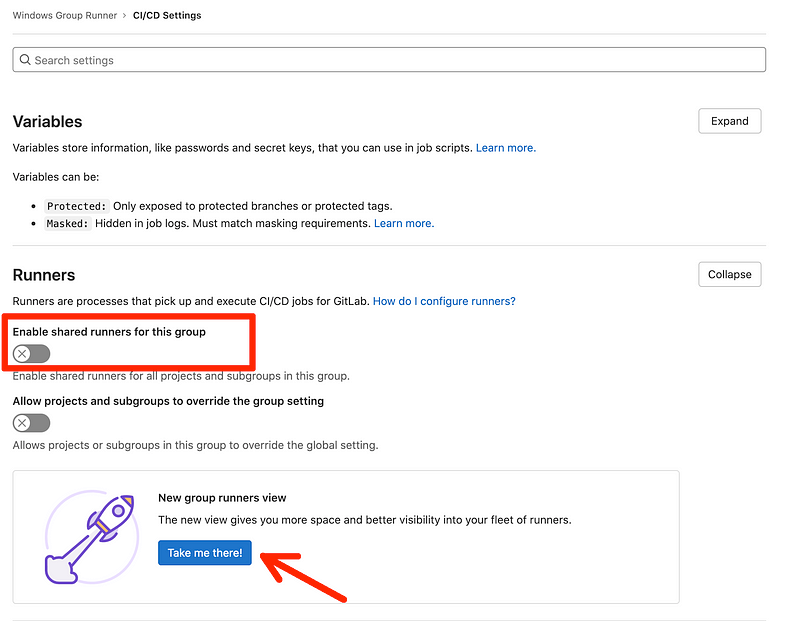
As a first step, make sure you disable any shared runners for this group. After this, we continue by viewing the Runners view. The same view is available from CI/CD > Runners.
Step 7 — Registering the GitLab Runner
This page will display all runners for this group. Currently, there are none of them.

Let’s see some instructions on how to set up the runner.

From this new window, we want to click on the Windows tab to get specific instructions. Copy the last command as this will contain the URL of the GitLab instance and the registration token.

After this, jump back into your command-line tool and paste the command. This will start the registration process where the following details are being asked.
- Enter the GitLab instance URL (for example, https://gitlab.com/). Simply hit enter as the command we have copied/pasted already contained this value.
- Enter the registration token — Simply hit enter as the command we have copied/pasted already contained this value.
- Enter a description for the runner — Simply hit the Enter/Return key to use the default name.
- Enter tags for the runner (comma-separated) — You can leave this empty for now. You can change this later from GitLab. Hit the Enter/Return key to continue.
- Enter optional maintenance note for the runner — You can leave this empty.
- Enter an executor: custom, docker, ssh, virtualbox, docker-ssh+machine, kubernetes, docker-ssh, parallels, shell, docker+machine —
If you have installed Docker, you can specify the
dockerexecutor. - Enter the default Docker image (for example, ruby:2.7) — You can use the default and hit the Enter/Return key to continue.

Now let’s start the service and verify that it is running:
.\gitlab-runner.exe start
.\gitlab-runner.exe status
The fact that the GitLab Runner has been registered properly can also be observed after refreshing the Runners page.

Step 8— Enabling the privileged mode
While our runner might seems to work, once we try to build Docker images we will run into troubles.
So we need to enable the privileged mode to be able to use Docker in Docker (dind).
We will need to edit the config.toml and flip the privileged from false to true. The config.toml file location is in C:\GitLab-Runner .
Open the file with your preferred text editor.

We want to flip the value from false to true for the privileged mode.

To use the new configuration, we need to restart the runner:
.\gitlab-runner.exe restartStep 9 — Testing the installation
We want to test that our newly configured runner is working properly. To test that, we will define a small pipeline that:
- uses artifacts and checks that they are passed from one stage to the other
- builds a Docker image
- pushes the image to the GitLab Container Registry
Create a new GitLab project in the new group and add the following pipeline definition file .gitlab-ci.yml:
stages:
    - build
- packagebuild:
image: alpine
stage: build
script:
- echo "Hello Docker" > index.html
artifacts:
paths:
- index.html
build docker image:
    image: docker
    stage: package
    services:
        - docker:dind
    script:
        - echo $CI_REGISTRY_PASSWORD | docker login -u $CI_REGISTRY_USER $CI_REGISTRY --password-stdin
        - docker build -t $CI_REGISTRY_IMAGE .
        - docker image ls
        - docker push --all-tags $CI_REGISTRY_IMAGE
If you want to learn how to build pipelines in Gitlab CI, I have created an online course that starts with the basics of Gitlab CI and YAML and helps you understand the fundamentals of CI/CD. Learn more about the course.
And also this Dockerfile:
FROM nginx
COPY index.html /usr/share/nginx/html
The pipeline should run without any issues.
If you enjoy content like this and it helped you solve a problem, help me create more. Please leave a comment, share, and press that 👏 a few times (up to 50 times). And consider subscribing to Medium for more amazing content.
The most important information you want to see in your job logs is your runner name and the executor, which should be Docker.

Troubleshooting
This job is stuck because the project doesn’t have any runners online assigned to it.
You may encounter this error if you have defined one or more tags when registering the runner.


The job is most likely stuck because of the way the runner is configured. You can add a tag for your job indicating you wish them to be executed with a specific runner (based on the tag) or you can amend the runner configuration and enable Run untagged jobs.
Go to the runner and click the edit button.

After this, verify the configuration

Cannot connect to the Docker daemon at tcp://docker:2375. Is the docker daemon running?
The above error could be is just an error from the Docker in Docker container failing to start. You should see in the long also this error:
*** WARNING: Service runner-kv7swsxt-project-36405802-concurrent-0-f612788ab42119df-docker-0 probably didn't start properly.
Health check error:
start service container: Error response from daemon: Cannot link to a non running container: /runner-kv7swsxt-project-36405802-concurrent-0-f612788ab42119df-docker-0 AS /runner-kv7swsxt-project-36405802-concurrent-0-f612788ab42119df-docker-0-wait-for-service/service (docker.go:1166:0s)
Service container logs:
2022-05-23T10:34:22.078672600Z ip: can't find device 'ip_tables'
2022-05-23T10:34:22.081335300Z modprobe: can't change directory to '/lib/modules': No such file or directory
2022-05-23T10:34:22.084316500Z mount: permission denied (are you root?)
*********
This error indicates that the runner is not configured to use the privileged mode. Please revisit the instructions in Step 8.
Conclusion
I hope this tutorial helped you set up your GitLab Runner to run on your Windows 10 or Windows 11 machine. Leave a comment in the section below if you have any questions. I would love to hear from you!
Thank you for sticking with this article until the end. If you enjoyed it, please leave a comment, share, and press that 👏 a few times (up to 50 times). It will help others discover this information and maybe it will help someone else as well.
Follow me on Medium and YouTube if you’re interested in more tutorials like this one.


