
Setting up a 3D minimap
Let’s see how film our scene from two angles at once to give players a top-down and more abstract representation of the level!

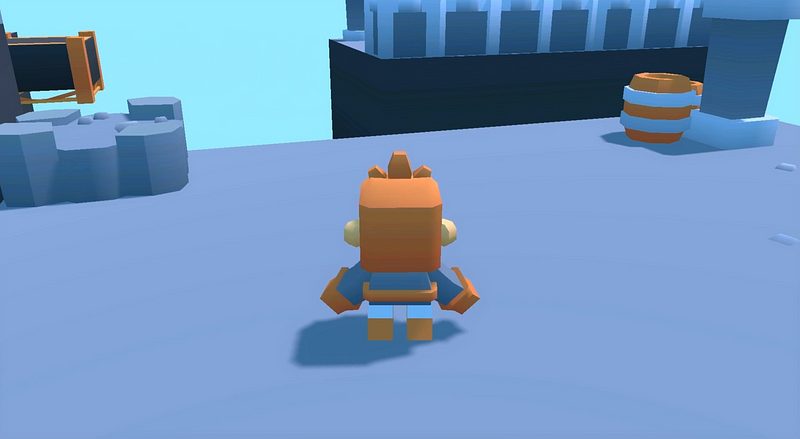
Plunging your players into a strange virtual world can sometimes have them lose their bearings for a while… which is why a lot of games offer a minimap that gives a bird’s-eye view of the scene and helps people understand the overall structure of the level.
So in this tutorial, let’s see how to make such a minimap in Godot :)
By the end of this article, you’ll know how to use a second Camera3D node in one of your 3D scenes to film the level from a specific angle, and how to use Godot’s viewport tools to repaste the view of this camera on the screen in a particular spot!
Note that in this tutorial, I’m going to start from the little dungeon-kinda level we made in this previous episode of the series, where we discussed how to attach a 3D camera to our hero in an RPG- like fashion, without any wall clipping or collisions.
As usual, since we’ll be coding our logic in C#, make sure that you have a version of Godot with .NET enabled.
And of course, don’t forget that you can get the demo scene and all the assets for this example on my Github 🚀 with all my other Godot tutorials :)
Also, the spaceships & icon assets are from Kenney’s library🚀
The tutorial is also available as a video — text version is below:
And just before diving into this 3D stuff, let’s talk 2D for just 2 seconds… :)
If you want to learn more about 2D tools for your future Godot 4/C# game projects, go ahead and check out my brand new “short-read” ebook: L’Almanach: Mini-2D Platformer!
This quick, practical guide will teach you the fundamentals of doing 2D games in this game engine with essential notions like tilemaps, 2D physics, animations, character controllers, and more. You’ll even build your very own 2D platformer game step-by-step!
So if you want to discover some 2D tricks for your next Godot 4/C# game in just about 100 pages and for a low-price, don’t hesitate to have a look at the Gumroad page :)
With all that said, let’s dive in and discover how to setup a basic 3rd person camera in Godot and C#!
Using a second camera
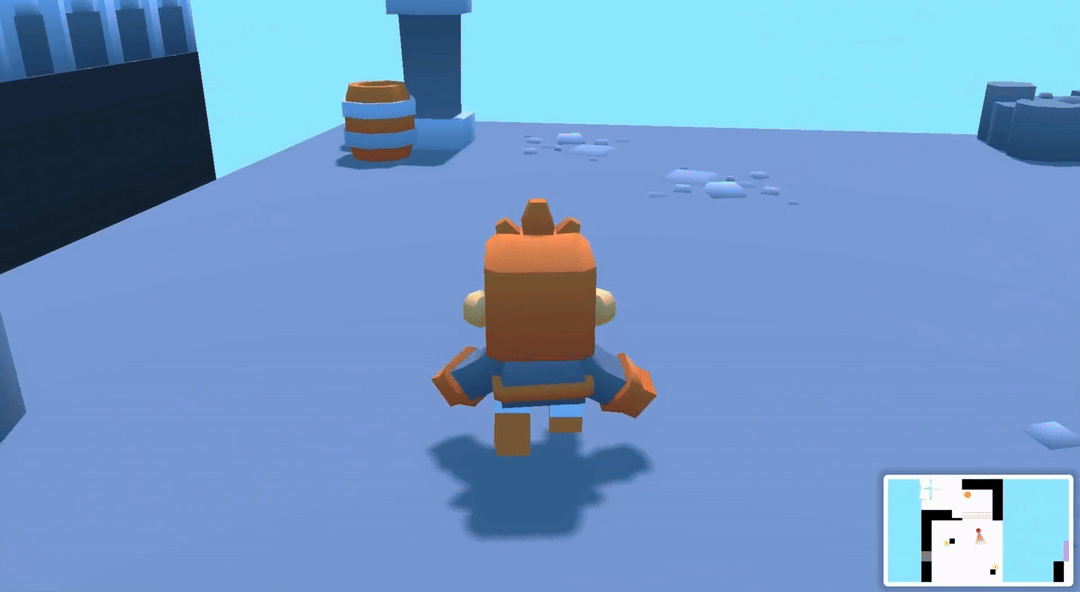
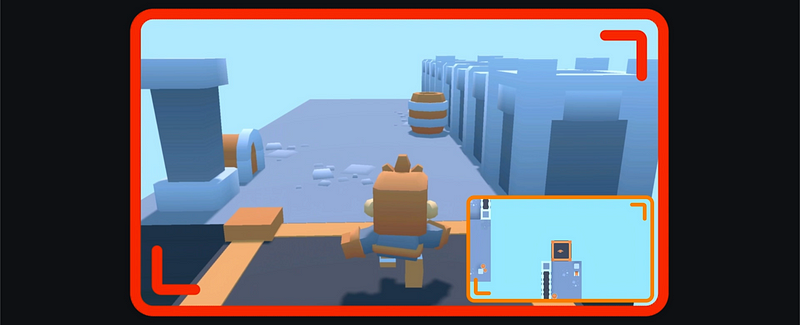
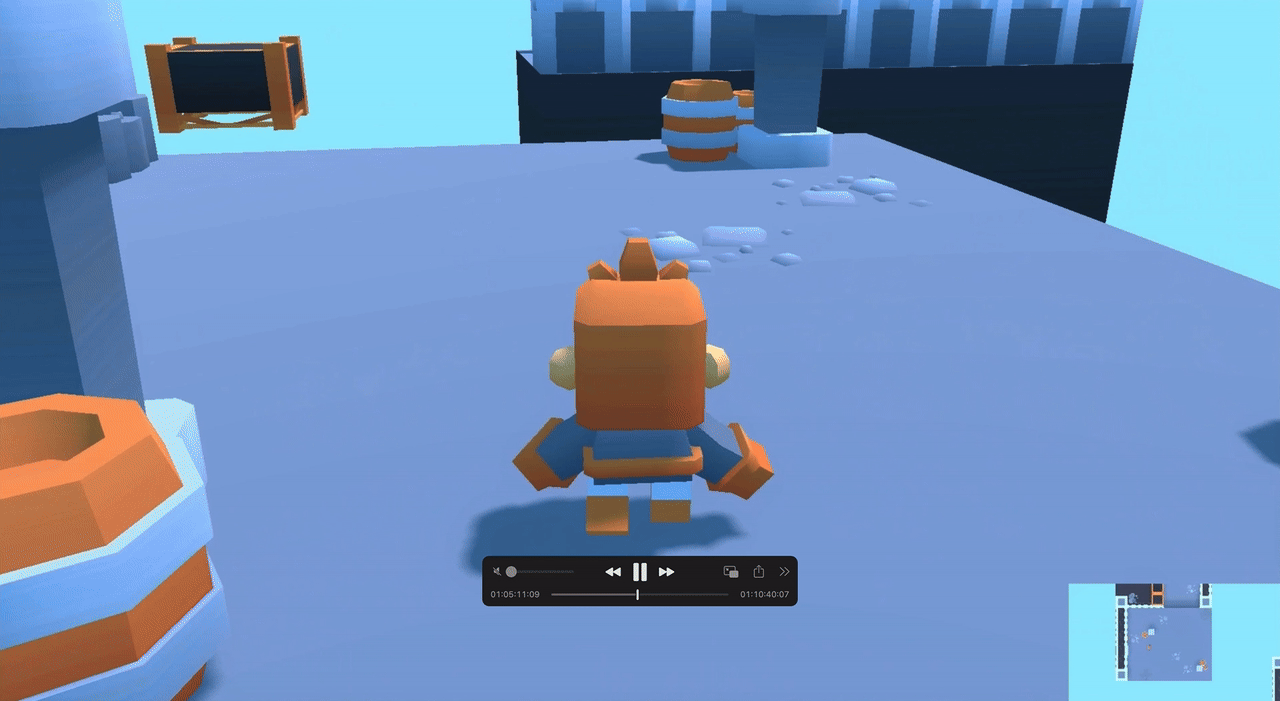
Alright, to begin with, we need to talk about how to use several cameras at the same time in a Godot scene. Cause if we’re able to stack multiple camera renders on the same screen, then we’ll be able to have our main character-focused view in the middle, and a top-view for our minimap in a corner of the screen:
But of course, if we just add a second Camera3D node in our scene, have it point down at the level and change its mode to orthographic, which looks great in the preview…

Then when we run the game, we don’t see it anymore!
That’s because we can’t simply auto-render multiple cameras on our screen by just adding them to the hierarchy. In fact, we need to do use a neat Godot tool: the viewports.
In short, a viewport is a screen that you can project a render on.
By default, any Godot scene contains the root viewport that is used by your active camera. Typically, in our case, our player-focused main camera is the active one, so it’s automatically rendering on this root viewport, that takes up the whole size of your computer screen.
But the trick is that if we create a second viewport, then if put another camera in this other viewport, we’ll be able to render it at the same time and get our double view of the scene :)
Note: By the way, it’s important to remember that you can only have one active camera per viewport, and that your camera will always render to the closest viewport in the hierarchy ;)
So, in our case, let’s say we create a SubViewport node in our hierarchy to create our secondary viewport, and put our new minimap camera inside it.
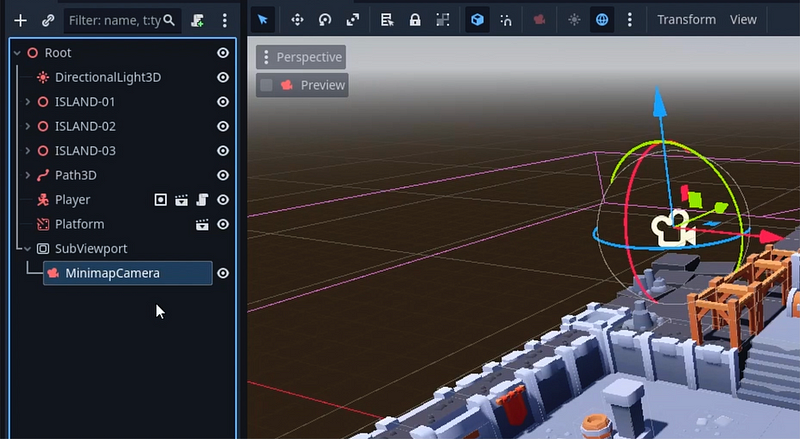
From that point on, we have two viewports: the root viewport, that our main player camera renders to, and this SubViewport that our minimap camera renders to.
However, for now, this second viewport is still not shown on screen: our minimap camera does render somewhere, but we can’t see the result!
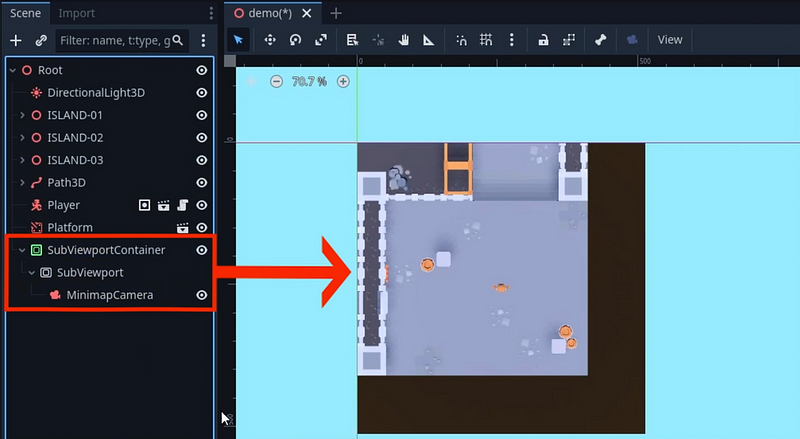
To fix this, we need to wrap our SubViewport subhierarchy into a SubViewportContainer UI node. This allows us to get back the content of the SubViewport child inside and display it on the screen as a simple interface element:
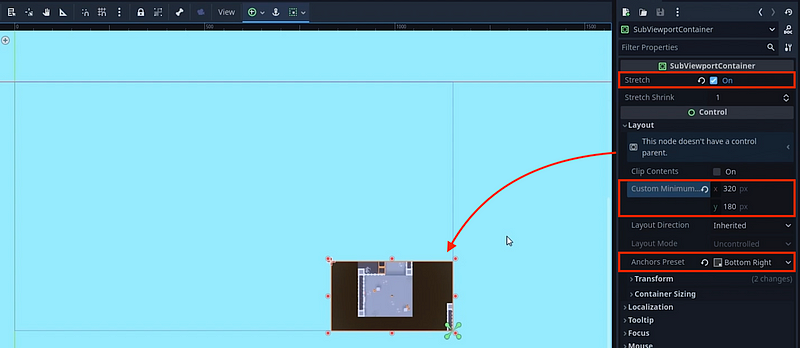
So for example, we can put our SubViewportContainer in the bottom-right corner of the interface, enable the Stretch option to have the SubViewport inside auto-resize to fit this UI size, and then set some custom dimensions on our container:
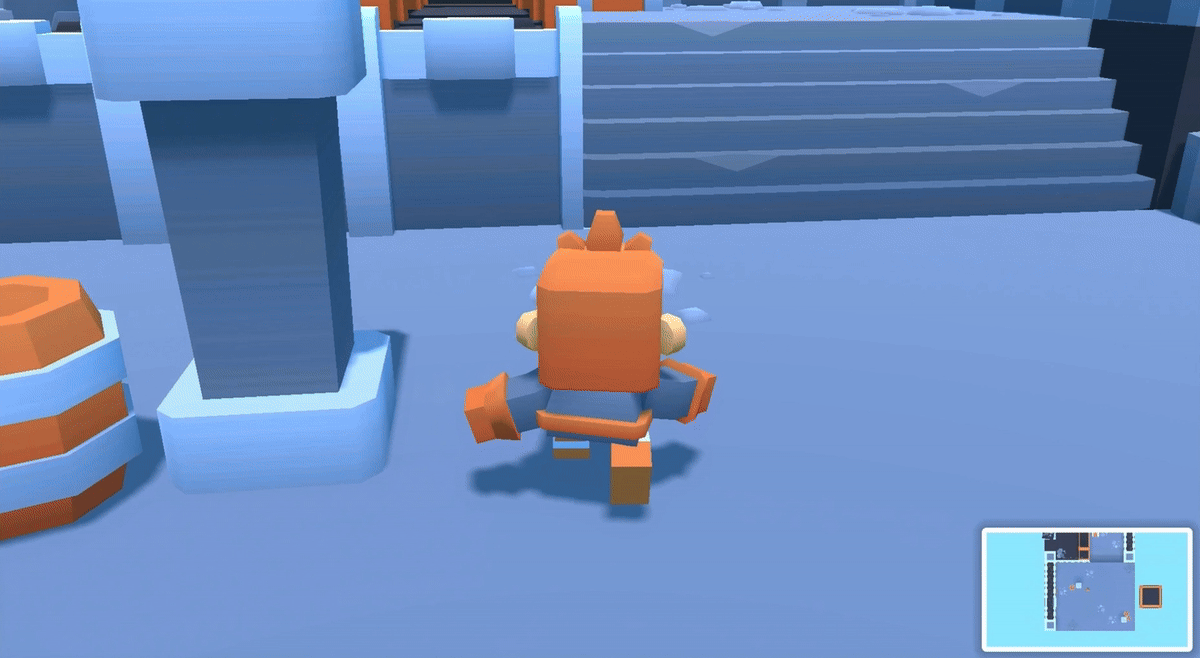
And there we are — if we replay our game, we see that we now have this additional render of our scene, that comes from our top-down minimap camera, and that indeed updates in real-time as the level state changes!
Ok, that’s great — so, now, let’s see some extra tips to improve this minimap even further…
Keeping the minimap centered on our player
Given that we’re working on a little RPG-like demo where our hero is clearly the whole focus of the game, it could be cool to have our minimap follow it at all times.
Except that, this time, we can’t use the same trick as in our previous episode, where we just parented the main camera to the player to have it inherit its transform — because our setup requires that our camera be extracted to another viewport…
This means that we need to code this follow logic ourselves — which, luckily, is pretty simple :)
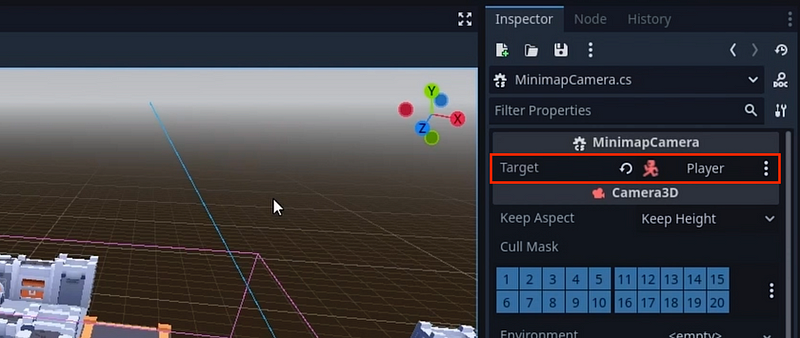
So let’s just attach a new C# script on our minimap camera, call it MinimapCamera.cs, and inside export a reference to a Node3D to use as a target:
using Godot;

public partial class MinimapCamera : Camera3D {

    [Export] private Node3D _target = null;

}
After rebuilding our project, we can assign our player node in this reference slot.
Now, in the init function of our script, we’re going to store the current offset between the minimap camera and its target. This will make it easy to keep this exact offset afterwards when we track the target:
using Godot;

public partial class MinimapCamera : Camera3D {

    [Export] private Node3D _target = null;
    private Vector3 _offset;

    public override void _Ready() {
        _offset = GlobalPosition - _target.GlobalPosition;
    }

}
Of course, if we want, we can also start by checking that a target was indeed assigned, or else print a little error and exit:
using Godot;

public partial class MinimapCamera : Camera3D {

    [Export] private Node3D _target = null;
    private Vector3 _offset;

    public override void _Ready() {
        if (_target == null) {
            GD.PrintErr("No target assigned for the minimap camera");
            return;
        }

        _offset = GlobalPosition - _target.GlobalPosition;
    }

}
Then, all that’s left to do is, in the process method, continuously re-assign our camera’s position relative to the target’s position, and using our offset vector:
using Godot;

public partial class MinimapCamera : Camera3D {

    [Export] private Node3D _target = null;
    private Vector3 _offset;

    public override void _Ready() {
        if (_target == null) {
            GD.PrintErr("No target assigned for the minimap camera");
            return;
        }

        _offset = GlobalPosition - _target.GlobalPosition;
    }

    public override void _Process(double delta) {
        GlobalPosition = _target.GlobalPosition + _offset;
    }
}
And here we go: the minimap now stays “hooked” to our player avatar and moves along with it.
Improving the minimap UI element
Another cool idea could be to make this minimap display slightly more appealing — cause for now, it looks really dull to just have this extra rectangle on the screen.
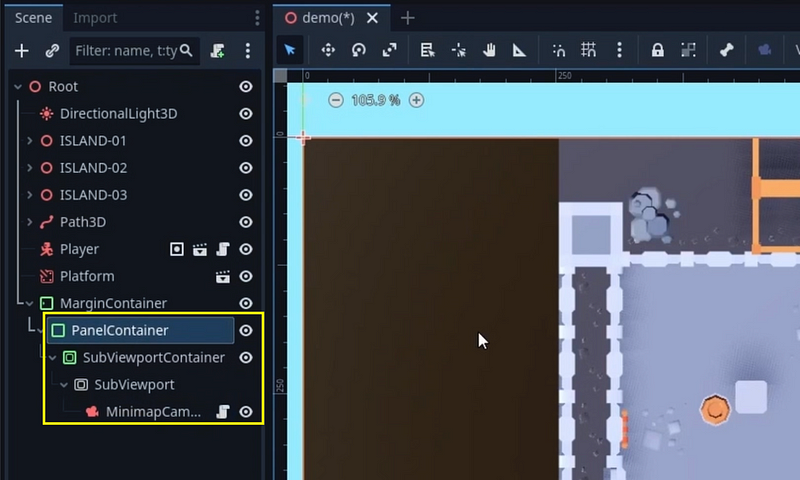
To do this, we can start by putting everything in a MarginContainer that stretches to the whole screen, to add some padding in the bottom-right corner:
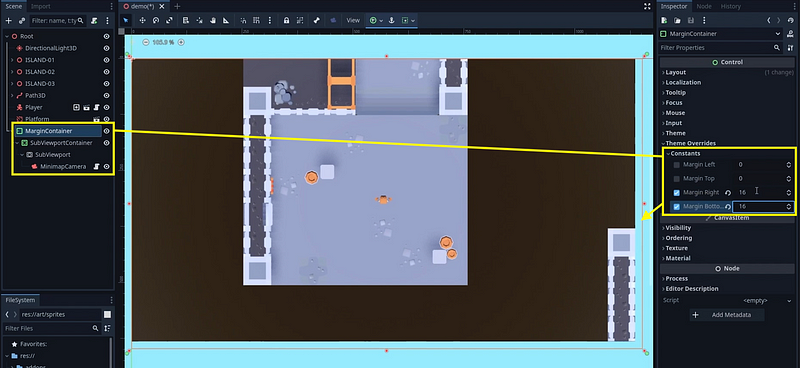
Then, we can use a PanelContainer to better customise our minimap.
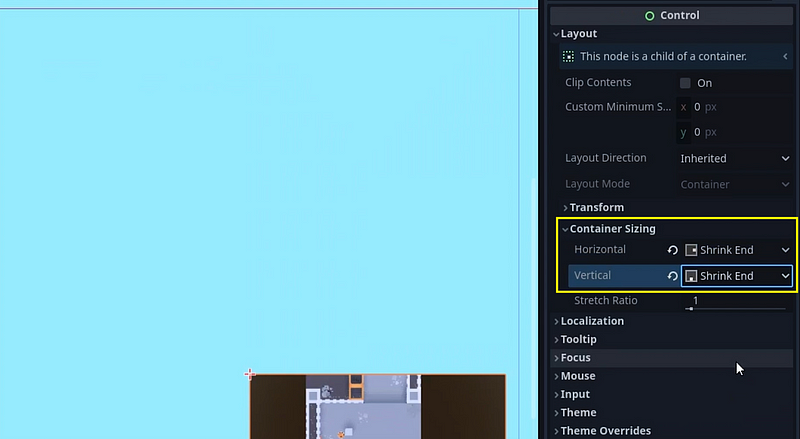
In its Container Sizing options, we’ll start by shrinking it to the corner:
And then, in its Theme Overrides section, we’ll give it a custom flat style.
Here, we can for example increase the content margins a bit to create a small border around our minimap render, change the fill colour to get something more readable on the background, and even play with the shadow options to further boost the contrast between this extra element and the base render:

Ok — that’s already way better!
But now, you might be wondering: what if I don’t want to show all those details on my minimap? What if I wanted to have a more abstract view in this top-view version?
Using visibility layers & culling
To have our main camera and our minimap camera render slightly different versions of our assets, we can re-use two tools that we discussed a while ago in the series, in this episode: the visibility layers and the culling masks.
In a nutshell, those are a way of telling Godot’s camera to only render some objects, if the culling mask of the camera matches the visibility layer of the object.
In our case, we can use this trick to prepare two alternate representations of our objects: the one we currently have for the main camera, with nice 3D models and all; and another more minimalist one for the minimap camera.

And just by putting those various elements on different visibility layers, and making sure our two cameras have different culling masks, we’ll be able to render each representation in just either one of the two viewports :)
Typically, suppose we create a Sprite3D in our player hierarchy with a simple circle texture:
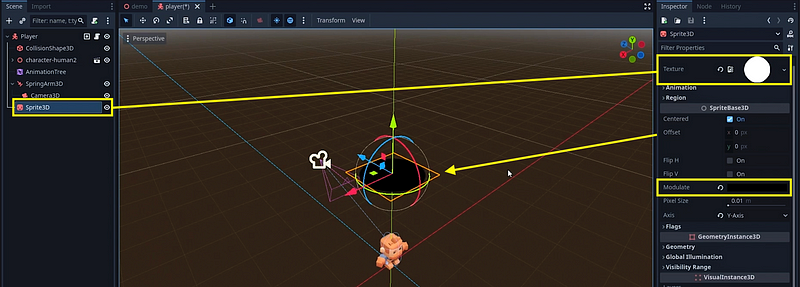
And then we put it on the second visibility layer:
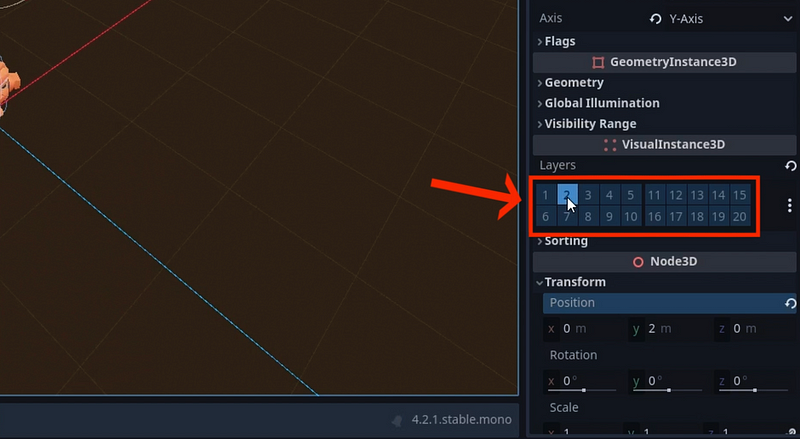
We’ll also make sure to remove this second layer from our main camera’s culling mask (the camera that is focused on our player and hooked to it in this player scene):

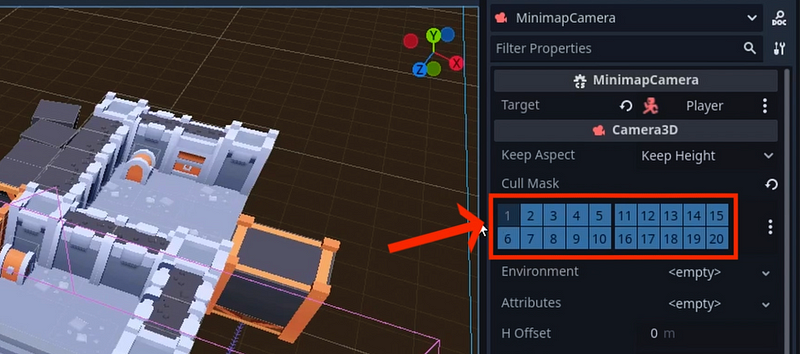
Then, back in the main demo scene, we’ll select our minimap camera and tell it to not render the first layer, but keep the second one:
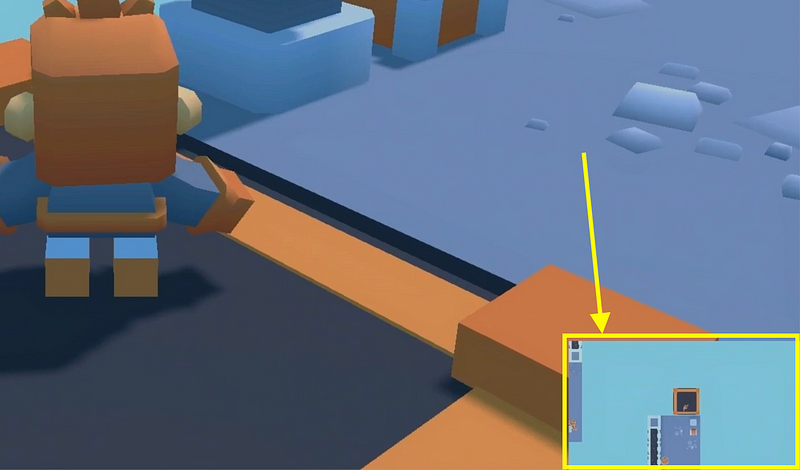
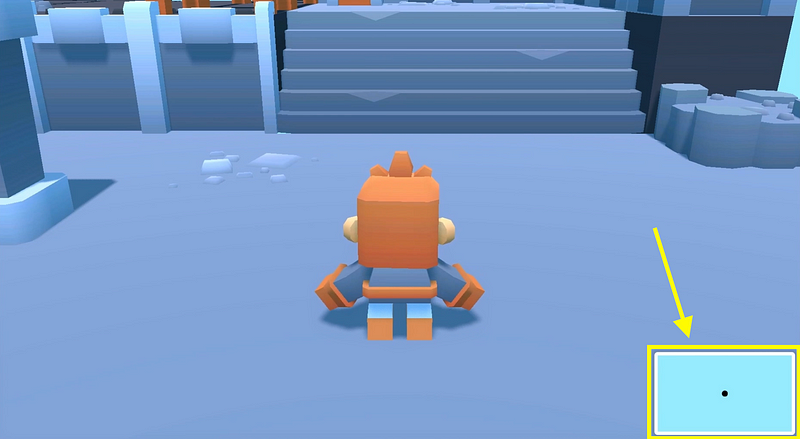
Now, if we run the game again, we see that we indeed have only our player on the minimap, shown as a little black dot!
Meaning that if we do something similar for our other assets such as the platform, the environment blocks, the chests, the barrels, etc, we’ll be able to easily choose the visuals we want to show on our minimap and possibly get a simpler visual than if we were just re-filming the exact same scene.
Note: If you want to ensure some visuals are in front of others, simply bring them up on the vertical Y axis: the higher the element, the more in front it will be in the minimap camera, as long as you don’t get higher than this camera :)
We can even give our player avatar a simple “view angle visual” to quickly see what direction it’s currently facing!
Conclusion
So, there you go: you know how to setup a simple minimap system for a 3D scene thanks to Godot’s viewport tools, how to have the camera follow the player, and even how to use visibility layers and culling to customise the render of this minimap to your liking :)
If you enjoyed the tutorial, feel free to clap for the article and follow me to not miss the next ones — and of course, don’t hesitate to drop a comment with ideas of Godot tricks that you’d like to learn!
As always, thanks a lot for reading, and take care :)
To read more of my content, and articles from many other great writers from Medium, consider becoming a member & following me!