
Using mask culling & visibility layers (Godot 4/C#)
Let’s see how to optimise our games with bitmasks and culling!
Rendering objects is one of the core systems in any game engine. But, over the years, game engine creators have boosted this base functionality with various options, to give users more control over the rendering of their games.
And, in particular, a very common trick that is available in most game creation software, Godot included, is the notion of visibility layers.
So, today, we’re going to see why this tool is interesting, how to set specific visibility layers for our nodes via both the Inspector panel and C# code, and how to use that to cull some objects on our cameras…
Important note: In this tutorial, we won’t talk about physics layers but only visibility layers. Although the two concepts sound the same, they’re different and they don’t have the same goal — and, today, we’ll focus on showing or hiding objects, thanks to visibility layers :)
As usual, since we’ll be coding our logic in C#, make sure that you have a version of Godot with .NET enabled.

And of course, don’t forget that you can get the demo scene and all the assets from this demo on my Github 🚀 with all my other Godot tutorials.
Also, the image, audio and 3D models assets are made by Kenney 🚀
The tutorial is also available as a video — text version is below:
But now, with all that said, let’s dive in and discover the basics of setting visibility layers for our nodes in Godot and C#!
Why play around with visibility layers?
Just before diving into the tool itself, let’s quickly recap why visibility layers are interesting. Like in many game engines, Godot implemented this tool because:
- First and foremost, visibility layers let us create more advanced effects like multiple views and split-screens, partial post-processing that only impacts a chunk of the scene or dynamic rendering of some elements depending on the state of the game or the interactions of the player with the world, for example.
- Second, they can also help with organisation and iterative design: by putting elements on different layers and conditionally showing or hiding them, you can better prepare complex scenes, and edit just the part you want without affecting the others.
- And finally, they’re nice in terms of optimisation and debug because they allow us to easily toggle off elements that aren’t useful at this time to lighten the render workload, or better isolate where the visual issues are coming from.
Overall, visibility layers are a neat tool for making efficient, well-organised and even more powerful games by giving us a finer control on the rendering of our scenes.
Setting up visibility layers
Ok, to begin with, let’s see how to use visibility layers on our nodes directly in the editor, using the nodes’ Inspector.
Something to keep in mind is that these visibility options are available for a lot of node types… but not all. More specifically, you can only set visibility layers for nodes that use (or derive from) the CanvasItem or VisualInstance3D types.
Meaning that typically, this tool is not available for the very basic Node type, or the Node3D type.
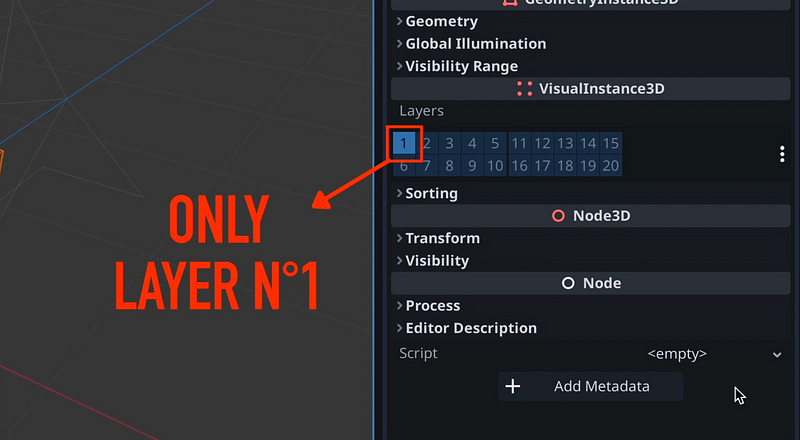
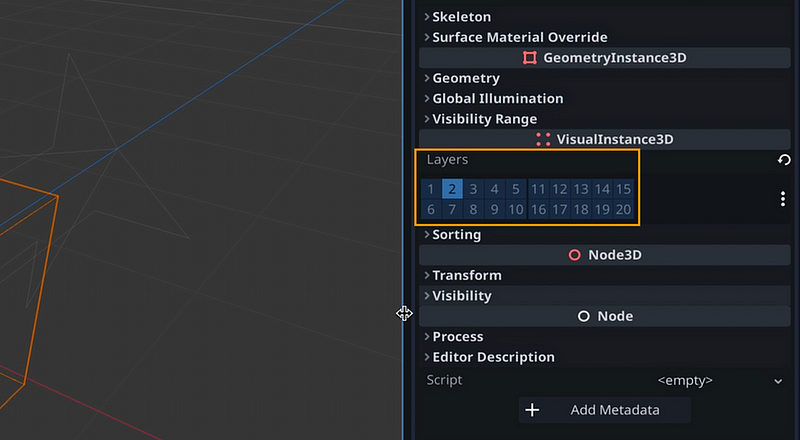
But so, if you have a CanvasItem or a VisualInstance3D, you’ll see that in its Inspector, you have a property called Visibility Layer or Layers with a little table of numbers:
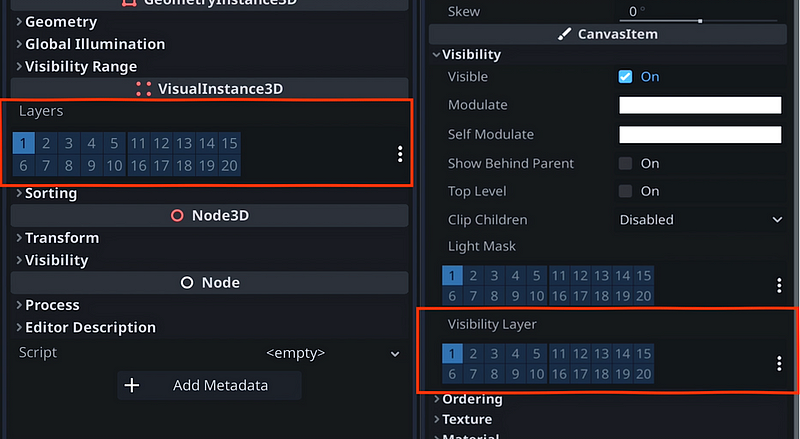
These cells represent all the layers that you can put your node on, so from 1 to 20, and as you can see we can simply click on a cell to toggle it on or off:
Basically, using this table, we can very easily change the layer of our node and put it on one or more layers at the same time. Our node will be on all the layers that are toggled on in this table.
For example:
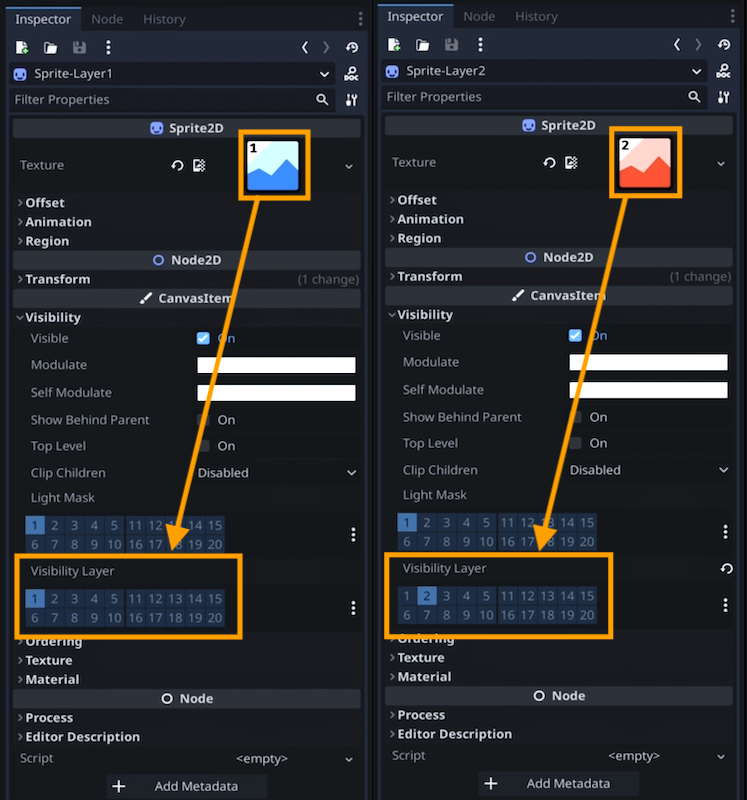
- This configuration, which is the default, means that the node is only on the visibility layer number one:
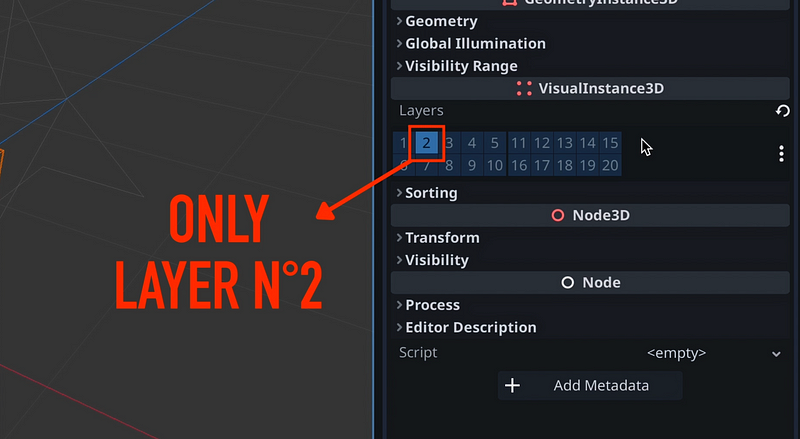
- This one means that it is only on the layer number two:
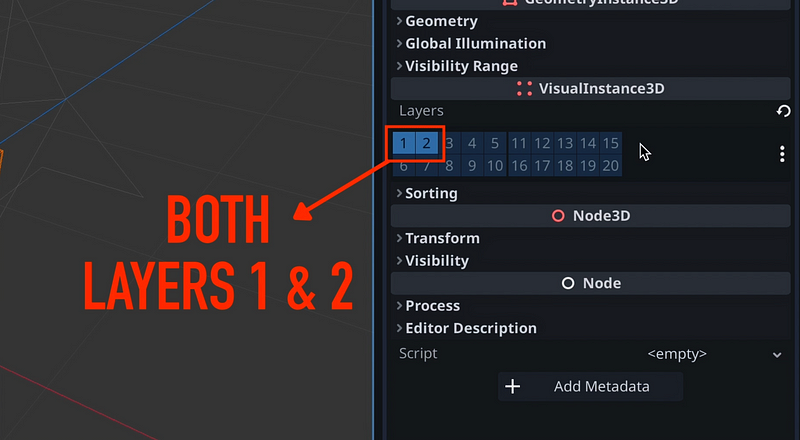
- And this one means that it is on both layers:
Now, by default, Godot’s 2D and 3D render settings are made so that you see every layers — so changing the visibility layers won’t have much effect if you leave it at that…
The next step is therefore to discuss how to use mask culling to have those layers be shown or hidden in your game. And, this time, the 2D and 3D workflows aren’t exactly the same!
Mask culling nodes using their layers
Ok so — having our game render nodes conditionally depending on their visibility layers can be a bit tricky, especially because, this time, it doesn’t work the same in 2D and in 3D.
Note: This comes from the way Godot was developed, with first a 2D-only render engine, and then a new 3D render engine a few years later (well, there was 3D, but it was so unusable that anyone used only 2D, anyway!).
That’s why you actually have two separate tabs to take care of either 2D or 3D nodes and, though it means that each engine is a bit more optimised, sometimes it also causes some discrepancy in their usage, like here.
But anyway — let’s start with 3D, since it’s the simplest.
Using cull masks in 3D
We’ll say that have this super simple 3D scene with a Camera3D node, a directional light, and a MeshInstance3D that renders a white sphere:
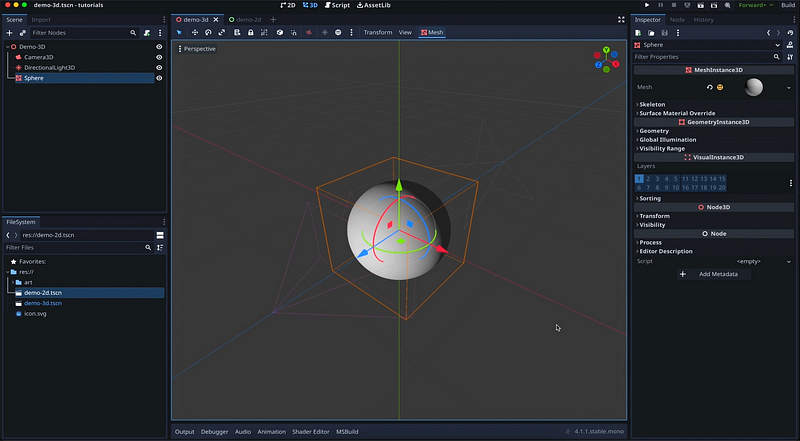
We’ll also make sure that this sphere is not on the visibility layer number one, but the layer number two:
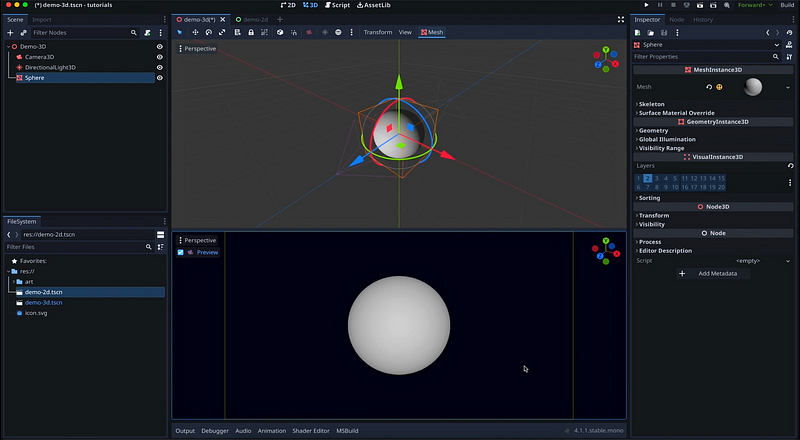
Now, you see that, even if we go into preview mode to check what our camera is rendering, for now, we still see our sphere:
And that’s because, at the top of our camera’s Inspector, in the Cull Mask property, every cell is toggled on — which means that, by default, our camera “sees” every layer:
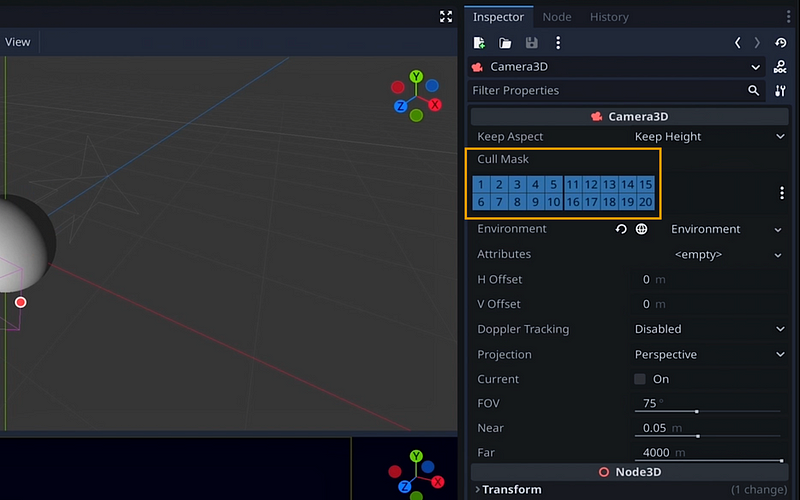
To hide the layer number two, we just need to toggle the second cell off — and you see that our sphere has now disappeared from the 3D camera preview :)
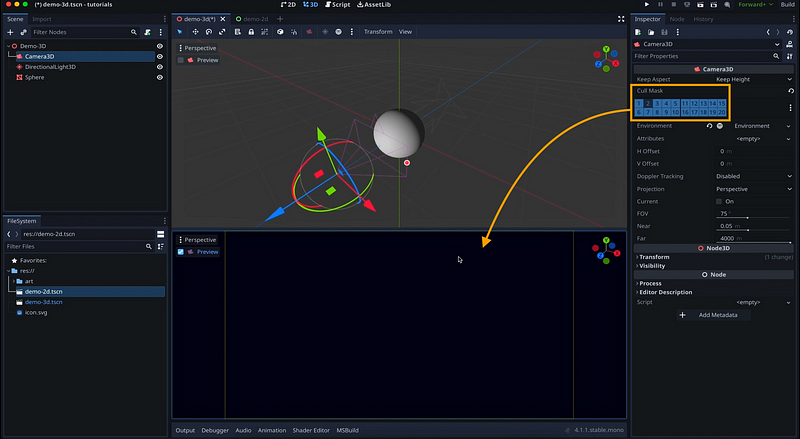
So this Cull Mask property is a table that is very similar to the node’s visibility layers one, except that it tells Godot which layers this Camera3D node should consider for rendering. Pretty straight-forward! :)
Using cull masks in 2D
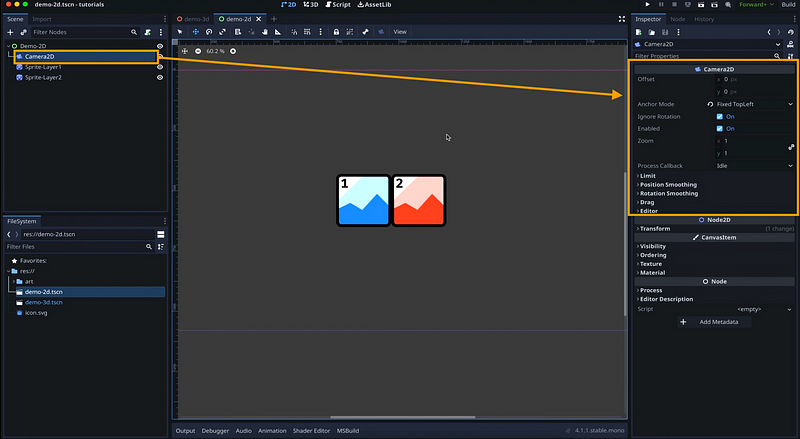
However, things are sadly a bit more complex when dealing with 2D cause, if you have a basic 2D scene like this one, with a couple of sprites, and you take a look at your Camera2D node, you’ll notice that it doesn’t have any Cull Mask property:
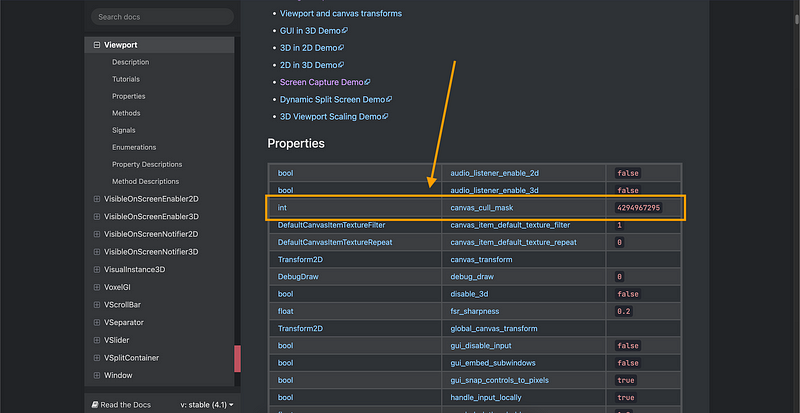
When working in 2D, this Cull Mask option is actually available not on the camera, but on the viewport that your 2D elements are children of. Indeed, if you look at the Godot docs, at the Viewport API reference page, you see that it has a canvas_cull_mask property over here:
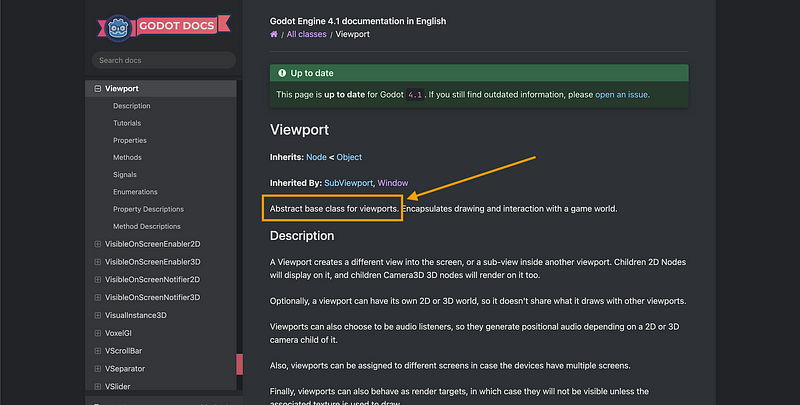
But if you scroll to the top, you’ll also notice that this Viewport node type is actually abstract, meaning that it can’t be instantiated directly:
Which is why, if inside the Godot editor you try to create a new node of type Viewport, you’ll see it’s greyed out and you can’t create it:

On the other hand, we can pick its direct inherited type, the SubViewport node type, that of course has a Cull Mask property too:
Now, setting up a SubViewport to fit the dimensions of the screen and properly match your scene preferences is not really the topic today, so I’m going to ignore this part and just assume that you have a SubViewportContainer and a SubViewport node, and that you’ve put all of your 2D elements inside, as children:

💬 Of course, if you’re curious about this, and typically how these nodes can be used to create a split-screen in a game, don’t hesitate to tell me in the comments! ;)
Anyway, here, you see that I put both my Sprite2D nodes and my Camera2D node under my SubViewport node — and I made sure to have one sprite on the layer number 1, and the other on the layer number two:
So, now, if I go to my SubViewport node and play around with the Canvas Cull Mask property, you see that my sprites instantly toggle on and off accordingly in the editor viewport!
Note: ’Cause remember that, this time, the culling isn’t linked to a camera but to the viewport itself, so it makes sense that Godot can show us the result live in the viewport like this ;)
So even if it’s a bit more complicated, you see that Godot still allows us to use visibility layers and mask culling in 3D and in 2D to easily separate our scene render in multiple chunks, for example to create multiple screens, or temporarily hide an object, or apply some post-processing on just part of the scene, or more!
Quick bonus: Naming your layers
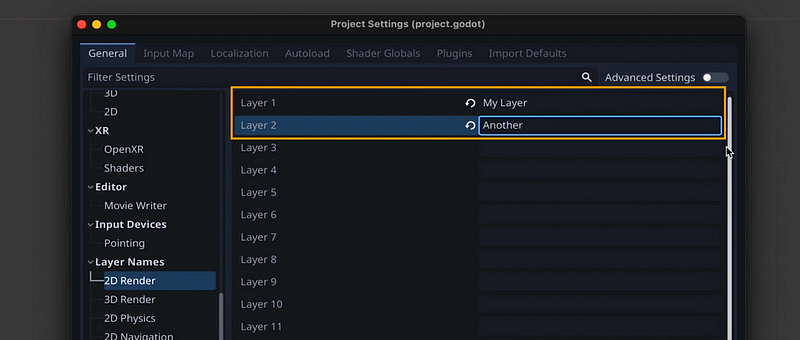
By the way, if you prefer to have some custom clearer names for your layers than “Layer 1”, “Layer 2”, etc. — then you can go to your Project Settings window and, in the Layer Names section, pick either the 2D Render or 3D Render section, depending on your type of game.
And here, you can put specific names in the different inputs:
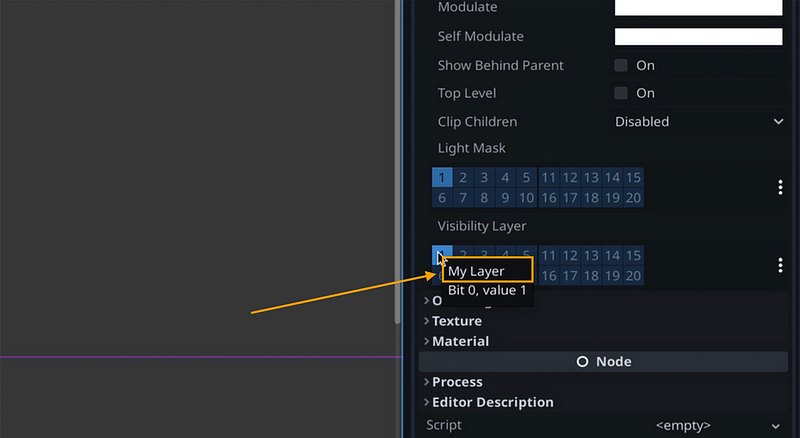
Then, when you come back to a visibility layers table, or a cull mask table, you’ll notice that when you hover a cell, you now have your own clear name displayed :)
Ok and now, to wrap up this tutorial, let’s quickly discuss another important things about visibility layers, which is how to get or set them using C# code…
Changing visibility layers via C# code
Alright, now that we know how to check and change visibility layers on our nodes via the Inspector panel, let’s take a look at the equivalent in C#.
Note: Here, we’ll focus on VisualInstance3D nodes but of course, you can get similar APIs for CanvasItems as well.
So, suppose we attach a new C# script on our “Sphere” in the basic 3D scene from before, for example called VisibilityController. We’ll remove the _Process() function and just use the _Ready() function to test a few API calls:
using Godot;
using System;
public partial class VisibilityController : MeshInstance3D
{
public override void _Ready()
{}
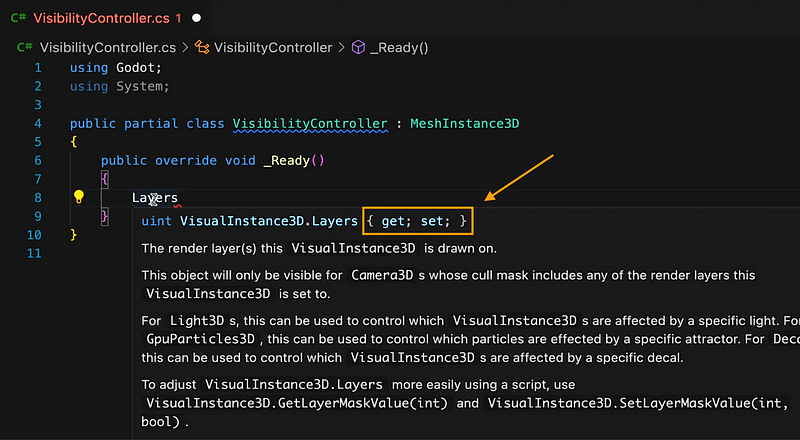
}Because our node is a MeshInstance3D, which derives from VisualInstance3D, we see it has a readily available Layers property that we can get or set:
If we print it as a debug and run our scene:
using Godot;
using System;
public partial class VisibilityController : MeshInstance3D
{
public override void _Ready()
{
GD.Print(Layers);
}
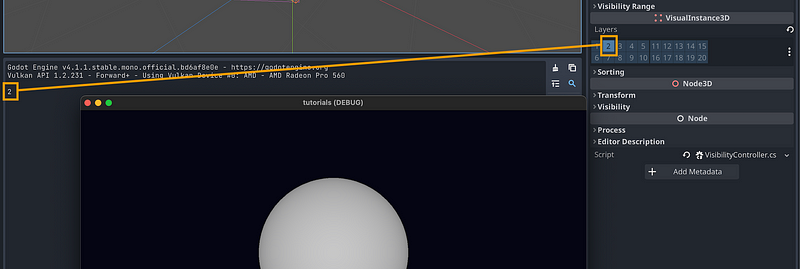
}Then we indeed get “2” in the console, which seems to correspond to the layer number two, right?
However, if we switch our sphere over to the layer number three, and we restart the game… then we don’t get 3 this time, but instead we get 4!
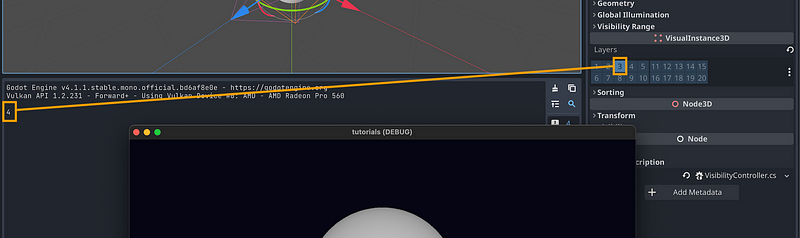
So… why is that?
Well the thing is that, like in many game engines, Godot’s mask layers (be it the visibility layers we’re studying today or the physics layers) rely on a system of bitmask, to store them more efficiently in memory and to allow us to combine multiple layers at the same time.
So the idea is that rather than just saying our layers value is equal to the exact number of the layer, we use this layer as the position of the bit to enable or disable in the layers value.
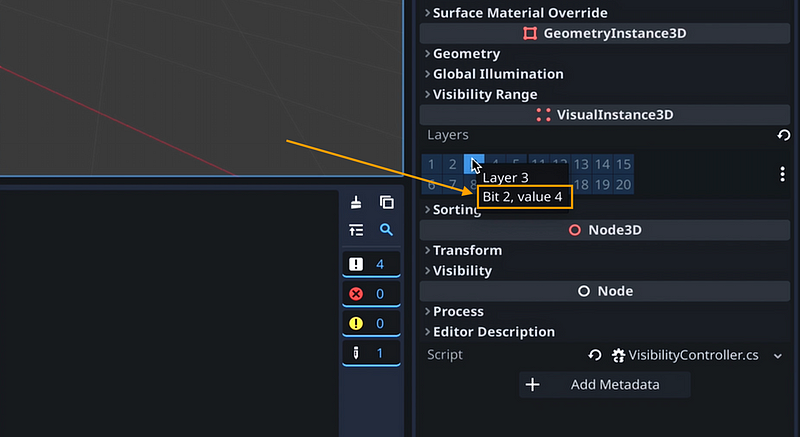
You can actually see this in the Layers table, too, when you hover a cell. Beneath the index of the layer, you see we have another line that tells us the position of the bit this layer controls, and the related value:
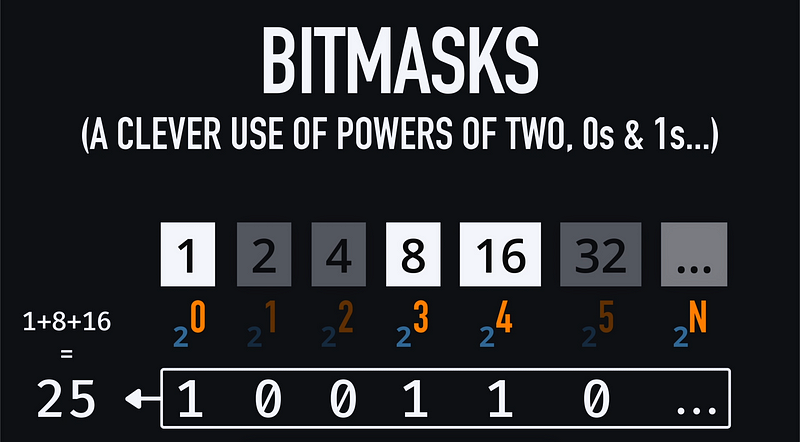
Now, if you’re not too familiar with powers of two and bitmasks, the gist is just that you put all the powers of two next to one another and then you number them starting from 0. And finally, your bitmask is just a series of 0s and 1s that tells the engine which slots are enabled and which ones are disabled — since, ultimately, the value of the mask is the sum of all powers of two that are enabled in the mask:
Again, if you don’t get all the fine details in one-go, it’s not really an issue here; the thing to keep in mind is that if you want to assign a new value to the Layers property of your VisualInstance3D, you can’t just use the number of the layer directly:
using Godot;
using System;

public partial class VisibilityController : MeshInstance3D
{
    public override void _Ready()
    {
        Layers = 3; // not layer 3!
    }
}
Instead, you need to use the corresponding power of two, or a sum of powers of two if you want to enable multiple layers on your node:
using Godot;
using System;

public partial class VisibilityController : MeshInstance3D
{
    public override void _Ready()
    {
        Layers = 4; // 2^2 = layer 3
        Layers = 5; // 2^0 + 2^2 = layers 1 + 3
    }
}
That being said, Godot actually provides us with a more easy-to-use set of APIs to get or set a specific layer in a node’s visibility layers, which are aptly named GetLayerMaskValue() and SetLayerMaskValue().
So typically, if we do a few prints like this:
using Godot;
using System;
public partial class VisibilityController : MeshInstance3D
{
public override void _Ready()
{
GD.Print($"On layer 1? {GetLayerMaskValue(1)}");
GD.Print($"On layer 2? {GetLayerMaskValue(2)}");
GD.Print($"On layer 3? {GetLayerMaskValue(3)}");
GD.Print(Layers);
}
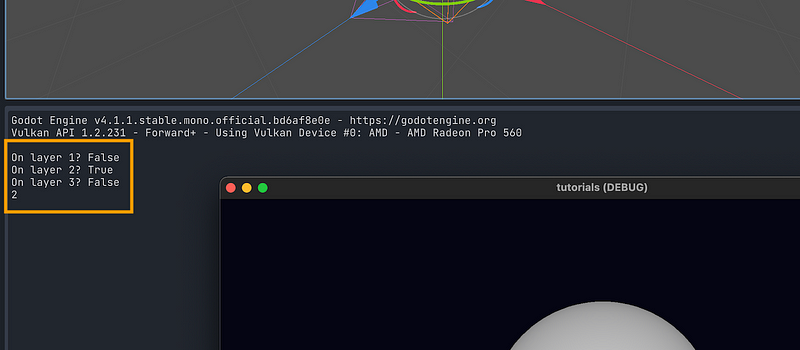
}Then we’ll first get a true or false boolean for whether or node is on the layer 1, 2 or 3; and then the corresponding mask value as a single integer. Here, since our sphere is just on the layer number two, we see that only the second print returns true, and the mask value is 2¹ = 2:
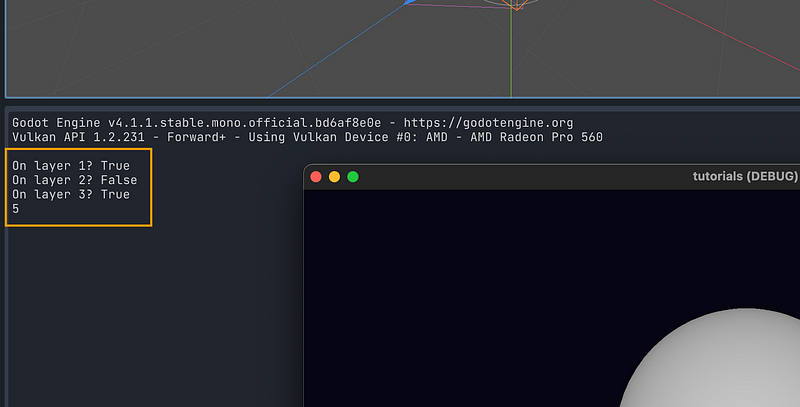
But if we were to use SetLayerMaskValue() to disable this layer number two and instead put our sphere on the layers 1 and 3:
using Godot;
using System;

public partial class VisibilityController : MeshInstance3D
{
    public override void _Ready()
    {
        SetLayerMaskValue(2, false); // remove from layer 2
        SetLayerMaskValue(1, true); // add to layer 1
        SetLayerMaskValue(3, true); // add to layer 3

        GD.Print($"On layer 1? {GetLayerMaskValue(1)}");
        GD.Print($"On layer 2? {GetLayerMaskValue(2)}");
        GD.Print($"On layer 3? {GetLayerMaskValue(3)}");

        GD.Print(Layers);
    }
}
Then you see our prints now reflect this change, and the new mask value is 5, because it is 2⁰ + 2² = 1 + 4 = 5 :
Also, just as a side-note, if you want to check the state of your visibility layers in the Inspector at runtime, don’t forget that you can also go to the Godot editor, to the Scene dock in the top-left corner, and switch to the Remote mode.
This shows you the runtime hierarchy of your scene, and the runtime states of your node. Then, you can simply select the “Sphere” object in the hierarchy, and you see that it is indeed on the layers 1 and 3.
Conclusion
But anyway, on that note, here you go: you know how to use visibility layers in Godot, and how to have your 3D or 2D scenes render objects conditionally thanks to those layers.
If you enjoyed the tutorial, feel free to clap for the article and follow me to not miss the next ones — and of course, don’t hesitate to drop a comment with ideas of Godot tricks that you’d like to learn!
As always, thanks a lot for reading, and take care :)
To read more of my content, and articles from many other great writers from Medium, consider becoming a member! Your membership fee directly supports the writers you read.


