
React Native — Full authentication flow with Spotify — Chapter 1: Building our React Native app

This article is a part of a larger series in which I want to show you how I set up Authentication with Spotify in my React Native application.
Content
I will publish this series through different chapters:
- Introduction
- Chapter 1: Building our React Native app
- Chapter 2: Backend Proxy based on Firebase Functions and Express
Coming up next:
- Chapter 3: Bringing Backend and Frontend together
- Chapter 4: React Native Navigation based on authentication state
- Chapter 5: Keeping your user base in Firestore
What will we do in Chapter 1?
- Register a Spotify Application
- Initialize our React Native application
- Use an auth library to prepare our React Native app for authentication
- Create one view with a login button that will prompt the Spotify login screen
- Run it on Android
Install Node.js / NPM
You will need Node.js to be able to continue with the following steps.
Prepare your Android Development environment
Follow the steps of the official documentation. Scroll down to “Android development environment” and install Android Studio.
Through this series, we will test our app on Android.
Register a Spotify Application
Create an account on https://developer.spotify.com/
In your Dashboard, you will find a button to create a new client id.

Complete the wizard:
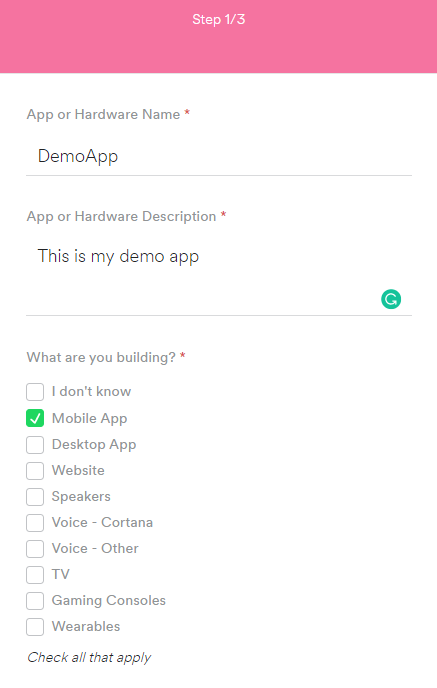
After completing all the steps you will see this screen:
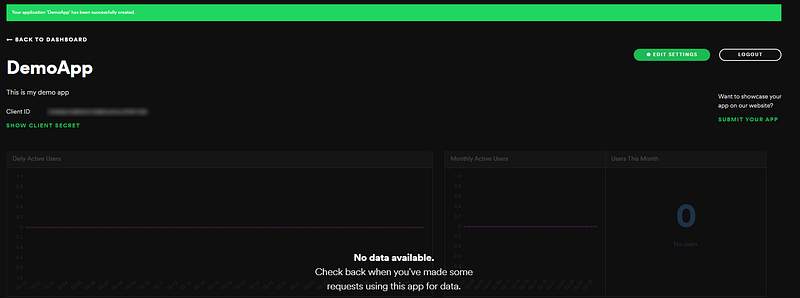
On this page, you can edit your Spotify App settings. On the top left side, your Client ID and Client Secret are displayed. When pressing the “edit settings” button, the possibility to add Redirect URIs will pop out.
In further steps, you will need your Client ID and Client Secret. For the moment, just remember that you can find them here.
Initializing our React Native Application
Skip this part if you already have a React Native project
So let’s start by initializing our React Native app Open command prompt and cd your way to your project directory.
Initialize a project with:
npx react-native init AwesomeProjectNote: Since NPM version 5.2.0 npx is prepackaged in npm. With npx you can use any node package directly from the npm registry without installing it. In the past, we would install the package globally (npm install react-native -g) and then use it directly from our computer. This isn’t necessary anymore, which means you will always be using the last version available on npm.
Open the project in your favorite IDE. I will be working in Visual Studio. https://code.visualstudio.com/
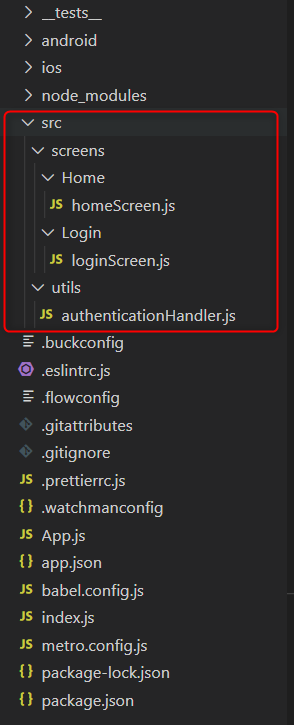
Edit your folder structure:
Handling authentication
Handling the standard oAuth flow is something that happens in a lot of applications. So, somewhere, someone has already written this code.
Thank god for the internet: react-native-app-auth
I have been using this library for my React Native authentication. I’m sure there are a lot of good alternatives, so take your pick!
Navigate to our new project:
cd AwesomeProjectInstall the auth library which we will be using
npm install react-native-app-auth --saveCreate the Authentication Handler
We define a configuration that will be used by the auth library:
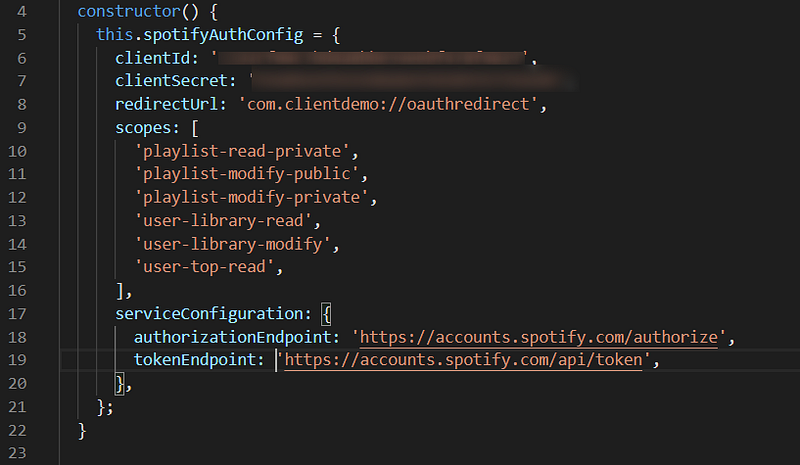
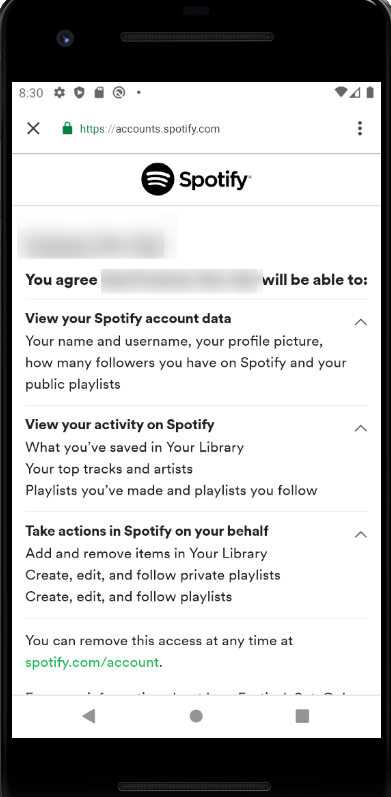
So what are we looking at?
ClientID & Client Secret: The Client ID & Client Secret defined by Spotify. Go to your Spotify Developer dashboard via https://developer.spotify.com/. You will see the Client ID of your application in the left top corner.
Redirect URI: The URI to which Spotify will redirect the user after logging in.
Scopes: The scopes (defined by Spotify) your apps require. This defines which authorizations your app receives on the account of the user.
A list of scopes: https://developer.spotify.com/documentation/general/guides/scopes/
Authorization endpoint: This endpoint will prompt the typical Spotify logon screen.
Token endpoint: Access tokens and Refresh tokens are requested via this endpoint
You can find more information about both endpoints on this page:
For the record: You should never expose your Client Secret through your client application or frontend. In chapter two I will explain how to do this working with Firebase Functions as a proxy.
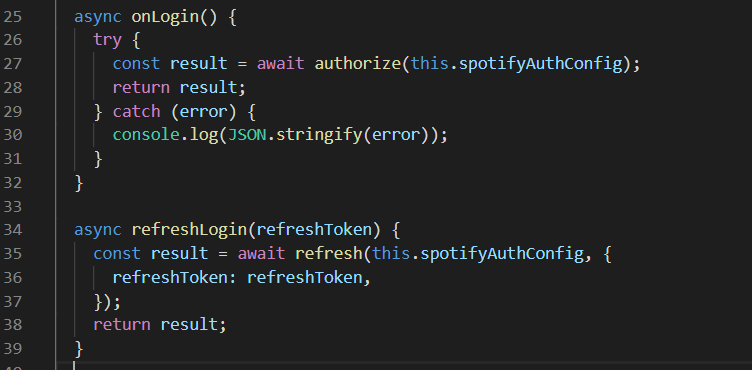
We defined two methods
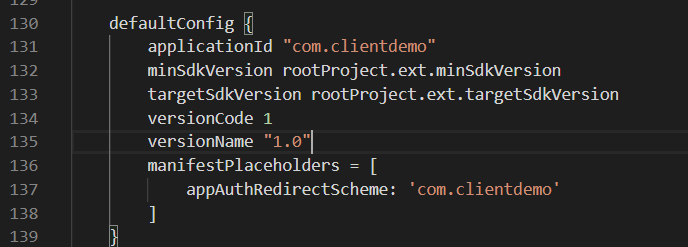
Make it Android Compatible:
Add ManifesPlaceholders to android/app/build.gradle.
By adding this line, our application will “understand” the Redirect URI used in the Spotify authentication.
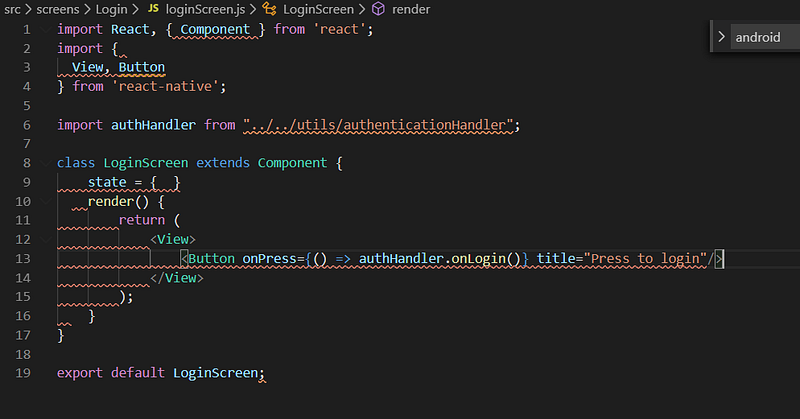
Build our Login screen
So we will stick to the basics. For the moment, we will only build one screen: the login screen. No navigation, no other screens.
Let’s add a button to our login screen. This button will execute the onLogin method when pressed.
Modify App.js
App.js is our main entry file for our React Native app. For the moment we will always return our login screen.
Running our application on an Android device
Now run the app on your Android device or emulator: (If you don’t know how visit https://reactnative.dev/docs/getting-started and scroll down to “Preparing the Android device”)
npx react-native run-androidThis should be the result:
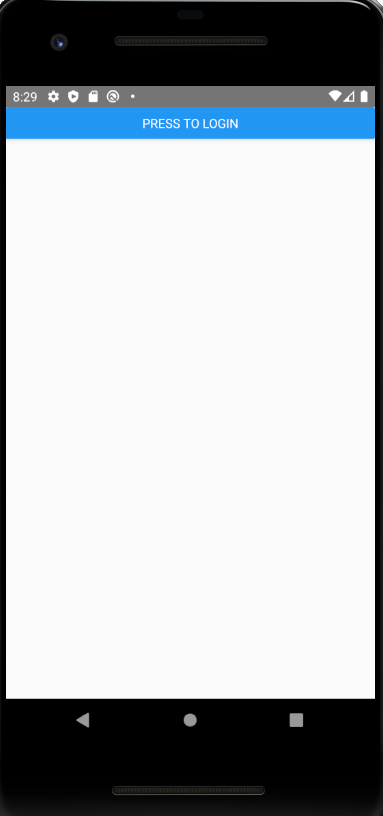
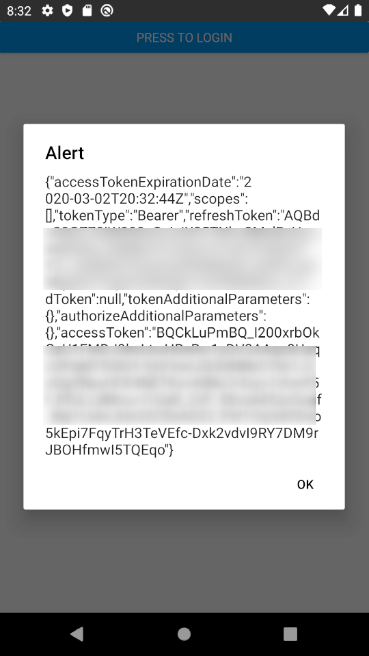
Alright! We have a working, very basic app with a Spotify authentication flow.
What’s wrong with the current version?
- Our Client Secret is exposed in our client app. The Client secret should always be secret, so this is bad. We will fix this in the next chapters
- We only have one screen.. We will add some navigation later on.


