
Rate Limit Concurrency Pattern with Unit Tests— (2) Fixed Window
In the previous article, I mentioned four rate limit algorithms, in this post, I will provide steps on how to implement a rate limit pattern using Golang and provide the exact scenarios for implementing the Fixed Window Algorithm.
If you don’t know the rate limit pattern, please view
Rate Limit Concurrency Pattern with Unit Tests — (1) Overview Four Algorithms
Rate Limit Concurrency Pattern with Unit Tests — (2) Fixed Window
Rate Limit Concurrency Pattern with Unit Tests — (3) Slide Window
Rate Limit Concurrency Pattern with Unit Tests — (4) Token Bucket
Rate Limit Concurrency Pattern with Unit Tests — (5) Leaky Bucket

How to implement
The following are steps on how to implement the rate limit pattern in Go.
1. Define Rate Limits
Decide on the number of requests allowed per user/IP and the time window, for example, 100 requests per hour.
2. Choose a Rate Limiting Algorithm
As I mentioned, there are four rate-limiting algorithms, please select one from Fixed Window, Sliding Window Log, Token Bucket, or Leaky Bucket.
3. Implement Rate Limiting Logic
Use middleware for HTTP servers and store request counts or timestamps in a fast, memory-based storage system.
4. Track Requests
Identify users or IPs for each incoming request and check the current count or timestamp against the defined limits.
5. Enforce Limits
If within the limit, proceed and update the count or timestamp. If exceeded, return an error response, typically HTTP 429, which means “Too Many Requests”. You can define a friendly response by yourself.
Fixed Windows Instances
I have listed all four algorithm scenarios in Rate Limit Design Pattern in Golang with Unit Tests — (1) Overview Four Algorithms, so in this article, I will provide code examples with the exact scenario directly.
First Instance
Assume a social media platform wants to limit the number of posts or comments a user can make per hour to prevent spam and encourage more thoughtful interactions. They decided to implement a fixed window rate-limiting algorithm where each user is allowed, for example, 10 comments per minute. Once a user reaches this limit, they cannot comment until the next minute begins.
I will use an in-memory map to track user activity. If you like, you can use a more scalable and persistent storage solution like a database or Redis. The following code is named impl.go.
package socialpost

import (
    "fmt"
    "net/http"
    "sync"
    "time"
)

type UserActivity struct {
    Count     int
    ResetTime time.Time
}

var (
    userActivities = make(map[string]*UserActivity)
    mutex          = &sync.Mutex{}
)

func RateLimitMiddleware(next http.Handler) http.Handler {
    return http.HandlerFunc(func(w http.ResponseWriter, r *http.Request) {
       userID := r.Header.Get("X-User-ID")

       mutex.Lock()
       activity, exists := userActivities[userID]
       currentTime := time.Now()

       if !exists || currentTime.After(activity.ResetTime) {
          userActivities[userID] = &UserActivity{Count: 1, ResetTime: currentTime.Add(1 * time.Minute)}
          mutex.Unlock()
          next.ServeHTTP(w, r)
          return
       }

       if activity.Count >= 10 {
          http.Error(w, "Rate limit exceeded", http.StatusTooManyRequests)
          mutex.Unlock()
          return
       }

       activity.Count++
       mutex.Unlock()
       next.ServeHTTP(w, r)
    })
}

func CommentHandler(w http.ResponseWriter, r *http.Request) {
    fmt.Fprintf(w, "Comment created successfully")
    // Do the exact logic in this handler
}
In the above code, each user’s activity is tracked using a map userActivities. The rateLimitMiddleware checks if the user has exceeded their comment limit. If the limit is exceeded, it returns an HTTP 429 error. If not, it allows the request and increments the user’s count. The count is reset every minute. The CommentHandler is used to process the exact comment logic.
The below code is the content of the file named impl_test.go.
package socialpost

import (
    "net/http"
    "net/http/httptest"
    "testing"
    "time"
)

func TestRateLimitMiddleware(t *testing.T) {
    tests := []struct {
       name              string
       userID            string
       requestCount      int
       additionalRequest bool
       expectedStatus    int
       resetAfter        time.Duration
    }{
       {"UnderLimit", "user1", 5, false, http.StatusOK, 0},
       {"AtLimit", "user2", limitNumber, false, http.StatusOK, 0},
       {"OverLimit", "user3", limitNumber, true, http.StatusTooManyRequests, 0},
       {"ResetAfterOneMinute", "user4", limitNumber, true, http.StatusOK, 1 * time.Minute},
    }

    for _, tt := range tests {
       t.Run(tt.name, func(t *testing.T) {
          // Mock request
          req := httptest.NewRequest("POST", "/comment", nil)
          req.Header.Set("X-User-ID", tt.userID)

          handler := RateLimitMiddleware(http.HandlerFunc(CommentHandler))

          // Send requests up to the limit
          for i := 0; i < tt.requestCount; i++ {
             rr := httptest.NewRecorder()
             handler.ServeHTTP(rr, req)
          }

          // Wait for reset interval if needed
          if tt.resetAfter > 0 {
             time.Sleep(tt.resetAfter)
          }

          // Send an additional request if required
          if tt.additionalRequest {
             rr := httptest.NewRecorder()
             handler.ServeHTTP(rr, req)

             // Assert for the additional request
             if status := rr.Code; status != tt.expectedStatus {
                t.Errorf("handler returned wrong status code: got %v want %v",
                   status, tt.expectedStatus)
             }
          }
       })
    }
}
In the above code, httptest.NewRequest is used to create mock HTTP requests. This function creates a new HTTP request suitable for use in HTTP tests. It is used to help developers to simulate different request scenarios. For “UnderLimit” and “AtLimit”, I send requests up to the limit and check the status of the last request. For “OverLimit”, I send requests up to the limit, then one additional request, and check the status of this additional request. For “ResetAfterOneMinute”, I send requests up to the limit, wait for one minute, then send one additional request, and check the status of this additional request.
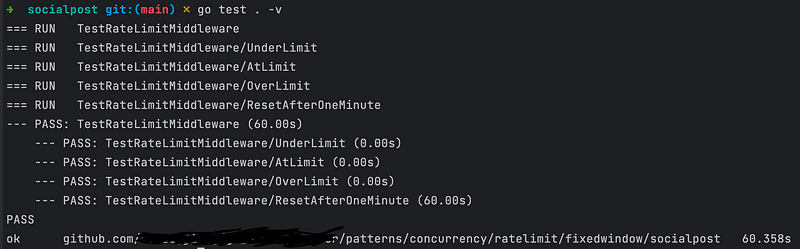
Let’s execute the command “go test . -v” to run tests. The test screenshot is below. As for the last test case “ResetAfterOneMinute”, I should wait 1 minute until the tests finish. That’s why the execution time is 60.358s.
Second Instance
Assume a server needs to limit the number of login attempts a user can make within a certain time frame (e.g., 5 attempts per 15 minutes) to prevent brute-force attacks on user accounts.
I will use an in-memory map to track user login attempts. If you like, you can use a more scalable and persistent storage solution like a database or Redis. The following code is named impl.go.
package loginrate

import (
    "fmt"
    "net/http"
    "sync"
    "time"
)

const (
    maxLoginAttempts      = 5
    loginFailTimeInterval = 15 * time.Minute
)

type LoginAttempt struct {
    Count     int
    ResetTime time.Time
}

type RateLimiter struct {
    loginAttempts map[string]*LoginAttempt
    mutex         sync.Mutex
}

func NewRateLimiter() *RateLimiter {
    return &RateLimiter{
       loginAttempts: make(map[string]*LoginAttempt),
    }
}

func (rl *RateLimiter) GetLoginAttempt(username string) *LoginAttempt {
    rl.mutex.Lock()
    defer rl.mutex.Unlock()

    attempt, exists := rl.loginAttempts[username]
    if !exists || time.Now().After(attempt.ResetTime) {
       rl.loginAttempts[username] = &LoginAttempt{Count: 1, ResetTime: time.Now().Add(loginFailTimeInterval)}
       return rl.loginAttempts[username]
    }
    return attempt
}

func RateLimitMiddleware(rl *RateLimiter, next http.Handler) http.Handler {
    return http.HandlerFunc(func(w http.ResponseWriter, r *http.Request) {
       username := r.FormValue("username")

       attempt := rl.GetLoginAttempt(username)

       if attempt.Count > maxLoginAttempts {
          http.Error(w, "Too many login attempts", http.StatusTooManyRequests)
          return
       }

       attempt.Count++
       next.ServeHTTP(w, r)
    })
}

func LoginHandler(w http.ResponseWriter, r *http.Request) {
    fmt.Fprintf(w, "Login attempt successful")
    // Add your exact logic after login
}
In the above code, the RateLimitMiddleware function is a middleware that can be used with an HTTP server to limit login attempts. The LoginHandler function is a placeholder for the actual login logic. Create a LoginAttempt struct to encapsulate the map and its operations, and encapsulate the map and its operations within a RateLimiter struct.
Let’s see the impl_test.go below together.
package loginrate

import (
    "net/http"
    "net/http/httptest"
    "net/url"
    "strings"
    "testing"
)

func TestRateLimitMiddleware(t *testing.T) {
    rl := NewRateLimiter()

    tests := []struct {
       name           string
       username       string
       requestCount   int
       expectedStatus int
    }{
       {"UnderLimit", "user1", 4, http.StatusOK},
       {"AtLimit", "user2", 5, http.StatusOK},
       {"OverLimit", "user3", 6, http.StatusTooManyRequests},
    }

    for _, tt := range tests {
       t.Run(tt.name, func(t *testing.T) {
          handler := RateLimitMiddleware(rl, http.HandlerFunc(LoginHandler))

          for i := 1; i <= tt.requestCount; i++ {
             // Create form data
             formData := url.Values{}
             formData.Set("username", tt.username)

             // Create a request with form data
             req := httptest.NewRequest("POST", "/login", strings.NewReader(formData.Encode()))
             req.Header.Add("Content-Type", "application/x-www-form-urlencoded")

             rr := httptest.NewRecorder()

             handler.ServeHTTP(rr, req)

             // Check the response status of the last request
             if i > maxLoginAttempts {
                if status := rr.Code; status != tt.expectedStatus {
                   t.Errorf("handler returned wrong status code: got %v want %v",
                      status, tt.expectedStatus)
                }
             }
          }

          // Clear the entry for the next test
          rl.mutex.Lock()
          delete(rl.loginAttempts, tt.username)
          rl.mutex.Unlock()
       })
    }
}
In the above code, I simulate multiple login attempts for different users and check if the response status code matches the expected outcome based on the rate limit rules. I simulate a POST request with form data, I create a request body that contains the form-encoded data. For “UnderLimit” and “AtLimit”, I send requests up to the limit. For “OverLimit”, is used to ensure that the middleware correctly blocks the 6th request (and any subsequent requests) after allowing the first 5 requests.
In the above test cases, I didn’t add the after 15 minutes test, if you’re interested in it, please try it by yourself. It is similar to the previous social post instance.
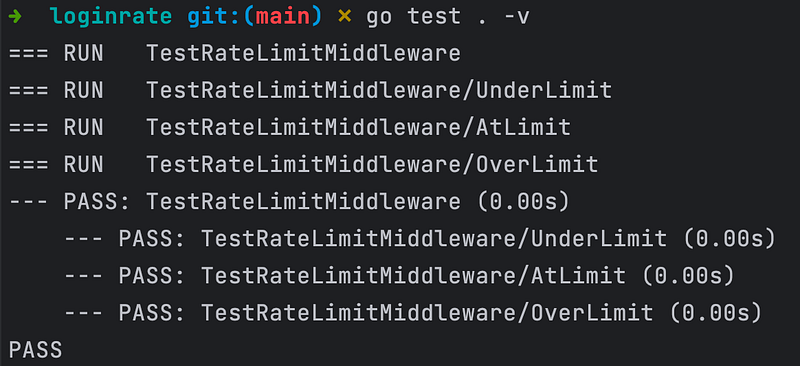
Let’s execute the command “go test . -v” to run tests. The test screenshot is below.
Conclusion
The Fixed Window Algorithm is a fundamental rate-limiting strategy suitable for scenarios where simplicity and consistent reset intervals are desired. However, it may not be ideal for systems that require more sophisticated handling of request patterns or where traffic spikes at window boundaries are a concern. I will provide other algorithm scenario examples in the following articles.
Perhaps you’re also interested in the following articles.
Go Back to Concurrency Design Patterns, please click here.
To View Design Patterns in Golang, please click here.
To view Creational Design Patterns in Golang, please click here.
To View Structural Design Patterns in Golang, please click here.
To View Behavioural Design Patterns in Golang, please click here.
To View Microservices Design Patterns in Golang, please click here.


