
Rate Limit Concurrency Pattern with Unit Tests — (5) Leaky Bucket
In the previous articles, I mentioned four rate-limit algorithms, how to implement rate-limit patterns and provided real-life examples for the fixed window algorithm, the slide window algorithm and the token bucket algorithm. This post will provide two examples of using the leaky bucket to manage a data steam management and a cloud provider to control requests example for implementing the Leaky Bucket Algorithm.
If you don’t know the rate limit pattern, please view
Rate Limit Concurrency Pattern with Unit Tests — (1) Overview Four Algorithms
Rate Limit Concurrency Pattern with Unit Tests — (2) Fixed Window
Rate Limit Concurrency Pattern with Unit Tests — (3) Slide Window
Rate Limit Concurrency Pattern with Unit Tests — (4) Token Bucket
Rate Limit Concurrency Pattern with Unit Tests — (5) Leaky Bucket

As the following, I will use the implement steps that I mentioned in Rate Limit Concurrency Pattern with Unit Tests — (2) Fixed Window. If you don’t know them, please view the article above.
First Instance
Imagine a data streaming platform that delivers continuous data streams to consumers, such as video or audio streaming. To prevent buffer overflows on the consumer side and to ensure a steady and smooth delivery of data, the platform uses the Leaky Bucket algorithm. This algorithm limits the rate at which data packets are sent to each consumer.
This file is named impl.go contains the implementation of the leaky bucket rate-limiting logic.
package datastream

import (
    "sync"
    "time"
)

const (
    capacity  = 5
    leakyRate = 100 * time.Millisecond
)

type DataPacket struct {
    // Define the structure of your data packet
}

type LeakyBucket struct {
    Capacity int
    Queue    chan DataPacket
    Rate     time.Duration
    wg       sync.WaitGroup
    stop     chan struct{}
}

func NewLeakyBucket(capacity int, rate time.Duration) *LeakyBucket {
    return &LeakyBucket{
       Capacity: capacity,
       Queue:    make(chan DataPacket, capacity),
       Rate:     rate,
       stop:     make(chan struct{}),
    }
}

func (lb *LeakyBucket) AddPacket(packet DataPacket) bool {
    select {
    case lb.Queue <- packet:
       return true
    default:
       return false // Bucket is full
    }
}

func (lb *LeakyBucket) StartStreaming() {
    lb.wg.Add(1)
    go func() {
       defer lb.wg.Done()
       ticker := time.NewTicker(lb.Rate)
       defer ticker.Stop()

       for {
          select {
          case <-ticker.C:
             if len(lb.Queue) > 0 {
                <-lb.Queue
                // Process the data packet, e.g., send it to a consumer
             }
          case <-lb.stop:
             return
          }
       }
    }()
}

func (lb *LeakyBucket) StopStreaming() {
    close(lb.stop)
    lb.wg.Wait()
}
In the above code, it defines two consts to make it easy to update the capacity and leakyRate. LeakyBucket struct manages data packets, queuing them and streaming them at a specified rate. In the StartLeaking method, the for-select loop allows the leaky bucket to process queue asynchronously, which is essential for simulating the continuous "leaking" of data at a steady rate. In the LeakyBucket implementation, the stop channel is used to signal the goroutine to stop leaking (processing calls). When the StopLeaking method is called, it closes the stop channel. In the StartLeaking method, the goroutine listens for this signal using a select statement. When the stop channel is closed, the case <-lb.stop: branch of the select statement is executed, causing the goroutine to exit the loop and stop processing.
The following code is the content of the file named impl_test.go.
package datastream

import (
    "testing"
    "time"
)

func TestLeakyBucketDataStreaming(t *testing.T) {
    tests := []struct {
       name                string
       capacity            int
       rate                time.Duration
       numberOfPackets     int
       delayBetweenPackets time.Duration
       expectedSuccesses   int
    }{
       {"WithinCapacity", capacity, leakyRate, 5, 50 * time.Millisecond, 5},
       {"ExceedCapacity", capacity, leakyRate, 7, 10 * time.Millisecond, 5},
       {"AfterLeak", capacity, leakyRate, 6, 150 * time.Millisecond, 6},
    }

    for _, tt := range tests {
       t.Run(tt.name, func(t *testing.T) {
          lb := NewLeakyBucket(tt.capacity, tt.rate)
          lb.StartStreaming()
          defer lb.StopStreaming()

          successes := 0
          for i := 0; i < tt.numberOfPackets; i++ {
             if lb.AddPacket(DataPacket{}) {
                successes++
             }
             time.Sleep(tt.delayBetweenPackets)
          }

          if successes != tt.expectedSuccesses {
             t.Errorf("%s: expected %d successful packets, but got %d", tt.name, tt.expectedSuccesses, successes)
          }
       })
    }
}
In the above code, the test cases in impl_test.go simulate different scenarios to ensure the call rate limit works as expected under varying conditions. A new LeakyBucket instance is created at the beginning of each test run, ensuring test isolation. Each test case includes parameters for the capacity and rate of the LeakyBucket, allowing each test to create its instance of LeakyBucket. The bucket should only allow a certain number of data packets per time unit, as defined by its capacity and leak rate. WithinCapacity is used to test if the bucket can handle the number of packets within its capacity. ExceedCapacity is used to test if the bucket correctly rejects packets when its capacity is exceeded. AfterLeak is used to test if the bucket can accept new packets after some have been leaked (processed).
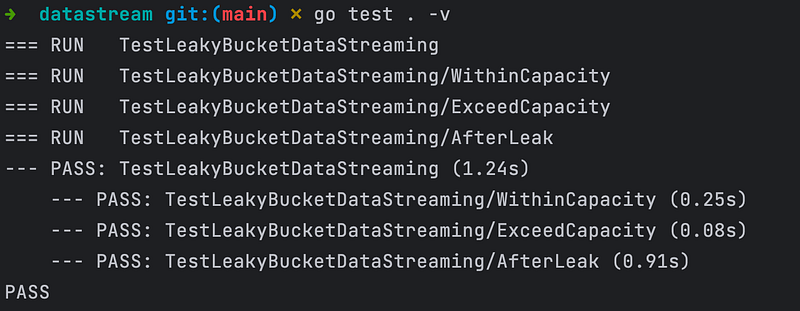
Let’s execute the command “go test . -v” to run tests. The test screenshot is below.
Second Instance
Assume a cloud service provider offers various resources (e.g., compute, storage, network bandwidth) to users. To prevent any single user from over-consuming resources and to ensure fair access for all users, the provider implements the Leaky Bucket algorithm. This algorithm limits the rate at which users can make resource requests.
This file is named impl.go, it contains the implementation of the Leaky Bucket rate-limiting logic.
package cloudprovider

import (
    "fmt"
    "net/http"
    "sync"
    "time"
)

const (
    capacity  = 2
    leakyRate = 50 * time.Millisecond
)

type LeakyBucket struct {
    Capacity int
    Queue    chan bool
    Rate     time.Duration
    wg       sync.WaitGroup
    stop     chan struct{}
}

func NewLeakyBucket(capacity int, rate time.Duration) *LeakyBucket {
    return &LeakyBucket{
       Capacity: capacity,
       Queue:    make(chan bool, capacity),
       Rate:     rate,
       stop:     make(chan struct{}),
    }
}

func (lb *LeakyBucket) RequestResource() bool {
    select {
    case lb.Queue <- true:
       return true
    default:
       return false // Bucket is full
    }
}

func (lb *LeakyBucket) StartLeaking() {
    lb.wg.Add(1)
    go func() {
       defer lb.wg.Done()
       ticker := time.NewTicker(lb.Rate)
       defer ticker.Stop()

       for {
          select {
          case <-ticker.C:
             if len(lb.Queue) > 0 {
                <-lb.Queue // Process a resource request
             }
          case <-lb.stop:
             return
          }
       }
    }()
}

func (lb *LeakyBucket) StopLeaking() {
    close(lb.stop)
    lb.wg.Wait()
}

func RequestRateMiddleware(lb *LeakyBucket, next http.Handler) http.Handler {
    return http.HandlerFunc(func(w http.ResponseWriter, r *http.Request) {
       if !lb.RequestResource() {
          http.Error(w, "Rate limit exceeded", http.StatusTooManyRequests)
          return
       }
       next.ServeHTTP(w, r)
    })
}

func RequestHandler(w http.ResponseWriter, r *http.Request) {
    fmt.Fprintf(w, "Resource request processed successfully")
    // do real requests logic
}
In the above code, it defines two consts to make it easy to update the capacity and leakyRate. The LeakyBucket struct manages resource requests, queuing them and processing them at a specified rate. RequestRateMiddleware uses LeakyBucket to rate-limit incoming HTTP requests. If the bucket is full, it responds with a 429 Too Many Requests status. This is done in the StartLeaking method. In the StartLeaking method, the for-select loop allows the leaky bucket to process calls asynchronously, which is essential for simulating the continuous "leaking" of requests at a steady rate. In the LeakyBucket implementation, the stop channel is used to signal the goroutine to stop leaking (processing calls). When the StopLeaking method is called, it closes the stop channel. In the StartLeaking method, the goroutine listens for this signal using a select statement. When the stop channel is closed, the case <-lb.stop: branch of the select statement is executed, causing the goroutine to exit the loop and stop processing.
The following code is the content of the file named impl_test.go.
package cloudprovider

import (
    "net/http"
    "net/http/httptest"
    "testing"
    "time"
)

func TestRequestRateMiddleware(t *testing.T) {
    tests := []struct {
       name              string
       capacity          int
       rate              time.Duration
       numberOfRequests  int
       delayBetweenCalls time.Duration
       expectedStatus    []int
    }{
       {
          name:              "WithinCapacity",
          capacity:          capacity,
          rate:              leakyRate,
          numberOfRequests:  2,
          delayBetweenCalls: 10 * time.Millisecond,
          expectedStatus:    []int{http.StatusOK, http.StatusOK},
       },
       {
          name:              "ExceedCapacity",
          capacity:          capacity,
          rate:              leakyRate,
          numberOfRequests:  3,
          delayBetweenCalls: 10 * time.Millisecond,
          expectedStatus:    []int{http.StatusOK, http.StatusOK, http.StatusTooManyRequests},
       },
       {
          name:              "AfterLeak",
          capacity:          capacity,
          rate:              leakyRate,
          numberOfRequests:  3,
          delayBetweenCalls: 150 * time.Millisecond,
          expectedStatus:    []int{http.StatusOK, http.StatusOK, http.StatusOK},
       },
    }

    for _, tt := range tests {
       t.Run(tt.name, func(t *testing.T) {
          lb := NewLeakyBucket(tt.capacity, tt.rate)
          lb.StartLeaking()
          defer lb.StopLeaking()

          handler := RequestRateMiddleware(lb, http.HandlerFunc(RequestHandler))

          for i := 0; i < tt.numberOfRequests; i++ {
             req := httptest.NewRequest("GET", "/resource", nil)
             rr := httptest.NewRecorder()

             handler.ServeHTTP(rr, req)

             if status := rr.Code; status != tt.expectedStatus[i] {
                t.Errorf("%s: request %d returned wrong status code: got %v want %v",
                   tt.name, i+1, status, tt.expectedStatus[i])
             }

             time.Sleep(tt.delayBetweenCalls)
          }
       })
    }
}
In the above code, the test cases in impl_test.go simulate different scenarios to ensure the call rate limit works as expected under varying conditions. A new LeakyBucket instance is created at the beginning of each test run, ensuring test isolation. Each test case includes parameters for the capacity and rate of the LeakyBucket, allowing each test to create its instance of LeakyBucket. These tests ensure that the leaky bucket algorithm correctly limits the rate of call processing. The bucket should only allow a certain number of calls per time unit, as defined by its capacity and leak rate. WithinCapacity is used to test if the bucket can handle requests within its capacity. ExceedCapacity is used to test if the bucket correctly rejects requests when its capacity is exceeded. AfterLeak is used to test if the bucket can accept new requests after some have been leaked (processed).
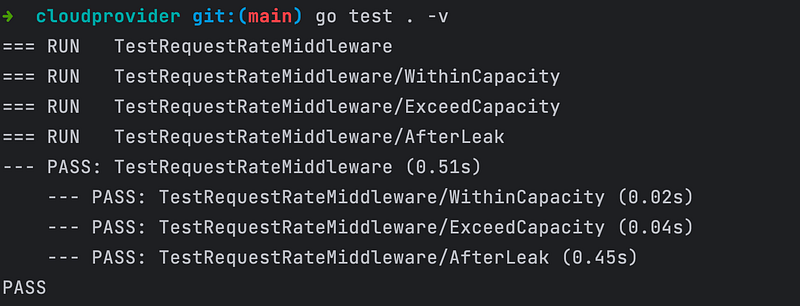
Let’s execute the command “go test . -v” to run tests. The test screenshot is below. The AfterLeak test delay between calls is 150 milliseconds, and it is called three times, that’s why it shows 0.45s.
Comparing these two examples, the maximum difference is that the datastream package does not use middleware. Middleware is particularly useful in web service or API contexts where you have a series of HTTP requests that need to be processed. However, in other contexts, such as data streaming or internal application processes, middleware might not be the most appropriate solution.
Conclusion
The Leaky Bucket algorithm is a rate-limiting tool used to control data flow in networks and applications. It metaphorically represents a bucket with a constant leak rate. Data packets or requests fill the bucket at varying rates. If incoming data exceeds the bucket’s capacity, it’s either discarded or queued, preventing overflow. The leak rate, representing the bucket’s hole, ensures data is processed or transmitted at a steady, manageable pace. This algorithm smoothens bursty traffic, providing a consistent output rate. It’s widely used in network traffic shaping, API rate limiting, and resource allocation to prevent system overload and ensure fair usage.
Perhaps you’re also interested in the following articles.
Go Back to Concurrency Design Patterns, please click here.
To View Design Patterns in Golang, please click here.
To view Creational Design Patterns in Golang, please click here.
To View Structural Design Patterns in Golang, please click here.
To View Behavioural Design Patterns in Golang, please click here.
To View Microservices Design Patterns in Golang, please click here.


