
GCP- Provision GKE Cluster Using Terraform Module
Why Google Kubernetes Engine or GKE is a good choice for deploying containerized applications.
Google Kubernetes Engine (GKE) is a managed, production-ready environment for deploying containerized applications. It is based on Kubernetes, an open-source container orchestration system.
GKE provides a number of features that make it a good choice for deploying containerized applications, including:
- Managed Kubernetes: GKE manages the control plane for your Kubernetes cluster, so you don’t have to. This frees you up to focus on developing and deploying your applications.
- Autoscaling: GKE can automatically scale your Kubernetes cluster up or down based on demand. This helps you to optimize your costs and ensure that your applications are always running at the right capacity.
- High availability: GKE automatically distributes your Kubernetes cluster across multiple zones, so your applications are always available even if one zone fails.
- Security: GKE provides a number of security features, including role-based access control (RBAC), network policies, and encryption. This helps you to secure your Kubernetes cluster and protect your applications.
Prerequisite:
Before you can provision a GKE cluster using Terraform, you need to ensure that you have the following prerequisites in place:
- Google Cloud Platform (GCP) Account: GCP account with the necessary permissions to create and manage resources.
- Google Cloud SDK (gcloud) : which provides the command-line tools for interacting with GCP services.
- Enable Google Kubernetes Engine (GKE) API: Enable the GKE API for your project. You can enable it either through the Google Cloud Console or by running the following command with the gcloud CLI.
gcloud services enable container.googleapis.com --project=PROJECT_ID- Authentication and Credentials: Configure authentication for Terraform to access your GCP account. You can use either Application Default Credentials (ADC) or a Service Account key file
- Install Terraform and kubectl: Install Terraform
https://terraform.io/downloads.htmland kubectl
Table of contents:
To provision a GKE cluster using Terraform, you can follow the steps below:
1: Set up a project on your Google Cloud account:
Create a new project on the Google Cloud Console or use an existing project where you want to provision the GKE cluster.
2: Enable required APIs:
Enable the Compute Engine API and Kubernetes Engine API for your project.
3: Create a Service Account:
Create a Service Account in your project with the necessary permissions to provision resources.Generate a JSON key for the Service Account.
4: Install and initialize the gcloud SDK:
Install the Google Cloud SDK on your local machine
5: Install kubectl:
Install the Kubernetes command-line tool, kubectl, on your local machine.
6: Install Terraform:
Install Terraform on your local machine
7: Create Terraform files:
Set up a directory for your Terraform files.
8: Provision the GKE cluster:
provision the GKE cluster based on your Terraform configuration.
9: Access cluster using kubectl:
Configure kubectl to connect to your GKE cluster.
10: Delete the cluster:
If you want to delete the GKE cluster,
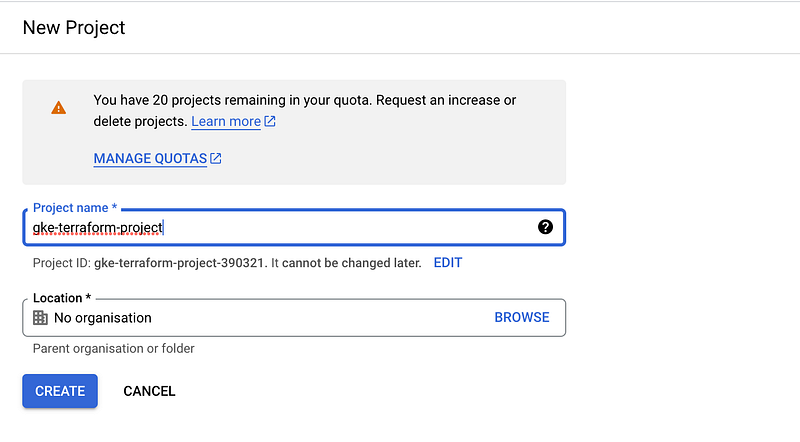
1. Set up a project on your Google Cloud account:
To create a new project in Google Cloud using the Console, you can follow the revised steps below:
- Open the Google Cloud Console in your web browser.
- Navigate to the “Manage Resources” page and Create a new project. Enter project details and finally review and create the project.
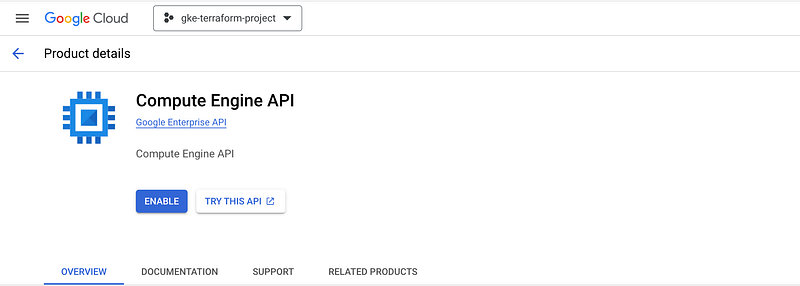
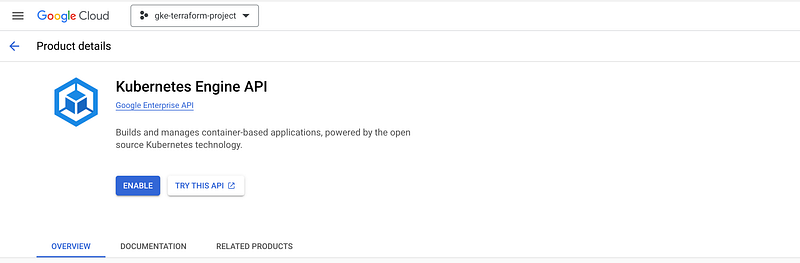
2. Enable required APIs:
Enabling the APIs allows Terraform to interact with the necessary Google Cloud services and resources.
To enable the required APIs for your project, you need to select and enable two APIs: the Compute Engine Api and Kubernetes Engine Api.If you need assistance locating these APIs in the Cloud Console API Library, you can use the search field and search for each API separately.
$ gcloud services enable container.googleapis.com
$ gcloud services enable compute.googleapis.com
3. Create a Service Account:
It is recommended to use separate service accounts for different services. In this guide, we will create a dedicated service account for Terraform to ensure proper isolation and control over its permissions.
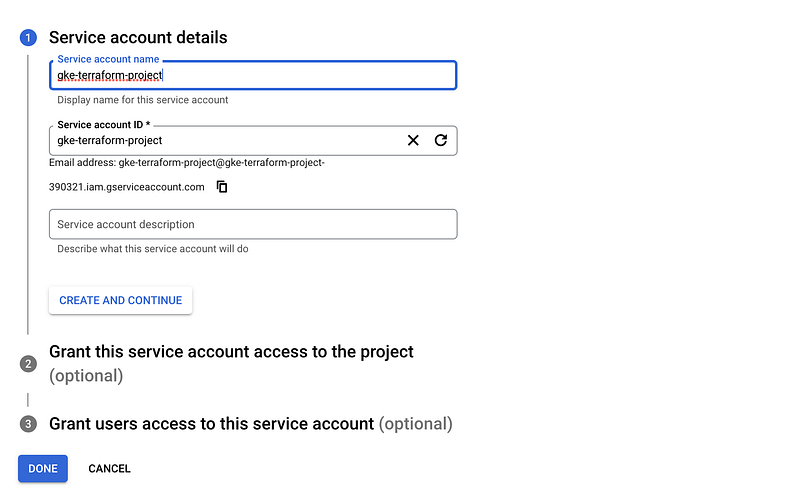
- Go to the Service accounts page: serviceaccounts in the Google Cloud Console.
- Click the Create service account button, Enter a name for the service account.
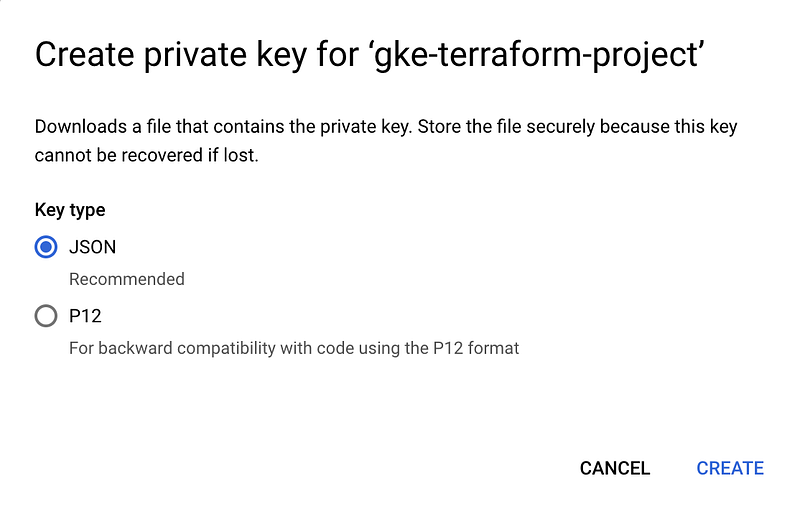
- Select a role for the service account and Click the Create button.
- The service account will be created and a JSON key file will be downloaded to your computer. This file contains the service account credentials
4. Install and initialize the gcloud SDK:
To run Terraform operations and create the GKE cluster on your GCP account, need to install and configure the Google Cloud SDK (gcloud) tool.
https://cloud.google.com/sdk/docs/installAfter installing, Initialize the gcloud SDK by running the command gcloud init and follows the prompts.
Authenticate with your Google Cloud account using the command gcloud auth login
commands:

gcloud auth list
gcloud auth application-default login
gcloud config set account `ACCOUNT`
gcloud config set project `PROJECT_NAME`
5. Install kubectl:
The Kubernetes command-line tool, kubectl, is an essential tool for managing Kubernetes clusters. It enables you to interact with Kubernetes resources, deploy applications, and manage pods, services, and other components of your cluster.
https://kubernetes.io/docs/tasks/tools/$ kubectl version6. Install terraform:
To use Terraform you will need to install it. HashiCorp distributes Terraform as a binary package. You can also install Terraform using popular package managers.
https://developer.hashicorp.com/terraform/tutorials/aws-get-started/install-cli$ terraform version7. Create Terraform files:
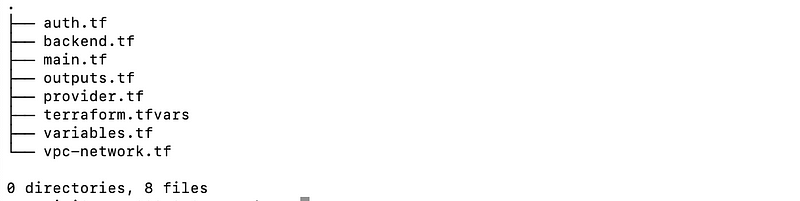
Create a new folder gke-terraform-project with the following files:
Note: we are going to use terraform modules kubernetes-engine and network.
The folder structure will be as below:
- Provider file named
provider.tf
terraform {
  required_version = ">= 1.0"
  required_providers {
    google = {
      source  = "hashicorp/google"
      version = "~> 4.69.1"
    }
    local = {
      source  = "hashicorp/local"
      version = ">= 2.0.0"
    }
    kubernetes = {
      source  = "hashicorp/kubernetes"
      version = ">= 2.0.0"
    }
  }
}- Store terraform tfstate named
backend.tf
# terraform {
#     backend "gcs" {
#       bucket = "gke-terraform-tfstate-bucket-01"    # GCS bucket name to store terraform tfstate
#       prefix = "gke-terraform-cluster"          # Update to desired prefix name. Prefix name should be unique for each Terraform project having same remote state bucket.
#     }
#   }

terraform {
  cloud {
    organization = "organization_name"

    workspaces {
      name = "workspaces_name_1"
    }
  }
}- Provision a separate VPC and subnet named
vpc-network.tf
module "gcp-network" {
  source       = "terraform-google-modules/network/google"
  version      = "6.0.0"
  project_id   = var.project_id
  network_name = "${var.network}-${var.env_name}"

  subnets = [
    {
      subnet_name   = "${var.subnetwork}-${var.env_name}"
      subnet_ip     = "10.10.0.0/16"
      subnet_region = var.region
    },
  ]

  secondary_ranges = {
    "${var.subnetwork}-${var.env_name}" = [
      {
        range_name    = var.ip_range_pods_name
        ip_cidr_range = "10.20.0.0/16"
      },
      {
        range_name    = var.ip_range_services_name
        ip_cidr_range = "10.30.0.0/16"
      },
    ]
  }
}- Create a GKE cluster and a separately managed node pool file named
main.tf
# google_client_config and kubernetes provider must be explicitly specified like the following.
data "google_client_config" "default" {}

provider "kubernetes" {
  host                   = "https://${module.gke.endpoint}"
  token                  = data.google_client_config.default.access_token
  cluster_ca_certificate = base64decode(module.gke.ca_certificate)
  # version                = "~> 2.10"
}

module "gke" {
  source                     = "terraform-google-modules/kubernetes-engine/google"
  version                    = "26.1.1"
  project_id                 = var.project_id
  name                       = "${var.cluster_name}-${var.env_name}"
  regional                   = true
  region                     = var.region
  zones                      = var.zones
  network                    = module.gcp-network.network_name
  subnetwork                 = module.gcp-network.subnets_names[0]
  ip_range_pods              = var.ip_range_pods_name
  ip_range_services          = var.ip_range_services_name
  http_load_balancing        = false
  network_policy             = false
  horizontal_pod_autoscaling = false
  filestore_csi_driver       = false
  create_service_account     = true
  logging_service            = "logging.googleapis.com/kubernetes"

  node_pools = [
    {
      name            = "node-pool"
      machine_type    = "e2-standard-2"
      node_locations  = "europe-west2-b,europe-west2-c"
      min_count       = 2
      max_count       = 5
      disk_size_gb    = 30
      spot            = false
      auto_upgrade    = true
      auto_repair     = true
      autoscaling     = true
      service_account = "gke-terraform-project@${var.project_id}.iam.gserviceaccount.com"
    },
  ]


  node_pools_oauth_scopes = {
    all = [
      "https://www.googleapis.com/auth/logging.write",
      "https://www.googleapis.com/auth/monitoring",
      "https://www.googleapis.com/auth/trace.append",
      "https://www.googleapis.com/auth/service.management.readonly",
      "https://www.googleapis.com/auth/devstorage.read_only",
      "https://www.googleapis.com/auth/servicecontrol",
    ]
  }

  node_pools_labels = {
    all = {}

    default-node-pool = {
      default-node-pool = true
    }
  }

  node_pools_metadata = {
    all = {}
    node-pool = {
      shutdown-script                 = "kubectl --kubeconfig=/var/lib/kubelet/kubeconfig drain --force=true --ignore-daemonsets=true --delete-local-data \"$HOSTNAME\""
      node-pool-metadata-custom-value = "node-pool"
    }
  }

  node_pools_taints = {
    all = []

    node-pool = [
      {
        key    = "node-pool"
        value  = true
        effect = "PREFER_NO_SCHEDULE"
      },
    ]
  }

  node_pools_tags = {
    all = []
    node-pool = [
      "node-pool",
    ]
  }
  depends_on = [
        module.gcp-network
        ]
}
Note: service_account = “gke-terraform-project@${var.project_id}.iam.gserviceaccount.com” : make sure you create the account
auth.tffor configuring authentication to a GKE cluster
module "gke_auth" {
  source               = "terraform-google-modules/kubernetes-engine/google//modules/auth"
  version              = "24.1.0"
  project_id           = var.project_id
  location             = module.gke.location
  cluster_name         = module.gke.name
  use_private_endpoint = true
  depends_on           = [module.gke]
}

resource "local_file" "kubeconfig" {
  content = module.gke_auth.kubeconfig_raw
  filename = "kubeconfig-${var.env_name}"
}- Store variable on the file named
variables.tf
### Common variables

variable "project_id" {
  type        = string
  description = "The project ID to host the cluster in"
  default     = ""
}
variable "region" {
  type        = string
  description = "The region to host the cluster in"
  default     = ""
}
variable "env_name" {
  type        = string
  description = "The environment for the GKE cluster"
  default     = "dev"
}

### Cluster variables
variable "cluster_name" {
  type        = string
  description = "The name for the GKE cluster"
  default     = ""
}
variable "network" {
  type        = string
  description = "The VPC network created to host the cluster in"
  default     = "gke-network"
}
variable "subnetwork" {
  type        = string
  description = "The subnetwork created to host the cluster in"
  default     = "gke-subnet"
}
variable "ip_range_pods_name" {
  type        = string
  description = "The secondary ip range to use for pods"
  default     = "ip-range-pods"
}
variable "ip_range_services_name" {
  type        = string
  description = "The secondary ip range to use for services"
  default     = "ip-range-services"
}
variable "zones" {
  type        = list(string)
  description = "The project ID to host the cluster in"
  default     = ["europe-west2-a", "europe-west2-b"]
}- To pass the values in
terraform.tfvars
project_id   = "gke-terraform-project-388620"
cluster_name = "gke-terraform-project"
region = "europe-west2"- Values for
output.tf
output "cluster_id" {
  description = "Cluster ID"
  value       = module.gke.cluster_id
}
output "Cluster_name" {
  description = "Cluster name"
  value       = module.gke.name
}

output "Cluster_type" {
  description = "Cluster type (regional / zonal)"
  value       = module.gke.type
}

output "Cluster_location" {
  description = "Cluster location (region if regional cluster, zone if zonal cluster)"
  value       = module.gke.location
}

output "Cluster_region" {
  description = "Cluster region"
  value       = module.gke.region
}

output "Cluster_zones" {
  description = "List of zones in which the cluster resides"
  value       = module.gke.zones
}

output "Cluster_endpoint" {
  sensitive   = true
  description = "Cluster endpoint"
  value       = module.gke.endpoint
}

output "min_master_version" {
  description = "Minimum master kubernetes version"
  value       = module.gke.min_master_version
}

output "logging_service" {
  description = "Logging service used"
  value       = module.gke.logging_service
}

output "monitoring_service" {
  description = "Monitoring service used"
  value       = module.gke.monitoring_service
}

output "master_authorized_networks_config" {
  description = "Networks from which access to master is permitted"
  value       = module.gke.master_authorized_networks_config
}

output "master_version" {
  description = "Current master kubernetes version"
  value       = module.gke.master_version
}

output "ca_certificate" {
  sensitive   = true
  description = "Cluster ca certificate (base64 encoded)"
  value       = module.gke.ca_certificate
}

output "network_policy_enabled" {
  description = "Whether network policy enabled"
  value       = module.gke.network_policy_enabled
}

output "http_load_balancing_enabled" {
  description = "Whether http load balancing enabled"
  value       = module.gke.http_load_balancing_enabled
}

output "horizontal_pod_autoscaling_enabled" {
  description = "Whether horizontal pod autoscaling enabled"
  value       = module.gke.horizontal_pod_autoscaling_enabled
}

output "node_pools_names" {
  description = "List of node pools names"
  value       = module.gke.node_pools_names
}

output "node_pools_versions" {
  description = "Node pool versions by node pool name"
  value       = module.gke.node_pools_versions
}

output "service_account" {
  description = "The service account to default running nodes as if not overridden in `node_pools`."
  value       = module.gke.service_account
}
8. Provision the GKE cluster:
- After you have saved your files, initialize the Terraform workspace. A
terraform initdownloads all the required providers and plugins.
$ terraform init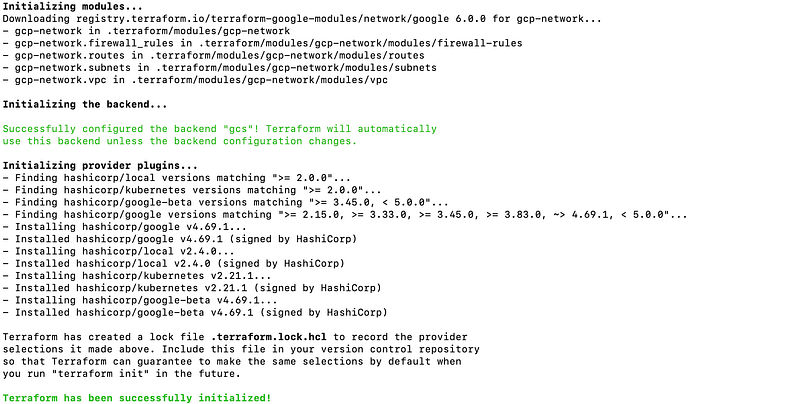
- Run a
Terraform plancreates an execution plan.
$ terraform plan
- The execution plan looks good, so let’s move ahead and apply this plan.
$ terraform apply -auto-approve
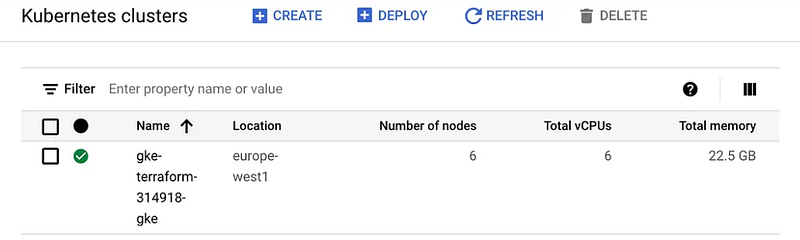
- Let’s confirm the cluster creation in the GCP portal.
9. Access cluster using Kubectl:
Configure Kubectl to connect to your GKE cluster by running gcloud container clusters get-credentials CLUSTER_NAME --region REGION where CLUSTER_NAME is the name of your GKE cluster and REGION is the region where the cluster is located.
$ gcloud container clusters get-credentials CLUSTER_NAME --region REGION --project PROJECT_NAME
Verify the connection by running kubectl get nodes to display the nodes in your GKE cluster.
$ kubectl get nodes
NAME                                                  STATUS   ROLES    AGE   VERSION
gke-terraform-k8s-cluster-d-node-pool-1c70ecad-xfjt   Ready    <none>   12m   v1.25.8-gke.500
gke-terraform-k8s-cluster-d-node-pool-2956fa2f-8xt5   Ready    <none>   12m   v1.25.8-gke.500
gke-terraform-k8s-cluster-d-node-pool-574989dc-38cb   Ready    <none>   12m   v1.25.8-gke.500
9. Delete the cluster:
Once we no longer need this infrastructure, we can clean up to reduce costs.
$ terraform destroy -auto-approve
I trust that you have found this guide straightforward and user-friendly.
Please share your thoughts and experiences after following the steps outlined. Your feedback is valuable and helps us improve the quality.
Topics:
- Terraform : Input Variables
- Store terraform state file on Terraform cloud Remote
- Terraform Tools That You Need
Do not forget the 👏 if you like this content! Also, I will be glad if you hit the follow button so you get notified of my new posts. You can also follow me on LinkedIn! Thank you!


