
Store terraform state file on Terraform cloud Remote
In this article, I am going to discuss how we can keep safe our terraform state file using terraform cloud.
Here are the steps on how to store Terraform state file on Terraform cloud Remote:
- Create a Terraform Cloud organization and workspace.
- Create a configuration file that defines the resources you want to create.
- Initialize Terraform.
- Configure Terraform Cloud to store the state file.
- Authentication with Terraform Cloud.
- Migrate the state file to Terraform Cloud.
- Verify the Terraform Cloud workspace.
Here are the detailed steps:
1.- Create a Terraform Cloud organization and workspace.
1.1: Go to the Terraform Cloud website and create an organization. Then, create a workspace in the organization.
And to create a new workspace in Terraform Cloud, follow these steps:
1.2: Click on the “New” button and select “Workspace” from the dropdown menu.

1.3: Select a workflow type: CLI-driven-workflow
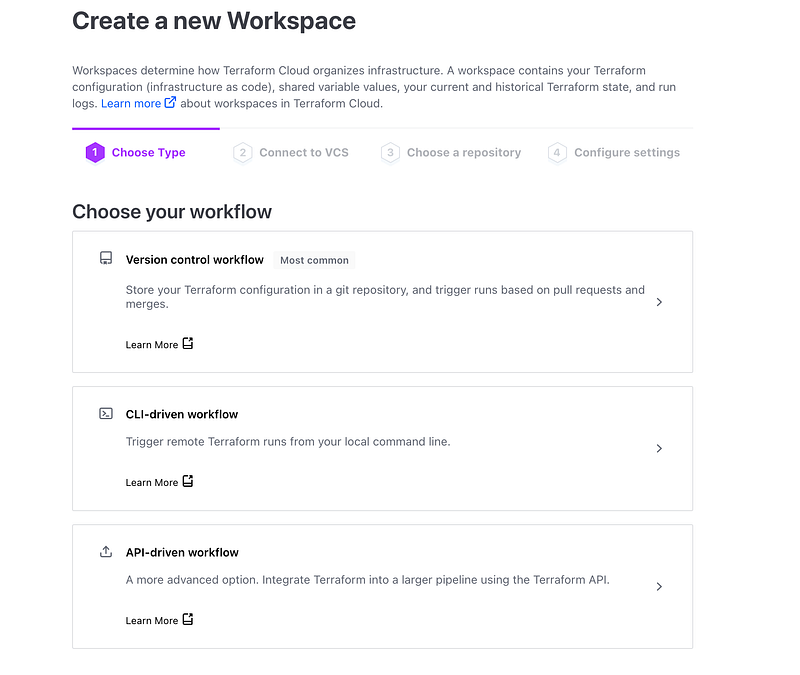
1.4: Enter a name for the workspace. Click on the “Create workspace” button.
2.- Create a configuration file that defines the resources you want to create.
The configuration file is a text file that defines the resources you want to create. The syntax of the configuration file is based on the HashiCorp Configuration Language (HCL).
2.1: Create a directory by any name (eg: terraform-cloud) and create a sample file in it. Next, create a .tf file named main.tf in this directory.
$ mkdir terraform-cloud
$ cd terraform-cloud
$ touch main.tf
2.2: Copy and paste the below content into your main.tf
terraform {
  required_version = "~> 1.4"
  required_providers {
    random = {
        source = "hashicorp/random"
        version = "3.0.1"
    }
  }
}


variable "num_random_numbers" {
  type    = number
  default = 2
}

resource "random_integer" "example" {
  count = var.num_random_numbers
  min   = 1
  max   = 100
}

output "random_numbers" {
  value = random_integer.example[*].result
}
we define a variable num_random_numbers that represents the number of random numbers to generate. By default, it is set to 5, but you can adjust it as needed.
The random_integer resource is used within a count loop, which creates multiple instances of the resource according to the value of num_random_numbers. Each instance generates a random number between 1 and 100 using the min and max parameters.
Output will be as below:
Outputs:

random_numbers = [
  24,
  20,
]
3.- Initialize Terraform.
Once you have created the configuration file, you need to initialize Terraform. This will create a directory called .terraform in the current directory. The .terraform directory contains the state file and other configuration files for Terraform.
$ terraform init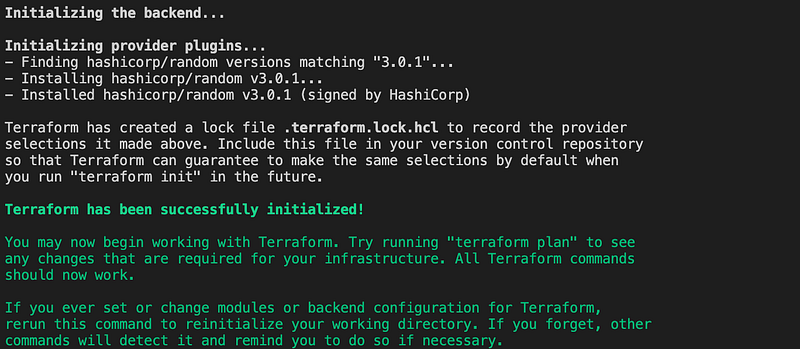
After Terraform initialises, apply the configuration and approve the run by typing “yes” at the prompt. (option: auto approve flag)
$ terraform applyTerraform used the selected providers to generate the following execution plan. Resource actions as below:
$ terraform apply

Terraform used the selected providers to generate the following execution plan. Resource actions are indicated with the following symbols:
  + create

Terraform will perform the following actions:

  # random_integer.example[0] will be created
  + resource "random_integer" "example" {
      + id     = (known after apply)
      + max    = 100
      + min    = 1
      + result = (known after apply)
    }

  # random_integer.example[1] will be created
  + resource "random_integer" "example" {
      + id     = (known after apply)
      + max    = 100
      + min    = 1
      + result = (known after apply)
    }

Plan: 2 to add, 0 to change, 0 to destroy.

Changes to Outputs:
  + random_numbers = [
      + (known after apply),
      + (known after apply),
    ]

Do you want to perform these actions?
  Terraform will perform the actions described above.
  Only 'yes' will be accepted to approve.

  Enter a value: yes

random_integer.example[0]: Creating...
random_integer.example[1]: Creating...
random_integer.example[1]: Creation complete after 0s [id=29]
random_integer.example[0]: Creation complete after 0s [id=86]

Apply complete! Resources: 2 added, 0 changed, 0 destroyed.

Outputs:

random_numbers = [
  86,
  29,
]
4.- Configure Terraform Cloud to store the state file.
Now, we have a local state file, we need to create a cloud code block in main.tfconfiguration.
The Terraform CLI workflow saves our state as a terraform.tfstate file same directory, where we run terraform apply.
To migrate your state to Terraform Cloud, update the cloud block and change the <ORG_NAME> to your Terraform Cloud organisation name and <WORKSPACE_NAME> to your workspace name.
terraform {
  required_version = "~> 1.4"
  cloud {
            organization = "ORG_NAME"
            workspaces {name = "WORKSPACE_NAME"}
        }
  required_providers {
    random = {
        source = "hashicorp/random"
        version = "3.0.1"
    }
  }
}

variable "random_numbers" {
  type    = number
  default = 2
}

resource "random_integer" "example" {
  count = var.random_numbers
  min   = 1
  max   = 100
}

output "random_numbers" {
  value = random_integer.example[*].result
}
5.- Authentication with Terraform Cloud
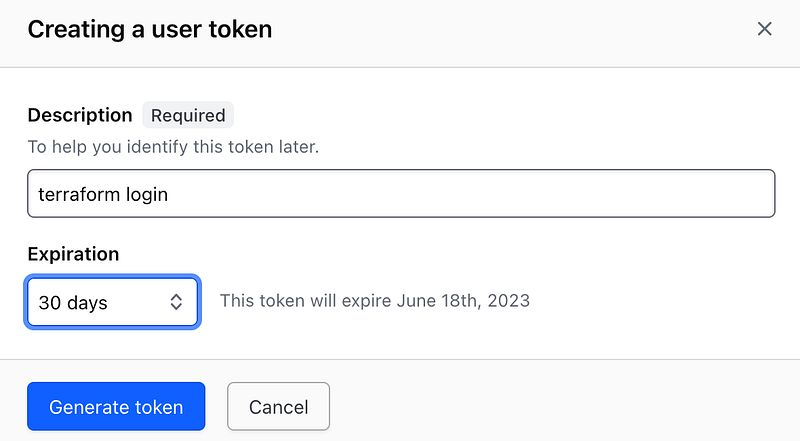
We must authenticate with Terraform Cloud in order to proceed with initialisation.
Before that we need an API TOKEN . Below steps on how to authenticate with Terraform Cloud for your local CLI as terraform login
5.1: Click on the User Settings and then Tokens as below.

5.2: Click on the Generate Enter a name for the token. Then, Click on the Generate token button and copy the token.
5.3: Open a terminal window and navigate to the directory where your Terraform configuration files are located. Run the following command:
$ terraform login5.4: Paste the token when prompted.
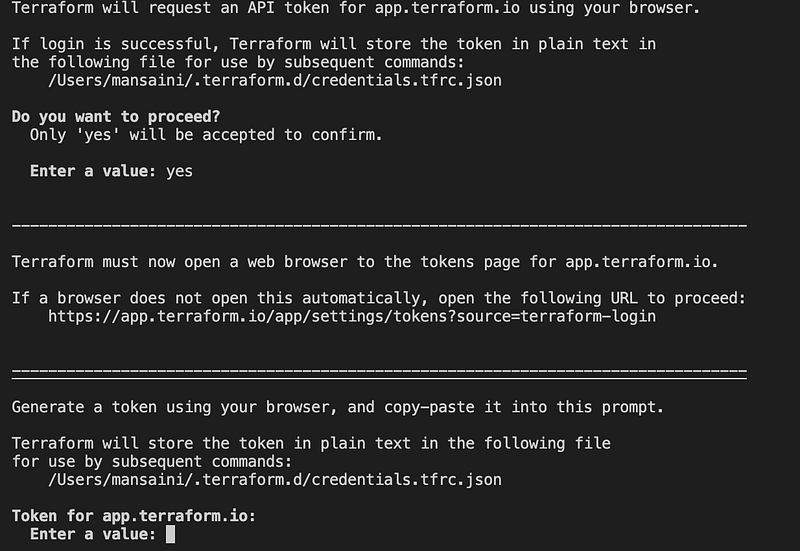
5.5: Once login is successful, you can see terraform console logs as below.

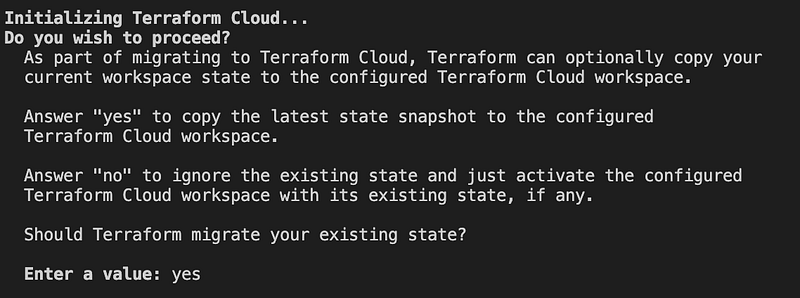
6.- Migrate the state file
Once we have authenticated to Terraform Cloud, we are ready to migrate our local state file to Terraform Cloud.
During reinitialization, Terraform presents a prompt saying that it will copy the state file to your Terraform Cloud workspace.
Enter yes and Terraform will migrate the state from your local machine to Terraform Cloud.
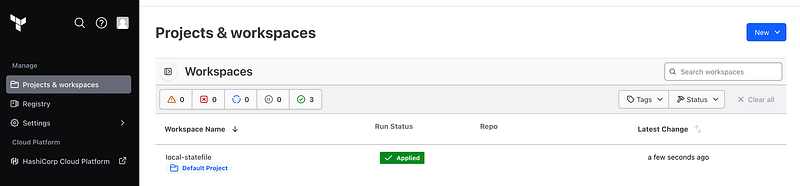
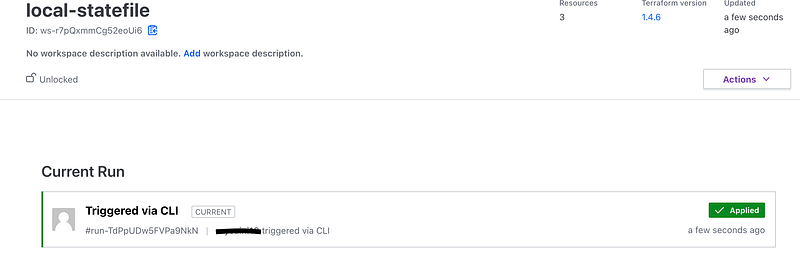
7.- Verify the Terraform Cloud workspace
After migrating your state to Terraform Cloud, log in to the Terraform UI. Find your workspace name. Navigate to the States tab of the workspace, and see your first action within the workspace.
7.1: Initiate a run to verify
After verifying that the statefile migrated to the Terraform Cloud workspace, remove the local state file.
$ rm terraform.tfstate
$ rm terraform.tfstate.backup
$ terraform apply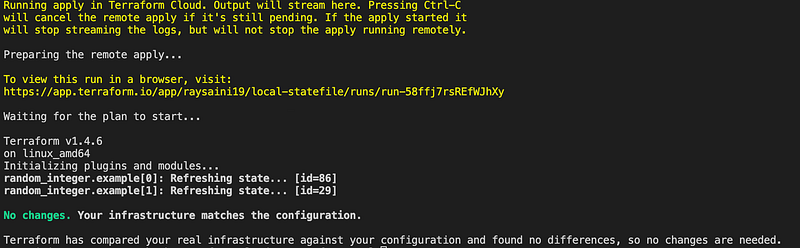
7.2: Initiate a new run
Change the configuration main.tf file (). Then, apply a new run.
terraform {
  required_version = "~> 1.4"
  cloud {
            organization = "ORG_NAME"
            workspaces {name = "WORKSPACE_NAME"}
        }
  required_providers {
    random = {
        source = "hashicorp/random"
        version = "3.0.1"
    }
  }
}

variable "random_numbers" {
  type    = number
  default = 3
}

resource "random_integer" "example" {
  count = var.random_numbers
  min   = 1
  max   = 100
}

output "random_numbers" {
  value = random_integer.example[*].result
}
$ terrafrom applyTerraform will stream logs from Terraform Cloud UI.
This confirms terraform is reading state files from remote terraform cloud.
Here are some additional details about storing Terraform state file on Terraform cloud Remote:
- The state file is a binary file that stores information about the resources that Terraform has created.
- The state file is required for Terraform to be able to manage the resources.
- The state file can be stored in a variety of locations, including on a local machine, in a remote repository, or in Terraform Cloud.
- Storing the state file in Terraform Cloud makes it easy to share the state file with other team members and to collaborate on infrastructure projects.


