
PHP Chunk File Upload using JavaScript
Today we are going to learn PHP Chunk File Upload using JavaScript. The Chunked Upload provides a way to reliably upload large files to Box by chunking them into a sequence of parts that can be uploaded individually. By using this the application uploads a file in part, allowing it to recover from a failed request more reliably.
Your server does not allow access to the PHP configuration file (php.ini), which makes it hard to upload large files. Without the changes in the PHP Configurations (php.ini). Chunk File Upload make its possible to upload large file to the server.

Also Read : How to create Custom Laravel Helpers in Laravel 9

Steps for PHP Chunk File Upload using JavaScript
- Step 1: File’s Structures
- Step 2: Download Plupload Uploader
- Step 3: Bootstrap and CSS
- Step 4: Create Index file and add JavaScript
- Step 5: Server-side Upload Handler
- Step 6: Conclusion
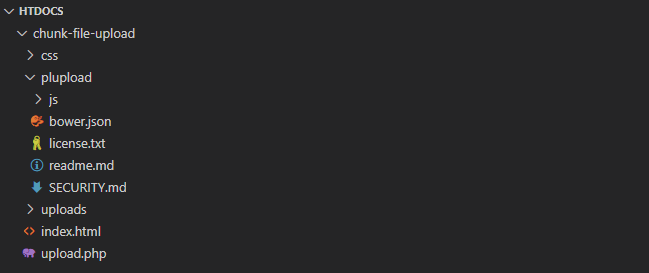
File’s Structures:
Before starting the tutorial first we look into the file’s structure of the project.
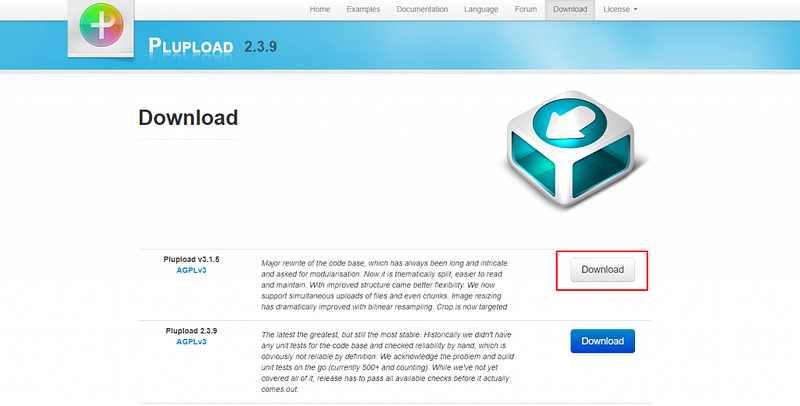
Download Plupload Uploader:
Download the Plupload. Extract the zip file to root directory and change the name of the folder to plupload as shown in the structure.
Also Read : Autocomplete Search using jQuery UI in Laravel 9
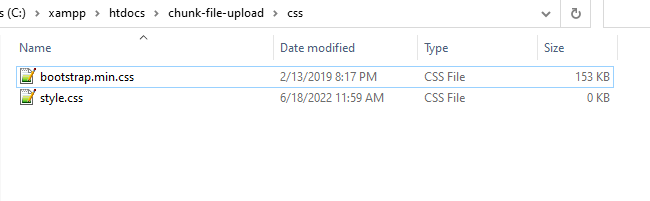
Bootstrap and CSS:
Download latest Bootstrap, add bootstrap.min.css file to css folder and create a new css file style.css in the same directory.
Add the following css to style.css file in css/style.css
body {
    padding: 20vh 32px;
    font-size: 14px;
    background: #eee;
}
.container h1{
    font-size: 40px;
    font-weight: bold;
    text-align: center;
}.wrapper{
width: 800px;
border: 1px solid #bebebe;
border-radius: 10px;
margin: 30px auto;
padding: 20px;
}#statusResponse p{
font-weight: 500;
font-size: 18px;
}.file-input {
display: inline-block;
text-align: left;
background: #bebebe;
padding: 16px;
width: 100%;
position: relative;
border-radius: 3px;
}
.file-input > [type='file'] {
position: absolute;
top: 0;
left: 0;
width: 100%;
height: 100%;
opacity: 0;
z-index: 10;
cursor: pointer;
}.file-input > .button {
display: inline-block;
cursor: pointer;
background: #eee;
padding: 8px 16px;
border-radius: 2px;
margin-right: 8px;
}.file-input:hover > .button {
background: #28a745;
color: white;
}.file-input > .label {
color: #f3f2f2;
white-space: nowrap;
}.file-input.-chosen > .label {
opacity: 1;
}#fileList div{
padding: 10px;
border: 1px solid #bebebe;
margin-bottom: 10px;
}.progress-bar{
background: #28a745;
}Also Read : Laravel 9 Sorting Columns with Pagination
Create Index file and add JavaScript:
Now its time to create a index.html file in the root of the directory. Create a new file name index.html and add the following code:
<!DOCTYPE html>
<html lang="en">
<head>
    <meta charset="UTF-8">
    <meta http-equiv="X-UA-Compatible" content="IE=edge">
    <meta name="viewport" content="width=device-width, initial-scale=1.0">
    <title>PHP Chunk File Upload using JavaScript - LaravelTuts</title>
<!-- Adding Bootstrap Library -->
<link rel="stylesheet" href="css/bootstrap.min.css"> <!-- Adding Stylesheet File -->
<link rel="stylesheet" href="css/style.css"> <!-- Adding Plupload Library -->
<script src="plupload/js/plupload.full.min.js"></script></head>
<body>
<div class="container">
<h1>PHP Chunk File Upload using JavaScript & PHP</h1> <div class="wrapper">
<div class="col-md-12">
<div id="statusResponse"></div> <!-- File Uplaod -->
<div class='file-input form-group'>
<input type='file' id="fileInput">
<span class='button'>Choose</span>
<span class='label' data-js-label>Select File</label>
</div> <div id="fileList"></div> <!-- Upload Button -->
<div class="form-group">
<a href="javascript:;" id="uploadBtn" class="btn btn-success">Upload</a>
</div> <!-- File Progress Bar -->
<div class="progress"></div>
</div>
</div>
</div> <script>
// Define Plupload uploader with configuration options
var uploader = new plupload.Uploader({
runtimes : 'html5,flash,silverlight,html4',
browse_button : 'fileInput', // you can pass an id...
url : 'upload.php',
flash_swf_url : 'plupload/js/Moxie.swf',
silverlight_xap_url : 'plupload/js/Moxie.xap',
multi_selection: false,
filters : {
max_file_size : '500mb',
mime_types: [
{title : "Image files", extensions : "jpg,jpeg,gif,png"},
{title : "Video files", extensions : "mp4,avi,mpeg,mpg,mov,wmv"},
{title : "Zip files", extensions : "zip"},
{title : "Document files", extensions : "pdf,docx,xlsx"}
]
},
init: {
PostInit: function() {
document.getElementById('fileList').innerHTML = '';
document.getElementById('uploadBtn').onclick = function() {
if (uploader.files.length < 1) {
document.getElementById('statusResponse').innerHTML = '<p style="color:#EA4335;">Please select a file to upload.</p>';
return false;
}else{
uploader.start();
return false;
}
};
},
FilesAdded: function(up, files) {
plupload.each(files, function(file) {
document.getElementById('fileList').innerHTML += '<div id="' + file.id + '">' + file.name + ' (' + plupload.formatSize(file.size) + ') <b></b></div>';
});
},
UploadProgress: function(up, file) {
document.getElementById(file.id).getElementsByTagName('b')[0].innerHTML = '<span>' + file.percent + "%</span>";
document.querySelector(".progress").innerHTML = '<div class="progress-bar" style="width: '+file.percent+'%;">'+file.percent+'%</div>';
},
FileUploaded: function(up, file, result) {
var responseData = result.response.replace('"{', '{').replace('}"', '}');
var objResponse = JSON.parse(responseData);
document.getElementById('statusResponse').innerHTML = '<p style="color:#198754;">' + objResponse.result.message + '</p>';
},
Error: function(up, err) {
document.getElementById('statusResponse').innerHTML = '<p style="color:#EA4335;">Error #' + err.code + ': ' + err.message + '</p>';
}
}
});
// Initialize Plupload uploader
uploader.init();
</script></body>
</html>Server-side Upload Handler:
Now create a upload.php file and add the following code:
<?php
// Make sure file is not cached (as it happens for example on iOS devices)
header("Expires: Mon, 26 Jul 1997 05:00:00 GMT");
header("Last-Modified: " . gmdate("D, d M Y H:i:s") . " GMT");
header("Cache-Control: no-store, no-cache, must-revalidate");
header("Cache-Control: post-check=0, pre-check=0", false);
header("Pragma: no-cache");

// Settings
$targetDir = 'uploads';
$cleanupTargetDir = true; // Remove old files
$maxFileAge = 5 * 3600; // Temp file age in seconds


// Create target dir
if (!file_exists($targetDir)) {
    @mkdir($targetDir);
}

// Get a file name
if (isset($_REQUEST["name"])) {
    $fileName = $_REQUEST["name"];
} elseif (!empty($_FILES)) {
    $fileName = $_FILES["file"]["name"];
} else {
    $fileName = uniqid("file_");
}

$filePath = $targetDir . DIRECTORY_SEPARATOR . $fileName;

// Chunking might be enabled
$chunk = isset($_REQUEST["chunk"]) ? intval($_REQUEST["chunk"]) : 0;
$chunks = isset($_REQUEST["chunks"]) ? intval($_REQUEST["chunks"]) : 0;


// Remove old temp files
if ($cleanupTargetDir) {
    if (!is_dir($targetDir) || !$dir = opendir($targetDir)) {
        die('{"jsonrpc" : "2.0", "error" : {"code": 100, "message": "Failed to open temp directory."}, "id" : "id"}');
    }

    while (($file = readdir($dir)) !== false) {
        $tmpfilePath = $targetDir . DIRECTORY_SEPARATOR . $file;

        // If temp file is current file proceed to the next
        if ($tmpfilePath == "{$filePath}.part") {
            continue;
        }

        // Remove temp file if it is older than the max age and is not the current file
        if (preg_match('/\.part$/', $file) && (filemtime($tmpfilePath) < time() - $maxFileAge)) {
            @unlink($tmpfilePath);
        }
    }
    closedir($dir);
}


// Open temp file
if (!$out = @fopen("{$filePath}.part", $chunks ? "ab" : "wb")) {
    die('{"jsonrpc" : "2.0", "error" : {"code": 102, "message": "Failed to open output stream."}, "id" : "id"}');
}

if (!empty($_FILES)) {
    if ($_FILES["file"]["error"] || !is_uploaded_file($_FILES["file"]["tmp_name"])) {
        die('{"jsonrpc" : "2.0", "error" : {"code": 103, "message": "Failed to move uploaded file."}, "id" : "id"}');
    }

    // Read binary input stream and append it to temp file
    if (!$in = @fopen($_FILES["file"]["tmp_name"], "rb")) {
        die('{"jsonrpc" : "2.0", "error" : {"code": 101, "message": "Failed to open input stream."}, "id" : "id"}');
    }
} else {
    if (!$in = @fopen("php://input", "rb")) {
        die('{"jsonrpc" : "2.0", "error" : {"code": 101, "message": "Failed to open input stream."}, "id" : "id"}');
    }
}

while ($buff = fread($in, 4096)) {
    fwrite($out, $buff);
}

@fclose($out);
@fclose($in);

// Check if file has been uploaded
if (!$chunks || $chunk == $chunks - 1) {
    // Strip the temp .part suffix off
    rename("{$filePath}.part", $filePath);
}

// Return Success JSON-RPC response
die('{"jsonrpc" : "2.0", "result" : {"status": 200, "message": "The file has been uploaded successfully!"}}');
Also Read : How to Create a Login Form in PHP Example
Conclusion:
Today we had learned PHP Chunk File Upload using JavaScript. Hope this tutorial will help you. Feel free ask question in the below comment section if you have any problem. You can find the project at github.
Also Read : How to Login with Google in PHP


