
One-way Data Binding and Event Handling in ASP NET Core Blazor
Creating and Using Components

Data binding is fundamental in an application. Each application needs to receive input and display output. There are two types of data binding: (1) one-way data binding binds field or property in a C# @code block to output element value in an HTML block, and (2) two-way data binding binds input element value in an HTML block to field or property in a C# @code block and vice versa.
This article covers: (1) one-way data binding, (2) event handling, and (3) creating a new component and using it as a page component and as a nested child component within another component.
One-Way Data Binding
In one-way data binding, class variables (fields) and properties in the @code block are bound to the HTML block for display. An HTML block automatically displays any change in a field’s value and/or property in a @code block. There is no input data from the HTML block bound to the @code block.
In the previous article, an example component has been given in an application BlazorWebAssemblyAppthat uses the one-way data-binding feature.
After the BlazorWebAssemblyApp application starts and the homepage appears, click the Counter menu to run the Counter.razor component and open the Counter page.
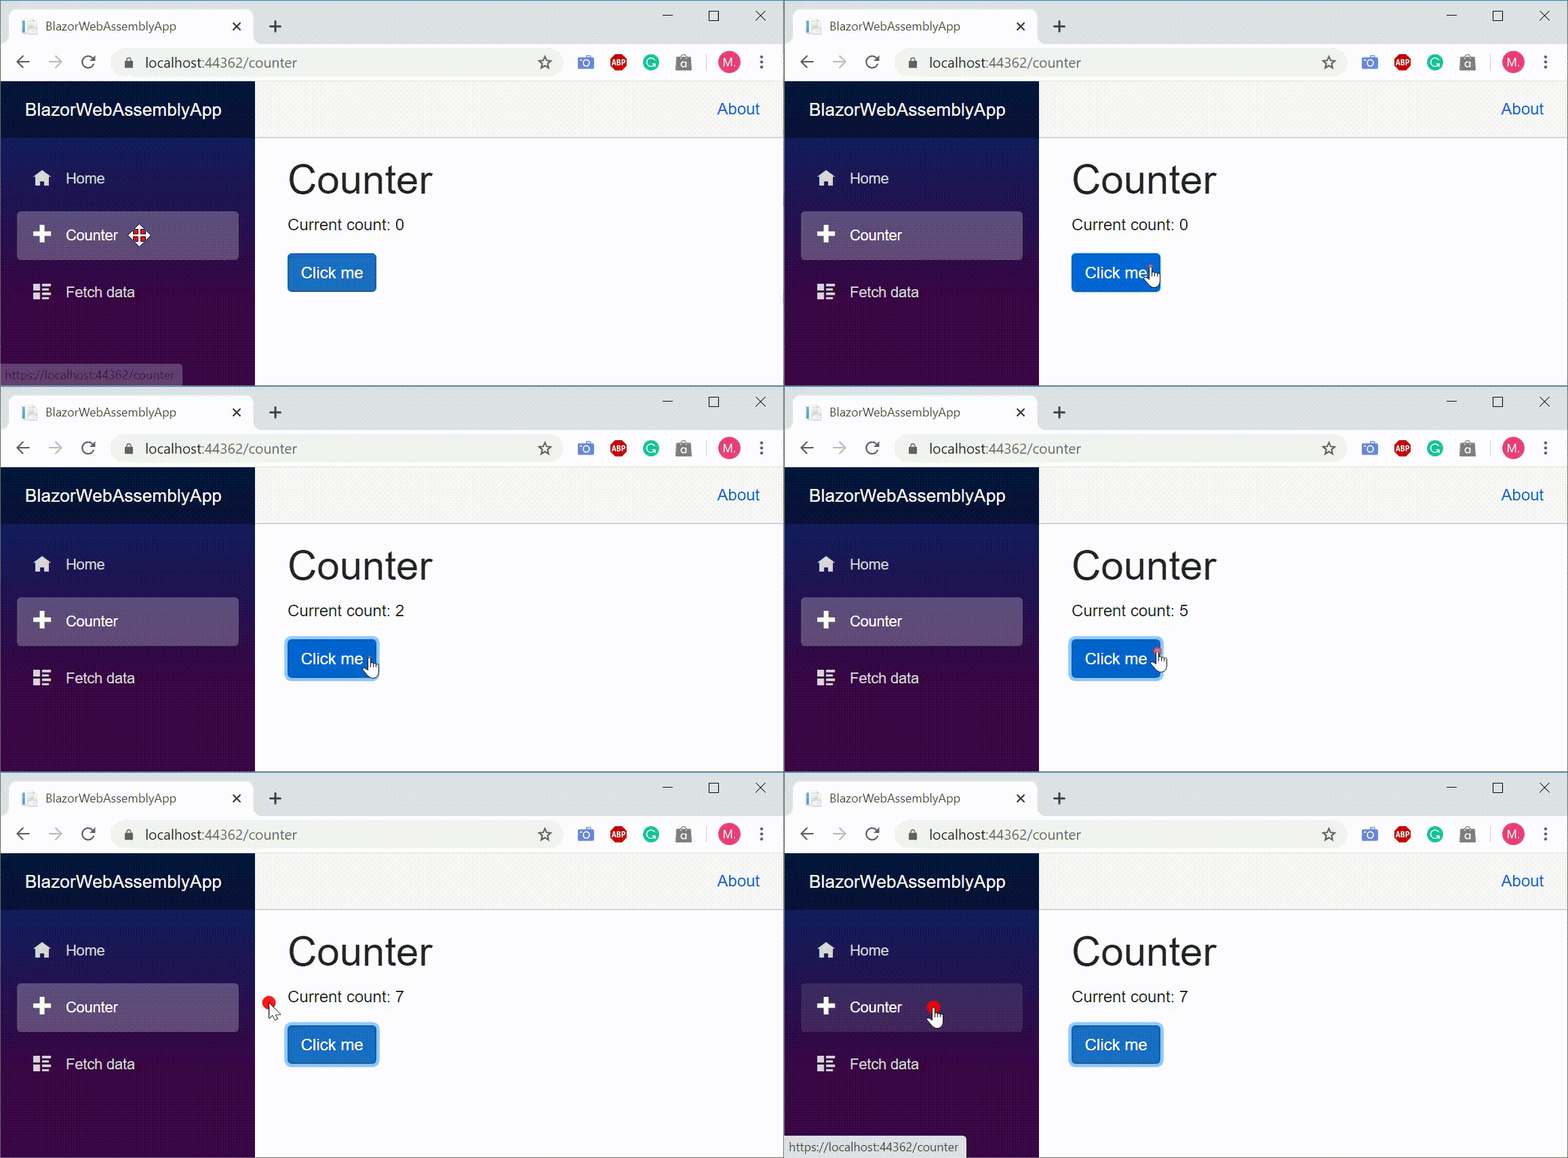
- The
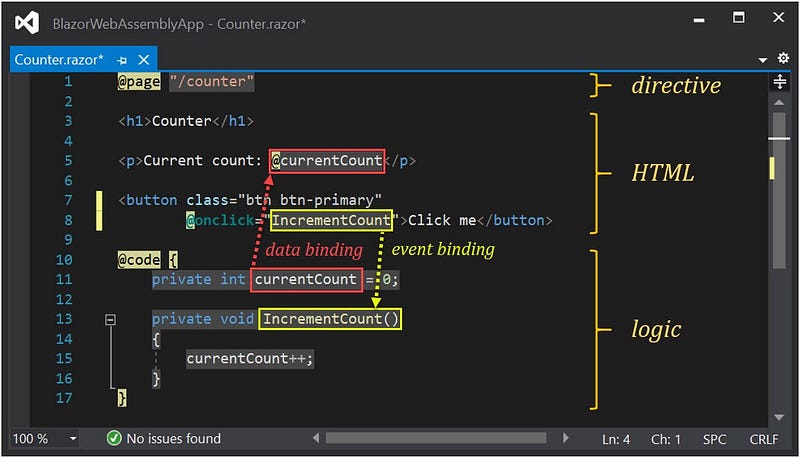
Counter.razorcomponent consists of three parts, namely directive, HTML, and logic block. - When the
Counterpage is loaded, the statement on line 11 in the@Codeblock gives an initial value 0 to thecurrentCountvariable. This value is automatically displayed with data binding by HTML command on line 5. - Next, each time the
Click mebutton is clicked, theIncrementCount()method in the@Codeblock is called, the value of thecurrentCountvariable increases by one. Using data binding, this change of value is automatically displayed by HTML. - This is an example of one-way data binding. With each change in the value of a variable in a
@Codeblock bound to an HTML block, the value display updates automatically. There is no input data from the HTML block bound to the@codeblock.
Event Handling
The binding between an event with a method (procedure or function) in a @Code block is called event binding. A method is run if there is an event; for example, clicking a button.
In the Counter.razor component, there is a bond between the Counter event on rows 7 and 8 in the HTML block and the IncrementCount() method in the @Code block line 13. Each time the Click me button is clicked, the IncrementCount() method in the @Code block is called, the currentCount variable value increases by one.
Creating a Component
Following is an example of a page component with simpler one-way data binding. The component displays today’s date data. The @Code block stores the current date into today variable, bound to HTML for display.
@page "/currentdate"<h3>Today is @today.ToString("dddd, dd MMMM yyyy")</h3>@code {
DateTime today = DateTime.Today;
}To add the component to the BlazorWebAssemblyApp project, follow these steps.
- Open Visual Studio 2019, choose:

- On the next screen:
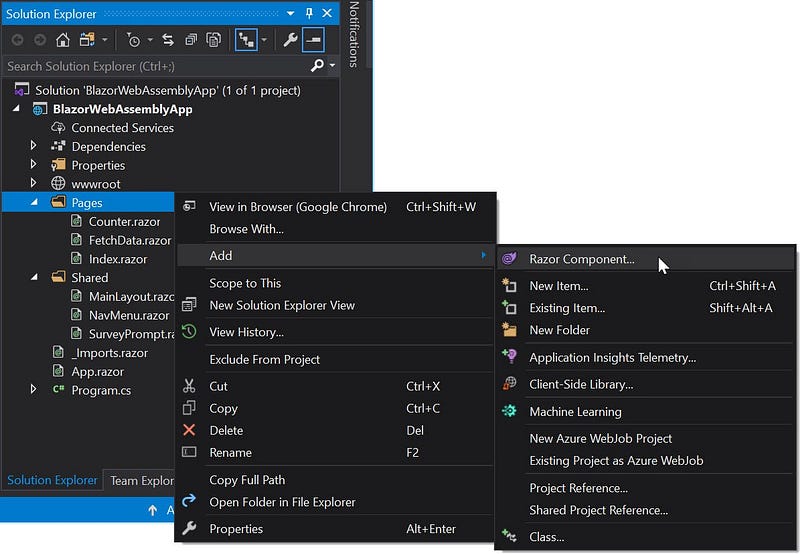
- In the
Solution Explorerpanel on the right side of the screen, selectPages|Add|Razor Component...
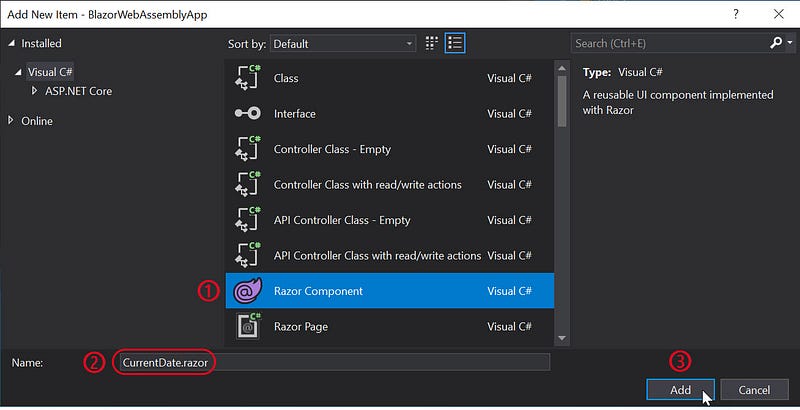
- Type
CurrentDate.razoras the file name. - Click
Add, the following screen appears.
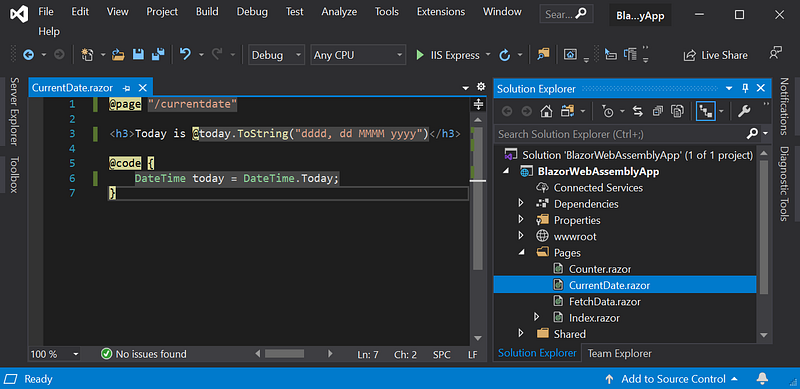
- Copy the HTML and C# code, paste it to the
CurrentDate.razorpanel on the left side of the screen.
Modifying the NavMenu.razor Component
The CurrentDate.razor component as a page component has been added to the project. To be used, the NavMenu.razor component must be modified by adding a new menu to it. For that, follow the steps below.
- In the
Solution Explorerpanel on the right side of the screen, selectShared|NavMenu.razor - In the
NavMenu.razorpanel on the left side of the screen, paste the following code into line 25.
<li class="nav-item px-3">
    <NavLink class="nav-link" href="CurrentDate">
        <span class="oi oi-calendar" aria-hidden="true"></span>
        Current date
    </NavLink>
</li>- The complete
NavMenu.razorcomponent code is as follows.
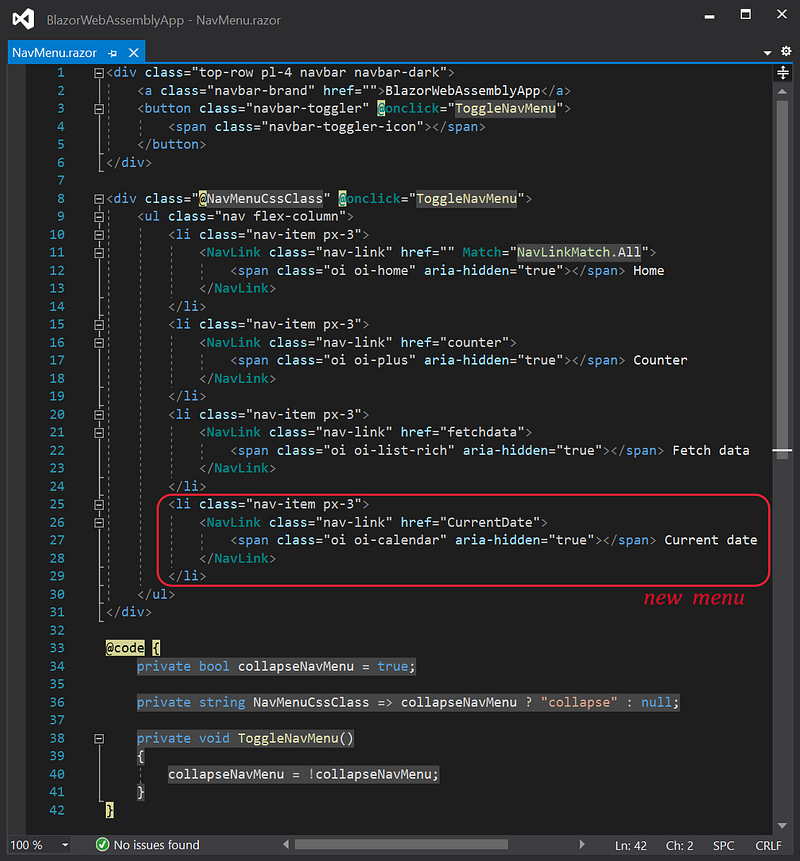
- Look at the code on line 27. The new menu uses icons
Calendarand textCurrent date. If you want to change the icon, you can see the list of icons here.
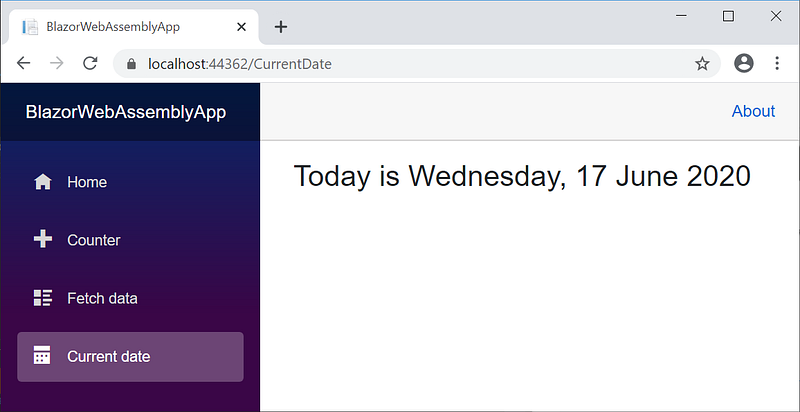
- Run the application by pressing
F5orCtrl F5. - Click
Current datemenu, the following page appears.
Nested Component
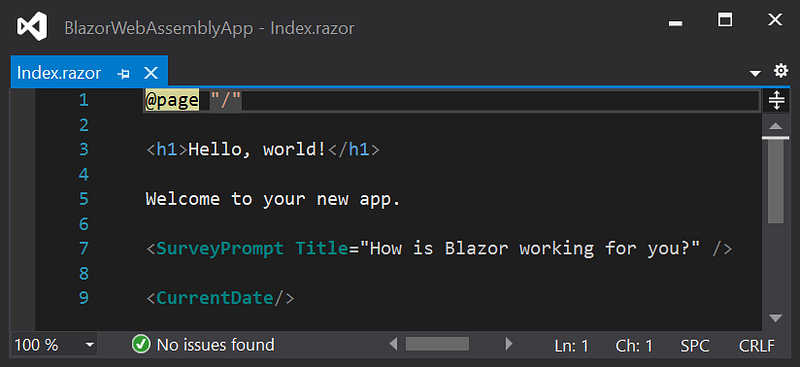
The CurrentDate.razor component as a page component can be nested into other page components. For example, nested on the homepage.
- In the
Solution Explorerpanel on the right side of the screen, selectPages|Index.razor - In the
Index.razorpanel on the left side of the screen, add the following code.
<CurrentDate/>- So, the complete
Index.razorcomponent code is as follows.
- Run the application by pressing
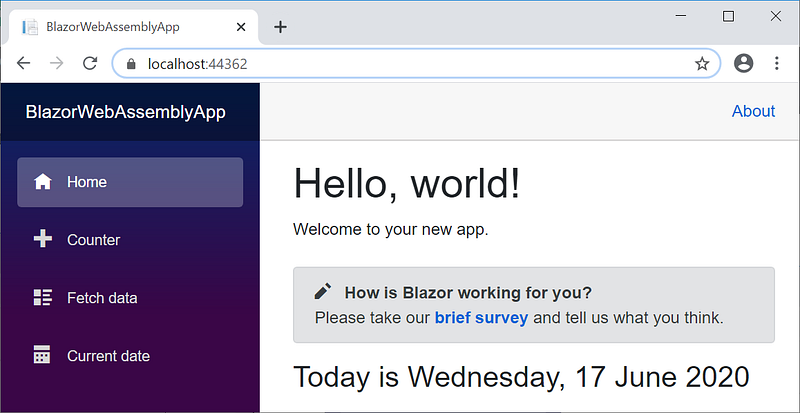
F5orCtrl F5, the following homepage appears.
What’s next?
The next article discusses the two-way data binding.


