
.NET Build YAML Pipeline with Code Coverage Report in Azure DevOps
This article shows how to create a .net build pipeline in YAML that also creates a code coverage report in Azure DevOps
Forewords
This is for a pipeline with Windows agents, if you are using Linux agents, then please look at this blog instead
Agenda

- Understanding the .net pipeline
- UseDotNet@2: or why you need to install .Net
- Restore or no restore?
- Build
- Generate and publish build artifact
- Run Tests
- Publish Code Coverage to ADO
- Release
- Sources
- Error List
What we want
A yaml pipeline that runs dotnet unit tests, creates a code coverage report and publishes it in Azure DevOps, finally the pipeline creates a build artifact for the release.

How we want it
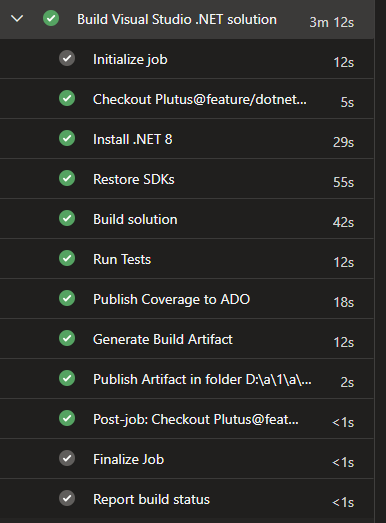
Understanding the .Net pipeline
What are the steps of a .net build pipeline?
- Restore (fetch all the NuGet packages)
- Build (compile)
- Generate & Publish the build artifact
- Run tests
- Publish Code coverage to Azure DevOps
- Restore Stage:
Responsible for fetching all the necessary dependencies and packages required by the .NET application. This typically involves using a package manager like NuGet to restore NuGet packages specified in the project files (.csproj) or solution files (.sln)
- Build Stage:
This typically includes restoring dependencies, compiling the code, and generating any necessary build artifacts, such as binaries or packages. Testing Stage:
- Generate & Publish the build artifact
his involves packaging the compiled application files, along with any other necessary resources, into a deployable format.
Once generated, the artifacts are published to a designated location, such as Azure DevOps Pipelines’ artifact repository or a file share.
This artifact will be used in the release stage, which basically deploys the artifact in the cloud (or your prefered location)
- Run tests
The pipeline runs automated tests to ensure the quality and functionality of the application. This may include unit tests, integration tests, or other forms of automated testing.
- Code Coverage Analysis
Optionally, the pipeline may include a code coverage analysis stage where it measures the percentage of code covered by automated tests.
- Publish code coverage
The results of the code coverage are published in a format for Azure DevOps to display
Gimme the code
  # Make sure the your correct .net sdk is installed
  - task: UseDotNet@2
    displayName: 'Install .NET 8'
    inputs:
      version: 8.x
      performMultiLevelLookup: true

  # Restore nuget packages
  - task: DotNetCoreCLI@2
    displayName: 'Restore Nuget Packages'
    inputs:
      command: 'restore'
      feedsToUse: 'select'
      vstsFeed: 'nameofyourfeed'
      includeNuGetOrg: true
      projects: ${{ parameters.solutionDirectory }}\${{ format('**\{0}.sln', parameters.solutionName) }}

  # Build solution
  - task: DotNetCoreCLI@2
    displayName: 'Build solution'
    inputs:
      command: 'build'
      projects: ${{ parameters.solutionDirectory }}\${{ format('**\{0}.sln', parameters.solutionName) }}
      arguments: '--configuration ${{ parameters.buildConfiguration }}'

 # Publish build results
  - task: DotNetCoreCLI@2
    displayName: 'Generate Build Artifact'
    inputs:
      command: publish
      publishWebProjects: False
      projects: ${{ parameters.solutionDirectory }}\${{ format('**\{0}.sln', parameters.solutionName) }}
      arguments: '--configuration  ${{ parameters.buildConfiguration }} --output $(Build.ArtifactStagingDirectory)'
      zipAfterPublish: False

# this code takes all the files in $(Build.ArtifactStagingDirectory) and uploads them as an artifact of your build.
  - task: PublishPipelineArtifact@1
    displayName: 'Publish Artifact in folder $(Build.ArtifactStagingDirectory)\${{ parameters.solutionName }}\* as ${{ parameters.solutionName }}_artifacts'
    inputs:
      targetPath: '$(Build.ArtifactStagingDirectory)\${{ parameters.solutionName }}'
      artifactName:  ${{ parameters.solutionName }}_artifacts

  # Run unit tests
  - task: DotNetCoreCLI@2
    displayName: 'Run Tests'
    inputs:
      command: test
      projects: ${{ parameters.solutionDirectory }}\*.UnitTests\*.UnitTests.csproj
      publishTestResults: true
      arguments: '--configuration ${{ parameters.buildConfiguration }} /p:CollectCoverage=true /p:CoverletOutputFormat=cobertura /p:ExcludeByFile="**/*Migrations/*.cs"'

  # Publish Code Coverage
  - task: PublishCodeCoverageResults@2
    displayName: 'Publish Coverage to ADO'
    inputs:
      codeCoverageTool: 'Cobertura'
      summaryFileLocation: '**/*coverage.cobertura.xml'
Let’s look into each part!
UseDotNet@2: why you need to install .Net
# Make sure the your correct .net sdk is installed
  - task: UseDotNet@2
    displayName: 'Install .NET 8'
    inputs:
      version: 8.x
      performMultiLevelLookup: true
Before running the rest of the pipeline, your agent needs to have .Net installed
version: 8.x
Must reference the dotnet version with which you developed your app
performMultiLevelLookup: true
When performMultiLevelLookup is set to true, the task will not only look for the exact version specified (in this case, version 8.x) but it will also look for any available patch or minor versions under the major version 8.
For example, if version 8.5 or 8.6 is available, the task will choose the latest available version under the 8.x major version.
Setting performMultiLevelLookup to true can be useful to ensure that the pipeline uses the latest patch or minor version within a specified major version range, potentially including bug fixes or performance improvements.
Restore
Any given projects in .Net uses some Nuget packages
Running dotnet restore, the .Net CLI checks what packages are referenced and downloads them if needed.
Why is it important?
- Dependency Resolution: Restoring NuGet packages ensures that the compiler has access to all necessary external libraries and frameworks.
- Build Integrity: Without restored NuGet packages, the build process may fail due to missing dependencies, maintaining the integrity of the build.
- Version Consistency: Restoring packages ensures that the correct versions of dependencies are downloaded, maintaining version consistency across builds.
What this will do in turn is create a file called project.assets.json that tracks all packages.
The command dotnet build needs this file
# Restore nuget packages
  - task: DotNetCoreCLI@2
    displayName: 'Restore Nuget Packages'
    inputs:
      command: 'restore'
      feedsToUse: 'select'
      vstsFeed: 'nameofyourartifact'
      includeNuGetOrg: true
      projects: ${{ parameters.solutionDirectory }}\${{ format('**\{0}.sln', parameters.solutionName) }}
feedsToUse, vstsFeed, includeNuGetOrg
The feedsToUse parameter is used to specify which package feeds should be used during the package restore operation.
When feedsToUse is set to ‘select’, it means that the task will use a combination of feeds based on other parameters provided. In this case, the combination of feeds to be used is determined by other parameters like vstsFeed and includeNuGetOrg.
Here’s what each parameter means:
feedsToUse: Specifies which package feeds to use during package restore.vstsFeed: Specifies the Azure Artifacts feed to use during package restore.includeNuGetOrg: Specifies whether to include the official NuGet feed (nuget.org) during package restore.
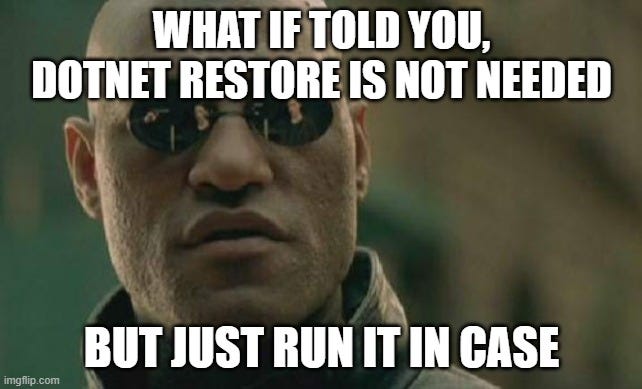
Do I need to run dotnet restore if I run dotnet build in a yaml pipeline?
If you carefully read the documentation, you will see that dotnet build implicitly runs dotnet restore
You don’t have to run dotnet restore because it's run implicitly by all commands that require a restore to occur, such as dotnet new, dotnet build, dotnet run, dotnet test, dotnet publish, and dotnet pack. To disable implicit restore, use the --no-restore option.
However! If you read further, you will see that for some cases — such as in a YAML pipeline — one must run dotnet restore
Why does one must run dotnet restore in a yaml pipeline?
When you’re working locally on your application and using NuGet packages, you typically don’t need to authenticate to access publicly available packages from the official NuGet.org feed. That’s because many of the commonly used packages are publicly available and can be accessed without authentication.
However, there are scenarios where you might need authentication:
- Private Feeds: If your organization hosts its own NuGet feed, it may require authentication to access packages from it
- Authentication for Specific Packages: Even on public feeds like NuGet.org, some packages might require authentication to download.
- Credentials for Package Sources: In certain cases, you might have configured your local development environment to use authenticated package sources.
If your project is already configured to use NuGet.org as a package source without requiring authentication, and your local development environment is successfully restoring packages without any issues, then you may not necessarily need to explicitly run the package restore step in your YAML pipeline.
However, it’s common practice to include a package restore step in the pipeline to ensure that all dependencies are explicitly managed and restored as part of the build process. This helps to ensure consistency and reproducibility across different environments and build agents.

Additionally, if you’re working with a larger team or in a CI/CD environment where multiple developers are contributing to the codebase or where multiple pipelines are running, including the package restore step explicitly in the pipeline ensures that the dependencies are always restored regardless of the individual developer’s local configuration.
In summary, while you might not strictly need to run the restore step in your YAML pipeline if your project is already set up to use NuGet.org without authentication, it’s often beneficial to include it for consistency and to ensure that dependencies are properly managed during the build process.
Build
# Build solution
- task: DotNetCoreCLI@2
displayName: 'Build solution'
inputs:
command: 'build'
projects: ${{ parameters.solutionDirectory }}\${{ format('**\{0}.sln', parameters.solutionName) }}
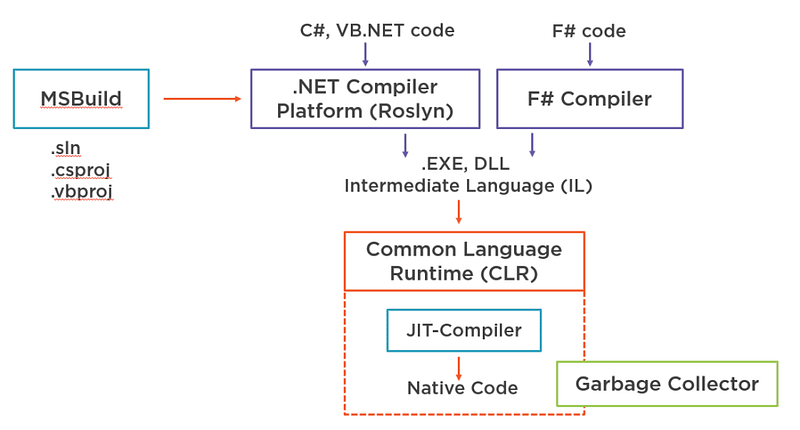
arguments: '--configuration ${{ parameters.buildConfiguration }}'Takes the project and its dependencies and turns it into a set of binaries (IL)
As a reminder, a C# project is first turned into intermediate language (IL) and then at runtime it is compiled in native code.
If you’re unfamiliar with the process, have a look at this blog post
Generate and publish build artifact
# Publish build results
  - task: DotNetCoreCLI@2
    displayName: 'Generate Build Artifact'
    inputs:
      command: publish
      publishWebProjects: False
      projects: ${{ parameters.solutionDirectory }}\${{ format('**\{0}.sln', parameters.solutionName) }}
      arguments: '--configuration  ${{ parameters.buildConfiguration }} --output $(Build.ArtifactStagingDirectory)'
      zipAfterPublish: False

# this code takes all the files in $(Build.ArtifactStagingDirectory) and uploads them as an artifact of your build.
  - task: PublishPipelineArtifact@1
    displayName: 'Publish Artifact in folder $(Build.ArtifactStagingDirectory)\${{ parameters.solutionName }}\* as ${{ parameters.solutionName }}_artifacts'
    inputs:
      targetPath: '$(Build.ArtifactStagingDirectory)\${{ parameters.solutionName }}'
      artifactName:  ${{ parameters.solutionName }}_artifacts
The ‘publish’ command compiles and publishes the project, the following task publishes the artifacts generated in the previous step as a pipeline artifact.
Run Tests
# Run unit tests
  - task: DotNetCoreCLI@2
    displayName: 'Run Tests'
    inputs:
      command: test
      projects: ${{ parameters.solutionDirectory }}\*.UnitTests\*.UnitTests.csproj
      publishTestResults: true
      arguments: '--configuration ${{ parameters.buildConfiguration }} /p:CollectCoverage=true /p:CoverletOutputFormat=cobertura /p:ExcludeByFile="**/*Migrations/*.cs'
Basically, you first fetch all your test projects in the projects argument
publishTestResults: True the task will collect the test results generated, typically include information such as the number of tests executed, passed, failed, duration of test execution, and any other relevant data.
arguments :
${{ parameters.buildConfiguration }}. The build configuration typically specifies whether the build is done in Debug or Release mode./p:CollectCoverage=true: This argument instructs the test runner to collect code coverage information during the test execution. When set totrue, it enables the collection of coverage data./p:CoverletOutputFormat=cobertura: This argument specifies the format in which the coverage data should be output. In this case, it's set tocobertura, which is integrated with AzureDevOps for code coverage reports./p:ExludeByFile=”**/*Migrations/*cs: This argument indicates all the files that won’t be taken into the code coverage report (here all my EF Core migrations)

Code Coverage Format
Cobertura is an open-source code coverage library for Java and .NET. While initially designed for Java projects, the .NET community has developed compatible tools to generate Cobertura-style coverage reports for .NET projects as well.
Azure DevOps can publish code coverage results with this format. However, few things must be set first:
- In your test project(s) install the Nuget packages:
Coverlet.MSBuildandCoverlet.collector

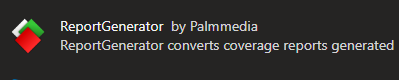
- Install the Azure DevOps extension: Report generator
go to organisation settings, extensions
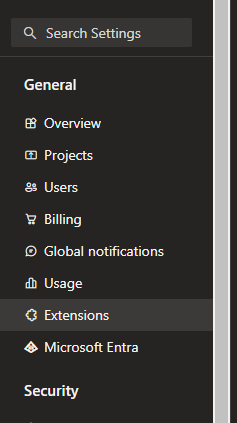
Look for report generator
You can also run the reports locally using
Run manually tests
dotnet test nameofyourproject.csproj /p:CollectCoverage=true /p:CoverletOutput=../CoverageResults/With a JSON report
```dotnet test /p:CollectCoverage=true /p:CoverletOutput=../CoverageResults/ /p:MergeWith=”../CoverageResults/coverage.json” /p:CoverletOutputFormat=”cobertura,json” -m:1```Publish Code Coverage to ADO
# Publish Code Coverage
- task: PublishCodeCoverageResults@2
displayName: 'Publish Coverage to ADO'
inputs:
codeCoverageTool: 'Cobertura'
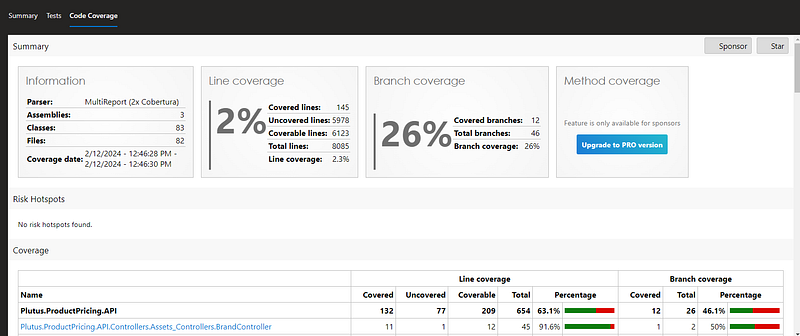
summaryFileLocation: '**/*coverage.cobertura.xml'Using Cobertura, we publish to ADO all the files wth name coverage.cobertura.xml
Does Azure DevOps not take Html files for its report?
In the past one would have to run the following scripts to basically get the report from Cobertura to HTML
That was to ensure that ADO would be able to render the report
However, if you install the reportgenerator extension already in ADO and publish the the report in Cobertura, you don’t need to run the two below commands!
So you don’t need extra tasks to install/run the custom ReportGenerator tool: it is now the default tool for reading coverage.cobertura.xml files and is included in the dotnet CLI.
The two below steps are not needed anymore!
  # First install the tool on the machine
  - script: |
      dotnet tool install -g dotnet-reportgenerator-globaltool
    displayName: 'Install ReportGenerator Tool'

 # Then, use it to create reports
  - script: |
     reportgenerator -reports:$(Build.SourcesDirectory)/**/coverage.cobertura.xml -targetdir:$(Build.SourcesDirectory)/CodeCoverage -reporttypes:'HtmlInline_AzurePipelines;Cobertura'
displayName: 'Generate Corbertura Report'What is Coverlet needed to create code coverage results in Azure DevOps?
Coverlet is an open-source alternative to the built-in collector. It generates test results as human-readable Cobertura XML files, which can then be used to generate HTML reports. To use Coverlet for code coverage, an existing unit test project must have the appropriate package dependencies, or alternatively rely on .NET global tooling and the corresponding coverlet.console NuGet package.
You can also use coverlet to run the reports locally, see below article
Release
Now that we have a build artifact, we can ‘release’ or deploy or code.
I have created another blog on how to do this in YAML
What is the difference between a build and release pipeline?
A build pipeline is responsible for compiling, testing, and packaging the source code into artifacts.
A release pipeline automates the deployment of artifacts generated by the build pipeline to various environments (e.g., development, staging, production), in our use case, in the cloud.
Sources
Error List
Error
A task is missing. The pipeline references a task called ‘reportgenerator’. This usually indicates the task isn’t installed, and you may be able to install it from the Marketplace: https://marketplace.visualstudio.com. (Task version 4, job ‘build_PlutusAPI’, step ‘’.)
Solution
Install the ADO extension (see Run unit tests)
Error
A task is missing. The pipeline references a task called ‘reportgenerator’ with version ‘4’. This indicates that the specific task version can not be found. (job ‘build_PlutusAPI’, step ‘’.)
solution
update the reportgenerator version (@4 to @5 for e.g.)
 # ReportGenerator extension to combine code coverage outputs into one
 - task: reportgenerator@5
   inputs:
     reports: '$(Agent.WorkFolder)/**/coverage.cobertura.xml'
     targetdir: '$(Build.SourcesDirectory)/CoverageResults'


