
My Obsidian Setup (Part 30) — Projects Update
In the previous article, I’ve shown an update that I’ve made to My Dashboard. It happens that today I’ve also updated my QuickAdd New Project macro.
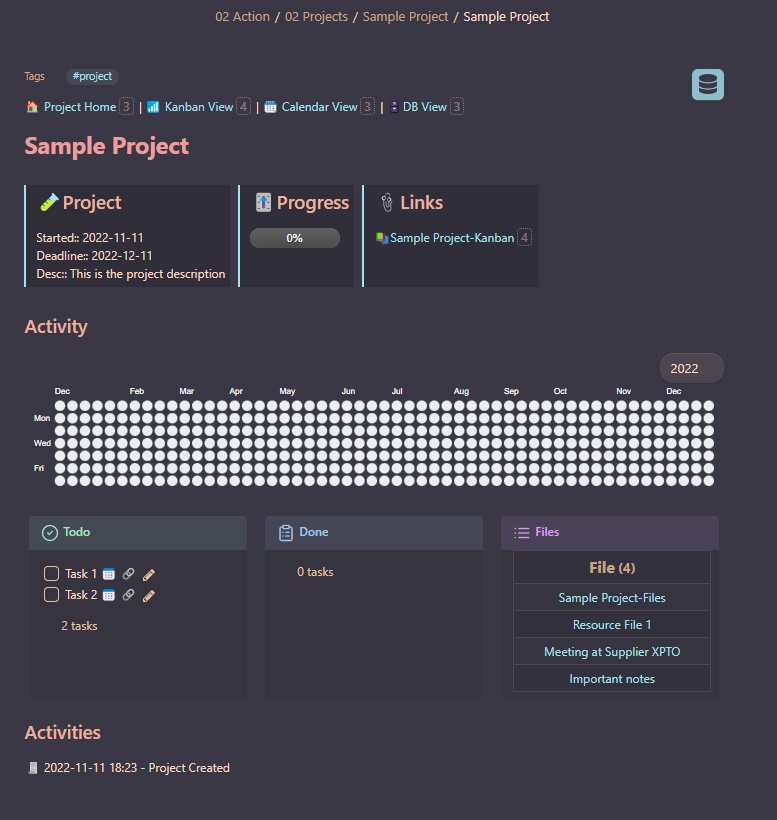
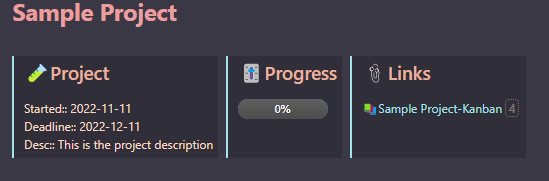
So, in part 19 of this series, I’ve already explained how I’m building the project’s home page.
Now I’ve modified the QuickAdd macro to also create a Kanban file for the tasks, a Tasks Due Date Calendar view, a project files DBFolder view, and a top menu to navigate between them. Unfortunately, I was not able to add this menu to the Kanban and DBFolder views.
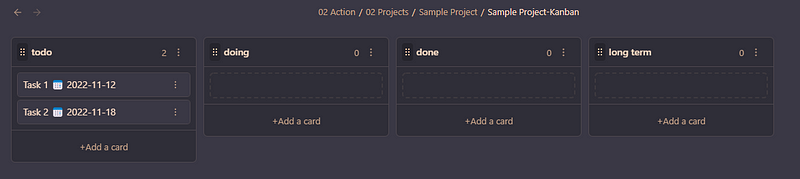
Project Tasks Kanban view
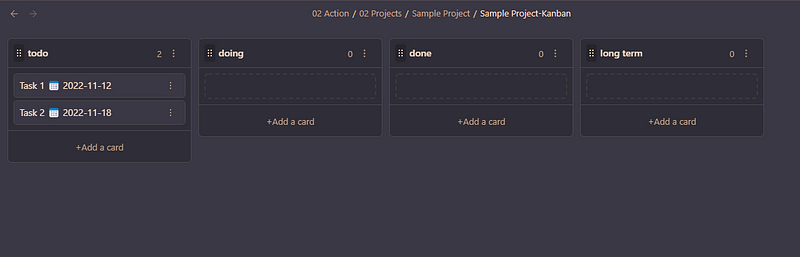
The Kanban view is created using the Kanban plugin with predefined list names (todo, doing, done, long term). To have it automatically created with our QuickAdd macro, create a new kanban page with the list names that you want, and save it to your templates folder.
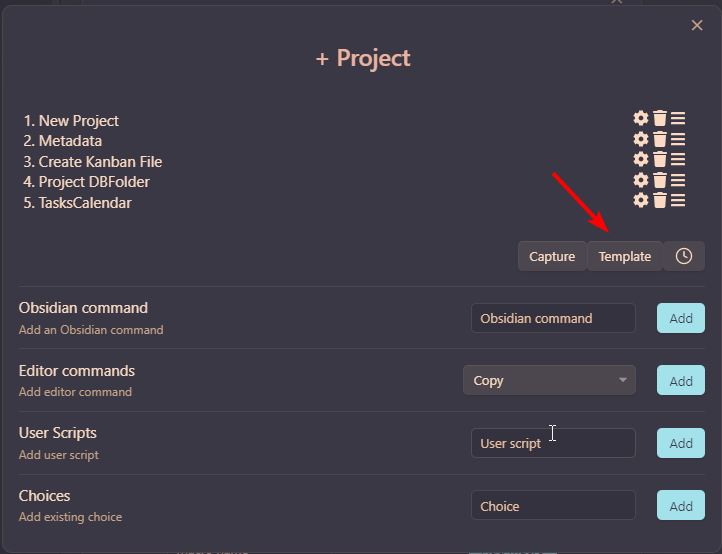
Now you just need to go to QuickAdd settings, configure macros, select your + Project macro, and add a new Templatestep.
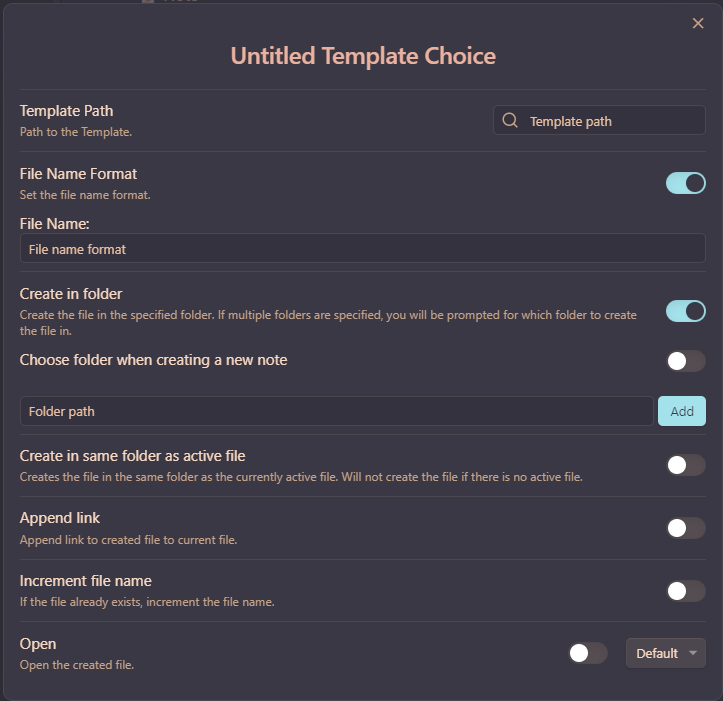
Template Path: the path to the Kanban file created as a template. File Name: use the {{VALUE:Project Name}} that we’re already using from a macro’s previous step, and add “-Kanban”, so the file is named <Project-Name>-Kanban. Create in Folder: add the folder path also using {{VALUE:Project Name}}, so the path is /path-to-projects-folder/project-name.
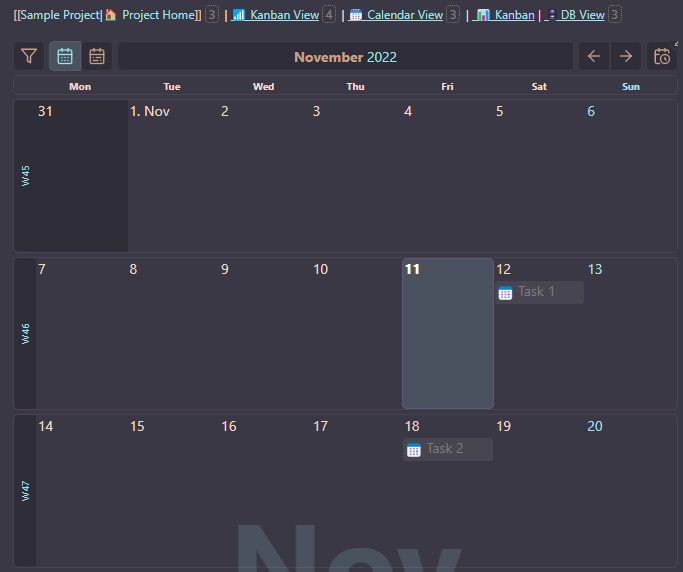
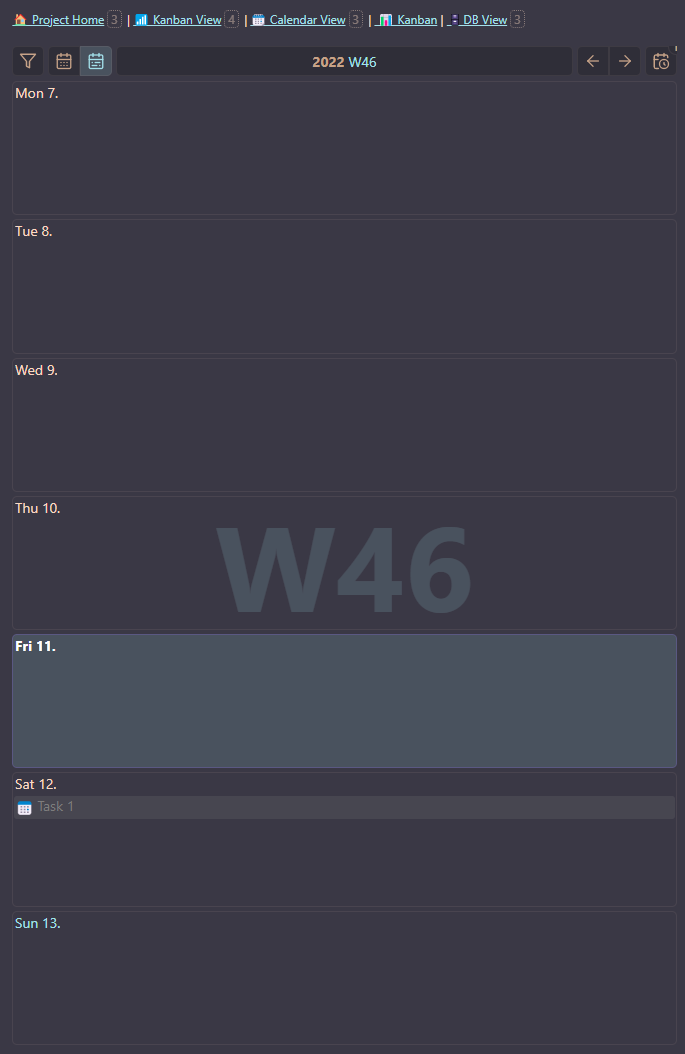
Project Tasks Calendar
For this, I’ll be using Obsidian-Tasks-Calendar. I’ve already written about it in the previous part of this series, including how to install it:
To add the Tasks Calendar view, create a new template file and insert the following code:
```dataviewjs
await dv.view("Resources/tasksCalendar", {pages: '"Projects/{{VALUE:Project Name}}/{{VALUE:Project Name}}-Kanban"', view: "week", firstDayOfWeek: 1, options: "style3"})
```
Replace Resources/tasksCalendar with the path where you stored tasksCalendar files from GitHub (check previous part); pages: Projects/with your project's path; for the view, firstDayOfWeek, and optionsalso check here.
Now, in QuickAdd, follow the same steps as for Kanban to create the new step for the Tasks Calendar view: create a new Template step, and the settings are almost the same. Just change the template path to the template we created for Tasks Calendar, and for the file name use {{VALUE:Project Name}}-TasksCalendar.
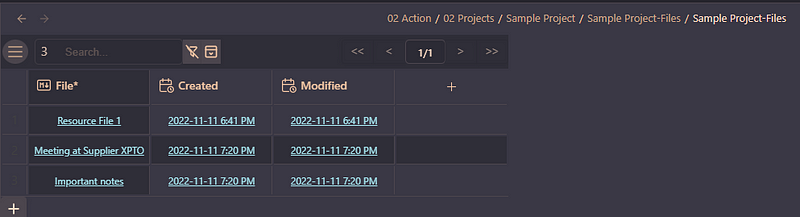
Project Files DB View
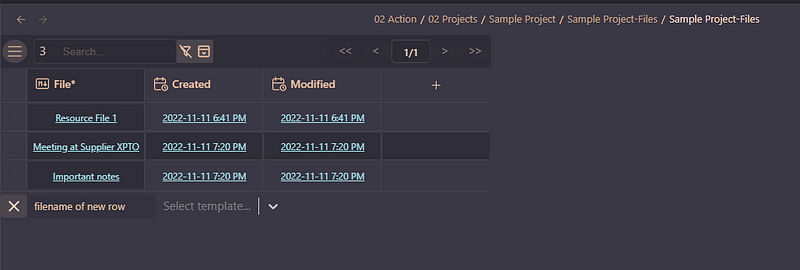
For this view, I’m using DBFolder plugin.
So, as with the other views, first, we will create the template file: open the command palette and run DBFolder: Create a new database table.
Now open the created DBFolder note as Markdown and change the following:
name: {{VALUE:Project Name}}-DB
description: {{VALUE:Project Name}}
source_form_result: "FROM \"<path-to-projects-folder>/{{VALUE:Project Name}}/{{VALUE:Project Name}}-Files\""
source_destination_path: <path-to-projects-folder>/{{VALUE:Project Name}}/{{VALUE:Project Name}}-Files
Change the paths according to your setup and the remaining settings as you please. Notice that I’m appending a -Filesin the end of source_form_resultand source_destination_path. This is because I want to create a folder <project-name>-Fileswhere I’m storing the project’s auxiliary notes, and those are the ones I want to show in the DB view.
Now that we have the DB View template, let’s do the same as for the other views: go to QuickAdd settings, New Project Macro, and add a new Templatestep. Once again, change the template path, the File Name Formatshould be {{VALUE:Project Name}}-Files and Create in foldershould be <path-to-projects>/{{VALUE:Project Name}}/{{VALUE:Project Name}}-Files.
That’s it. Now to recap the full workflow, when running the QuickAdd action +New Project:
- We are prompt for the project name, start date, due date, and description
- A new folder is created in the projects folder, with the project name that we inserted
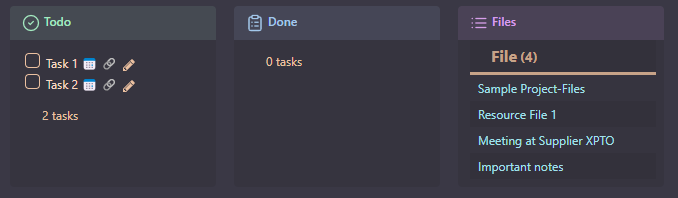
- A new project home page is created with the following areas:

- A Kanban view page is created automatically.
- A Tasks Calendar page is also created automatically, with a button to switch between month and week views.

- A DBFolder page is created, in the
<project-name>-Filesfolder where we will store project auxiliary notes.
You can read the previous parts of My Obsidian Setup series here:
Click here to be notified every time I publish a new story 😉.
If you’re not a Medium member yet and wish to support me or get access to all my stories, click here.


