
Making an AlertDialog in Android
This is an expansion of an answer I wrote on Stack Overflow.
AlertDialogs are useful for displaying a message to a user and optionally giving them a chance to respond to it. This is the equivalent of an iOS UIAlertController (or a Flutter AlertDialog). The examples below show a basic setup for one, two, and three buttons.
One button
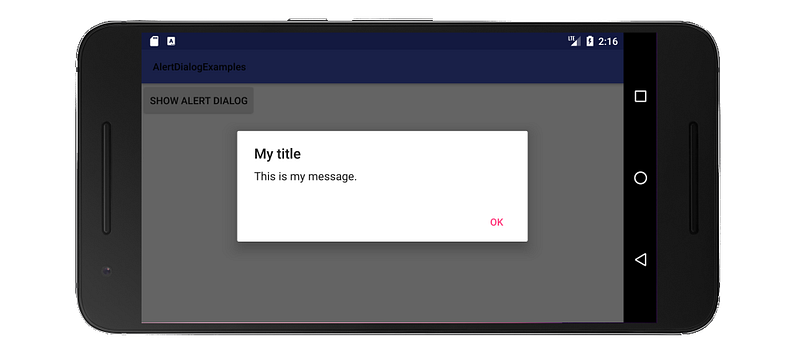
import android.support.v7.app.AlertDialog;public class MainActivity extends AppCompatActivity { public void showAlertDialogButtonClicked(View view) { // setup the alert builder
AlertDialog.Builder builder = new AlertDialog.Builder(this);
builder.setTitle("My title");
builder.setMessage("This is my message."); // add a button
builder.setPositiveButton("OK", null); // create and show the alert dialog
AlertDialog dialog = builder.create();
dialog.show();
}
}Two buttons

public class MainActivity extends AppCompatActivity { public void showAlertDialogButtonClicked(View view) { // setup the alert builder
AlertDialog.Builder builder = new AlertDialog.Builder(this);
builder.setTitle("AlertDialog");
builder.setMessage("Would you like to continue learning how to use Android alerts?"); // add the buttons
builder.setPositiveButton("Continue", null);
builder.setNegativeButton("Cancel", null); // create and show the alert dialog
AlertDialog dialog = builder.create();
dialog.show();
}
}Three buttons
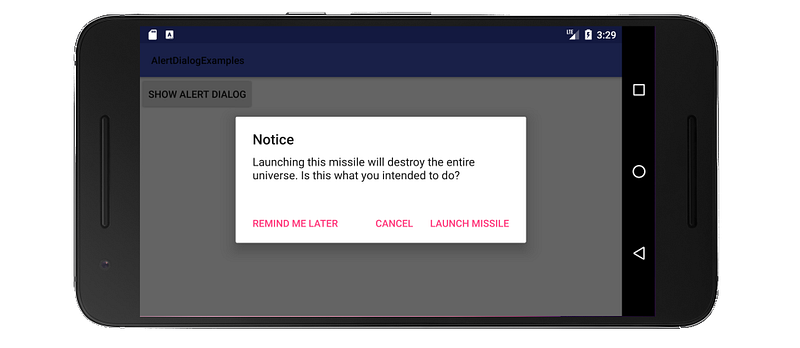
public class MainActivity extends AppCompatActivity { public void showAlertDialogButtonClicked(View view) { // setup the alert builder
AlertDialog.Builder builder = new AlertDialog.Builder(this);
builder.setTitle("Notice");
builder.setMessage("Launching this missile will destroy the entire universe. Is this what you intended to do?"); // add the buttons
builder.setPositiveButton("Launch missile", null);
builder.setNeutralButton("Remind me later", null);
builder.setNegativeButton("Cancel", null); // create and show the alert dialog
AlertDialog dialog = builder.create();
dialog.show();
}
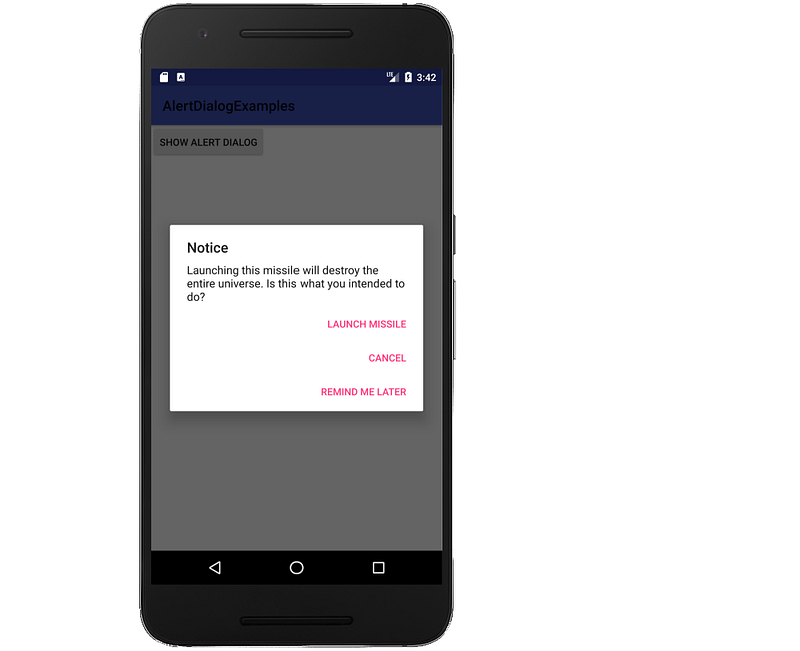
}If the button text it too long to all fit horizontally, then it will automatically get laid out in a vertical column of three buttons.
Handling Button Clicks
The OnClickListener was null in the above examples. You can replace null with a listener to do something when the user taps a button. For example:
builder.setPositiveButton("Launch missile", new DialogInterface.OnClickListener() {
    @Override
    public void onClick(DialogInterface dialog, int which) {
// do something like...
launchMissile();
}
});Changing the button color
By default the button colors are the same color as the colorAccent in the base application theme, which is set in your styles.xml file.
<style name="AppTheme" parent="Theme.AppCompat.Light.DarkActionBar">
    <item name="colorPrimary">@color/colorPrimary</item>
    <item name="colorPrimaryDark">@color/colorPrimaryDark</item>
    <item name="colorAccent">@color/colorAccent</item>
</style>
You can change the color as simply as changing the colorAccent hex value in your colors.xml file.
<color name="colorAccent">#D81B60</color>However, this will change the accent color all across your app. If you only want to change it for the dialog, you can make a custom theme. Add the following to your styles.xml file:
<style name="AlertDialogTheme" parent="Theme.AppCompat.Light.Dialog.Alert">
    <item name="colorAccent">@color/dialogButtonText</item>
</style>
This overrides colorAccent. Next define the dialogButtonText color in colors.xml:
<color name="dialogButtonText">#008577</color>Now whenever you create a dialog you can just pass in the custom theme. Replace the AlertDialog.Builder line in the examples above with the following code:
AlertDialog.Builder builder = new AlertDialog.Builder(this, R.style.AlertDialogTheme);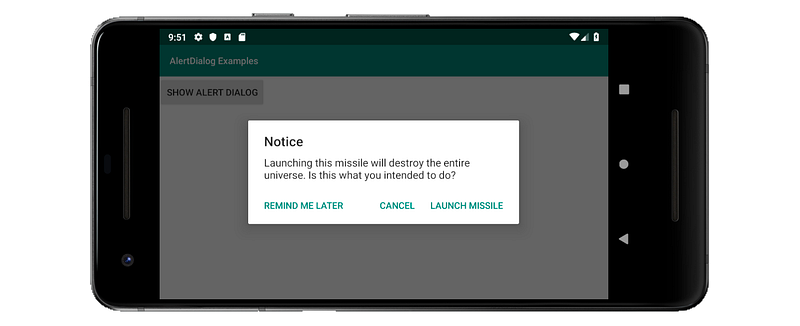
If you want more control over the color of individual buttons, see the answers to this Stack Overflow question.
Notes
- Use string resources rather than hard coded strings.
- You can wrap everything in a class that extends
DialogFragmentfor easy reuse of a dialog. (See this for help.) - These examples used the support library to support versions prior to API 11. So the import should be
import android.support.v7.app.AlertDialog; - I omitted the
onCreatemethod in the examples above for brevity. There was nothing special there.
Going On
There are many more varieties of dialogs that you can make. See the documentation for help with this.
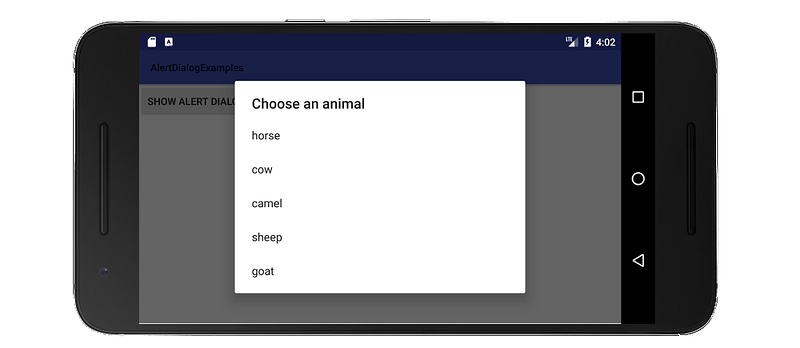
Since only three buttons are supported in an AlertDialog, here is an example of a dialog with a list.
public class MainActivity extends AppCompatActivity { public void showAlertDialogButtonClicked(View view) { // setup the alert builder
AlertDialog.Builder builder = new AlertDialog.Builder(this);
builder.setTitle("Choose an animal"); // add a list
String[] animals = {"horse", "cow", "camel", "sheep", "goat"};
builder.setItems(animals, new DialogInterface.OnClickListener() {
@Override
public void onClick(DialogInterface dialog, int which) {
switch (which) {
case 0: // horse
case 1: // cow
case 2: // camel
case 3: // sheep
case 4: // goat
}
}
}); // create and show the alert dialog
AlertDialog dialog = builder.create();
dialog.show();
}
}See this answer for similar examples of a radio button list and a checkbox list.