
Loading resources at runtime (Godot 4/C#)
Let’s discover the power of Godot’s Load() built-in!
All games are complex multimedia project that mix together code, design and art to create unique experiences for the players. And as a creator, you need to know how to have those different domains interact to properly give life to your ideas…
That’s why, in this tutorial, we’re going to see how to use our assets at runtime, from our code. So we’ll see how to load a few common types of resources in our C# scripts, and more precisely: images, audio files, 3D models and scenes.
As usual, since we’ll be coding our logic in C#, make sure that you have a version of Godot with .NET enabled.

And of course, don’t forget that you can get the demo scene and all the assets from this demo on my Github 🚀 with all my other Godot tutorials.
Also, the image, audio and 3D models assets are made by Kenney 🚀
The tutorial is also available as a video — text version is below:
And now, with all that said, let’s dive in and discover the basics of loading resources at runtime in Godot and C#!
A quick note on Godot file paths
Just before talking about how to load resources from C# scripts, let’s quickly see how Godot handles file paths, and how to properly reference our assets in the code.
The first important thing to keep in mind is that Godot uses a UNIX-style path separator — and that’s true even on Windows! Meaning that no matter what your OS is, when you’re coding logic in Godot, you should use forward slashes to go through a path:
/a/path/to/a/fileAnd, also, there are two notable directory prefixes that you should use to store or retrieve game data: the res:// and user:// root folders:
- The
res://prefix allows you to easily access the root directory of your project, meaning the directory that contains yourproject.godotfile. So that’s the prefix you need to put at the beginning of your asset paths to load resources relative to your project file hierarchy. - The
user://prefix points to a specific directory on the user’s device (which depends on the platform your user is running the game on). This folder is typically where you should store your persistent data, like the player’s saves and settings. By default, this directory is inside the Godot editor data folder because, this way, the data is completely self-contained and doesn’t “leak outside” of Godot. But if you configure the Project Settings properly, the user data directory can also be put in the usual data path for all applications, next to the Godot editor data path.
Just for reference, here are a few examples of user data path for the different desktop platforms:

Ok — now that we’re clear on what those prefixes are, and how we should write our resource paths in Godot, let’s get to it and see how to load images using C# code in a Godot project…
Loading up images
Alright — for this tutorial, we’re going to assume that we have a very basic showcase scene like this one, with a UI control panel that lets us switch between a few images, a few sounds and a few 3D models:
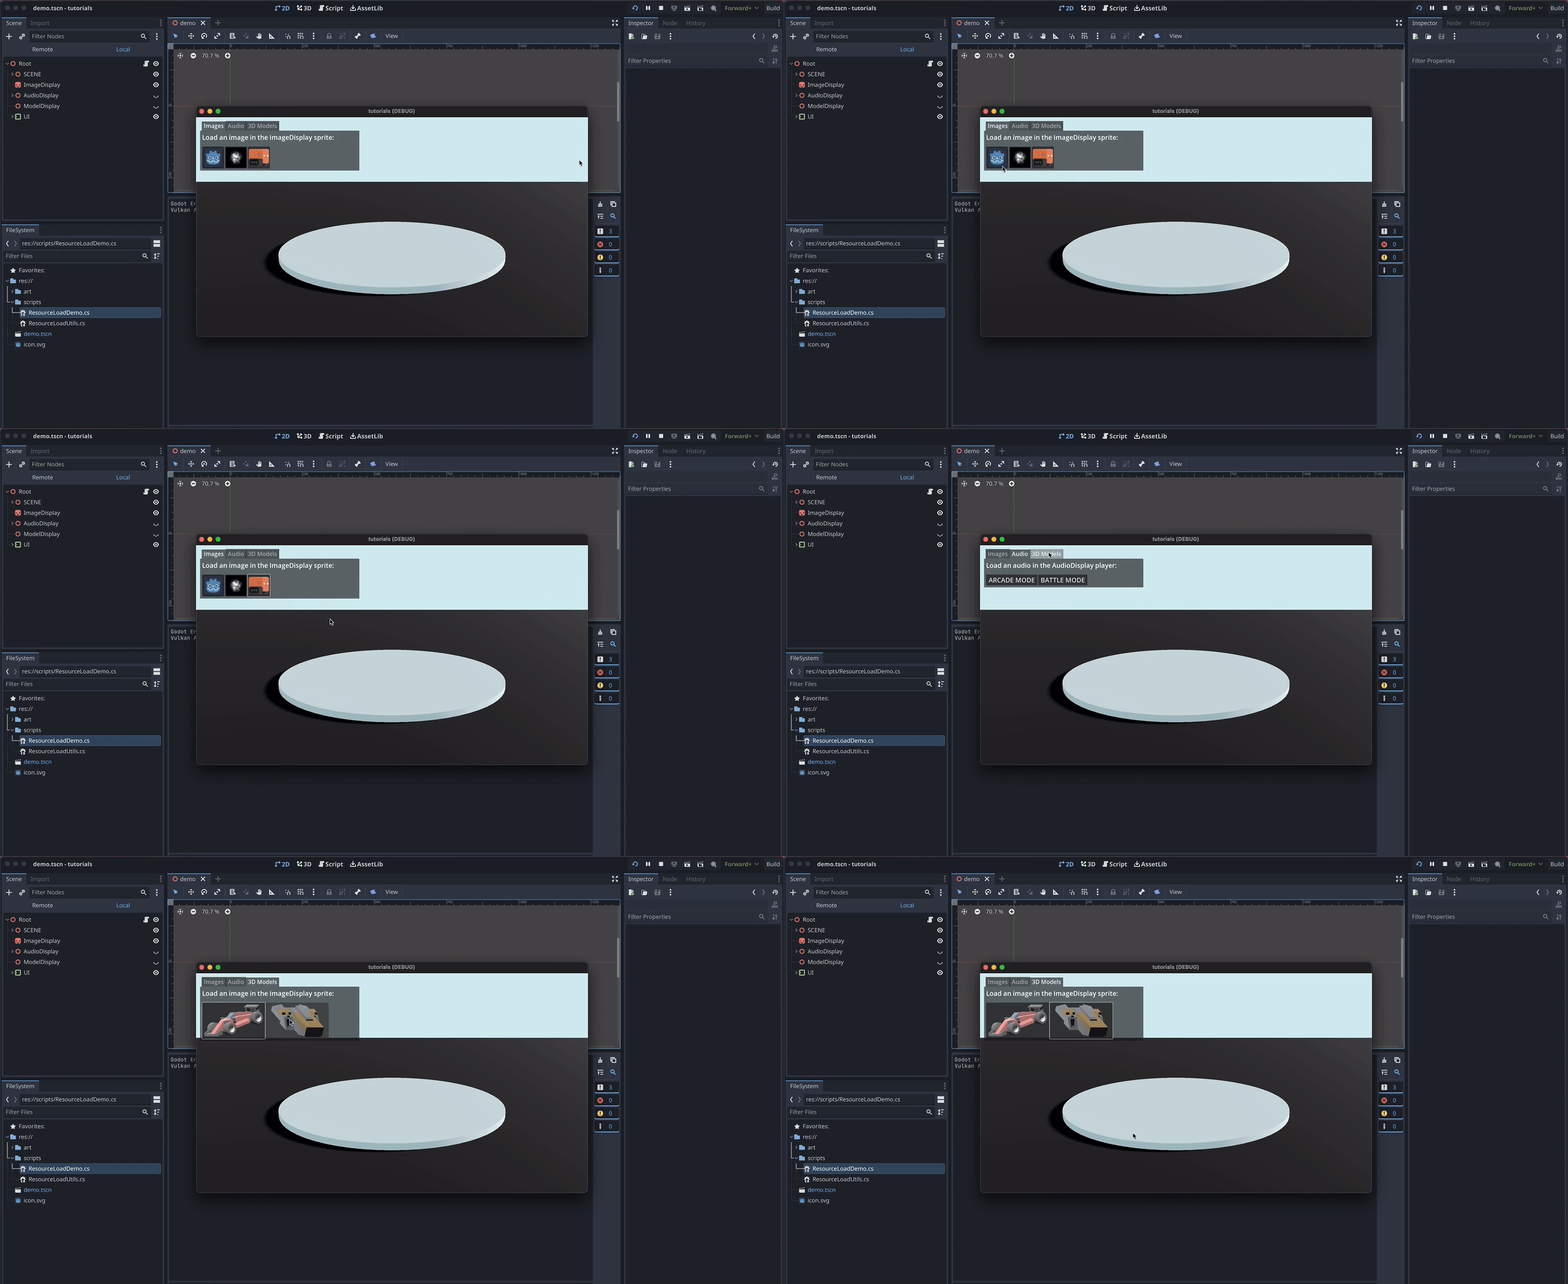
For now, of course, we’ll focus on the images — but don’t forget that you can get this whole demo scene, along with the control panel manager script, from the Github repo 🚀, as a starter template, if you want to build up the logic gradually along with me :)
Our goal in this tutorial will just be to fill in the ResourceLoadUtils static class with the logic for loading various types of resources in a context-independent way, based on the resource display node and the path of the resource to load:
using Godot;
using System;

public static class ResourceLoadUtils
{
    public static void LoadImage(Sprite3D sprite, string imgPath)
    {}

    public static void LoadAudioFile(AudioStreamPlayer player, string audioPath)
    {}

    public static void Load3DModel(Node3D parent, string modelPath)
    {}
}
So, for example, to begin with the images — we’ll first implement the logic of the LoadImage() function. And as you can see, the point will be to use the path we’re given by the control panel manager script to load an image resource from the Godot project, and then apply it as the new texture for the given Sprite3D node in the scene.
This way, we’ll be able to click on our various image buttons to change the visual in the middle of the screen.
The path that is provided by the control panel is composed from a root path, that starts with the res:// prefix and points to the assets directory for this tutorial, and then a unique file reference that is different for each button:
using Godot;
using System;
using System.IO;

public partial class ResourceLoadDemo : Node3D
{
    private const string _ROOT_PATH = "res://art/resources";

    private void _OnImageBtnPressed(string path)
    {
        // combine common root path with unique resource path
        ResourceLoadUtils.LoadImage(
            _imageDisplay,
            Path.Join(_ROOT_PATH, path));

        _ToggleVisuals(0);
    }

    // ...
}
For example, for the first button that corresponds to the Godot icon, stored here in the assets folder, our callback uses the “img/icon.svg” path.
Note that, here, I’ve used two tricks to setup these callbacks with the right data:
- First, to actually be able to pass in a path in my callback functions, I’ve made sure to toggle the Advanced mode inside the signal callback wizard. This allows us to add some additional input parameters, and thus provide extra data to the signal callback function, like our path here:

- Second, to know what exactly is the path of my image resource, I simply went to the Inspector of my UI button and, where I picked my icon, I clicked on this sub-resource to check out the exact path of the asset in the project:

(Again, the beginning of the path is already defined as a root path in the demo manager, that is common to all of my resources, so here I only need to keep the end of the path, the part with “img/icon.svg”.)
Now, honestly, loading up images is really one of the easiest things in Godot. We simply need to use the global built-in called Load(), that is inside the GD object in C#, and pass in the type of resource we want to load and the path of the asset:
GD.Load<T>("a/path");If we take a look at the Texture field inside our Sprite3D display node, we see that it expects a Texture2D:

So all we have to do is pass in Texture2D as the type in our call to Load(), and Godot will auto decompress and convert the image to the right format upon loading:
public static void LoadImage(Sprite3D sprite, string imgPath)
{
    sprite.Texture = GD.Load<Texture2D>(imgPath);
}
By the way, this would also work for a 2D sprite — both Sprite2D and Sprite3D nodes use a Texture2D resource ;)
Which means that, at this point, if we come back to our scene and run it, we can click on the buttons in the UI and the sprite in the middle automatically gets updated to show this image:

(Of course, the Sprite3D’s size adapts to the initial texture image… still, overall, we see our logic applies no matter which type and resolution of image we’re using!)
Ok, that’s cool! And now that we know how to load images, let’s move on to audio files…
Loading up audio files
Again, here, the point will be to use our UI control panel to load and play one of two OGG audio files: either the “Arcade mode” or “Battle mode” voice-over line:

And, again, this is quite easy to do. All we have to do is use the GD.Load() built-in and pass it our path. Except this time, we want to output an audio stream variable, and more precisely an OGG stream — which Godot calls an AudioStreamOggVorbis:
GD.Load<AudioStreamOggVorbis>(audioPath);
Then, we just need to assign it as the Stream property of our AudioStreamPlayer node, and call the Play() method of our audio source to actually play this sound:
public static void LoadAudioFile(AudioStreamPlayer player, string audioPath)
{
    player.Stream = GD.Load<AudioStreamOggVorbis>(audioPath);
    player.Play();
}
And that’s it!
If we come back to our game and click the two buttons, you can hear (in the video version of the tutorial) that we get the sounds as expected :)
Plus, because the stream gets replaced, clicking on a button before the voice has finished talking will immediately interrupt it and switch over to the other sound clip, so we can very easily update our player audio source.
By the way, note that Godot’s audio utilities are really cool and, in particular, like in many game engines, there are quite a few tricks to doing spatialised audio, having special sound effects, or even per-zone SFX… so if you’re curious about this, as usual, feel free to drop a comment down below, and I might do a tutorial on this topic in the future :)
But anyway — on that note, let’s keep going and talk about loading 3D models…
Loading up 3D models
So far, we’ve talked about images, sounds and scenes, and we’ve seen that Godot’s Load() built-in method is an easy-to-use, quick and adaptable way of retrieving a wide variety of resources from your project at runtime.
And guess what? It actually works almost as directly for 3D models, too! :)
The only little tweak is that, rather that retrieving the 3D model root node in one-go, we need to first to get this model file as a reference PackedScene variable, and then instantiate it in the scene to actually create our 3D node:
public static void Load3DModel(Node3D parent, string modelPath)
{
    // (clean-up previous child, if any)
    if (parent.GetChildCount() > 0)
        parent.GetChild(0).Free();

    PackedScene s = GD.Load<PackedScene>(modelPath);
    Node3D model = s.Instantiate<Node3D>();
    parent.AddChild(model);
}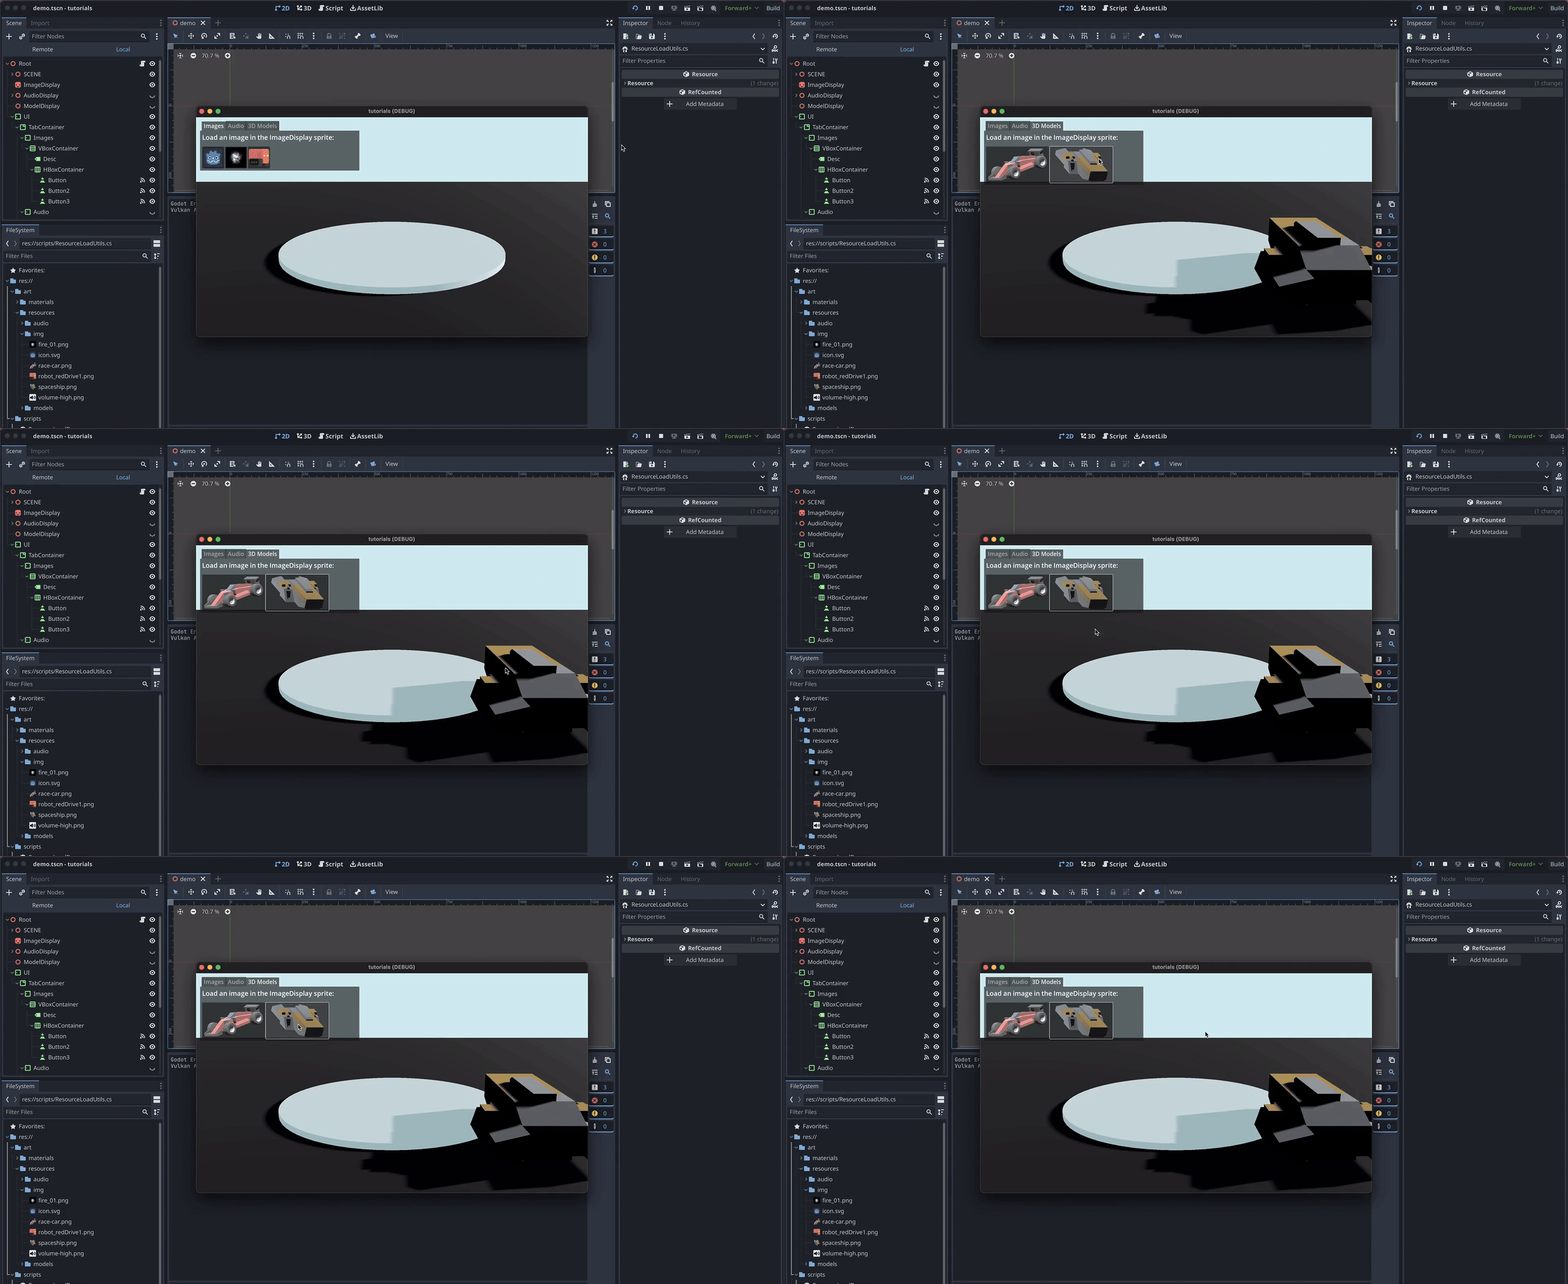
Now, you’ll notice that, as we’ve discussed before in this episode of the series, the 3D model may have some offset relative to the origin that is embedded in the file itself, and comes from the position the object had in the 3D creation software at the time of export…
So if we really wanted our 3D model to be centred on the pedestal, we’d need to wrap it some additional Godot scene, to counteract the offset, or to edit the initial model itself.
But anyway, here, we’ve managed to successfully get our 3D models with just a few lines of C# code… so now to wrap up this tutorial, let’s have a look at how to load up scenes at runtime in various modes :)
Loading up scenes or prefabs
A few weeks ago, I did a tutorial on how to make a basic game loop in Godot 4 and C# and, in this episode, I quickly talked about how to load scenes at runtime, via code, to transition from one chunk of the game to another.
But you might remember that, at the time, I said it was just a crude way of doing it, and there were other methods for loading scenes. So, today, I want to dive deeper in this topic and explore some extra concepts :)
So, last time, we saw how to load scenes thanks to the SceneTree API; which we can do using a string path (with ChangeSceneToFile()), or using a direct reference to a PackedScene (with ChangeSceneToPacked()). This replaces the entire hierarchy and, at the end of the frame you’ve called the function on, it completely changes the current node tree with the new one.
However, another very common thing in game projects is to rely on what we call a multi-scene workflow.
Using a multi-scene workflow
Basically, the idea is that, rather than putting everything together in a huge bundle of assets, props, scripts, lights, cameras and all, you rather separate your scenes in smaller chunks according to some specific organisation.
For example, a usual technique is to keep all the UI on one side, all the base environment objects on another, and then all the characters and “main” elements as a third part — and then re-assemble all of this in one final complete scene at runtime.
Using a multi-scene workflow like this has several advantages:
- It helps reduce the size of each chunk, and make them more manageable than one huge scene with hundreds of nodes.
- If you’re working in a team, it facilitates collaborative dev because every team member can work on one bit of scene without disrupting the others and iterate as much as they want.
- Plus, that “per-team member” separation is especially valuable when the time comes to re-merge everyone’s work and you’re versioning the project because, this way, you don’t have as many merge conflicts as if everyone was editing the exact same file.
Now, if you’ve ever worked with Unity, you might have noticed that ever since Unity 5, multi-scene workflows have become a built-in feature, since you can directly drag multiple scenes next to one another in the scene hierarchy to overlap them in one big pack, and you can also do this additive loading from the script API.
But, in Godot, the API doesn’t have this “special loading mode” because, as we said a long time ago in the very first episode of the series, Godot’s scenes and prefabs aren’t that complicated and that unique: they’re simply a hierarchy of nodes that you saved as a resource in your project!
Meaning that a scene can be added to the current node hierarchy just like any other prefab or even brand new node — you just have to instantiate your scene chunks one by one, and you’ll basically have recombined everything properly :)
Sync or async?
That being said, there’s another essential notion to keep in mind when loading resources, and in particular scenes, since those contain a lot of things and are usually heavier than a bare image or audio file — and that’s whether your loading is synchronous or asynchronous.
To put it simply, a synchronous operation, once executed, blocks your entire code until it’s finished. For most instructions, this ‘blocking time’ is so negligible that you don’t see it as a player, and so it’s no big deal. Plus, synchronous operations are very easy to keep track of since they happen one after the other, so it’s always more handy for developers to use those when possible.
However, if your operation takes a while to complete, then blocking the game might not be very wise. Cause yeah, when we say blocking the game, we’re taking about everything: the background logic, the animations, the sounds, the render screen update… basically, it’s just like your entire computer froze — which is never really reassuring to players!
This is why, when you think your operation could be a bit long, you might want to make it asynchronous. This time, the idea is to start the operation parrallel to your main game thread and, this way, your main logic can basically “forget” it until it is done.
For loading up a prefab or a scene in Godot asynchronously, the trick is to use the ResourceLoader API, and more precisely the LoadThreadRequest() and LoadThreadedGet() functions. So, to better understand how it works, let’s have a look at an example from the Godot official docs, on how to load an Enemy prefab scene asynchronously inside a pre-existing node tree.
First, we initiate the request — for example in the _Ready() function. Again, this won’t block anything, since it’s async, which means that the main game thread will keep running as usual:
public partial class AsyncLoadButton : Button
{
    public override void _Ready()
    {
        ResourceLoader.LoadThreadedRequest("Enemy.tscn");
        Pressed += _OnButtonPressed;
    }
}
And then, when we click on some button later in the scene, we use the result of our async operation to actually retrieve and instantiate the scene:
public partial class AsyncLoadButton : Button
{
    private const string _ENEMY_SCENE_PATH = "Enemy.tscn";

    public override void _Ready()
    {
        ResourceLoader.LoadThreadedRequest(_ENEMY_SCENE_PATH);
        Pressed += _OnButtonPressed;
    }

    private void _OnButtonPressed()
    {
        PackedScene enemyScene = ResourceLoader.LoadThreadedGet(
            _ENEMY_SCENE_PATH)
        Node enemy = enemyScene.Instantiate();
        AddChild(enemy);
    }
}
Basically, in-between the _Ready() function execution and the moment we click on the button, enough time has elapsed for the load request to complete, and so the resource is ready to be retrieved and used in the button click callback function (_OnButtonPressed()).
Though note that this idea of “hoping” that enough time has passed for the resource to be ready is a bit simplistic and, in truth, if you want a full on-the-fly async scene loader, you might prefer to check out some of the assets from Godot’s asset lib like NovemberDev’s Asynchronous Scene Loader package, or ImmersiveRPG’s GodotAsyncLoader plugin :)
And on that note — we’ve now covered the most basic types of resources you might need to load at runtime using code, and we’ve seen the power of the Load() built-in, and some of its asynchronous equivalents, to access and retrieve assets efficiently :)
Conclusion
So here you go: you now know how to easily retrieve images, audio files, 3D models or scenes from your Godot project files using a very condensed and generic C# script!
If enjoyed the tutorial, feel free to clap for the article and follow me to not miss the next ones — and of course, don’t hesitate to drop a comment with ideas of Godot tricks that you’d like to learn!
As always, thanks a lot for reading, and take care :)
To read more of my content, and articles from many other great writers from Medium, consider becoming a member! Your membership fee directly supports the writers you read.


