
Image Classification using Convolutional Neural Networks (CNN)
We know these days image classification is becoming popular and its applications are increasing rapidly. In this blog, we will use convolutional neural networks for image classification on skin cancer data.
“we will start with google colab because there no issue with python libraries their dependencies and also its cloud base environment so we will not need a lot of configuration.”
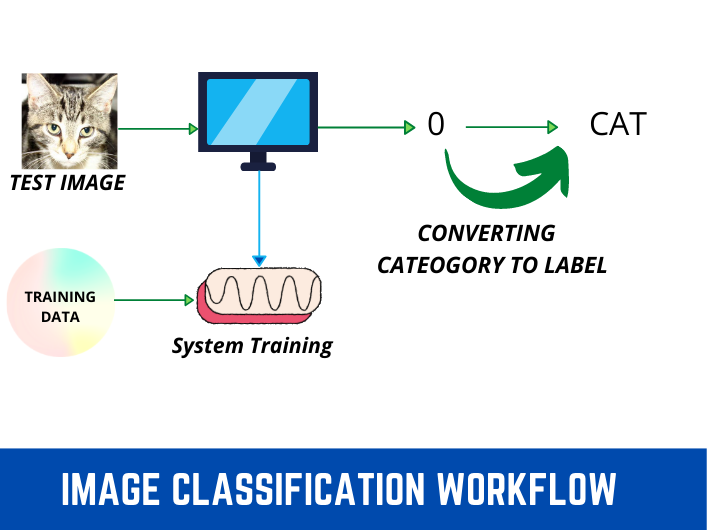
Note: Let’s start implementation, if you follow step by step tutorial then there will be no error at the end.
Step-1
We need to create a folder in Google Drive with the name “image classification”. This is not a necessary name you can create a folder with another name as well.

Step-2
Now, we need to make a folder of the “dataset” inside the image classification folder in which we will store our training and testing data. This is not a necessary name you can create a folder with another name as well.
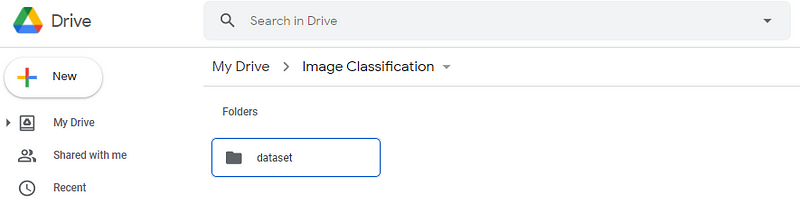
You can use any dataset but in this article, I will focus on binary classification, which means the dataset I will use have two classes. for multi-class classification, the procedure will be the same, but at some steps little changing needed, which I will tell in every step mentioned below.
Step-3
Now, we need to add data inside the “dataset” folder, you can use any dataset, while the dataset I have used is from Kaggle and the data is regarding “skin cancer binary classification”. you can download the dataset from the link.
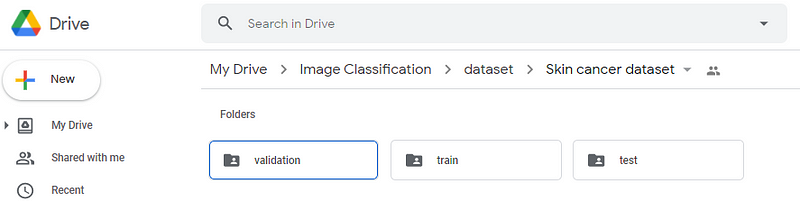
Step-4
Now, we need to make a notebook inside the “image classification” folder, because we will write code inside that file and also will be able to access the dataset from Google Drive.
You can open the “image classification” folder and then click
New->More->Google Colaboratory (process for making Google Colab files in folders)
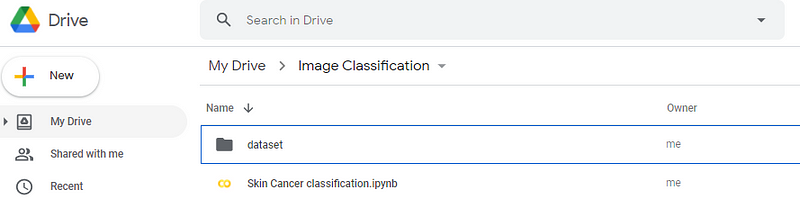
Now, we have set the dataset path and notebook file created. let start with a code for classifying cancer in the skin.
Step-5
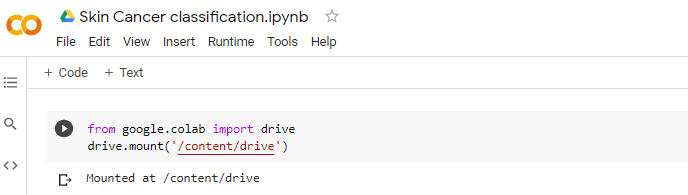
Open the Google-Colab file, Here we first need to mount Google Drive to access the dataset stored in the “image classification” folder. You can use the below-written code to mount Google Drive.
from google.colab import drivedrive.mount(‘/content/drive’)once you run the above code. It will ask you for an authorization code, once you add that, your google drive will be mounted.
Note: google drive and google colab account must be the same for authorization. If the google account changed then google drive will not mount.
Step-6
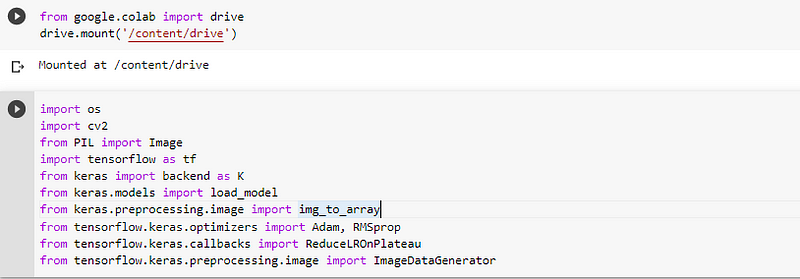
Now, we need to import libraries for dataset reading and CNN (convolutional neural network) model creation.
import osimport cv2from PIL import Imageimport tensorflow as tffrom keras import backend as Kfrom keras.models import load_modelfrom keras.preprocessing.image import img_to_arrayfrom tensorflow.keras.optimizers import Adam, RMSpropfrom tensorflow.keras.callbacks import ReduceLROnPlateaufrom tensorflow.keras.preprocessing.image import ImageDataGeneratorStep-7
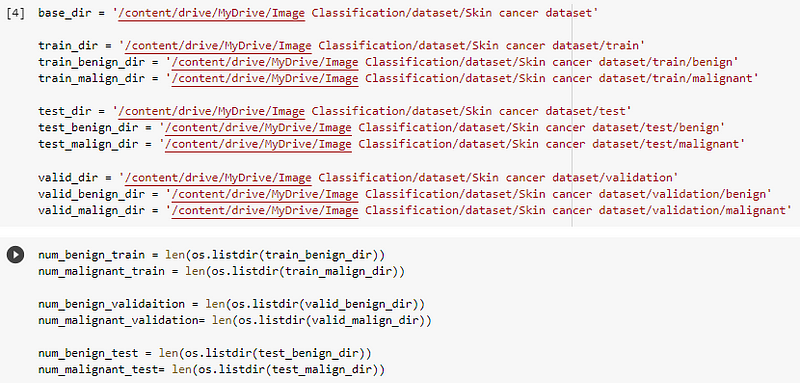
Now, we need to set the path of training, testing, and validation directories. You can use only (test and train folders), validation folder usage is not necessary.
base_dir = '/content/drive/MyDrive/Image Classification/dataset/Skin cancer dataset'train_dir = '/content/drive/MyDrive/Image Classification/dataset/Skin cancer dataset/train'train_benign_dir = '/content/drive/MyDrive/Image Classification/dataset/Skin cancer dataset/train/benign'train_malign_dir = '/content/drive/MyDrive/Image Classification/dataset/Skin cancer dataset/train/malignant'test_dir = '/content/drive/MyDrive/Image Classification/dataset/Skin cancer dataset/test'test_benign_dir = '/content/drive/MyDrive/Image Classification/dataset/Skin cancer dataset/test/benign'test_malign_dir = '/content/drive/MyDrive/Image Classification/dataset/Skin cancer dataset/test/malignant'valid_dir = '/content/drive/MyDrive/Image Classification/dataset/Skin cancer dataset/validation'valid_benign_dir = '/content/drive/MyDrive/Image Classification/dataset/Skin cancer dataset/validation/benign'valid_malign_dir = '/content/drive/MyDrive/Image Classification/dataset/Skin cancer dataset/validation/malignant'Note: you can select a path by clicking on a folder in the left vertical tab->drive->My Drive->Folder Path
Step-8
Now, we need data from these folders with the help of the OS library.
num_benign_train = len(os.listdir(train_benign_dir))num_malignant_train = len(os.listdir(train_malign_dir))num_benign_validaition = len(os.listdir(valid_benign_dir))num_malignant_validation= len(os.listdir(valid_malign_dir))num_benign_test = len(os.listdir(test_benign_dir))num_malignant_test= len(os.listdir(test_malign_dir))Until now, our Google Colab has four cells containing code as shown in the image below.
Step-9
Now, let’s take a look at, how many training and testing images we have in our dataset.
print("Total Training Benign Images",num_benign_train)print("Total Training Malignant Images",num_malignant_train)print("--")print("Total validation Benign Images",num_benign_validaition)print("Total validation Malignant Images",num_malignant_validation)print("--")print("Total Test Benign Images", num_benign_test)print("Total Test Malignant Images",num_malignant_test)total_train = num_benign_train+num_malignant_traintotal_validation = num_benign_validaition+num_malignant_validationtotal_test = num_benign_test+num_malignant_testprint("Total Training Images",total_train)print("--")print("Total Validation Images",total_validation)print("--")print("Total Testing Images",total_test)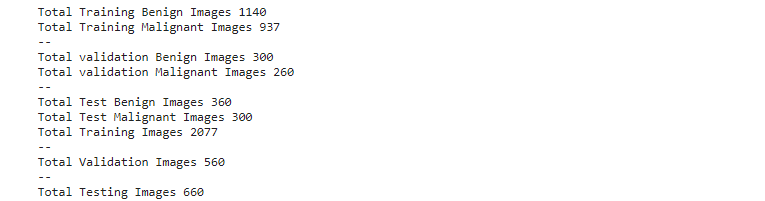
Step-10
Now, we need to set the size (height, width) of the images. This step is mostly needed when dataset images have different sizes, If all data have the same size, then we don’t need to set image size, but it’s preferable to use a small image size, as it will speed up the training process. I used an image shape of (240,240).
IMG_SHAPE = 240batch_size = 32Step-11
Now, we need to preprocess data (train, test, validation), which includes, rescaling and shuffling.
image_gen_train = ImageDataGenerator(rescale = 1./255)train_data_gen = image_gen_train.flow_from_directory(batch_size = batch_size,directory = train_dir,shuffle= True,target_size = (IMG_SHAPE,IMG_SHAPE),class_mode = 'binary')image_generator_validation = ImageDataGenerator(rescale=1./255)val_data_gen = image_generator_validation.flow_from_directory(batch_size=batch_size,directory=valid_dir,target_size=(IMG_SHAPE, IMG_SHAPE),class_mode='binary')image_gen_test = ImageDataGenerator(rescale=1./255)test_data_gen = image_gen_test.flow_from_directory(batch_size=batch_size,directory=test_dir,target_size=(IMG_SHAPE, IMG_SHAPE),class_mode='binary')Step-12
Before training, let's check class names, The image data generator will use folder names as class names.
train_data_gen.class_indices
Step-13
Now, we need to build our custom CNN (convolutional neural networks) architecture, which will include different (CNN, dropout, polling, flattened, dense) layers.
skin_classifier = tf.keras.Sequential([tf.keras.layers.Conv2D(16,(3,3),activation = tf.nn.relu,input_shape=(IMG_SHAPE,IMG_SHAPE, 3)),tf.keras.layers.MaxPooling2D(2,2),tf.keras.layers.Conv2D(32,(3,3),activation = tf.nn.relu),tf.keras.layers.MaxPooling2D(2,2),tf.keras.layers.Conv2D(64,(3,3),activation = tf.nn.relu),tf.keras.layers.MaxPooling2D(2,2),tf.keras.layers.Conv2D(128,(3,3),activation = tf.nn.relu),tf.keras.layers.MaxPooling2D(2,2),tf.keras.layers.Flatten(),tf.keras.layers.Dropout(0.5),tf.keras.layers.Dense(512,kernel_regularizer = tf.keras.regularizers.l2(0.001), activation = tf.nn.relu),tf.keras.layers.Dense(2,activation = tf.nn.sigmoid)])
Note: The above architecture is not taken from any pre-trained model, you can change this architecture according to your needs.
Step-14
Now, we need to compile our custom CNN (convolutional neural networks) model.
skin_classifier.compile(optimizer='adam', loss=tf.keras.losses.sparse_categorical_crossentropy, metrics=['acc'])Step-15
Let’s check the summary of the compiled model before we start our training process.
skin_classifier.summary()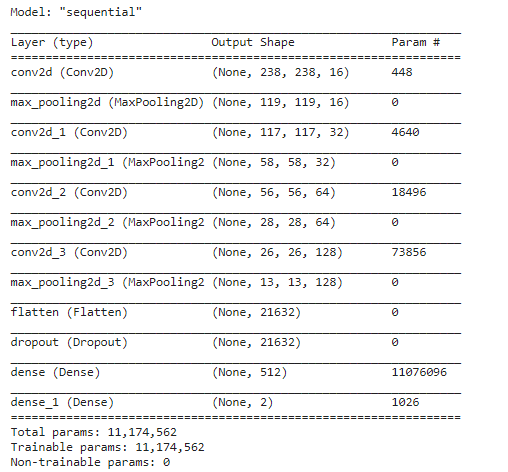
Step-16
Finally, we need to start our training process.
history_skin_classifier = skin_classifier.fit(train_data_gen,steps_per_epoch=(total_train//batch_size),epochs = 5,validation_data=val_data_gen,validation_steps=(total_validation//batch_size),batch_size = batch_size,verbose = 1)Note: I trained the model on five epochs. For better results, 50–60 epochs can be tested, in order to achieve 85% accuracy on testing data.
If, you followed all the above steps, then now, you can able to see epochs running after the step-16 code also shown in the below picture.

Step-17
Now, we can test our model on testing data.
results = skin_classifier.evaluate(test_data_gen,batch_size=batch_size)print("test_loss, test accuracy",results)Note: Accuracy on training and testing data, will not good on 5 epochs, but if you will train on large epochs then accuracy will be better. I only trained model for providing you a path to build and train your own custom CNN (convolutional neural networks) architecture.

Step-18
Now, we can save our model files (weights, JSON) in Google Drive for future classification of image data.
model_json = skin_classifier.to_json()with open("/content/drive/MyDrive/Image Classification/Skin_cancer_classification.json", "w") as json_file:json_file.write(model_json)skin_classifier.save("/content/drive/MyDrive/Image Classification/Skin_cancer_classification.h5")print("Saved model to disk")skin_classifier.save_weights("/content/drive/MyDrive/Image Classification/SCC-Weights.h5")Note: Congratulations, you have built your custom CNN (convolutional neural networks) architecture. This article only focuses on binary classification, while you can test on your own data (binary or multiclass classification).
If you have videos and want to develop a dataset from these videos, read my articles regarding these,
If you have data and want to label that for object detection, object tracking, etc., read my article regarding that,
About Me
- Muhammad Rizwan Munawar is a highly experienced professional with more than three years of work experience in Computer Vision and Software Development. He is working as a Computer Vision Engineer and has knowledge and expertise in different computer vision techniques including Object Detection, Object Tracking, Pose Estimation, Object Segmentation, Segment Anything, Python, and Sofware Development, Embedded Systems, Nvidia Embedded Devices. In his free time, he likes to play online games and enjoys his time sharing knowledge with the community through writing articles on Medium.
Please feel free to comment if you have any questions 🙂, If you like the article, Let’s connect on LinkedIn :) 👇


