
How to send mail using Gmail in Laravel 9?
In this tutorial we are going to learn how to send mail using Gmail in Laravel 9.
Sending mail become more important now a days. It can be used as a means of communication, informing a failure or an update, helping the team with instructions and guidelines to follow.

Email marketing is important for building relationships with prospects, leads, current customers, and even past customers because it gives you a chance to speak directly to them, in their inbox, at a time that is convenient for them.
So, Before starting;
In this tutorial we are using Gmail’s SMTP server to send mails.

Video
Also Read : How to Install Alpine.js in Laravel 9
Steps on how to send mail using Gmail in Laravel 9
- Step 1: Create fresh Laravel 9 Application
- Step 2: Gmail SMTP server configuration
- Step 3: Configure Google account settings
- Step 4: Creating Models and Migrations
- Step 5: Establish the database connection
- Step 6: Generate a Mailable
- Step 7: Creating Controllers
- Step 8: Create a Mailable
- Step 9: Write Markdown messages
- Step 10: Creating Routes
- Step 11: Test the application
- Step 12: Conclusion
Create fresh Laravel 9 Application
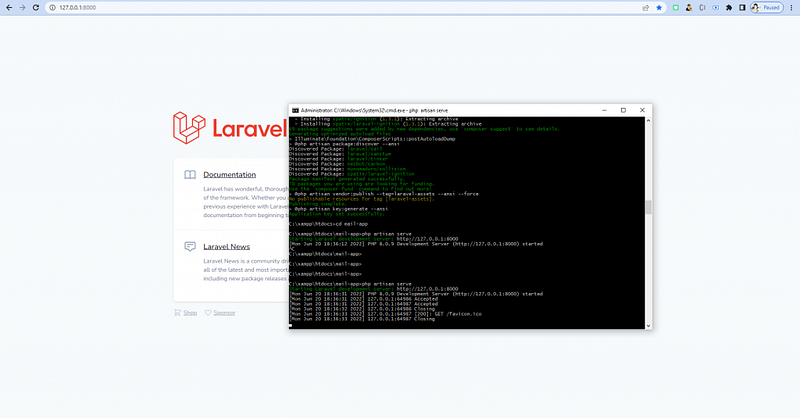
First, We will create a fresh Laravel 9 application. To create a Laravel application run the following command in terminal:
composer create-project laravel/laravel mail-app

cd mail-app

php artisan serve
“mail-app” is the Laravel application name.
Gmail SMTP server configuration
Now, We are going to configure mail server in Laravel. To configure the mail open a .env file which you can find in root of the project.
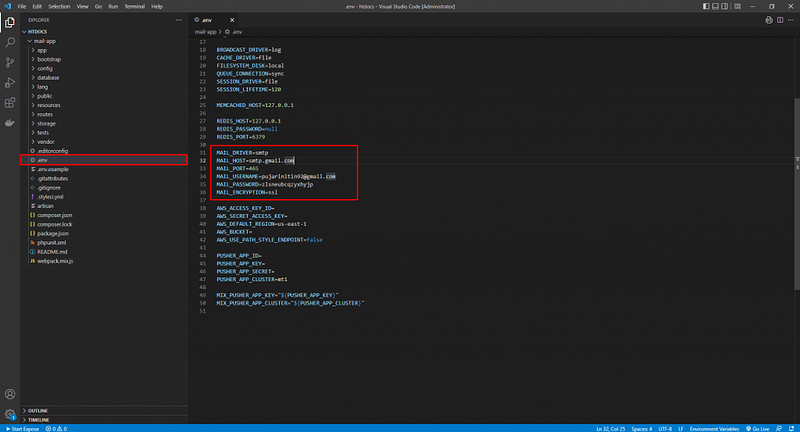
Now update the following variable as show below:
MAIL_DRIVER=smtp
MAIL_HOST=smtp.gmail.com
MAIL_PORT=465
MAIL_USERNAME=<Enter your Gmail address>
MAIL_PASSWORD=<Enter your Google App passwords>
MAIL_ENCRYPTION=ssl
Also Read : Autocomplete Search using jQuery UI in Laravel 9
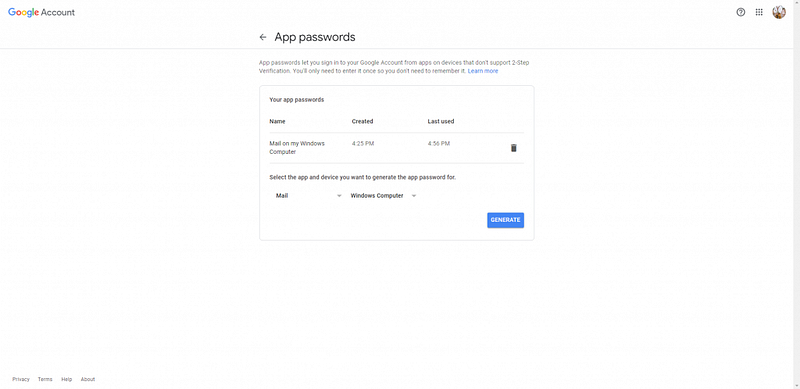
Configure Google account settings
Now configure your Google account settings visit Google Security Page.
- First, Turn on 2-Step Verification.
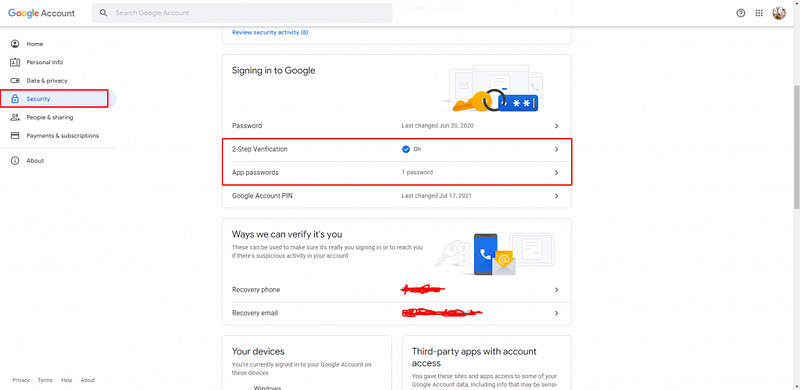
- Second, Create App passwords; use this password in .env for MAIL_PASSWORD.
Also Read : Laravel 9 Sorting Columns with Pagination
Creating Models and Migrations
Now we are going to create Subscriber Model with migration. Run the following command in terminal to create model and migration.
php artisan make:model Subscriber -mUpdate Subscriber.php by adding the code below to the top of the file, which enables Model mass assignment.
class Subscriber extends Model
{
    use HasFactory;
protected $guarded = [];
}Update the Subscriber migration table add the following code:
public function up()
{
    Schema::create('subscribers', function (Blueprint $table) {
        $table->id();
        $table->string('email');
        $table->timestamps();
    });
}
Establish the database connection
First create a database in phpmyadmin and then update the following in .env file.
DB_CONNECTION=mysql
DB_HOST=127.0.0.1
DB_PORT=3306
DB_DATABASE=<Enter your database name>
DB_USERNAME=<Enter your database username>
DB_PASSWORD=<Enter your database password>
Now clear the cache by following command.
php artisan config:cache
Next run the database migrations by running the following command:
php artisan migrateAlso Read : How to Create a Login Form in PHP Example
Generate a Mailable
We will be using a Markdown Mailable for this tutorial
Markdown Mailables contain a mix of Markdown and Blade templates that allow you to construct your email messages with prebuilt UI elements from Laravel.
To create the Mailable (app/Mail/Subscribe.php) and its corresponding view template (resources/views/emails/subscribers.blade.php), run the following Artisan command:
php artisan make:mail Subscribe --markdown=emails.subscribersCreating Controllers
Now, we are creating SubscriberController to create a controller follow the command in terminal
php artisan make:controller SubscriberControllerAdd the following code to SubscriberController can found in App\Http\Controllers\SubscriberController.php :
<?phpnamespace App\Http\Controllers;use App\Mail\Subscribe; use App\Models\Subscriber; use Illuminate\Http\JsonResponse; use Illuminate\Http\Request; use Illuminate\Support\Facades\Mail; use Illuminate\Support\Facades\Validator;
class SubscriberController extends Controller
{
    public function subscribe(Request $request){
$validator = Validator::make($request->all(),[
'email' => 'required|email|unique:subscribers'
]); if($validator->fails()){
return new JsonResponse(
[
'success' => false,
'message' => $validator->errors()
], 422
);
} $email = $request->all()['email']; $subscriber = Subscriber::create([
'email' => $email
]); if($subscriber){
Mail::to($email)->send(new Subscribe($email));
return new JsonResponse(
[
'success' => true,
'message' => "Thank you for subscribing to our email, please check your inbox"
], 200
);
}} }
Create a Mailable
Add the following code to App\Mail\Subscribe.php
<?phpnamespace App\Mail;use Illuminate\Bus\Queueable; use Illuminate\Contracts\Queue\ShouldQueue; use Illuminate\Mail\Mailable; use Illuminate\Queue\SerializesModels;
class Subscribe extends Mailable
{
use Queueable, SerializesModels; public $email; /**
* Create a new message instance.
*
* @return void
*/
public function __construct($email)
{
$this->email = $email;
} /**
* Build the message.
*
* @return $this
*/
public function build()
{
return $this->subject('Thank you for subscribing to our newsletter')
->markdown('emails.subscribers');
    }
}Also Read : How to Login with Google in PHP
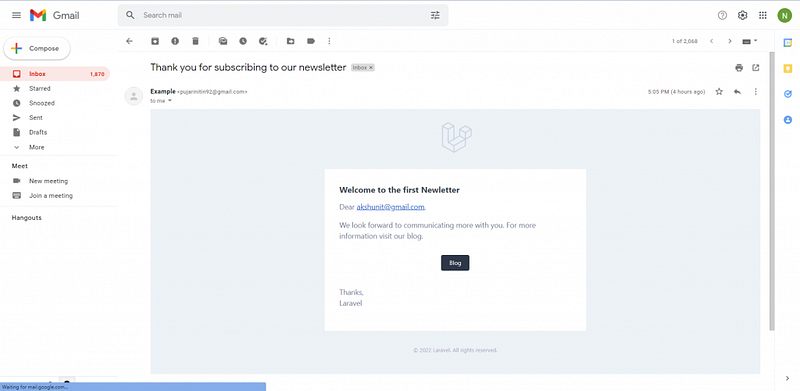
Write Markdown messages
Open the Blade file resources/views/emails/subscribers.blade.php which contains all the components of the message, and update it to match the code below.
Note: This is the Blade file being targeted in the markdown() method in the build() method of the Mailable class.
@component('mail::message')
# Welcome to the first Newletter
Dear {{$email}},We look forward to communicating more with you. For more information visit our blog.@component('mail::button', ['url' => 'https://laraveltuts.com'])
Blog
@endcomponentThanks,<br>
{{ config('app.name') }}
@endcomponentCreating Routes
Now we will create API routes for our application.
<?phpuse Illuminate\Http\Request; use Illuminate\Support\Facades\Route;
use App\Http\Controllers\SubscriberController;
/*
|--------------------------------------------------------------------------
| API Routes
|--------------------------------------------------------------------------
|
| Here is where you can register API routes for your application. These
| routes are loaded by the RouteServiceProvider within a group which
| is assigned the "api" middleware group. Enjoy building your API!
|
*/Route::middleware('auth:sanctum')->get('/user', function (Request $request) {
return $request->user();
});Route::post('/subscribe', [SubscriberController::class, 'subscribe']);Also Read : PHP Chunk File Upload using JavaScript
Test the application
Now its time to test the application. First run the command below to start the application.
php artisan serveRun the command below in the root directory of the project, replacing <subscriber email address> with the email address that needs to subscribe.
curl -X POST -F "email=<subscribers email address>" http://localhost:8000/api/subscribeIf success then its return:
{
    "success":true,
    "message":"Thank you for subscribing to our mail, please check your inbox"
}
If the request is unsuccessful because the email is already subscribed, you will see an output similar to the example below:
{
    "success":false,
    "message":{
        "email":[
            "The email has already been taken."
        ]
    }
}
Conclusion
In this tutorial, we had learned how to send mail using Gmail in Laravel 9? Hope this tutorial help you for sending the mail your clients or subscribers. If you have any trouble then you can contact me via the comment section below. Thank you!
Also Read : Install ReactJS in Laravel 9 Tutorial
Medium Articles:
- How to Login with Google in PHP
- Install ReactJS in Laravel 9 Tutorial
- Codeigniter 3 and AngularJS CRUD with Search and Pagination Tutorial
- PHP Chunk File Upload using JavaScript
June 21, 2022, Originally published at laraveltuts.com ・6 min read