
How To Run DreamBooth With Stable Diffusion Locally — A Step-By-Step Guide

In recent months, the rise of AI art generators has been nothing short of meteoric. These creative tools keep getting better and better at a rate that is hard to keep up with. Now, with Dreambooth, you can use your own photos to make these AI models even more personalized.
What Is DreamBooth?
DreamBooth is a tool to fine-tune an existing text-to-image model like Stable Diffusion using only a few of your own images.
It means that you can customize the AI model so that it can make an infinite number of variations of you, your dog, or your car.
Isn’t that interesting?
In this article, I am going to show you how you can run DreamBooth with Stable Diffusion on your local PC. Let’s go.
System Requirements
- Windows 10 or 11
- Nvidia GPU with at least 10 GB of VRAM
- At least 25 GB of local disk space
If your environment meets the above requirements, you can proceed with the steps.
Step #1. Download and install Stable Diffusion locally
Download the GitHub project from here and install it.
I won’t go into details on how to set up the environment. In case you need a step-by-step guide, you can see my recently published article below.
If the installation is successful, you should see this UI in your browser.

Step #2. Setup DreamBooth
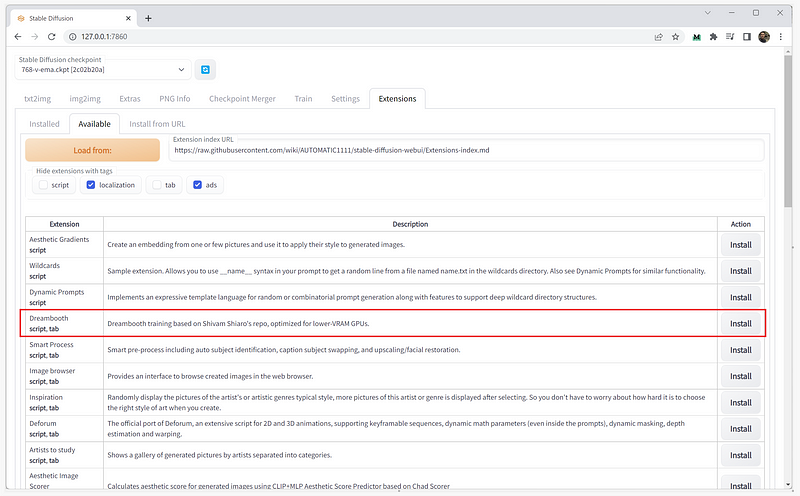
Under Extensions>Available, click on the “Load from:” button to show all the available extensions.
Find the DreamBooth extension and click on "Install."
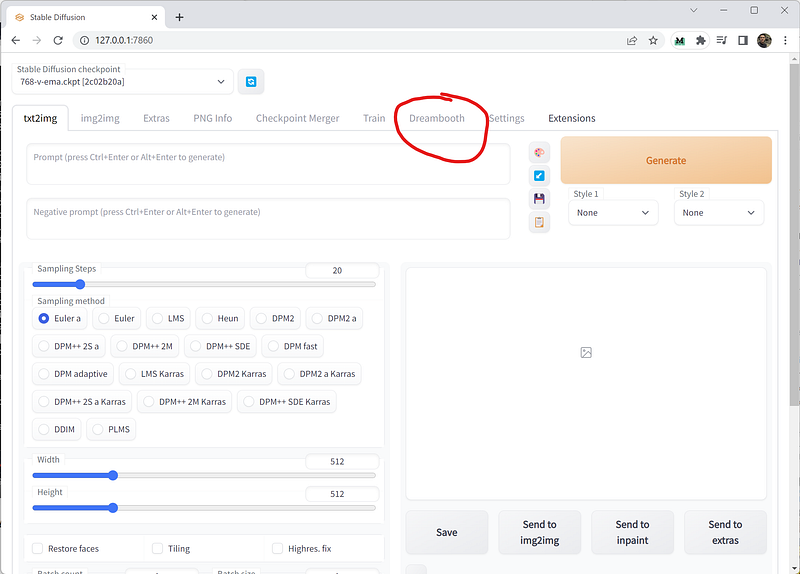
Next, go to the “Installed” tab and click on the “Apply and restart UI” button.

Your Web UI will restart, and you should be able to see the Dreambooth tab.
Step #3. Create A Model
Creating a model is pretty easy. In the “Create Model” tab, name your model, select your checkpoint file, and click on the "Create" button.

This might take a while—around 10 minutes in my case. Once the model is successfully created, you should see this message.

Step #4. Train The Model
Prepare the photos that will be used to train the model.
In this example, I grabbed some portraits of the incredible Jenna Ortega from Google.
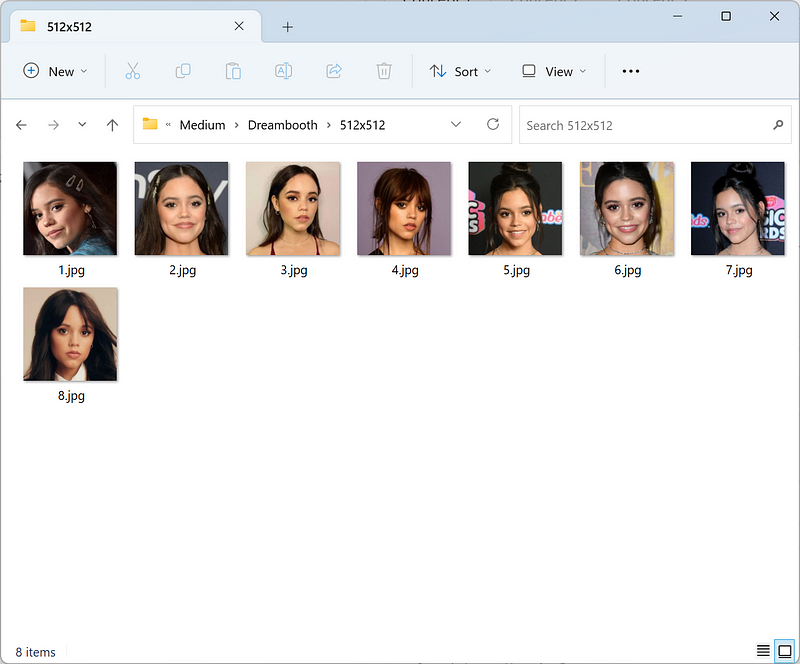
Take note that you need to resize the photos to 512x512 resolution. You can simply crop and resize images inside the default Windows Photos desktop app.
Copy the path of the image folder and paste it into the dataset directory.
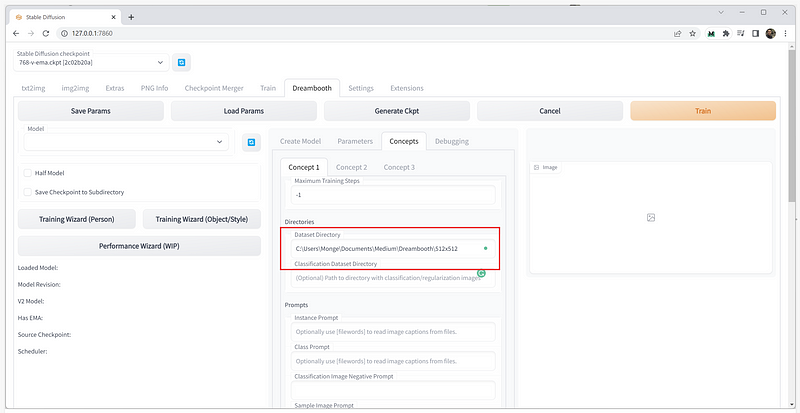
I am going to leave all the settings at default for now. Some adjustments to the parameters are required to achieve better results. The details of that are for another story.
Click on the "Train" button to start training the model. Again, this step will take some time, depending on the specs of your GPU.
Step #5. Generate Your Images
This is the final step.
Load the checkpoint file on the upper left menu and start making your AI images. Here’s an example:

Pretty cool, right? Here are some more:
Prompt: A girl as a game of thrones character

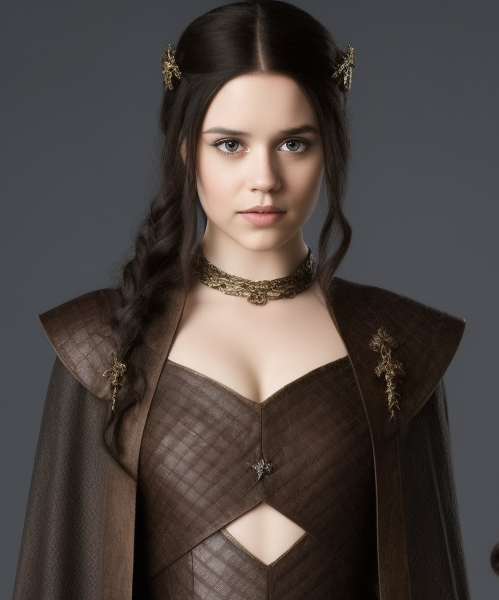
Ain’t she gorgeous? At first glance, you wouldn’t even think that these images are not real.
Final Thoughts
As someone who’s been following AI progress in the creative space since early 2022, I’m thrilled to see the emergence of new AI tools like Dreambooth.
The possibilities with this technology are virtually limitless. You can use it to create avatars, virtual lookalikes, and even your own digital doubles.
I’m excited to see what this technology can do in the coming years. I will keep an eye on the progress, try them out, write my thoughts and results, and publish them all here on Medium.


