
How to Prepare Artwork for a Generative NFT Programmer
Based on dozens of inquiries I’ve received lately.
Wow, thanks to everyone for contacting me lately about generative NFT programming services. It’s such an exciting time for NFTs, and for me personally and professionally. Ever since I launched NFTuxedoCats.com, I’ve been inundated with activity, fielding inquiries from artists and NFT teams in need of developers. (Hopefully, you’ve read my article on generative programming services.)
The question I get the most, from those nearly ready to have their generative set (of 1,000, 5,000, or 10,000, usually) NFTs created as graphics is this: How do you want the artwork supplied?
And so, for this article, I’m going to answer that question. But, keep in mind that this is MY own personal answer. I’m not sure what others may require, so be sure to ask your own generative programmer if you’re not using me!
Adobe Photoshop PSD File
As a web developer, Photoshop is a near daily go-to for me. If I’m not using it for producing graphics for the web, then I’m in there looking at designers’ specs for web sites I’m building. It’s just a fantastic tool — not only for design, but (it turns out) for communication as well.
Initial Setup
I’m going to write a whole other article on dimensions of generative NFTs. But for now, I’ll just offer a quick guideline:
- Shape: You can of course make your NFTs square or rectangular, as we’re talking about graphics here. For some reason, square ones seem to be the most popular (though my NFTuxedoCats were rectangular, portrait oriented). My recommendation: square.
- Minimum size: There’s no minimum size in terms of dimension. But, for practical purposes, I’d say the smallest you’d want to go would be 500px square.
- Maximum size: Practically speaking, I think there is a max. And that goes especially for generative graphics, as we’ll be producing 10,000 of them and the file sizes alone, once you have 10k of anything, is cumbersome. Also, most users are going to appreciate your graphics on-screen only, even if making them giant may please a few out there. For me, I’d say around 2000px square would be a goal max. I’m open to discussions, though.
- Ideal size: For now, I’d say 750px square to 1200px square should serve most purposes for generative art.
- DPI: Please set this at 72dpi.
I’ll add more information as I make various determinations. Thanks!
Working with Layers
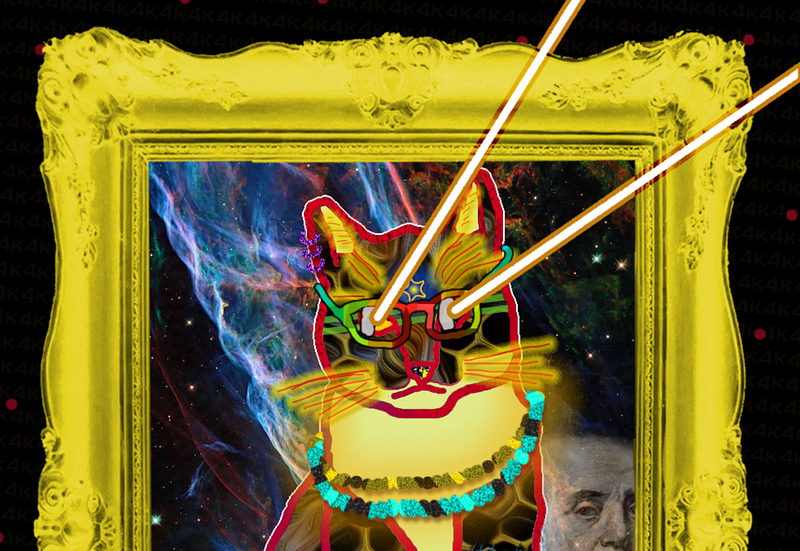
For generative NFT projects, Photoshop is absolutely a perfect tool. And that’s mostly thanks to the LAYERS it uses. So, let’s look at a hypothetical project. Imaging we’re doing a character that will have differing (1) backgrounds, (2) face traits, (3) eye traits, (4) hair traits, (5) hat traits, and (6) other extras that appear on the page. Your Photoshop layers could be organized into folders like this:
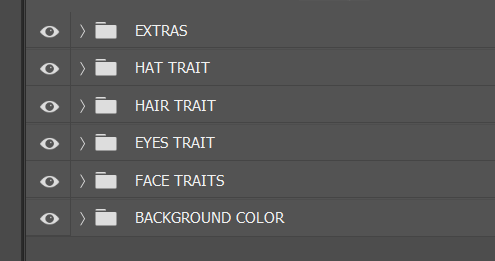
What’s cool about this (aside from the organization) is that layers are, by definition, built atop one another. So, in the above setup, we know that the background color is going to be what’s on the bottom (behind everything else), followed by the face, eyes, hair, hat, and any extras of this setup.
Clearly a FACE would lie “below” things like eyes and hair, because eyes and hair would be things we place atop the generic face. (Does that make sense?)
Similarly, we see that HAT is above the HAIR one — because hats would be drawn atop any hair. (And, of course, you can also have rules like “only 10% of characters should ever have a hat.”)
And so the reason Photoshop PSDs are so great is that the layer setup communicates a TON of information to the programmer. Without these layers, the programmer would need to spend a ton of time figuring all of this out. (Here, it’s a simple example, but that’s not always the case!)
Anyway, within each layer folder, you’d place your variations. For example, let’s expand the HAIR trait folder group and see what all might be available for our program to select:
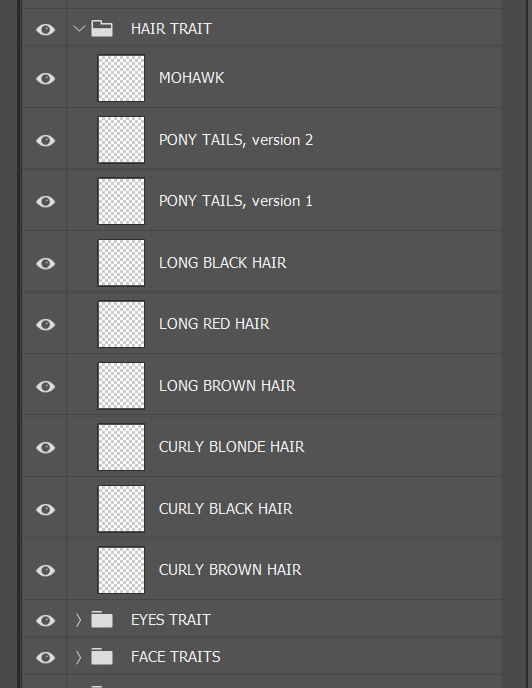
[[[ UPDATE: After doing these projects for several, here’s a tip that’s super helpful, for both you and me: Within the folders, arrange your individual layer items alphabetically. In the above example, it would go top to bottom Curly Black Hair, Curly Blonde Hair, Curly Brown Hair, Long Black Hair, etc. And then, in your rarity table, also group individual trait items alphabetically. This makes them easy to match up visually when I’m spot checking to ensure all artwork and traits match up from the PSD to the spreadsheet. ]]]
Within the folder, ordering isn’t always so important because, typically, we would only have ONE hair style. Also, keep in mind that, no matter how many variations you include, we can also introduce logic dictating how rare a specific one should be.
By default, in the above example, there are 9 variations, and we would just tell the computer, “pick any one of the nine at random.” And that’s fine, and works well. But, you can also let me know of any special rules you’d like. For example, you might give me a list like this:
- Mohawk (5%)
- Pony Tails, v2 (13%)
- Pony Tails, v1 (10%)
- Long Black Hair (14%)
- Long Red Hair (5%)
- Long Brown Hair (13%)
- Curly Blonde Hair (6%)
- Curly Black Hair (15%)
- Curly Brown Hair (19%)
And if that’s the case, no problem: I’ll code to those specs! (This is handy if you want to introduce various rarities, which most teams do.)
To further the example here, I’ve included an “extras” layer group, for things that would go atop the whole graphic.
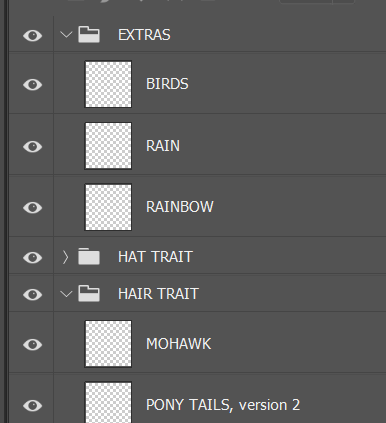
I suppose we could have put birds and rainbows in the background, just as logically. But here, they’re on the top-most layer and would be “above” any other graphical elements on the page. (Sometimes they might live in the margins, simply “above” the background visually. Other times, they may be “above” the main character.)
Anyway, that’s how I personally prefer graphic files to be submitted to me for programming. And this also gives your artist plenty of ability to organize as he/she sees fit, and to experiment by turning various combinations of layers on and off as the art is being done. It also allows your artist to position elements exactly as desired (as opposed to, say, providing me with a graphic of some glasses and simply saying “place these atop the face.”)
The above will communicate about 80% of what I’ll need to know for programming purposes. The rest would be various special logic rules that you may want to also include (e.g., “the rain trait can only show up if the character has a hat” — things like that.) Basically, though, if you can think up a rule, I can probably code it into existence in your generative NFT set!
Speaking of logical rules and whatnot, here’s how you can go about setting up your rarity table:
… and you’ll want to plan the number of properties and traits correctly:
… and here’s just some more general information about my own generative coding services:


