
How To Get Started With Azure
A step-by-step Guide for Absolute Beginner
Cloud Computing is everywhere and is the most demanding and sought-after skill that companies are looking for. Most companies either have plans to migrate to the cloud from on-prem or already migrated their workloads. There is a shortage of Cloud Engineers and this is a great time to enter into cloud computing. We have a few cloud providers out there such as GCP, AWS, Azure, OCI, etc.
Azure is a cloud computing platform from Microsoft. Microsoft Azure lets you create future-ready innovations across all of your environments using the newest technologies. You can even sign up for an Azure free account and get popular services free for 12 months. In this post, we will see how we can see how to get started with Microsoft Azure step by step.
- Creating an Account
- Azure Hierarchy
- Understand Management Groups and Subscriptions
- Understand Resource Groups
- Understand Directories
- Creating Users and Groups
- Role Assignments
- Managing Resources With Azure Portal
- What is Azure CLI
- Managing Resources with Azure CLI
- What is Azure Cloud Shell
- Managing Resources with Cloud Shell
- What is Powershell
- Managing Resources with Cloud Shell
- What is Azure SDK
- Managing Resources with Azure SDK
- Creating a static website
- Managing Resources With Terraform
- Other Example Projects
- Summary
- Conclusion
Creating an Account
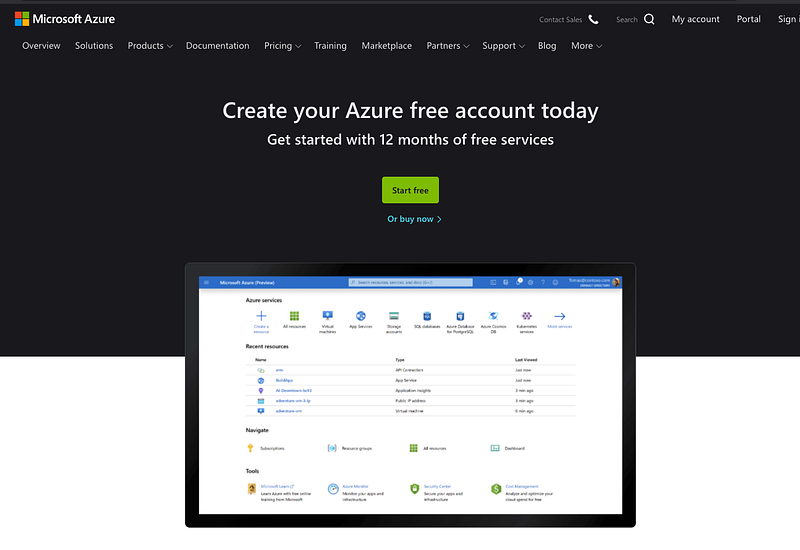
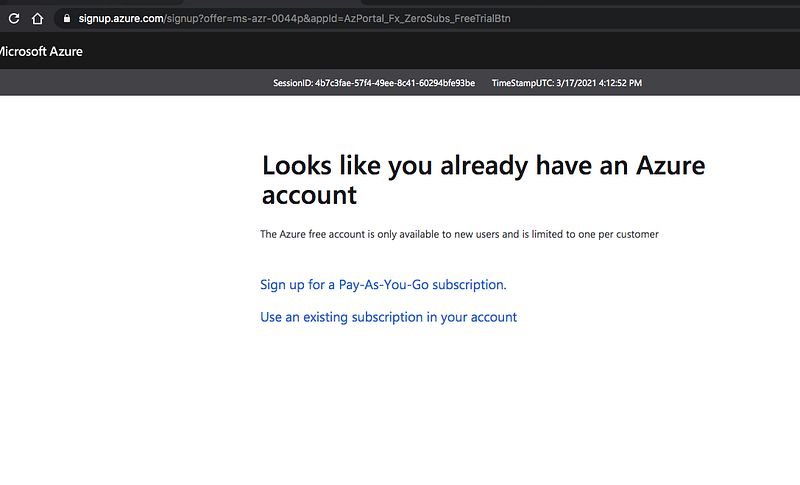
Microsoft offers a free account and you can get popular services free for 12 months. Let’s start with creating an Azure-free account. Go to this link to create an account.
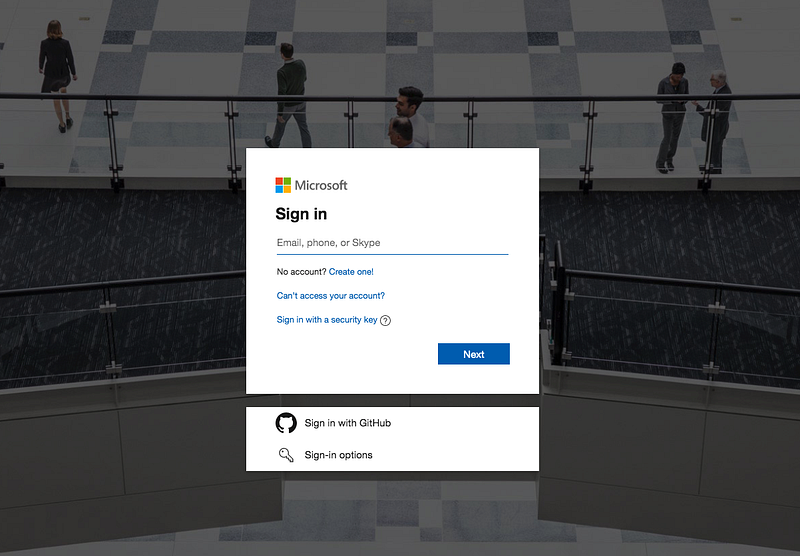
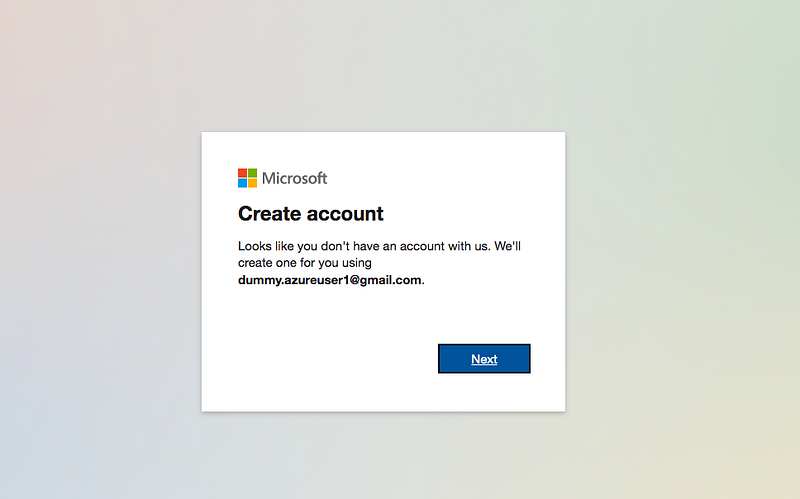
You can click on the create and login with your Microsoft account or you can create one.
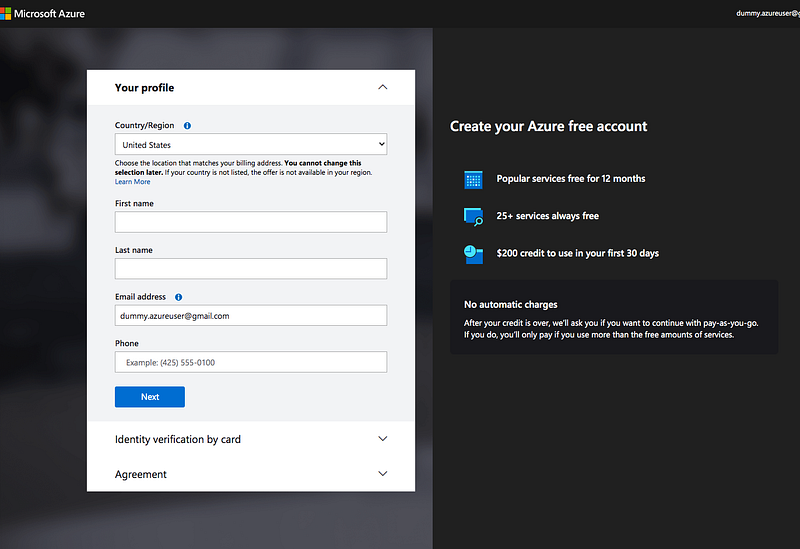
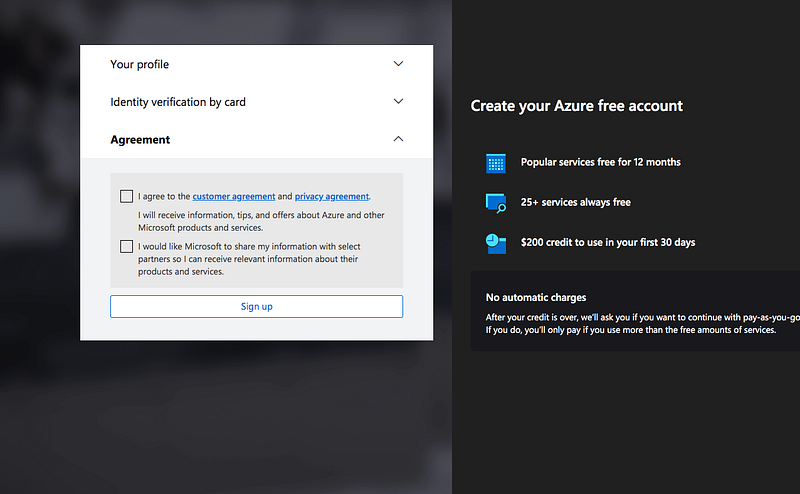
If you are creating the account you are asked to verify your account with the code. Once you provide the code and set up the account, it will take you to the profile page where you enter your profile information, and card details for the verification and agreement as below.
Once you provide all this information and you can check the agreement checkboxes and hit the sign-up button.
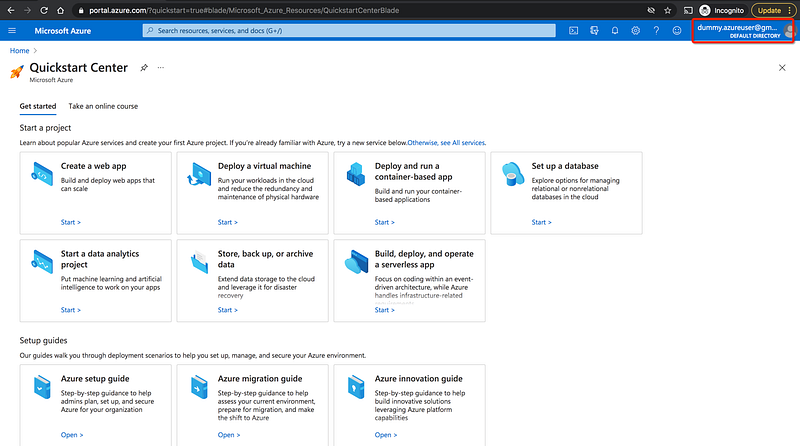
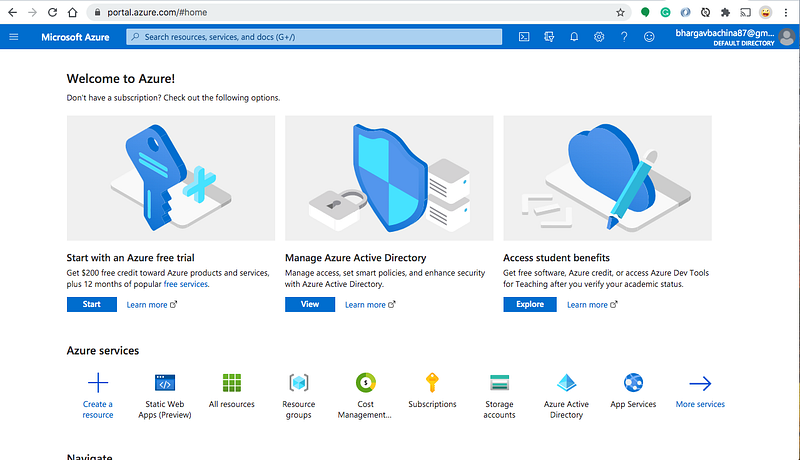
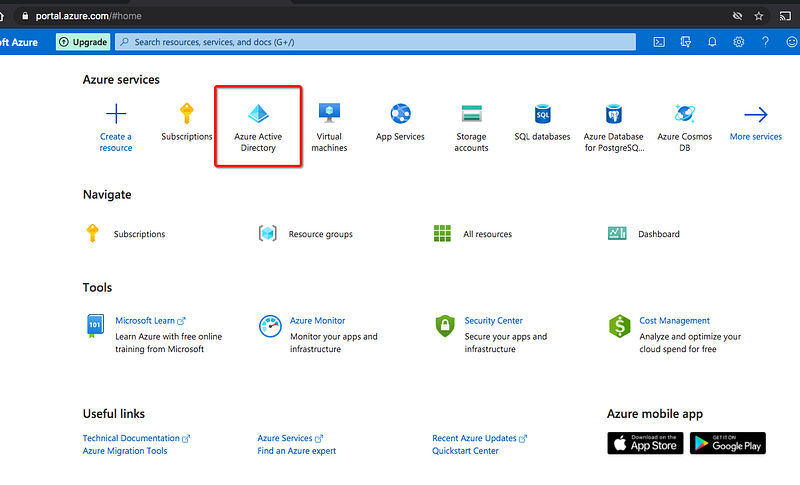
Once done, you can see the below page and click on the Build in the portal button and you will be redirected to the portal dashboard as below.

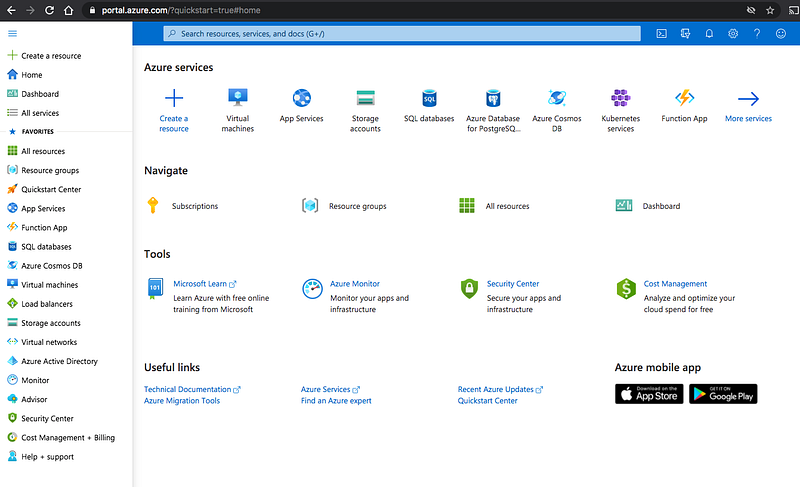
When you click on the home and you can see the commonly used resource's dashboard and you can navigate through on the left blade as well.
Azure Hierarchy
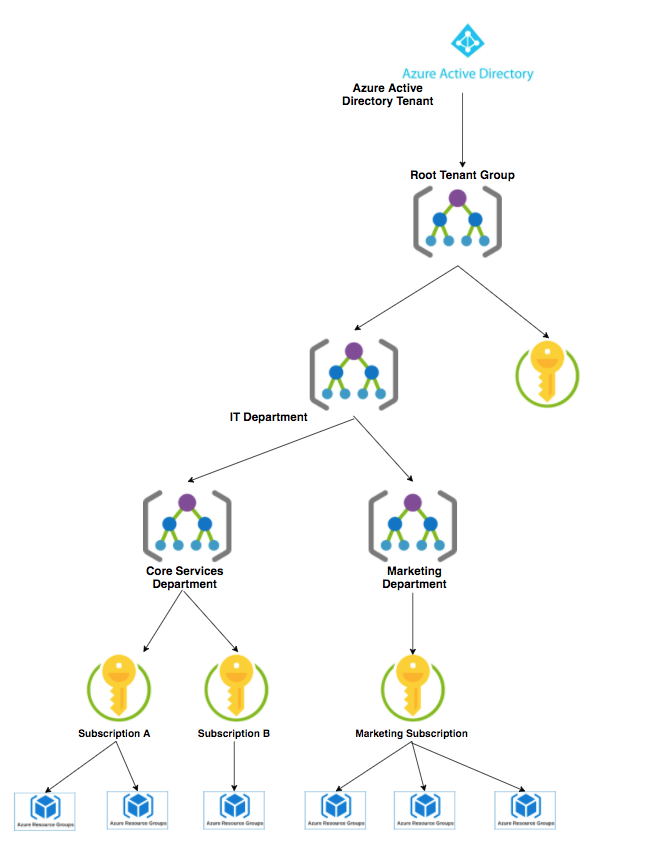
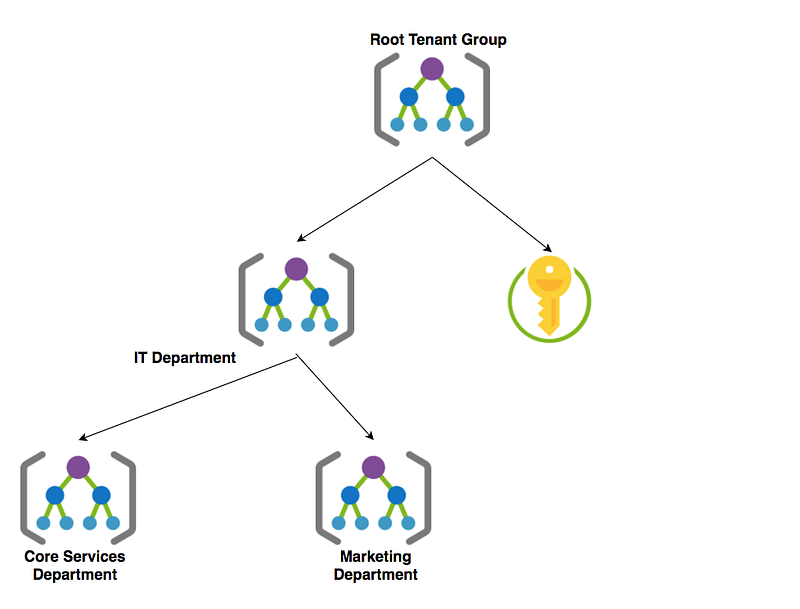
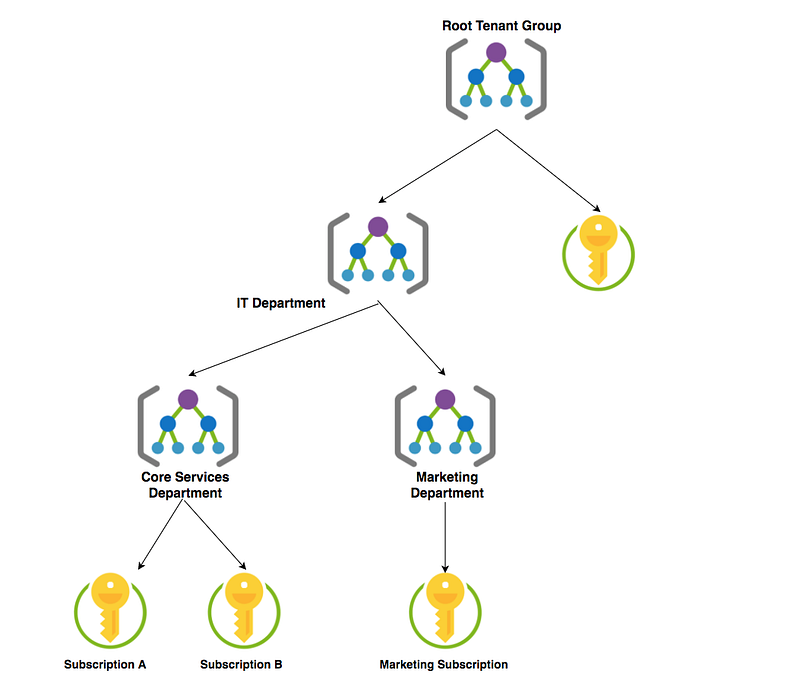
Let’s understand the Hierarchy. First, we need to have a tenant/ Azure Active Directory and every tenant has a root management group called Root Tenant Group. If you don’t create any management groups further all the subscriptions are tied to this root management group.
You can create management groups and subscriptions under the root management group. You can create child management groups under the management group as well based on your need.
Subscriptions can be created under a management group and each management group can have multiple subscriptions as long as these subscriptions belong to the same tenant. An Azure subscription has a trust relationship with Azure Active Directory (Azure AD). A subscription trusts Azure AD to authenticate users, services, and devices. Multiple subscriptions can trust the same Azure AD directory. Each subscription can only trust a single directory.
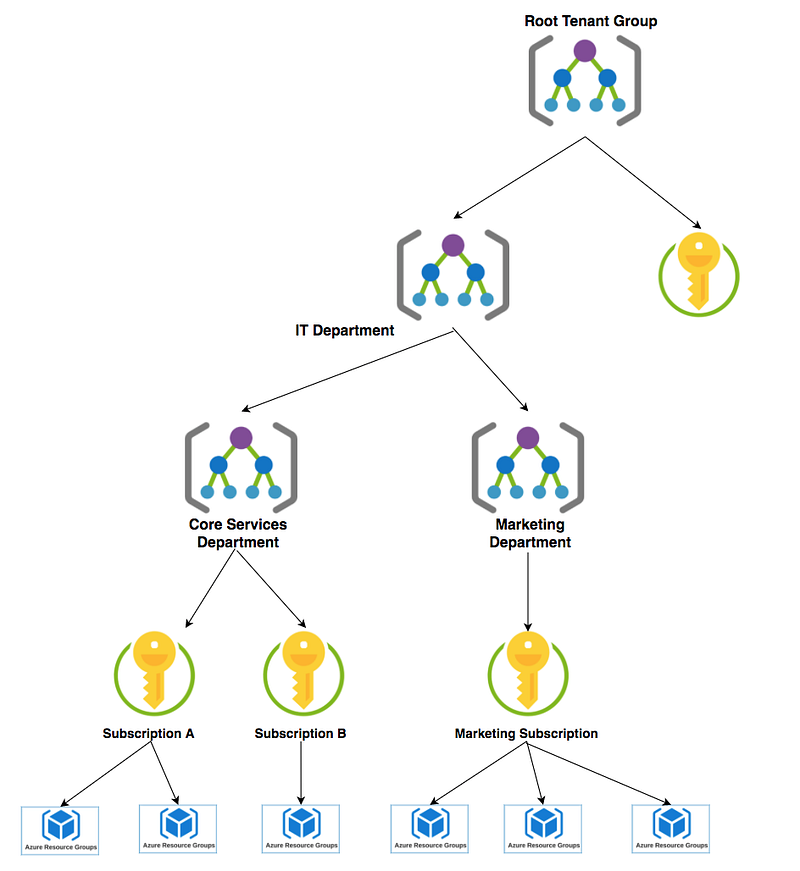
You can create resource groups under each subscription and you can create as many as you want based on your need.
Understand Management Groups and Subscriptions
Management Groups are nothing but groups where you can manage multiple subscriptions. Management groups are containers that help you manage access, policy, and compliance across multiple subscriptions. Create these containers to build an effective and efficient hierarchy that can be used with Azure Policy and Azure Role-Based Access Controls.
According to Microsoft Docs, If your organization has many subscriptions, you may need a way to efficiently manage access, policies, and compliance for those subscriptions. Azure management groups provide a level of scope above subscriptions. You organize subscriptions into containers called “management groups” and apply your governance conditions to the management groups. All subscriptions within a management group automatically inherit the conditions applied to the management group.
For example, every account has a Root Management Group called Root Tenant Group and you can create other management groups (Ex: IT Department) and subscriptions under it. You can even create child Management Groups (Ex: Core Services Department, Marketing Department).
Subscriptions are nothing but the entity that group all of the resources that you use under one billing account.
According to the Microsoft website, A subscription is an agreement with Microsoft to use one or more Microsoft cloud platforms or services, for which charges accrue based on either a per-user license fee or on cloud-based resource consumption.
Organizations can have multiple subscriptions. User accounts for all of Microsoft’s cloud offerings are stored in an Azure Active Directory (Azure AD) tenant, which contains user accounts and groups. User accounts are stored in an Azure AD tenant.
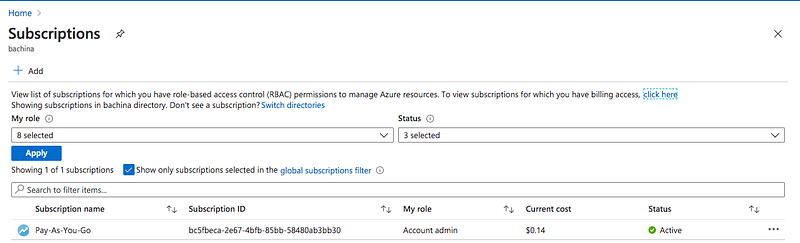
You have created an account and clicked on the subscriptions in the dashboard and you can see one subscription which is free tier one.
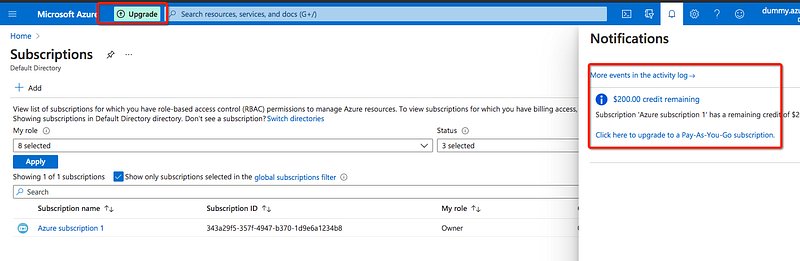
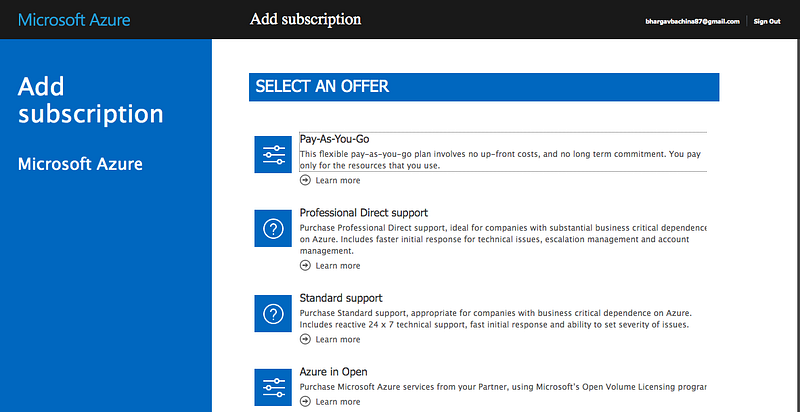
To create a subscription, you need to log in to your account and click on the subscriptions and add one. Use this method if you want to upgrade from a free tier subscription.
You need to create a subscription for your account. The most common is Pay As You Go subscription.
You need a subscription to be associated with your tenant so that all the cost is billed to this subscription. One management group can contain multiple subscriptions as long as these subscriptions belong to the same tenant. Here is the example Hierarchy.
Understand Resource Groups
Resource groups are nothing but groups that you can put your logically related resources into.
According to Microsoft Docs, A resource group is a container that holds related resources for an Azure solution. The resource group can include all the resources for the solution, or only those resources that you want to manage as a group. You decide how you want to allocate resources to resource groups based on what makes the most sense for your organization.
For example, if you are working on an application in the core services team you can create a resource group to put all the resources that belong to this application. Let’s add the resource groups to the subscriptions below. You can have as many resource groups as you want for each subscription based on your need.
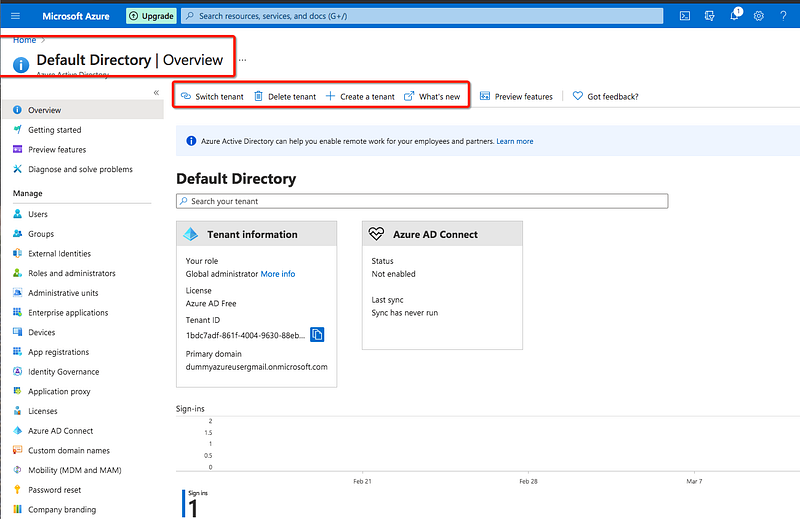
Understand Directories
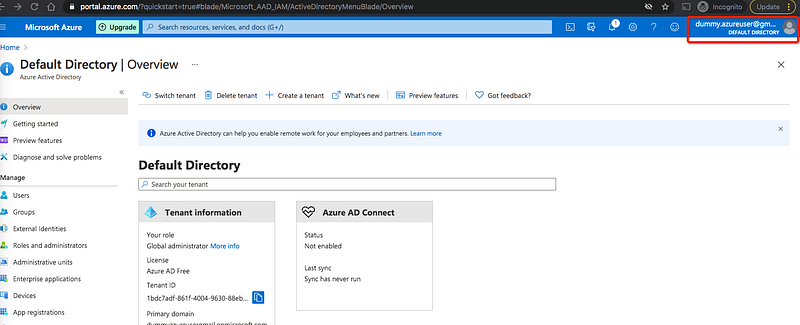
User accounts for all of Microsoft’s cloud offerings are stored in an Azure Active Directory (Azure AD) tenant, which contains user accounts and groups. User accounts are stored in an Azure AD tenant. When you first create an account, the default directory is created for you, and your subscription is associated with it.
You can see that on the top right side of the Azure portal.
If you can click on the switch directory you won’t see any other directories. Let’s create one by going to the Azure Active Directory resource.
Click on the Create tenant and select the Azure Active Directory on the next screen.
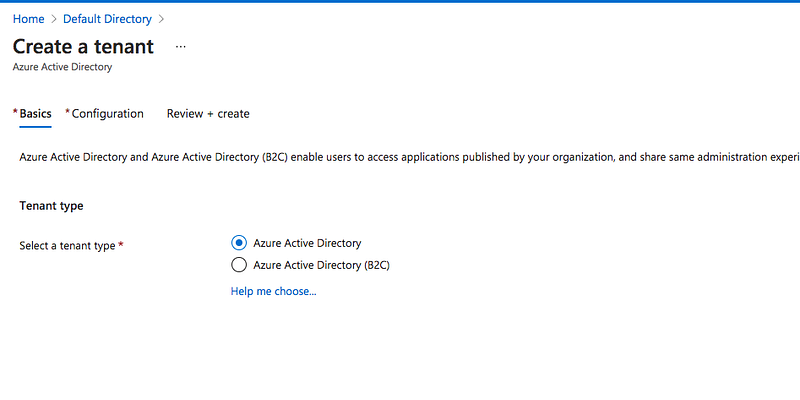
You can give your organization details and click on the create on the next screen.

It will take a few minutes to create one.

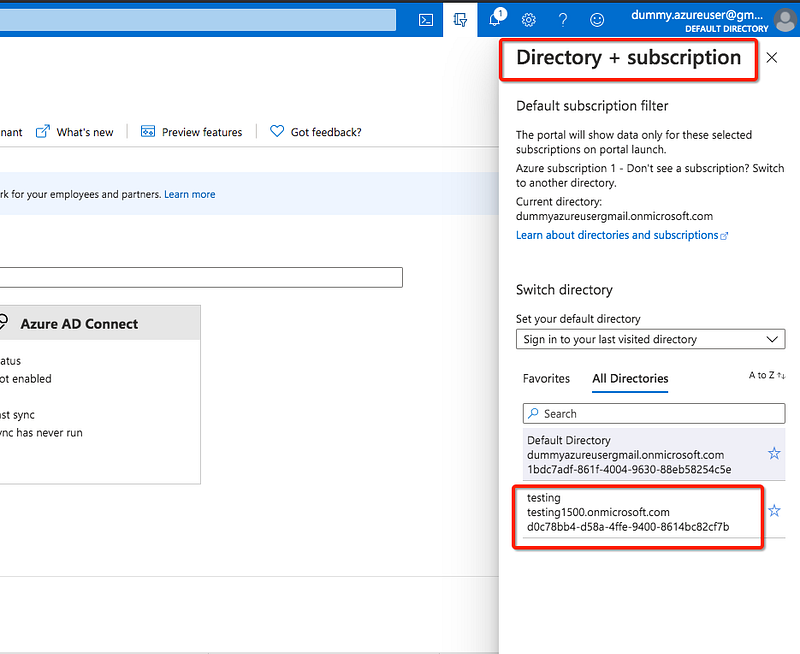
Once the tenant is created and you click on the top right corner you can see the tenant there. Always remember directory and subscription go together and you can’t create or manage any resource without the subscription.
If you try to create any resource you will be asked to take the subscription.
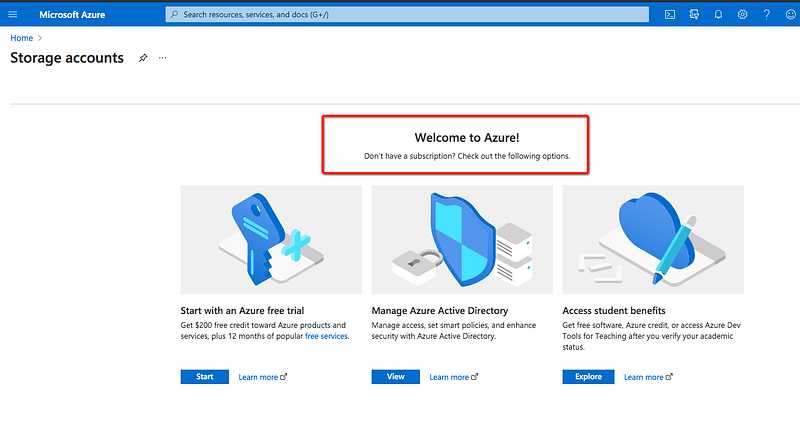
When you click on the start button, you will have two options: Sign up for a new subscription or use an existing one if you have any subscriptions already in your account.
Creating Users and Groups
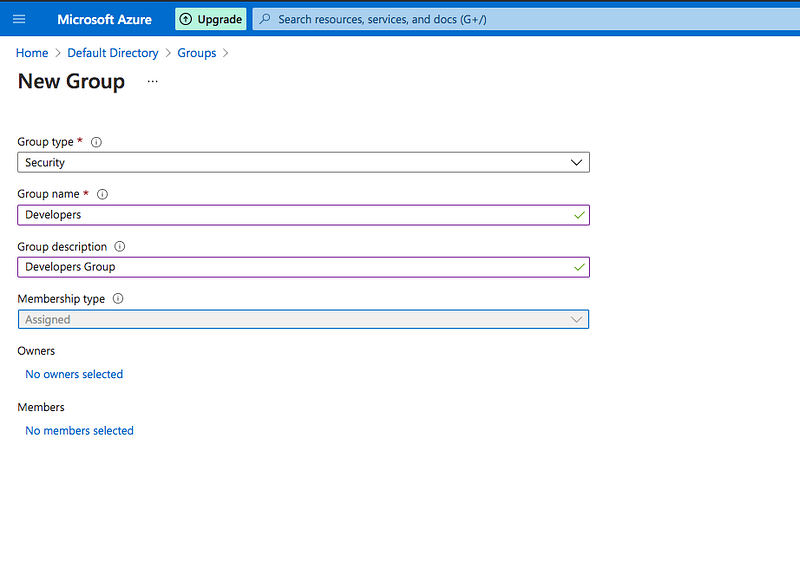
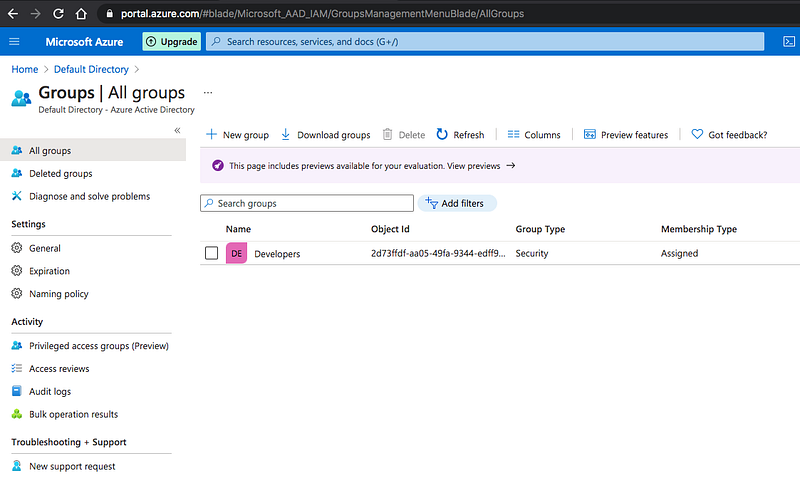
You can create users and groups in the Azure Active Directory. Click on the Azure AD and create a group.
Click on the groups and create a group by giving basic details.
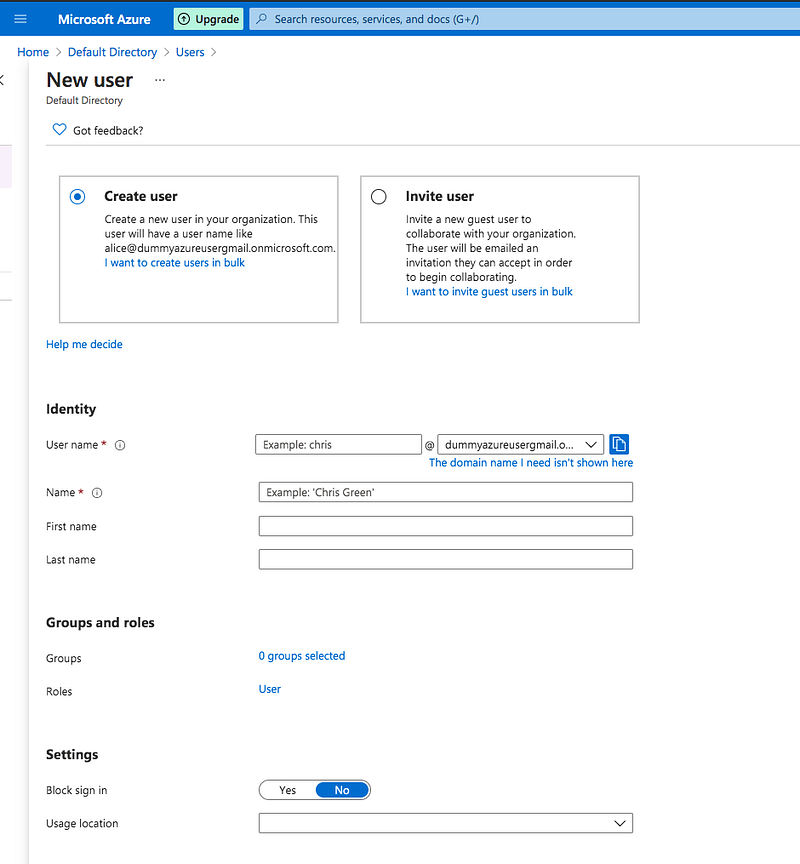
Let’s click on the users on the left blade in the Azure Active Directory and create a new user.
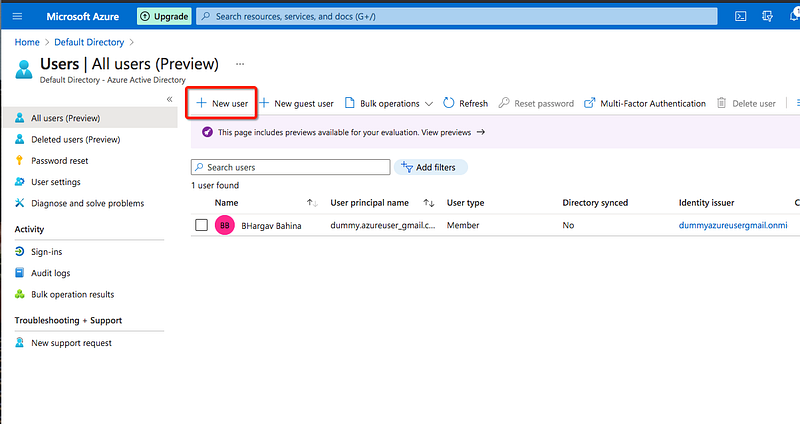
There are two ways you could create a user: one is creating a user and another one is inviting a user.
Let’s invite a user by providing basic details such as email, firstName, lastName, etc, and add this user to the group Developers we just created above.
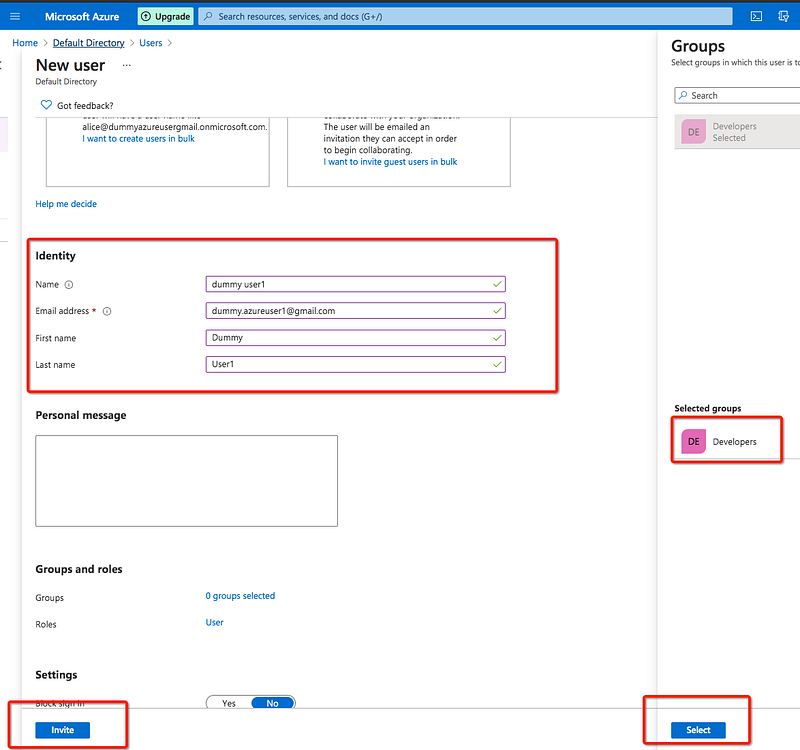
You can see the user listed in the user section after we sent the invite and you can see the difference in the columns user type and creation type.

You will get the email to accept the invitation as below.
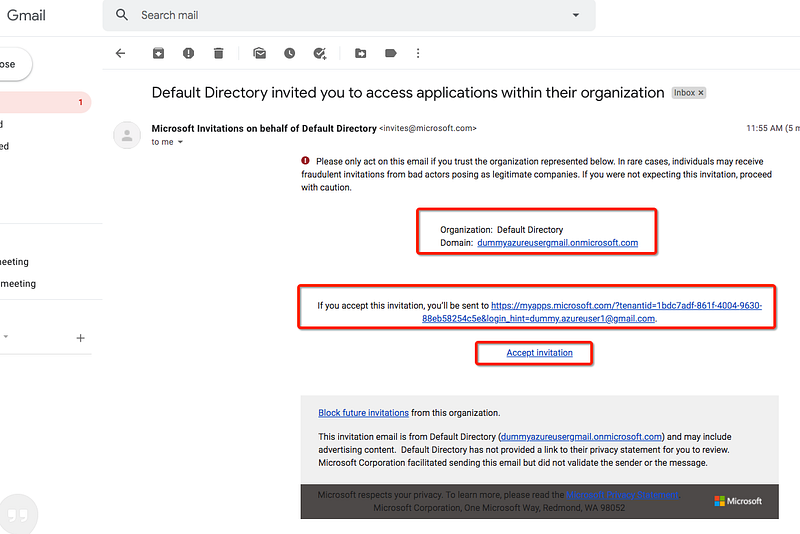
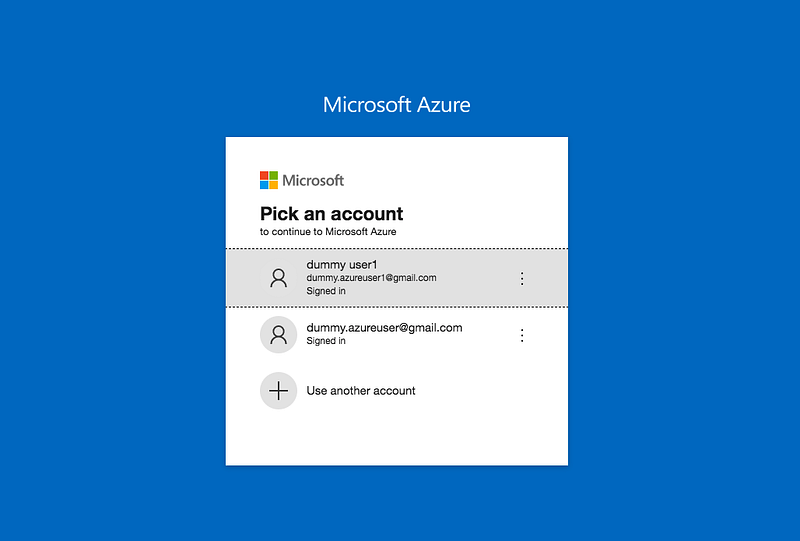
Once you accept the invitation and you will be redirected to create an account.
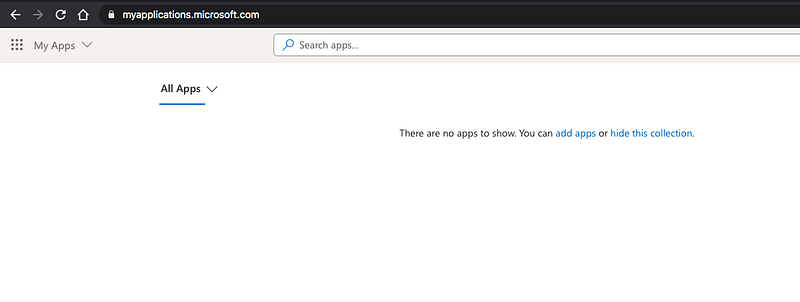
Once you created an account you will see my apps page as below. If you click on the user icon on the top right you can see the default directory click on it and you will see the login page.
You are logged in now with a different user that the invitation is sent. You need to assign this user or this group to any subscription or resource groups.

Role Assignments
If you are new to the user it’s kind of confusing to understand the roles. Go through this article to understand it better.
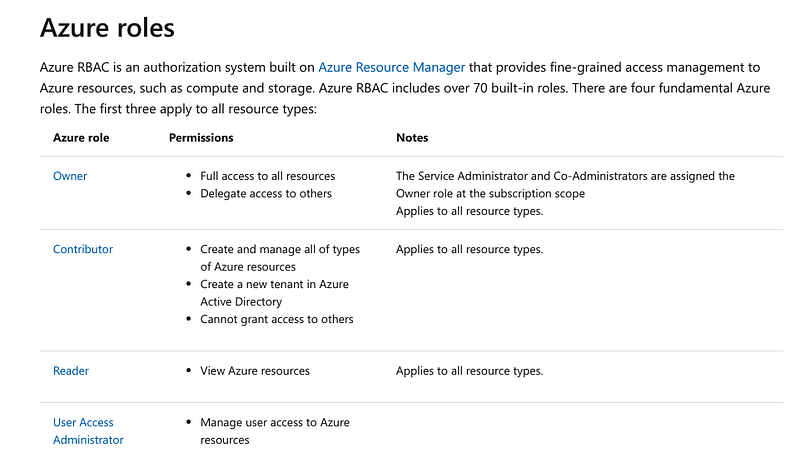
https://docs.microsoft.com/en-us/azure/role-based-access-control/rbac-and-directory-admin-rolesTo better understand roles in Azure, it helps to know some of the histories. When Azure was initially released, access to resources was managed with just three administrator roles: Account Administrator, Service Administrator, and Co-Administrator. Later, Azure role-based access control (Azure RBAC) was added. Azure RBAC is a newer authorization system that provides fine-grained access management to Azure resources. Azure RBAC includes many built-in roles, can be assigned at different scopes and allows you to create your own custom roles. To manage resources in Azure AD, such as users, groups, and domains, there are several Azure AD roles.
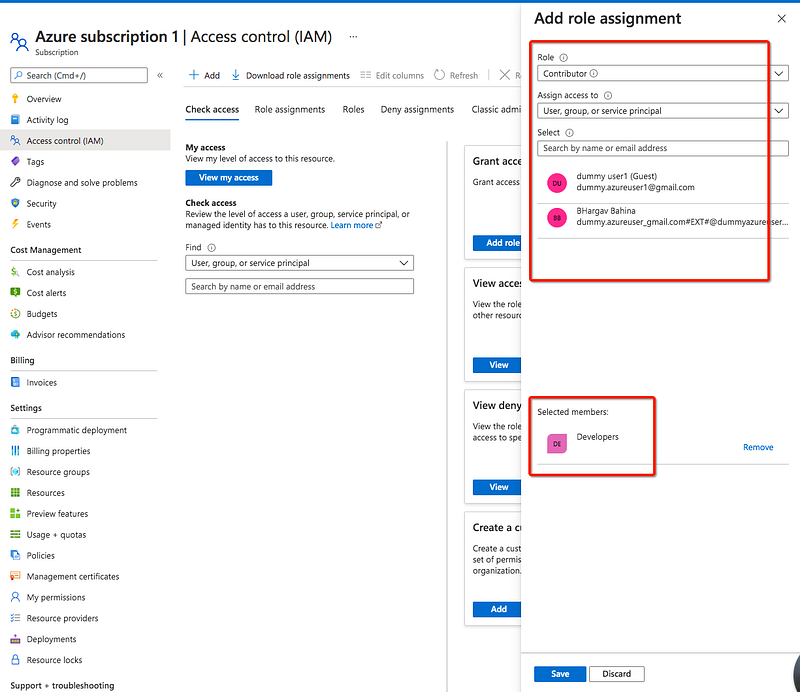
We are going to create Azure RBAC roles and there are three roles as defined below.
Let’s select the subscription and go to the Access control.
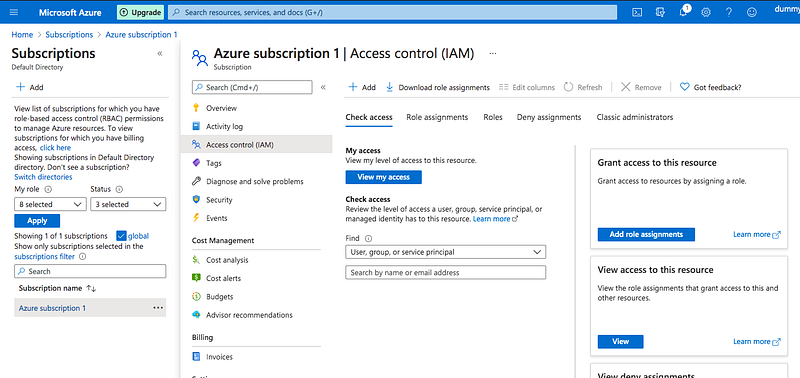
We have created groups and a user above. let's add role assignment to the Developers group. If you log in with that user now you can see the subscription under the subscriptions section.
Managing Resources With Azure Portal
Managing resources using the Azure portal is the easiest and straightforward approach. As long as you have a subscription and you can just log in and select any resource you want to create.
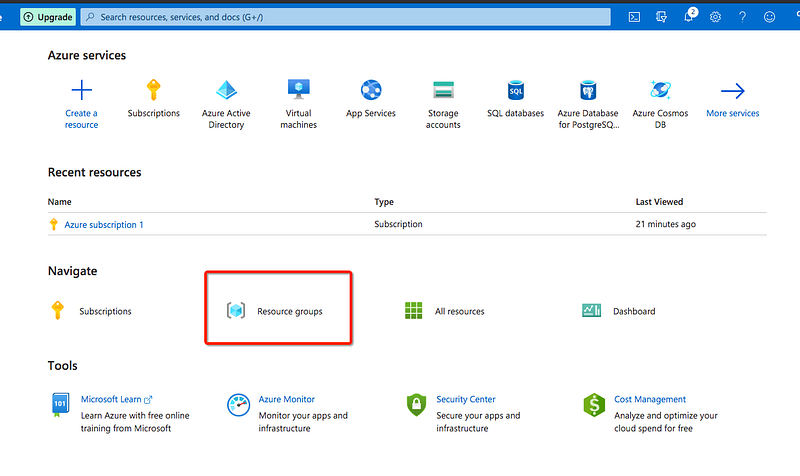
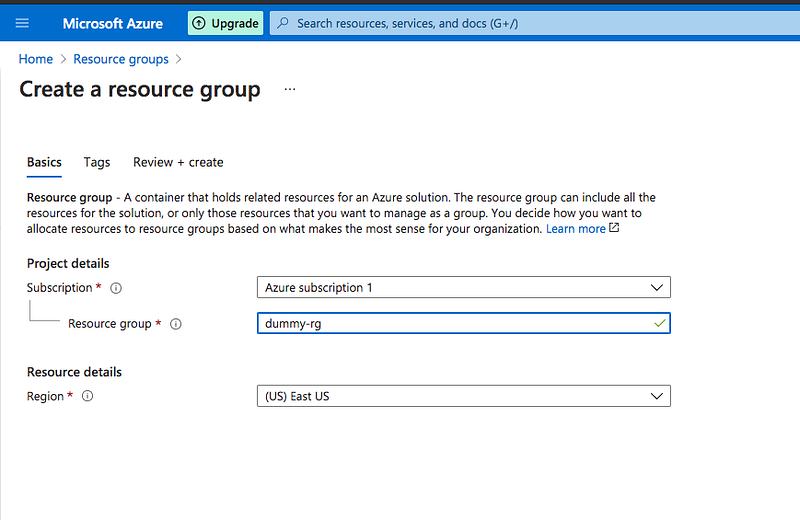
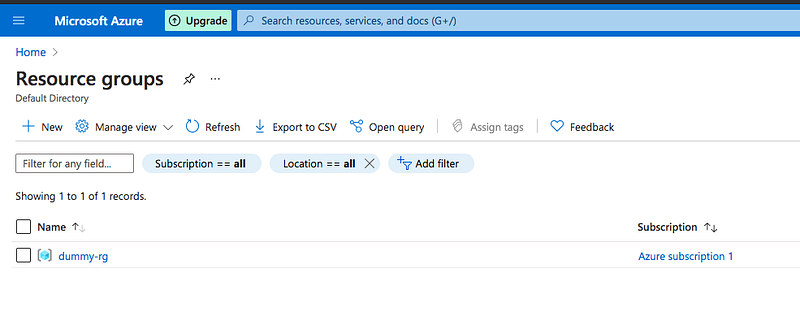
I am creating a resource group. Let’s click on it and create one. Notice that you need to select the subscription as well.
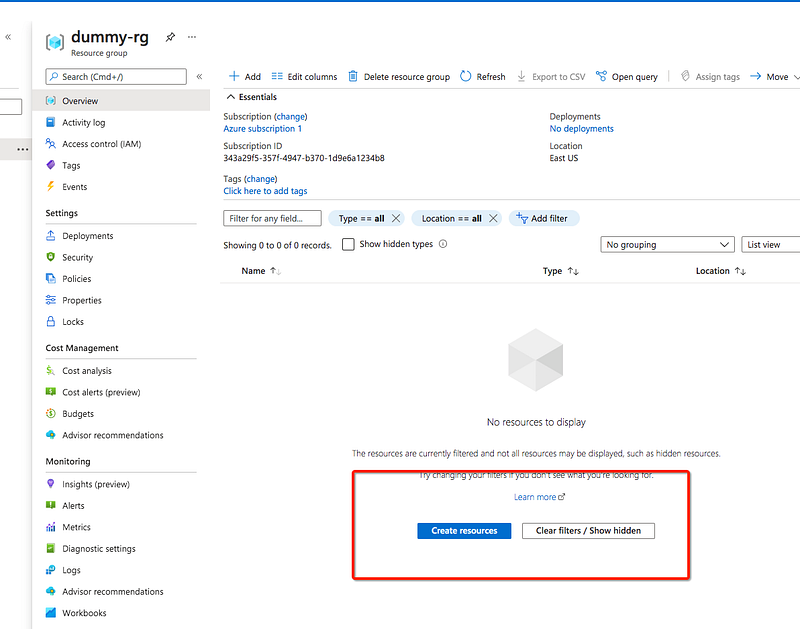
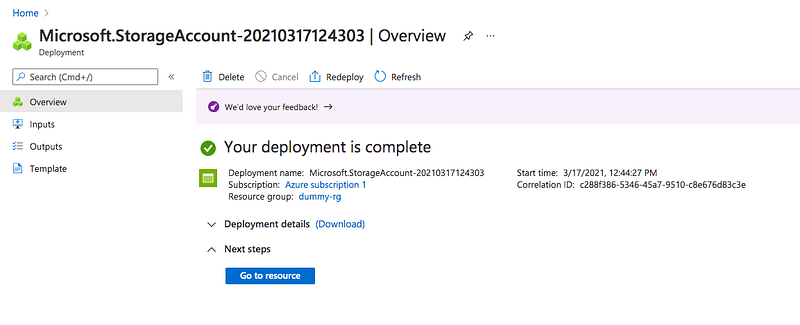
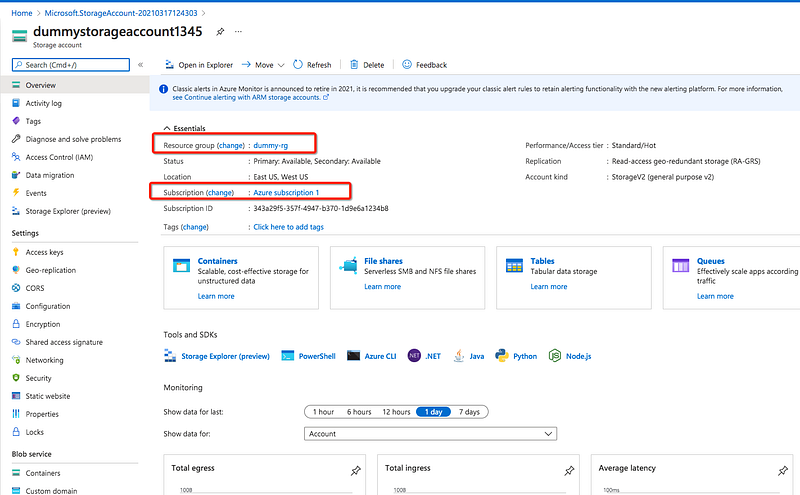
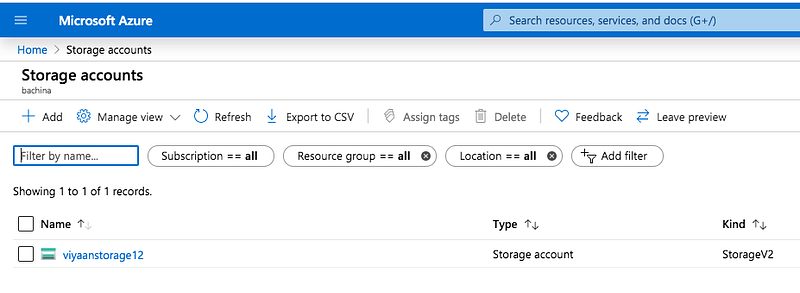
We have created a resource group now and click on it and create a resource storage account.
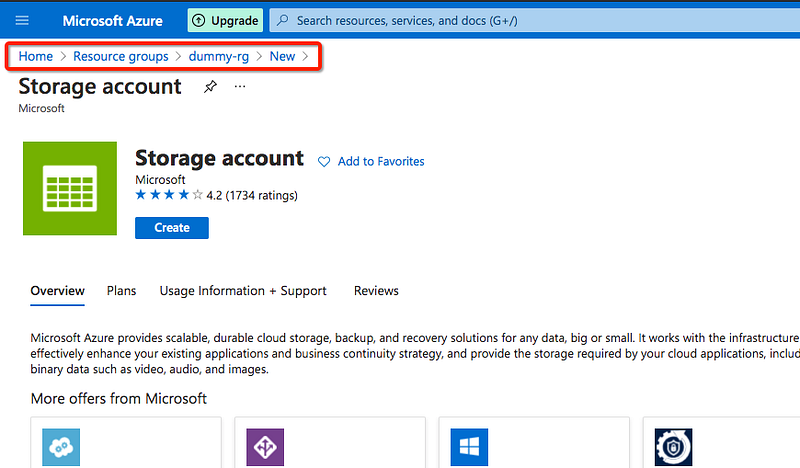
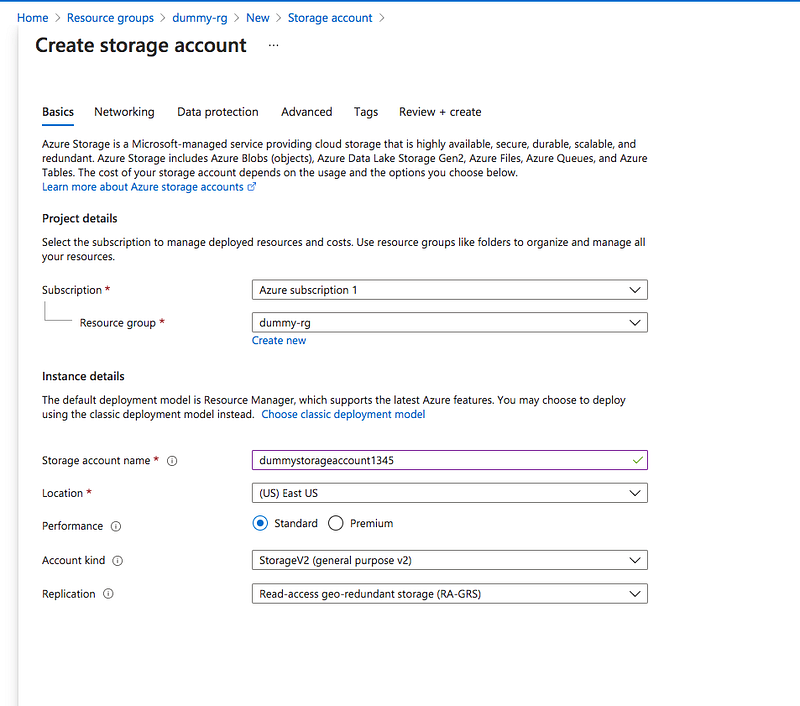
The Storage Account Creation takes some time. You can see the resource created once done. You can see the associated resource group and subscription on the storage account overview page. There is a delete button you can delete any resource as long you have permissions.
What is Azure CLI
Azure CLI is the command-line interface that creates an environment to create and manage resources. It is available to run on Windows, Mac, Linux, etc. With Azure CLI, it’s easy for you to get started with Azure. The full documentation is available here.
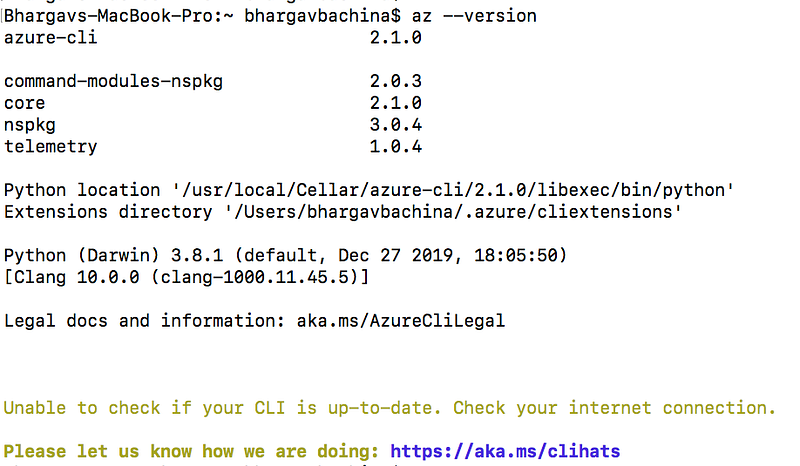
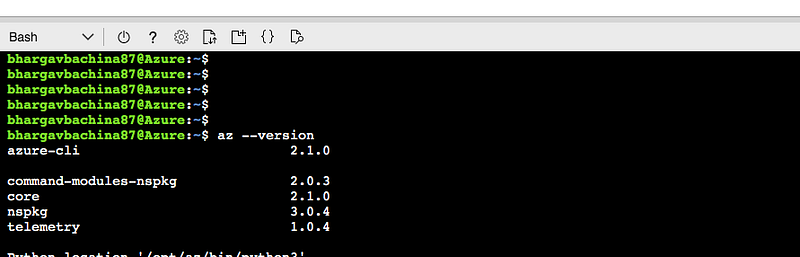
Let’s install Azure CLI with the following command. Homebrew is the easiest way to manage Azure CLI.
clebrew update && brew install azure-cliWe can check the version with this command az --version. You can check all the available commands with this command az --help.
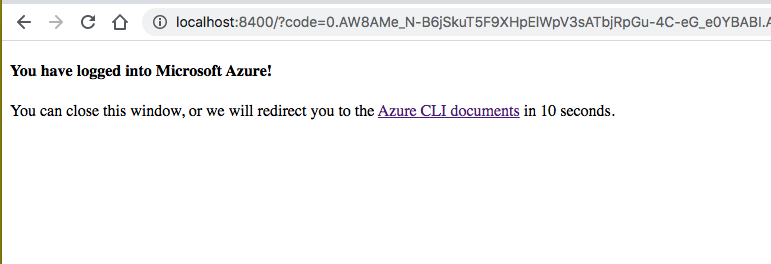
Once Azure CLI is installed, you should log in with your Azure account with this command az login and you will be redirected to the login page and this page appears after you log in

Once you have logged in you will be redirected to the confirmation page
You can see the JSON output as well on the terminal.
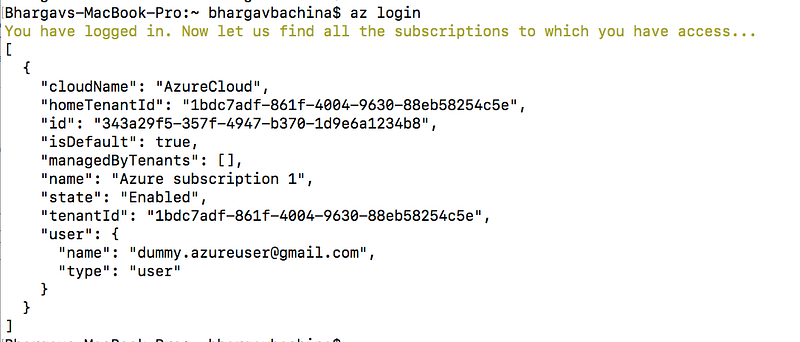
You now can do whatever you want and manage Azure resources. For example, you can list the Azure account list with this command az account list --output=table

Managing Resources with Azure CLI
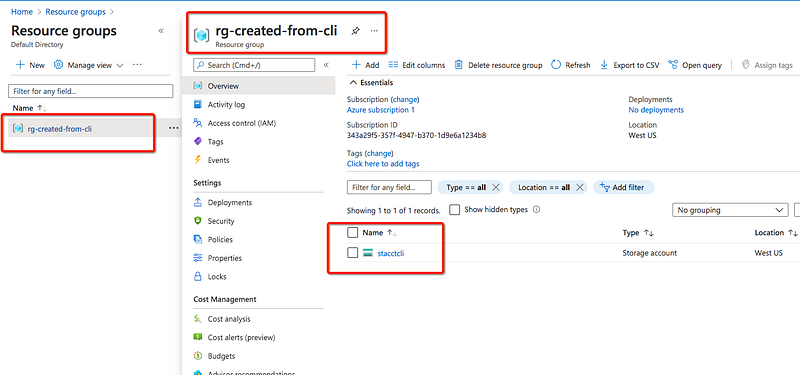
We have configured Azure CLI with the Azure account. It’s time to create the same resource that we created with the Azure portal with the Azure CLI. We have created a resource group and storage account with the portal, lets do the same with the Azure CLI.
// creating a resource group
az group create -l westus -n rg-created-from-cli
// creating a storage account
az storage account create -n stacctcli -g rg-created-from-cli -l westus --sku Standard_LRSYou can see these resources created in the portal.
What is Azure Cloud Shell
Azure cloud shell is an interactive way of managing Azure resources with CLI in the browser itself. It is authenticated and is available both in bash and Powershell.
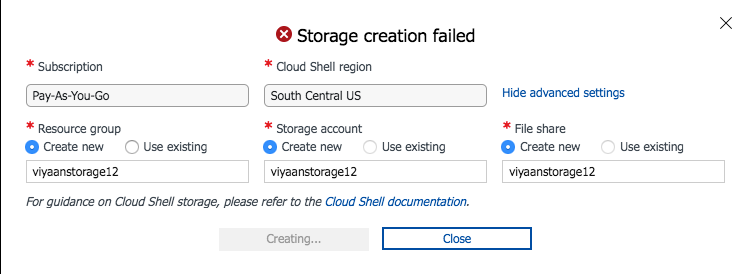
If you look at the below image, once you log in to your Azure account you can actually click on the cloud shell icon on the top right side. Azure cloud shell pops up at the bottom and asks you to choose from Powershell or bash. Azure cloud shell requires a storage account to persist files and you can create one from the shell itself by clicking on create storage button.
The storage account should be unique across Azure. You can actually see the documentation here. You should give your unique name by clicking on the Show advanced settings.
You can actually see the storage account created in your subscription.
Once the storage account is created you can run az commands.
Managing Resources with Cloud Shell
We have configured Azure Cloud Shell with the Azure account. It’s time to create the same resource that we created with the Azure portal with the Azure Cloud Shell. We have created a resource group and storage account with the portal, lets do the same with the Azure Cloud Shell.
// creating a resource group
az group create -l westus -n rg-created-from-cli
// creating a storage account
az storage account create -n stacctcli -g rg-created-from-cli -l westus --sku Standard_LRSYou can see these resources created in the portal.
What is Powershell
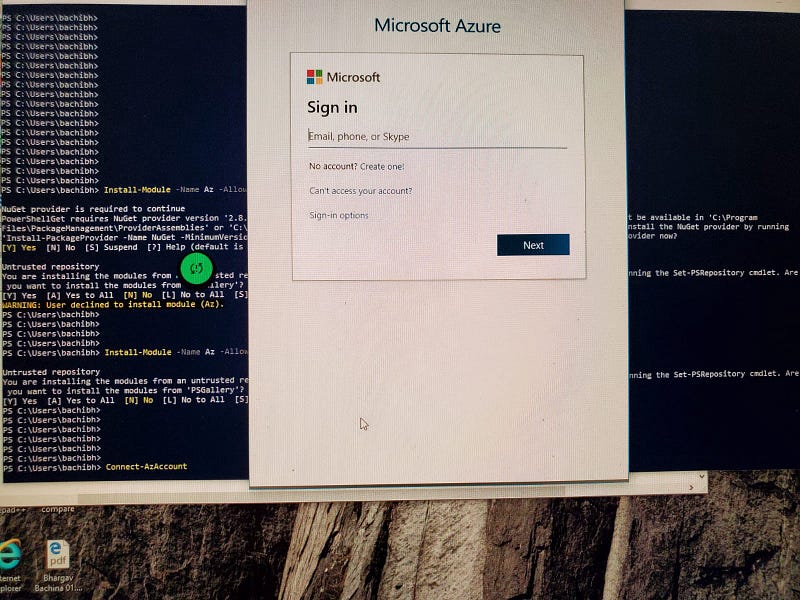
Azure PowerShell is designed for managing and administering Azure resources from the command line. You need to install the az Powershell module to use the Azure command-line interface. The complete documentation is here.
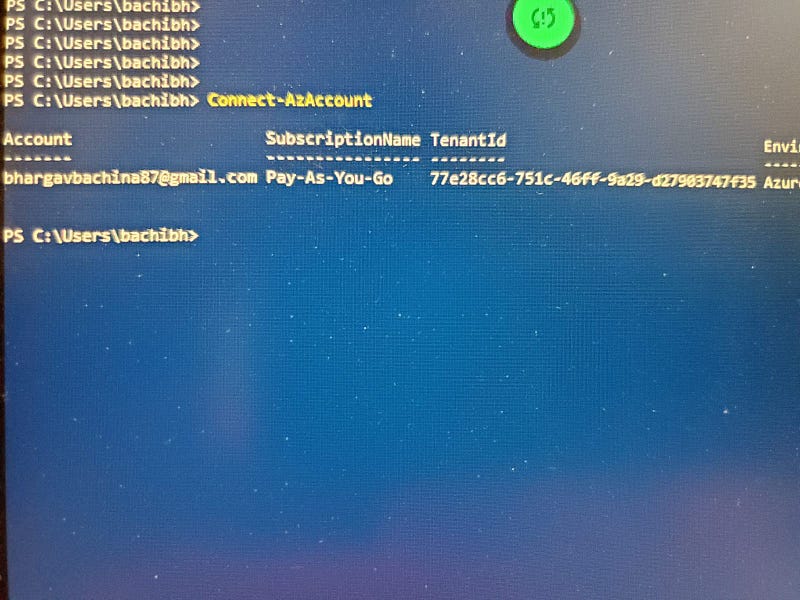
Install-Module -Name Az -AllowClobber -Scope CurrentUserThere should be a popup window that asks you to log in to your Azure account.
Once logged in you can see the below subscription details. From now on, you can actually manage Azure resources from Powershell. Here is the complete documentation.
Managing Resources with Cloud Shell
We have configured Powershell with the Azure account. It’s time to create the same resource that we created with the Azure portal with the Powershell. We have created a resource group and storage account with the portal, lets do the same with the Powershell.
// creating a resource group
$resourceGroup = "storage-resource-group"
$location = "westus"
New-AzResourceGroup -Name $resourceGroup -Location $location
// Creating a storage accountNew-AzStorageAccount -ResourceGroupName $resourceGroup `
-Name <account-name> `
-Location $location `
-SkuName Standard_RAGRS `
-Kind StorageV2What is Azure SDK
We have managed Azure resources through CLI, portal, etc. Azure provides an SDK that lets you programmatically manage and interact with Azure services.
The Azure SDKs are collections of libraries built to make it easier to use Azure services from your language of choice. These libraries are designed to be consistent, approachable, diagnosable, dependable, and idiomatic.
You can explore more on this page.
Managing Resources with Azure SDK
Here is a simple nodejs application in which we can interact with Azure Blob storage with the help of Azure SDK. You need to install a specific SDK library first with the following command (NodeJS application)
npm install @azure/storage-blobThis is an example file of how we can use SDK to interact with Azure resources. We will see detailed posts on this in the upcoming posts.
Creating a static website
Azure CDN with blob storage is one of the options which provides a low-cost and highly reliable static website hosting solution. These static sites have only CCS, HTML, JS files, fonts, etc. In this post, we can see how we can build a static website with React and host that on Azure.
Here is the detailed post on how to create a React Static Website on Azure.
Managing Resources With Terraform
Terraform is the infrastructure as a Code offering from HashiCorp. It is a tool for building, changing and managing infrastructure in a safe, repeatable way. Operators and Infrastructure teams can use Terraform to manage environments with a configuration language called the HashiCorp Configuration Language (HCL) for human-readable, automated deployments.
In this post, we can see how we can build a static website with a simple HTML and host that on Azure with Terraform.
Every application needs different environments for different purposes and each application needs at least 3 environments. For example, we need a Development environment for the developers to push the code and test it themselves, a QA environment for testers to test the app before we put that into production, a prod environment for the live users.
We need to build these environments before we deploy our applications. We can even have a separate one for regression testing and we can have as many environments as we want. It all depends on our needs.
Terraform is an Infrastructure as a code tool that can build these environments with one command. In Azure, we can build these environments using resource groups and subscriptions. In this post, we will see how we can build different environments on Azure using Terraform.
Azure — Building Different Environments With Terraform Using Folders
Other Example Projects
There are so many other services available on Azure. Here is the list of the services that you can explore and get used to Azure.
Summary
- Cloud Computing is everywhere and is the most demanding and sought-after skill that companies are looking for.
- All most of the companies are either have plans to migrate to the cloud from on-prem or already migrated their workloads.
- Azure is a cloud computing platform from Microsoft. Microsoft Azure lets you create future-ready innovations across all of your environments using the newest technologies.
- You can even sign up for an Azure free account and get popular services free for 12 months.
- An Azure subscription has a trust relationship with Azure Active Directory (Azure AD). A subscription trusts Azure AD to authenticate users, services, and devices. Multiple subscriptions can trust the same Azure AD directory. Each subscription can only trust a single directory.
- Azure management groups provide a level of scope above subscriptions. You organize subscriptions into containers called “management groups” and apply your governance conditions to the management groups.
- You need a subscription to be associated with your tenant so that all the cost is billed to this subscription. One management group can contain multiple subscriptions as long as these subscriptions belong to the same tenant.
- A resource group is a container that holds related resources for an Azure solution. The resource group can include all the resources for the solution, or only those resources that you want to manage as a group.
- User accounts for all of Microsoft’s cloud offerings are stored in an Azure Active Directory (Azure AD) tenant, which contains user accounts and groups. User accounts are stored in an Azure AD tenant.
- Azure RBAC is a newer authorization system that provides fine-grained access management to Azure resources. Azure RBAC includes many built-in roles, can be assigned at different scopes and allows you to create your own custom roles.
Conclusion
This is a lot of information to take in but, this post serves as a good starting point for your Azure Cloud Journey. In future posts, we will see more services with examples.


