How how to TEXT TO IMAGE , CONTROLNETS, STABLE DIFFUSION
How to create controlled poses and styles using Stable Diffusion and ControlNets
Using ControlNets with Stable Diffusion to get more control on the generated output images
What this Article is about !
Goodnews !! (for all AUTOMATIC1111 Stable diffusion UI users)
There is now a plugin/extension for the ControlNet compatible with AUTOMATIC1111 . Here, we will walk you through what ControlNets are, what it can be used and detail out the initial guide to getting your Stable Diffusion ( SD ) working with ControlNets .
A short note on Control nets
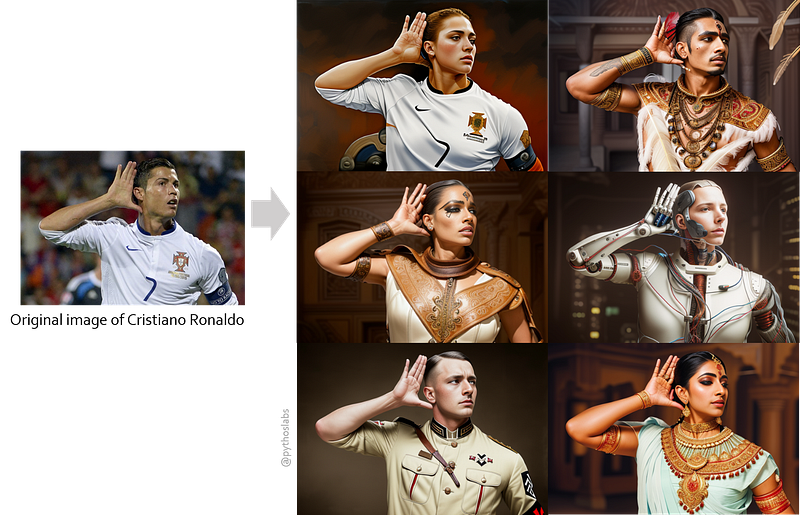
If you have worked with Image2Image option in Stable Diffusion (SD ), you know how easily you can transfer a style / pose from a base image to your generated image. Now, ControlNet goes a step forward and create almost exact replicas of your poses / styles / positions.
To put in one line, ControlNets let you decide the posture, shape and style of your generated image when you are using any Text-To-Image based models. Enough of the basic introduction , more later …
What can you do with ControlNet anyways?
The possibilities are endless, but here are a few sample use-cases , you can try your own !
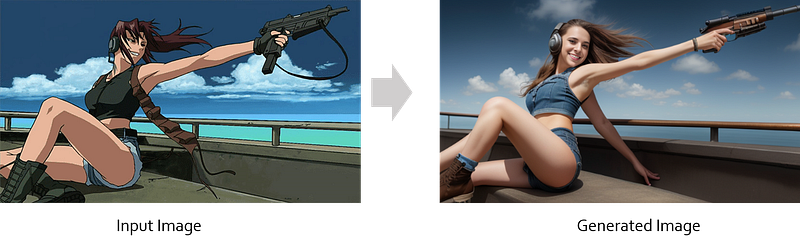
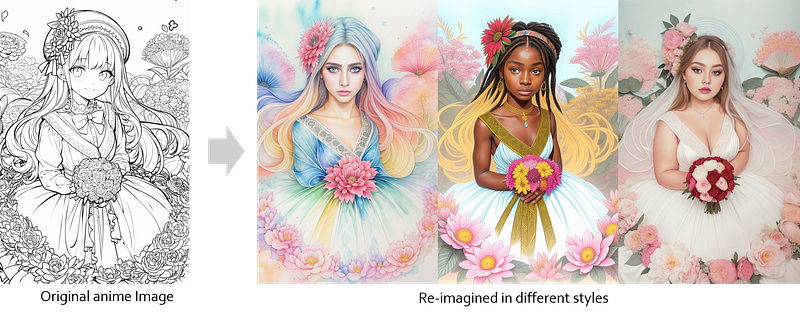
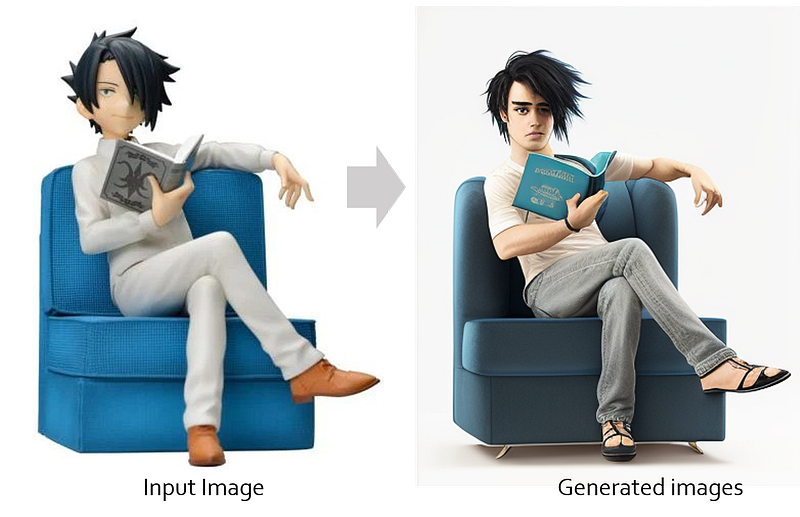
1. Convert those Japanese anime images into other animation forms ….
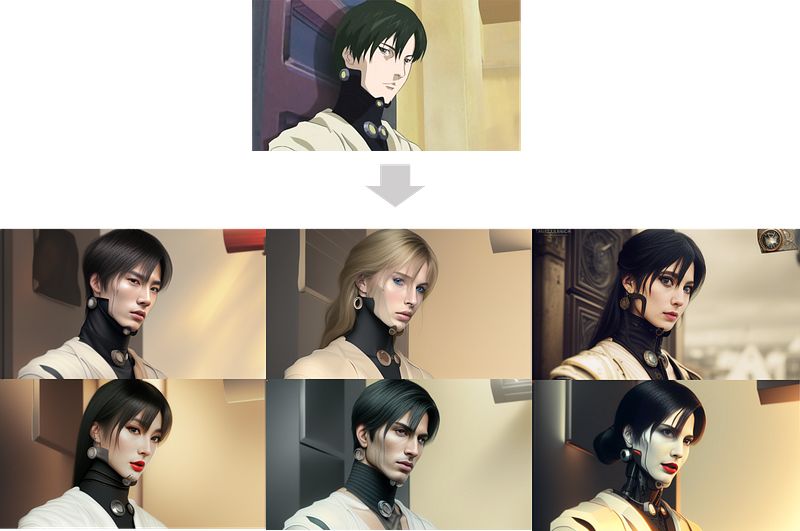
or even try to convert them to real-life images !
or … make them extremely artistic !
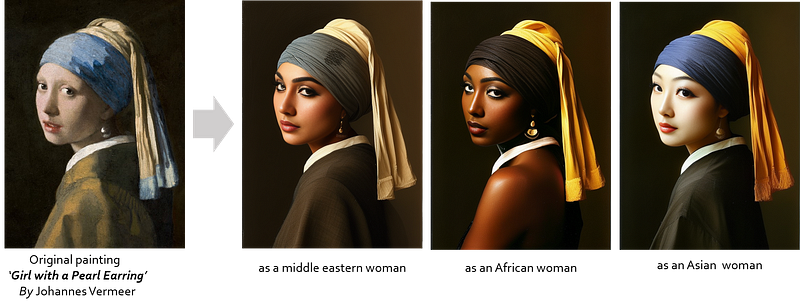
2. Reimagine classic paintings ..
3. Visualize how ancient marble statues might have looked in real life — with different clothes, settings and times !
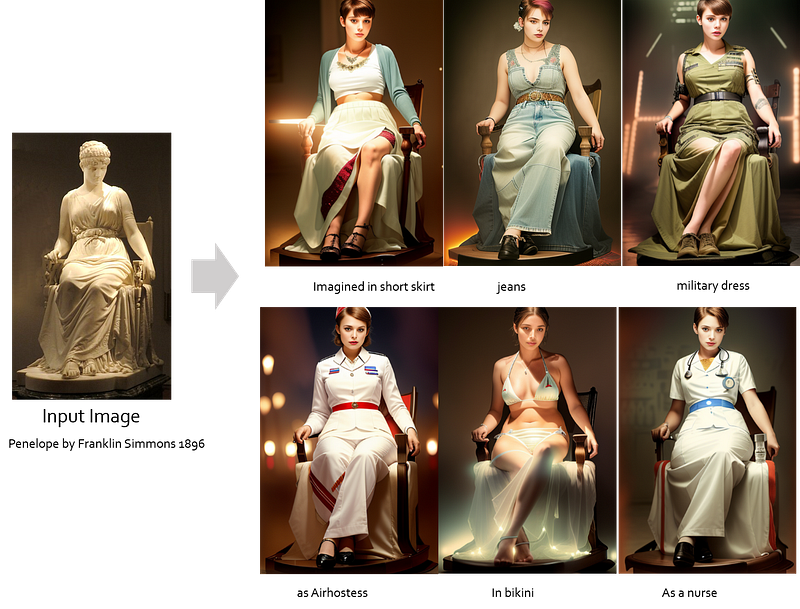
Imagine how their dresses would have been in that bygone era …
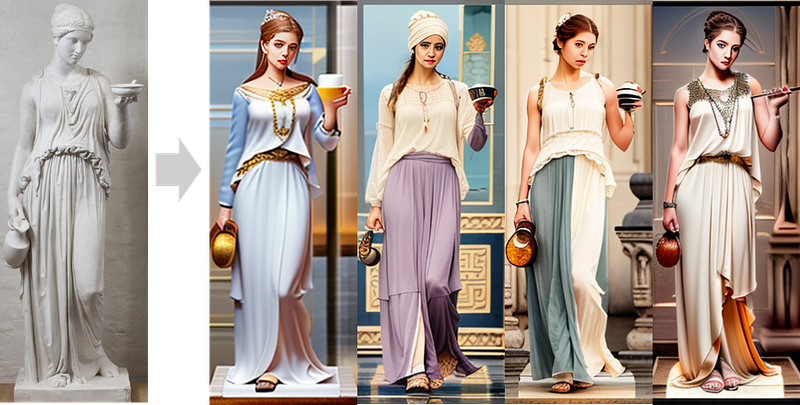
.. or even dare to imagine how they might have looked like.

4. Create some animated gif images from a sequence of images that are generated from the ControlNet
or some disturbing psychedelic mushroom gifs !

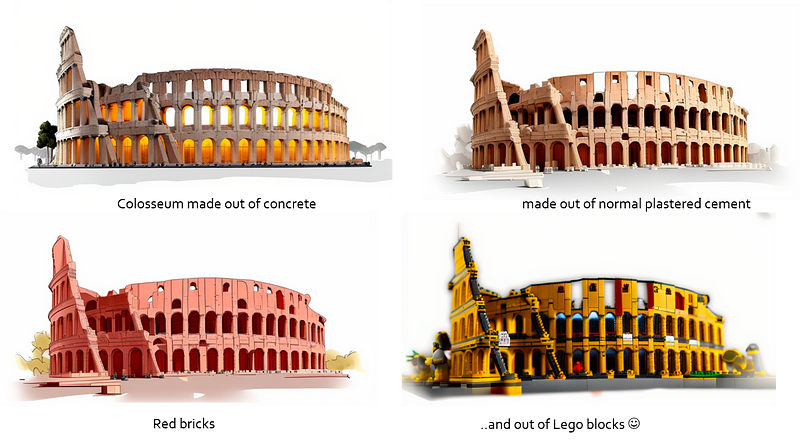
5. See how ancient structures would have looked like in a different building material …
6. Or create some other rather less interesting images …
Installation — Lets get the stuff running
- Install the extension through your AUTOMATIC1111 UI ( If you have no idea about the AUTOMATIC1111 Web UI for Stable Diffusion, see our article on how to get that running )
For this,
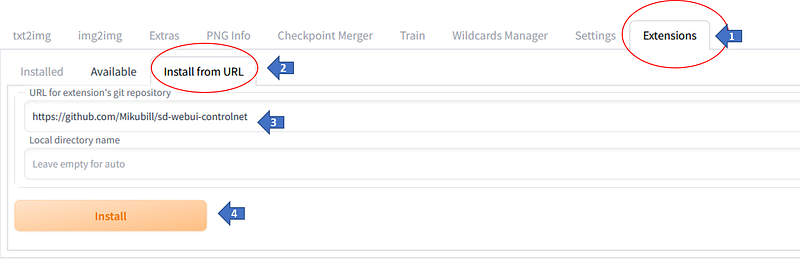
[1] go to the extensions tab,
[2] go to the “Install from URL” option,
[3] Enter the URL for the git repo of this extension (https://github.com/Mikubill/sd-webui-controlnet )
[4] Click Install .. and Voila ! you are done with the setup !
2. Copy the pre-trained model into your local machine and place it in <AUTOMATIC1111 folder>/models/ControlNet
You can get the pre-trained models from here — https://huggingface.co/lllyasviel/ControlNet/tree/main/models
or a trimmed version from here
https://huggingface.co/webui/ControlNet-modules-safetensors/tree/main
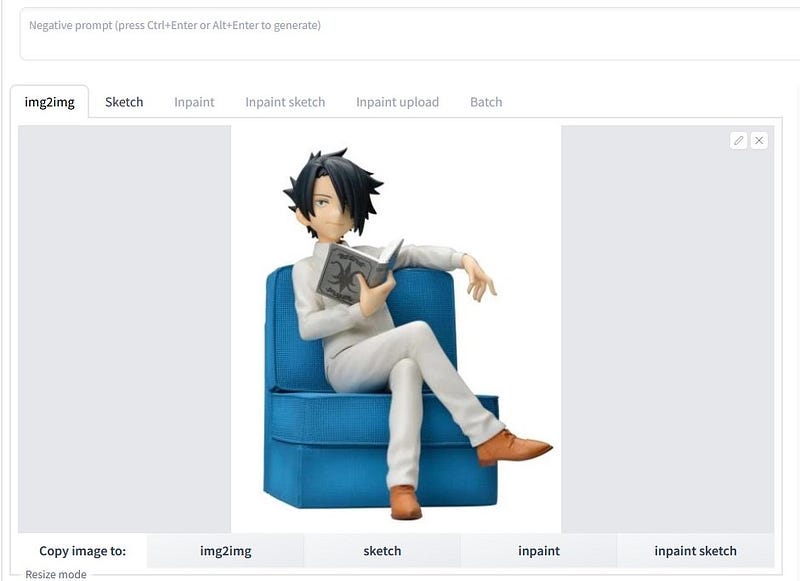
3. Open your AUTOMATIC1111 WebUI, and go to either txt2img or the img2img tabs . Lets use the img2img option . ( you can do almost the exact with txt2img playarea.)
Drop your reference image you want to emulate.
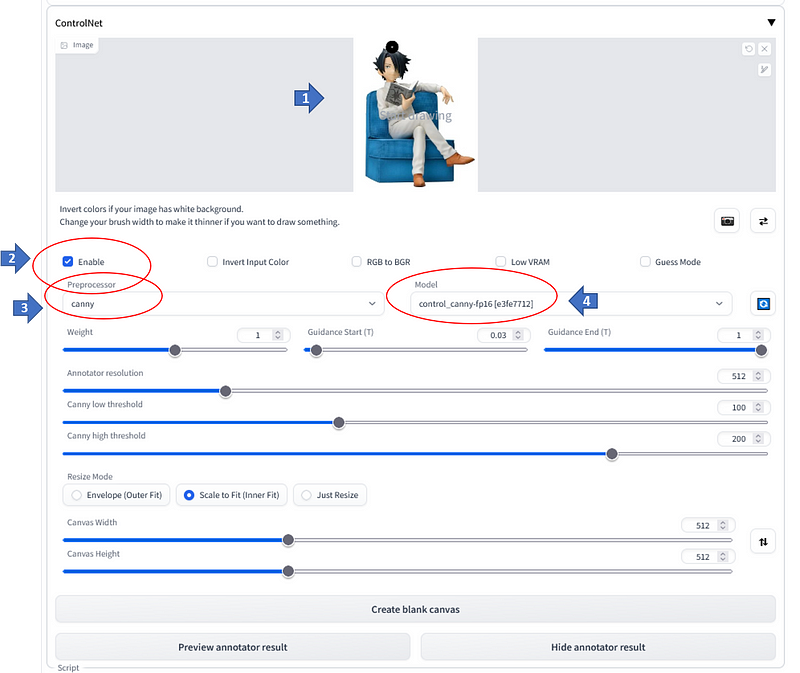
If you scroll down to almost at the bottom of the page, you will see an extra menu for ControlNet, looking like this —

Expand the dropdown and there you can find some options. To just get started,
[1]drop the control image into the image box area. This image is the one where you want your final output should take the pose/shape/style from. ( In this example we are using the same image )
[2] Enable the option ( check it on )
[3] Select the pre-processor ( Here we are choosing canny )
[4] Select the corresponding model for the pre-processor
Now you are done and ready to go ! Press ‘Generate’
Some Internals — A quick look into how it works internally
ControlNets rely on some basic network models to generate an intermediate control image ( control map ) which are inspired by some of the Computer vision algorithms like edge detection, depth estimation etc. The Diffusion model then uses these control images to generate the final output image.
Pre-processing algorithms
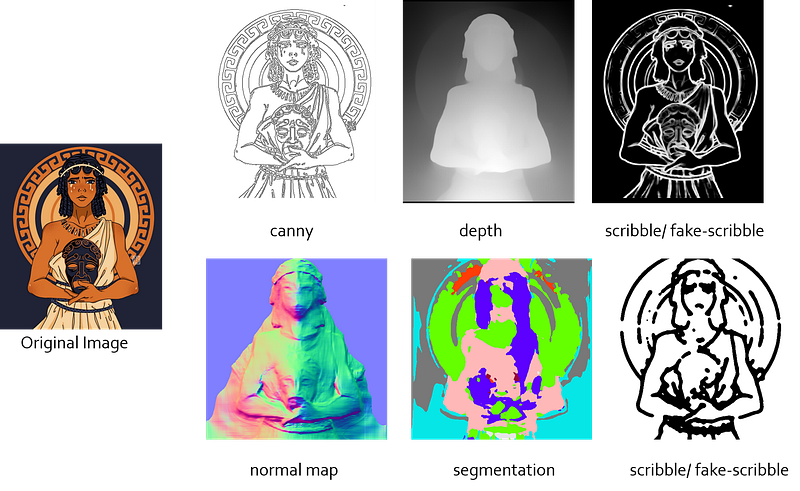
Lets go through a few of the intermediate pre-processing algorithms :
1. Canny ( simply the old OpenCV canny edge detection algorithm )
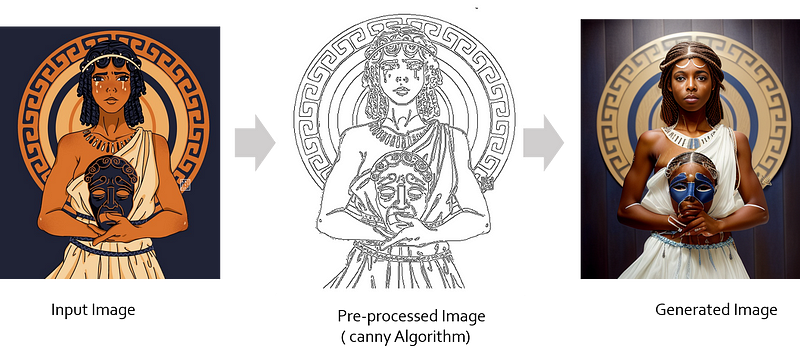
The input image goes through a preprocessing step, which converts it into the control image ( called control map ). Here, the canny edge detection algorithm creates an intermediate image with just the boundaries for the input image entities ( after some of the usual steps like noise reduction, gradient detection, thresholding etc )
This method works well if you have an input image which has high contrast. Lower contrast images fail to detect the edges efficiently.
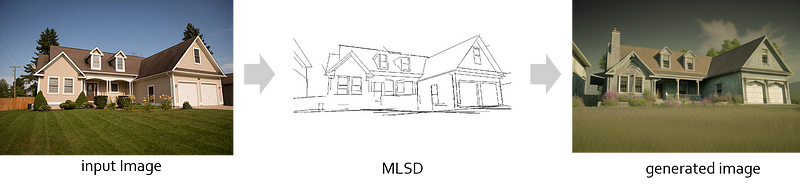
2.MLSD
MLSD is a good pre-processor when the input image has a lot of straight lines and sharp edges. Use-cases for these are to generate images of houses, architecture rich buildings , interiors of room isometric projections of buildings, objects etc.
3. depth
When your desired output has a lot of depth variations, your choice of . Some sample use-case settings are — inside of a restaurant, a long shot view of landscape with different entities farther apart.
4. open pose
When you want to replicate the same posture/ pose of the individual subjects in an image, but you still want the model to be creative on the texture and surface of the subjects, opt for the open pose.
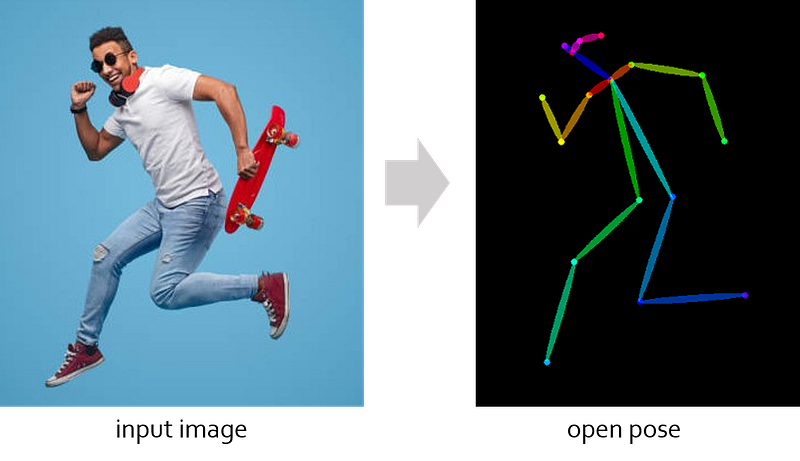
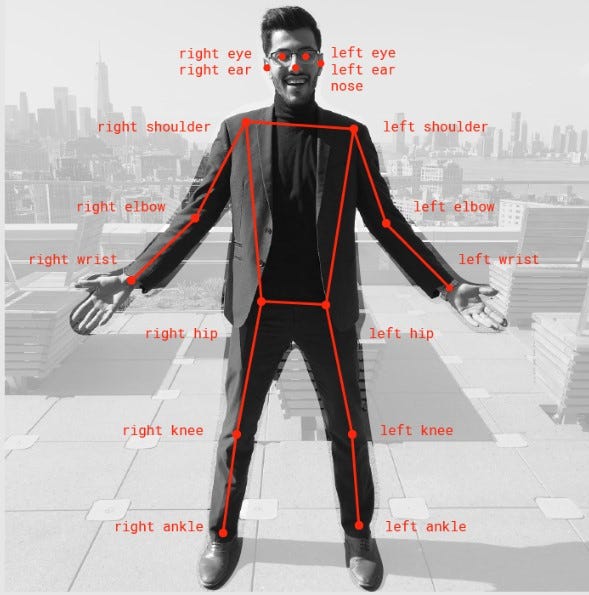
This is loosely based on / similar to the posenet model (human pose detection). See image below on what the key-points denote.
Tips when using ControlNets
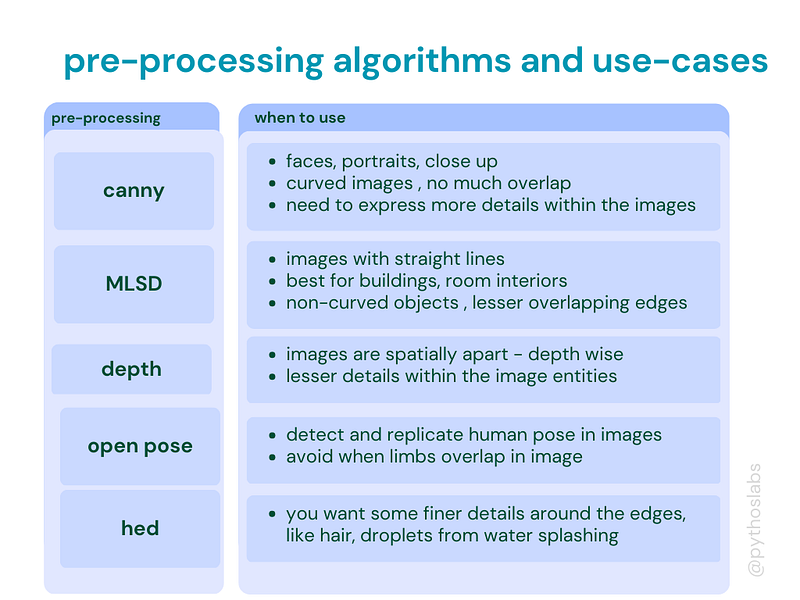
1. Use the pre-processing algorithm/model based on what you type of image you want to generate and what your control image is. Use this quick guide table to decide which ones to use :
2. When using img2img option, change the dimensions of the output image to that of the width-height of the original image you are uploading. If not the exact dimensions, atleast maintain the exact width:height ratio.
Credits / References
- The original White paper for ControlNets “Adding Conditional Control to Text-to-Image Diffusion Models” ( Lvmin Zhang, Maneesh Agrawala )
https://arxiv.org/abs/2302.05543
2. The original github repo for ControlNets ( https://github.com/lllyasviel/ControlNet )
3. The pre-trained model ( .pth version — https://huggingface.co/lllyasviel/ControlNet/tree/main/models (Note : these are very bulky files almost 5 GB each )
4. Smaller version of the pre-trained model . Yes, these work as good as the bigger files ( for higher sampling rates ) https://huggingface.co/webui/ControlNet-modules-safetensors/tree/main
5. Online gif making tool (https://ezgif.com/ )
Related Links
- If you want to use an online app which lets you create your desired human poses manually , PoseMy.art is a good starting point . Here’s an article showing how to use it with ControlNet.
2. If you like to go base up and want to get a guide on writing text prompt for Midjourney ( also for stable diffusion ), here is the link :