
Fast Track Your API Development With Insomnia
A fast yet simple alternative to Postman for sending REST and GraphQL requests
If you are developing a set of APIs, chances are you already know Postman — an API Client for API development. Generally, one would use an API client to test APIs in terms of functionality, performance, security, reliability, and the correctness of the responses.
While Postman is the de facto standard for API testing and development, I would like to draw your attention to a fast and easy-to-use alternative to Postman — Insomnia REST Client.
The goal of this article is to share with you some of the handy tips and tricks that you can use with Insomnia, especially while developing GraphQL APIs, though it works great with REST too.
If you want to try out the APIs used in this article, feel free to check out:
Why Not Postman?
No Support for Schema Import via URL and Autocomplete
With the introspection system, GraphQL is able to provide a way for clients to discover the resources that are available in a GraphQL schema which then allows features like self-documentation and autocompletion to be used by the users.
Postman as of the date of writing this article does not directly support importing GraphQL schemas via URL directly (issue). As a result, to use autocomplete on Postman, one would need to import your schema file manually to Postman every time there are new changes made to your schema which can be very cumbersome.
Here are some useful tips when using Insomnia.
Environment Variables
Cmd/Ctrl + E
Control + Space doesn’t work, use {{ENV_VAR_NAME}} insteadLike Postman, we could easily set Environment Variables
in Insomnia and use them later on when making our requests.
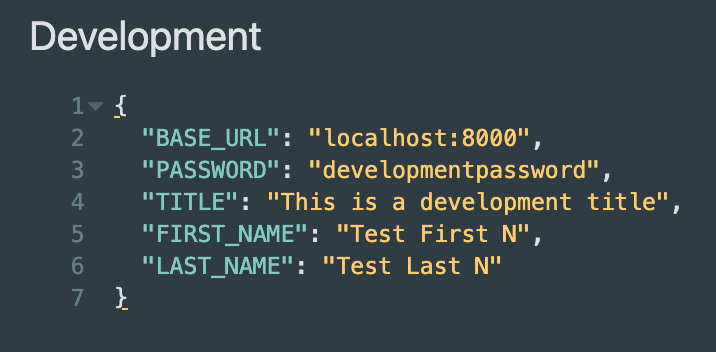
For instance, we can configure our API’s BASE_URL according to our environment such as Local, Staging or Production and switch to a different environment with ease.
Do note that the environment is to be filled with JSON format.
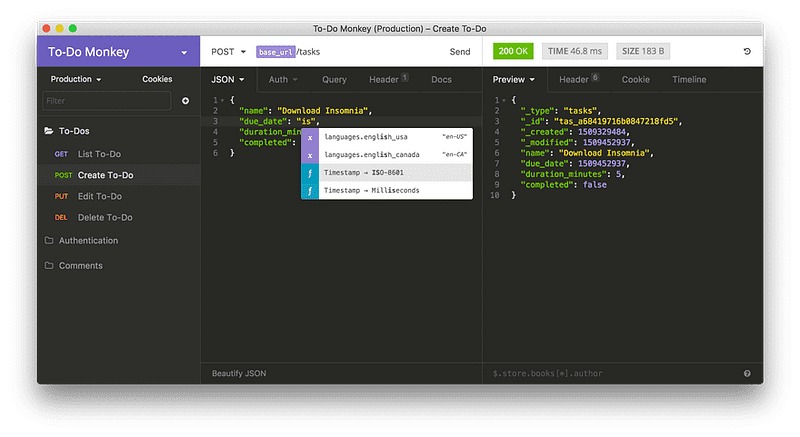
To reference any environment variable, simply press Control/Cmd + Space on your keyboard.
NOTE: In case the autocomplete does not render, simply use
{{ENV_VAR_NAME}}instead.
Chaining Requests
Insomnia provides the ability to extract values from the responses of other requests (source).
Imagine if we want to run thecreateArticle mutation to create a new article, the server would require us to be authorized first.
In other words, an access token of some sort would be required in the request header of the createArticle mutation.
Without chaining requests, you have to:
- Send a
tokenAuthmutation to obtain thetoken.
# Mutation
mutation TokenAuth($username: String!, $password: String!) {
  tokenAuth(username: $username, password: $password) {
    token
  }
}
# Query Variables
{
"username": "username",
"password": "password123"
}# Response
{
"data": {
"tokenAuth": {
"token": "eyJhbGciOiJIUzI1NiIsInR5cCI6IkpXVCJ9.eyJzdWIiOiIxMjM0NTY3ODkwIiwibmFtZSI6IkpvaG4gRG9lIiwiaWF0IjoxNTE2MjM5MDIyfQ.SflKxwRJSMeKKF2QT4fwpMeJf36POk6yJV_adQssw5c"
}
}
}2. Copy the value of token from the data.tokenAuth.token from our response.
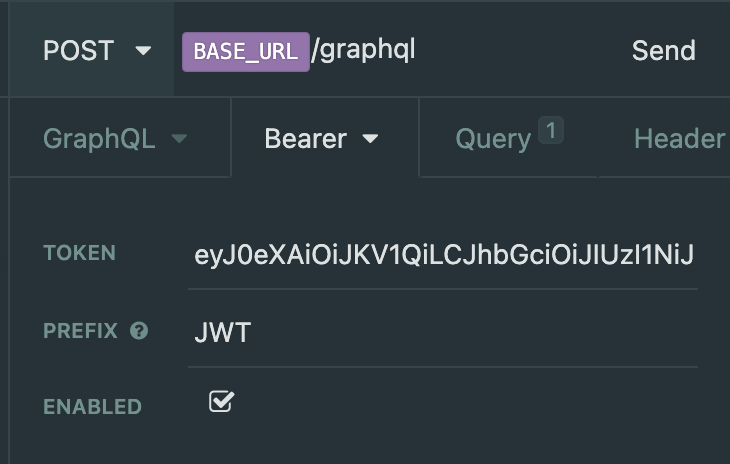
token from tokenAuth to our createArticle Authorization header3. Paste the token value (eyJhbGciOiJIUzI1NiI.....)in the authorization header of the createArticle request and hit ‘Send’.
4. Repeat Step 1 — 3 every time the token expires.
Steps with chaining requests:
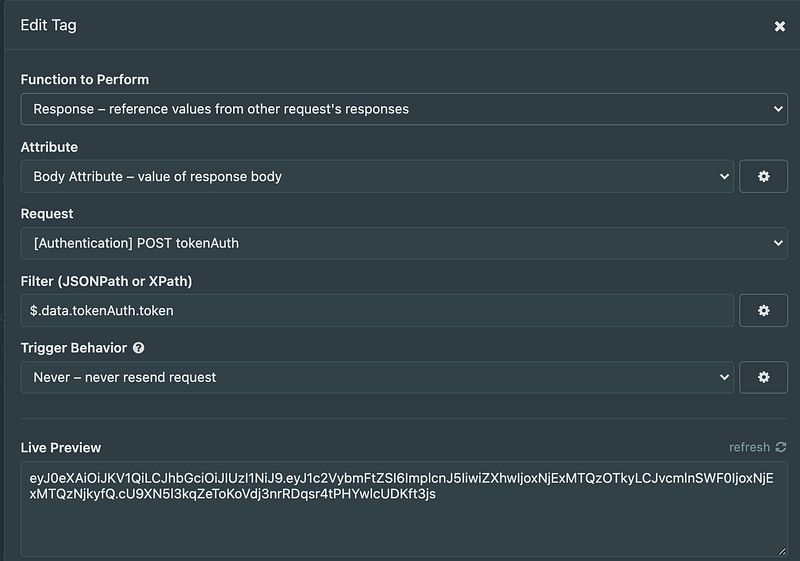
- Setup
tokenAuthmutation once as Step 1 above. - Go to
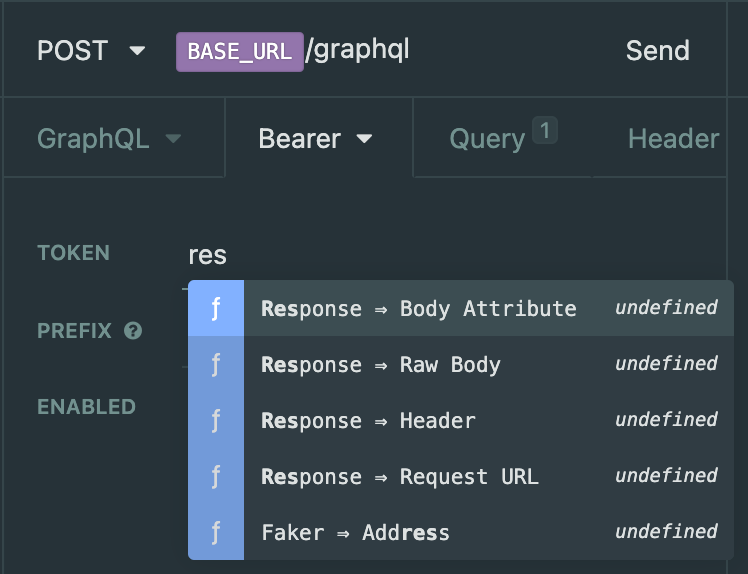
createArticle, under the “Bearer” option, select “Bearer Token” - At “TOKEN”, hit
Control/Cmd + Space, select “Response → Body Attribute” - At “Edit Tag”, under “Request”, select the request that you have set up in Step 1 (i.e.
POSTtokenAuth) - Under “Filter”, filter your response by JSONPath i.e.
$.data.tokenAuth.token - Lastly, you may configure the “Trigger Behaviour” accordingly
- Hit ‘Send’ at your
createArticlemutation
The idea here is that instead of having to copy the value of token manually every time from the response to createArticle mutation, we would only perform Step 1 — 6 once.
Plugins
One of my favorite reasons for using Insomnia is that it supports numerous plugins that can be used to extend the functionality of Insomnia.
To install any plugin, simply hit Control/Cmd + , key on your keyboard, go to ‘Plugin’, and type in the npm-package-name of the plugin that you want to install on Insomnia.
You may find a list of available plugins here.
Faker Plugin (insomnia-plugin-faker)
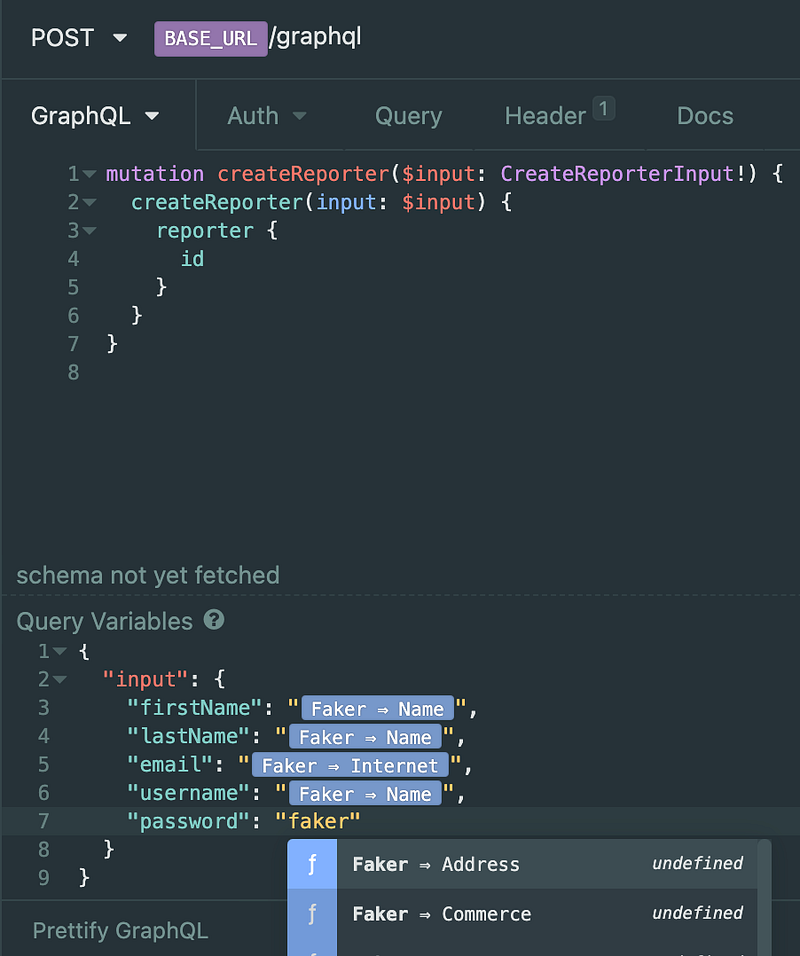
Control/Cmd + Space to search Faker inputsIf you come from the JavaScript world, you probably have heard of Faker. In short, one would use Faker to generate a massive amount of realistic fake data.
The insomnia-plugin-faker allows us to generate Faker data right within the Insomnia itself which can be super handy.
As an example, under query variables for your createArticle mutation, simply hit Control/Cmd + Space and type faker so that the autocomplete can render the type of Faker data you want to generate.
Simple as that.
Gist Sync Plugin (insomnia-plugin-gist-sync)
Another amazing plugin that I use a lot personally is the insomnia-plugin-gist-sync plugin.
The plugin allows users to sync workspaces with GitHub gist, for free! Simply just follow the steps in the link given to set up.
I’d highly recommend you to check out their paid version of the app as they come with additional features that allow for better team collaboration.
Closing Thoughts
Prior to using Insomnia, I was using Postman a lot. Eventually, I find myself using Insomnia more and more.
Personally, I find Insomnia very easy to work with. Not forgetting to mention that I simply just like Insomnia’s cleaner and less cluttered UI. The hotkeys on Insomnia are much more intuitive to use too.
Finally, Insomnia supports the ability to import multiple file types such as Postman v2, OpenAPI, Swagger, and more.