
HOW TO DRAW
How to Draw Dogs’ Eyes
from cartoon to realistic
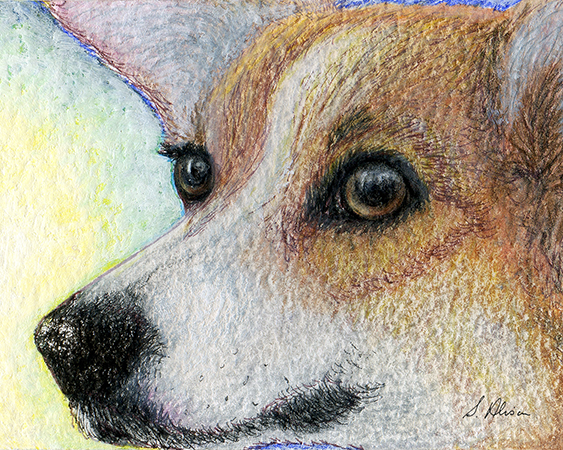
When drawing dogs the eyes are the most important part.
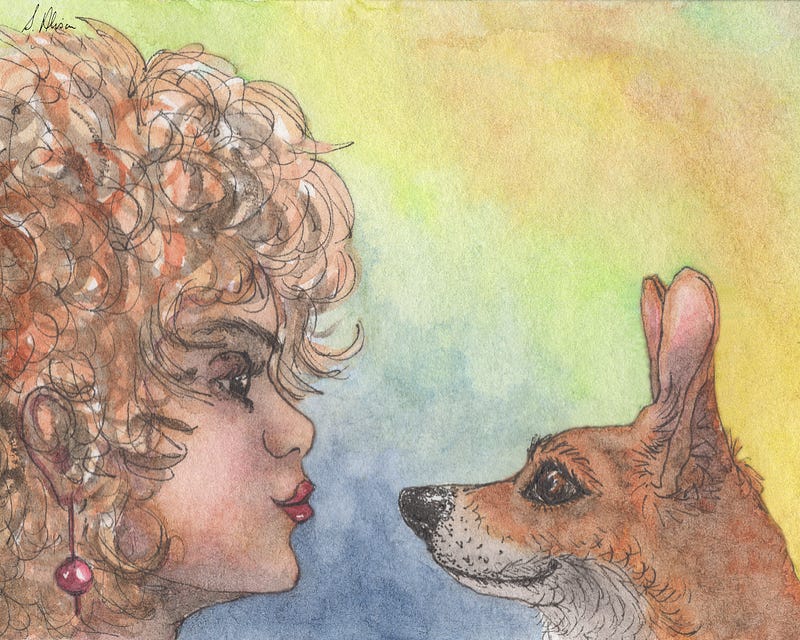
Add a pair of speaking eyes to a barely sketched picture, and the whole thing has meaning.
Sometimes I start with the eyes — after the initial shapes of the whole composition have been drawn in — and sometimes I leave them until last if I’ve not quite decided exactly what overall effect I wish to achieve.
But the eyes are always the bit I’m most uptight about because they’re the part of the drawing it’s most important to get right, and if I mess up that bit then I might have to start the whole thing again.
However, with a bit of practice, and thinking about how they work, they’re not that difficult.
In ‘How to Draw a Dog’ we started with a circle, which is always a good place to start when drawing anything.
Circles for eyes work, too.
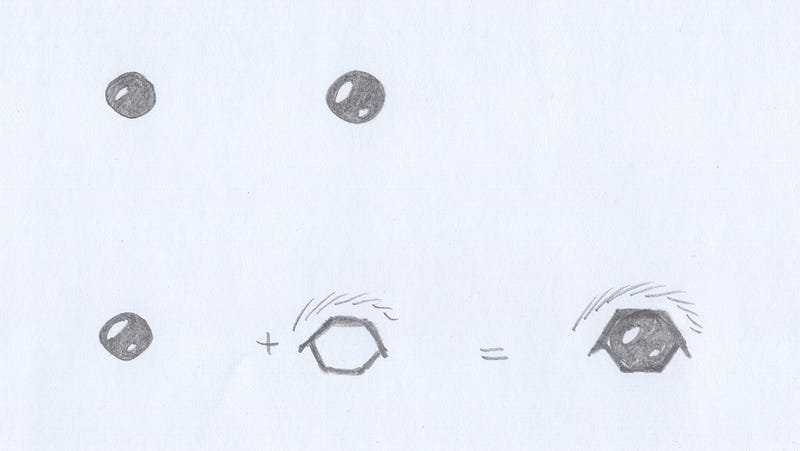
Starting with basic cartoon eyes, the circle would be black, but with some of the white of the paper showing through for highlights. Eyes usually show some light in them. One dot of white will do it, or two or more.
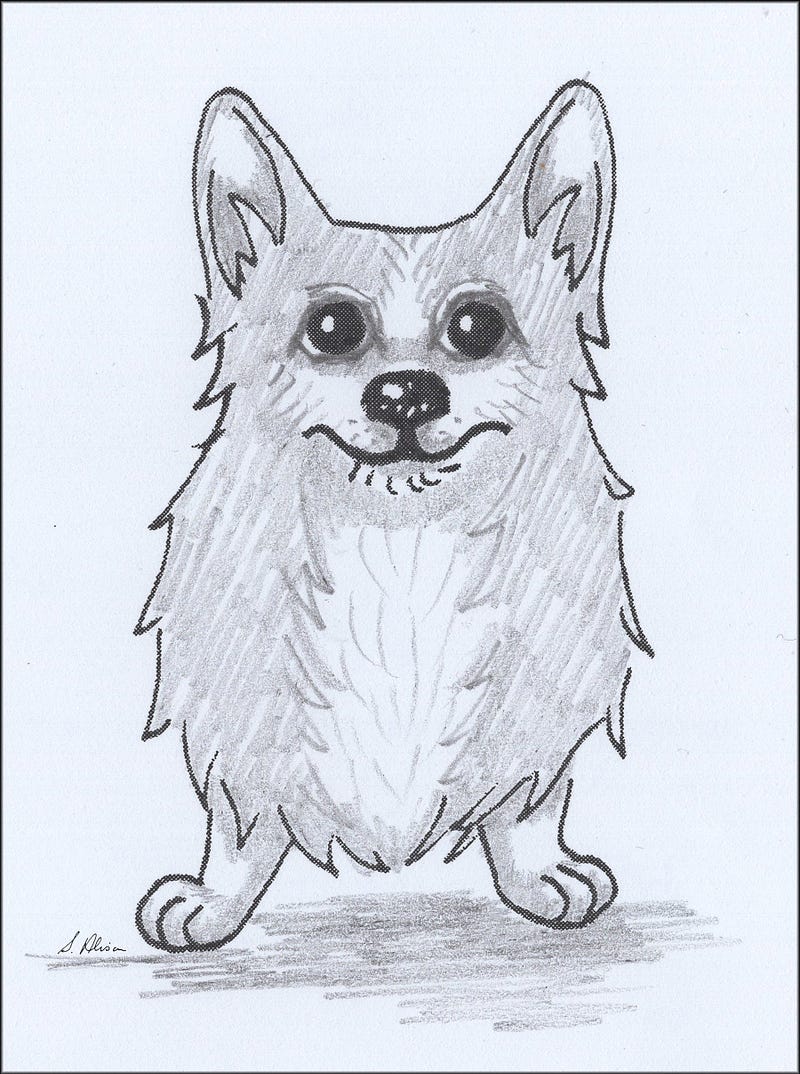
In ‘How to Draw a Corgi’ eyebrows and mascara were added to the basic cartoon eyes.
This basic eye can show all kinds of moods and expressions depending on where the black bit is within the eye socket, and where the highlight is, too. There are many ways of changing this very basic eye representation to convey what you want.
Everything you want to do can be done with cartoon-type eyes.
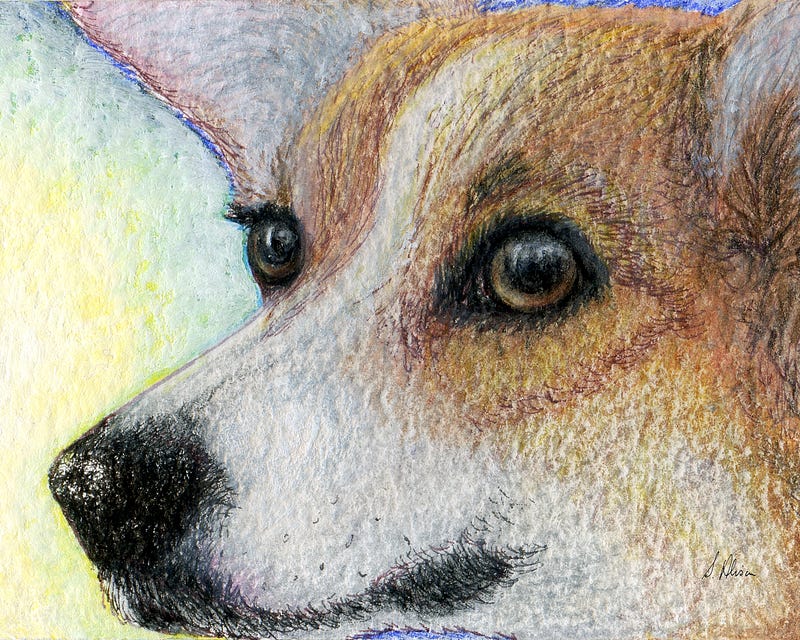
But, if you want to draw more realistic eyes, it is just as straightforward, but will take a little longer.
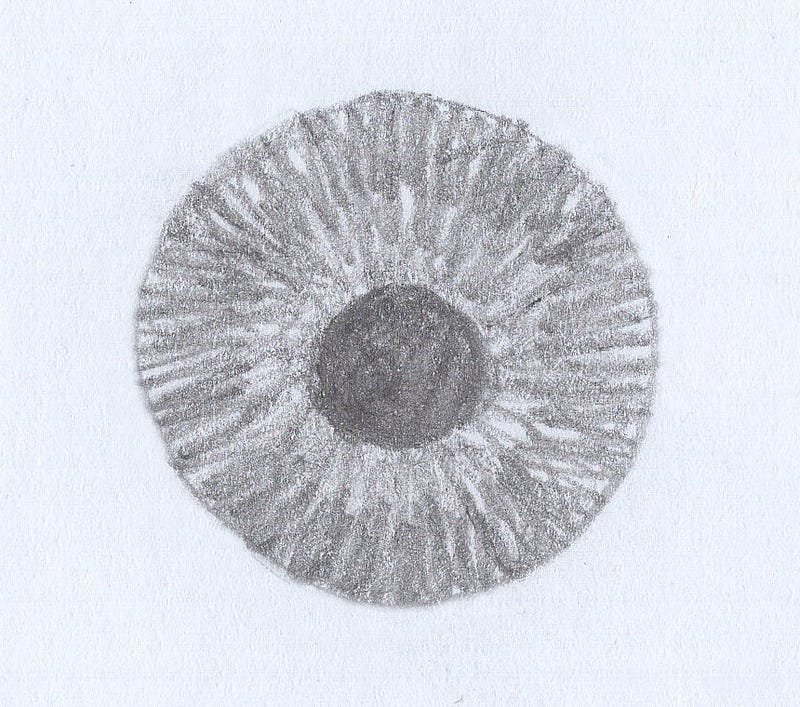
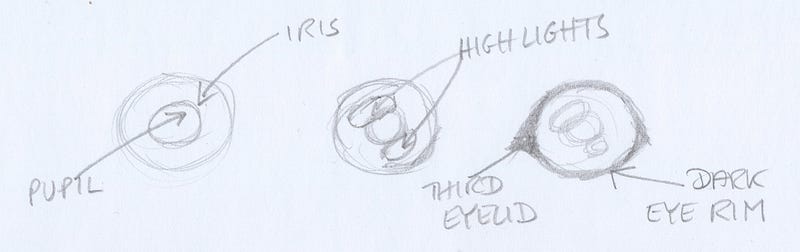
On the left the first circle is the iris — the coloured bit of the eye which is the most part of what we see when looking at a dog’s eye — with the pupil — the black bit — in the middle.
The pupil is a hole in the iris that lets the light through into the back rooms of the eye.
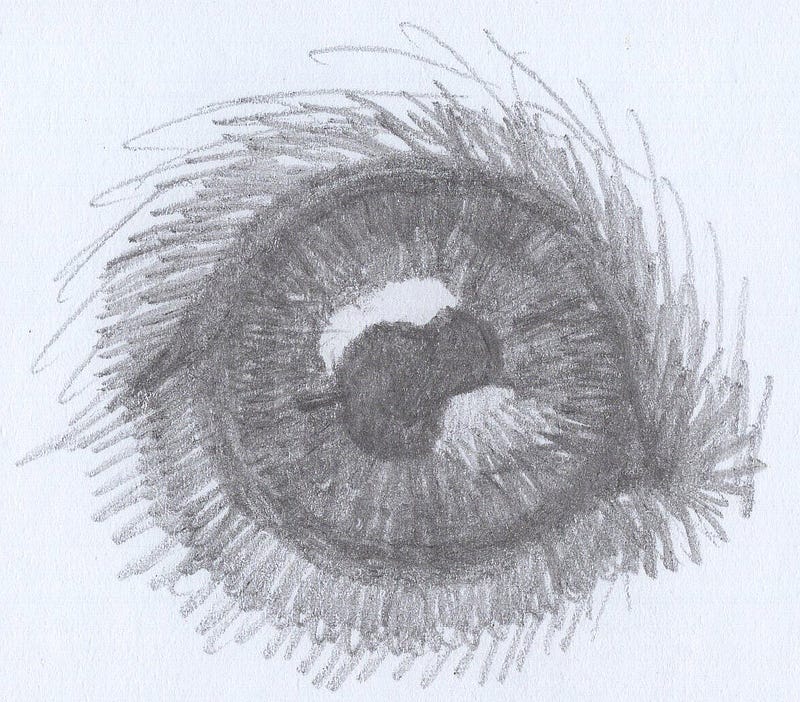
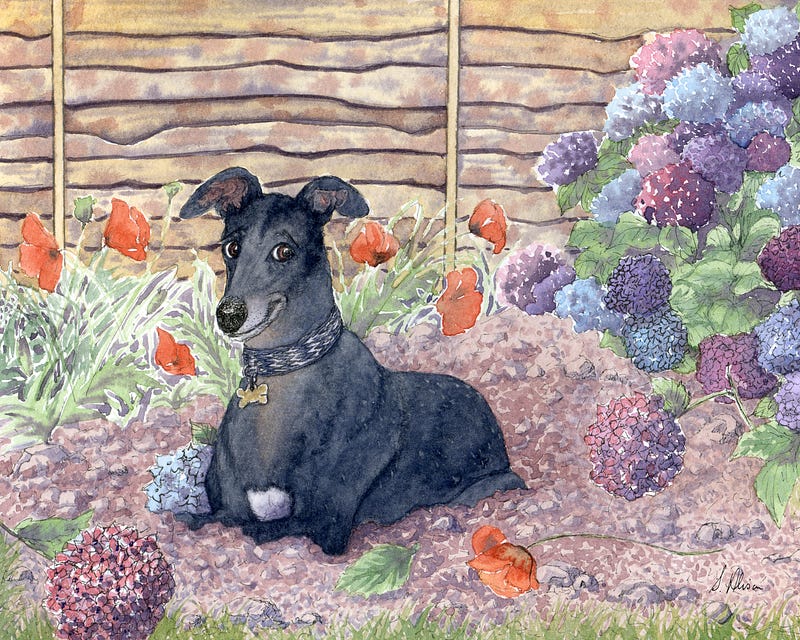
The next circle (above left) shows two highlights. The next shows the third eyelid in the corner of the eye, which is usually black or white. Plus a dog’s dark eye rim.

Many breeds of dog naturally have dark eye rims (mascara). Apparently, they absorb sunlight so rays aren’t reflected into the dog’s eyes, which would then make seeing difficult.
Dogs have three eyelids — the usual ones, and the third one, which is either black or white, and is in the corner of Doggo’s eye. They are for protection and lubrication of the eyeball.
The easiest way to draw the iris and pupil is a small circle inside a larger circle; the pupil is black and the iris is scribbled in using pencil/pen strokes that are like spokes of a wheel all around the pupil, with the outer part of the iris darker than the inner.
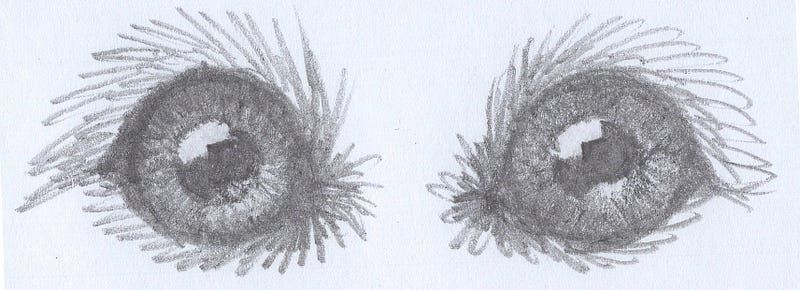
You can either rub out some of the pencil for highlights, or leave the white of the paper to shine through. Often, the shape and position of highlights is the same in both eyes, but not always.
The top of the iris as we look at the drawing is going to be darker than the bottom of it because the eyelid throws a shadow.
Eyes like this are brilliant for doodle times — when you’re on the phone, when you’re watching telly, when you’re in a waiting room, when you’re just doodling to relax.
Soon you’ll be drawing amazing eyes completely naturally and you’ll stop worrying about them. They’ll be so brilliant it will be hard to stop drawing them and start drawing something else!
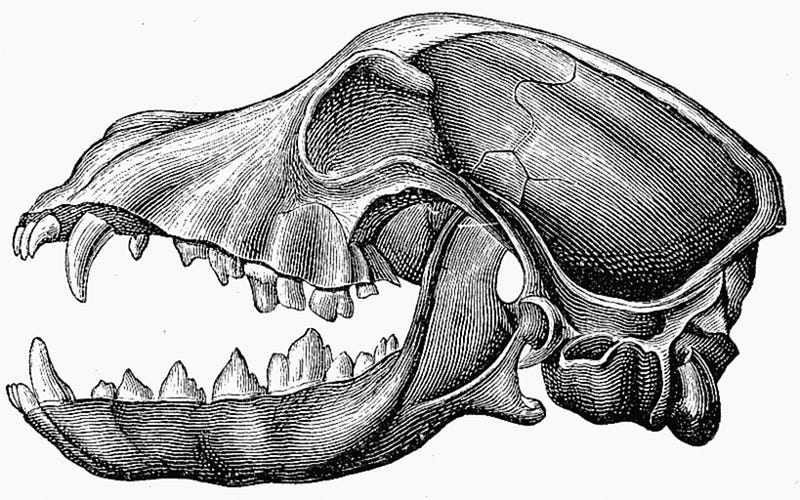
Quite often you can work out how something should be drawn by thinking about how it works. So the shape of the eye is round and we know about ‘eyeballs’ so we know the eye is an organ that is spherical, but still fits into the skull.
This knowledge helps when working out what to draw.
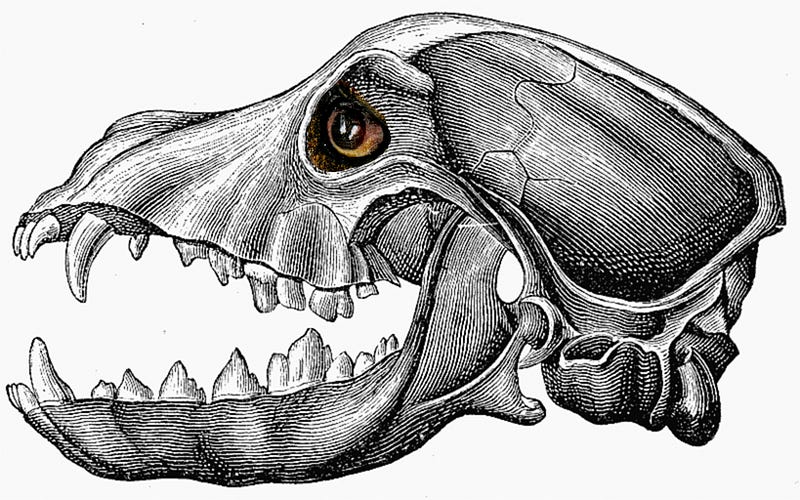
You can see how the eye fits into the socket evolution has prepared for it (left). You can also see how just an eye can make an otherwise unfriendly-looking skull look quite different, full of character, and much more welcoming!
The bony bits of the eye socket often have a little line of fur on top of them that shows the shape underneath. It might be a little darker — or a little lighter if it’s catching the light, but, as with Roman remains found under earth and grass, you always know there’s a skull under the skin and fur, which influences what shows on top.
The direction of the pencil/pen marks help with the overall impression the viewer gains. The direction and the length of the pencil strokes and the weight of them, also play their part. Not all the hairs around a dog’s eye will be the same length.
In brief:
As with anything, look for basic shapes so you get everything in the right place from the off.
This is always important, and I’m sure I will have said it before, but many beginners feel the need to dispense with this stage, but it is a useful habit to keep forever.
Once you have the basic shapes in place, then think your way through the details that make up the eye — that is — the upper, lower and third eyelids; the iris, pupil and highlights.
Then think about where the shadows will be, and thus the darker and lighter parts of the eye.
And you have your perfect eye!
The next session will be about how to get the expressions you want into your dogs’ faces.
All pictures and photos are by Susan Alison. Except the dog skull which can be found in the public domain in many places including via Wikimedia Commons.
Susan Alison’s Amazon Author Page |Susan’s Etsy Store | Susan’s website


