avatarTodd B Harrington

Summary

The article outlines the process of a couple transforming a dull corner in their living room into a cozy space with a gas fireplace, involving professional assistance for installation and gas connection.

Abstract

The author and his wife tackled a DIY project to revitalize an uninspiring corner of their living room by installing a corner gas fireplace. After researching and visiting a local fireplace store, they opted for a gas fireplace due to cost and structural efficiency. The project required professional help, including a fireplace installer for the primary installation and a plumber for the gas connection. The author completed the platform framing with guidance, which was a significant cost-saving measure. The installation process involved constructing a support platform, completing the framing, and ensuring proper gas line connection and vent ductwork installation. The project concluded with finish work, including painting and building a custom bookshelf. The entire renovation took approximately five weeks, also encompassing a fresh coat of paint for the living room.

Opinions

  • The author expresses satisfaction with the decision to install a gas fireplace, considering it a practical and cost-effective choice over a traditional wood-burning or stone fireplace.
  • The necessity for professional assistance, particularly for the gas connection, is emphasized as a critical safety measure that should not be attempted as a DIY task.
  • The author values the cost savings achieved by doing some of the work themselves, such as the platform framing, while recognizing the importance of relying on professionals for specialized tasks.
  • The inclusion of a custom bookshelf built by the author's son-in-law is seen as a valuable addition to the space, providing functionality for storing tech gear.
  • The project is described as a success, with the new fireplace effectively transforming the living room corner into a more inviting and functional area.

DIY – Adding a Fireplace

Transforming a dull corner in your living room…

(Photo by Author, © Todd B Harrington)

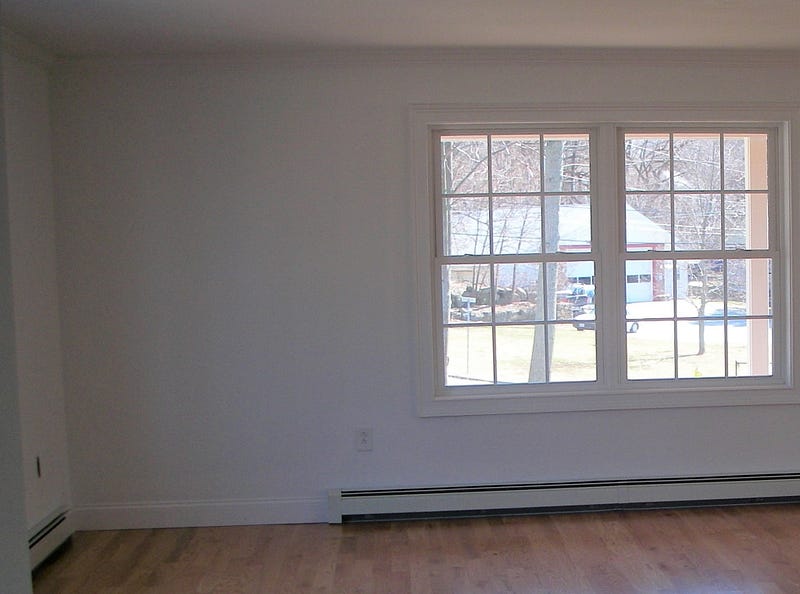
The corner on the left was begging for something since the day my wife and I bought this place. It didn’t happen right away, but we eventually figured it out.

We zeroed in on a corner fireplace. Given the nature of wood-burning fireplaces, we decided on a gas style. Between the cost and structural challenges of building a brick or stone fireplace, we took the easier and cheaper route of gas.

Prior to actually making the commitment to install one, we did a fair amount of homework. We visited a local fireplace store and scheduled a visit to determine the feasibility of installing one in the corner of our living room.

The big difference between this DIY project and the porch renovation project I wrote about previously was the necessity for assistance from outside professionals.

In this case, there were two. The fireplace installer did the primary installation once the platform framing was complete. Secondly, and most important, was a plumber to make the gas connection. The gas connection, while not complicated in this case, is just something you don’t DIY in your home.

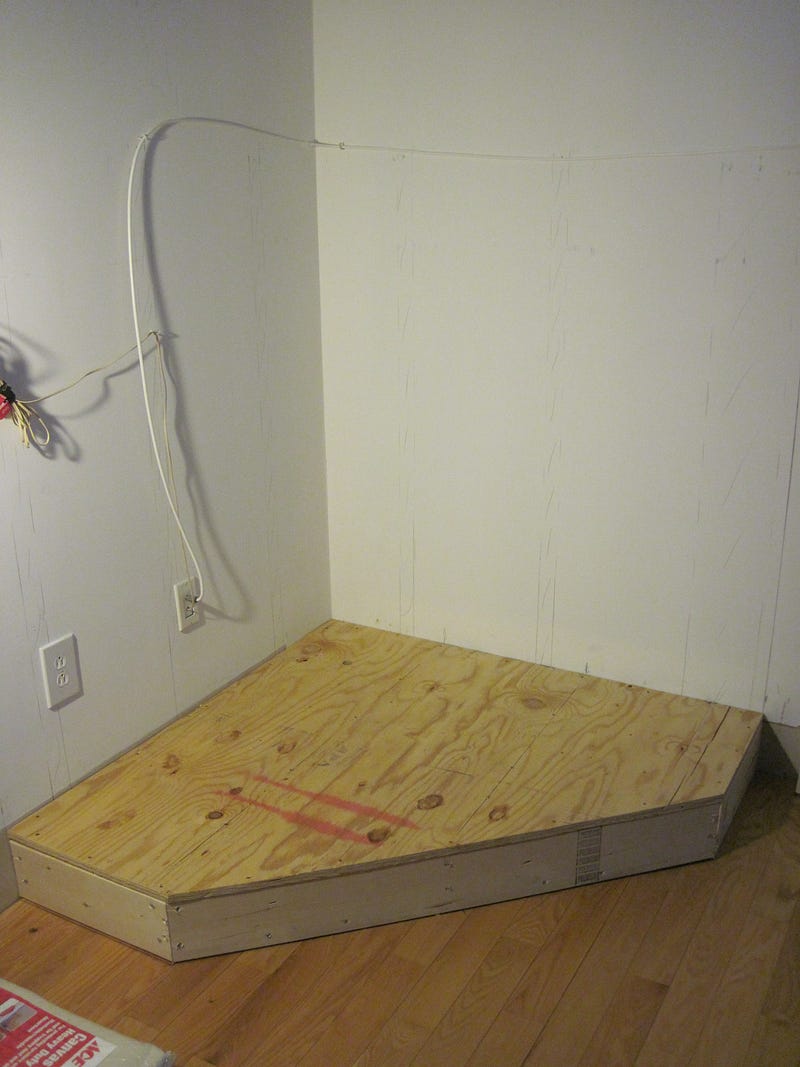
That said, construction began with a platform to support the fireplace. With guidance from the installer, I was able to do the framing myself. It is a significant cost savings in a project like this.

(Photo by Author, © Todd B Harrington)

With the mounting platform complete, the installer came in next to do his handiwork. That step allowed me to complete the framing and schedule the plumber for the gas hookup and inspection.

(Photo by Author, © Todd B Harrington)

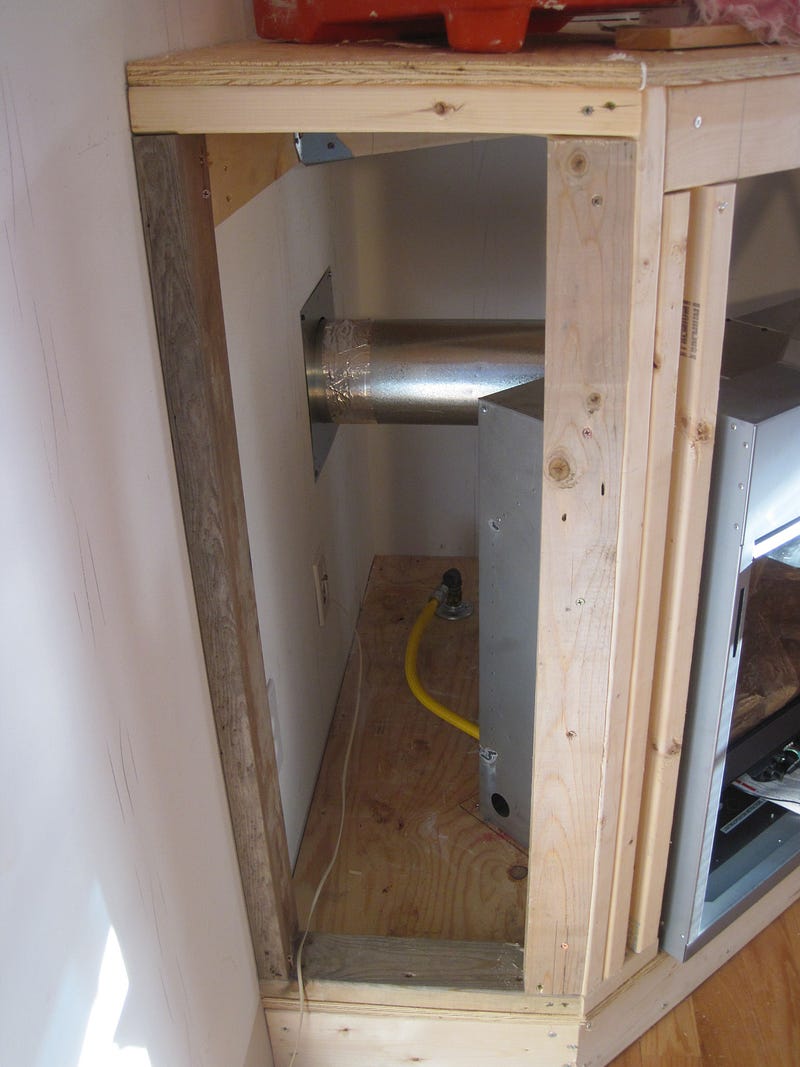
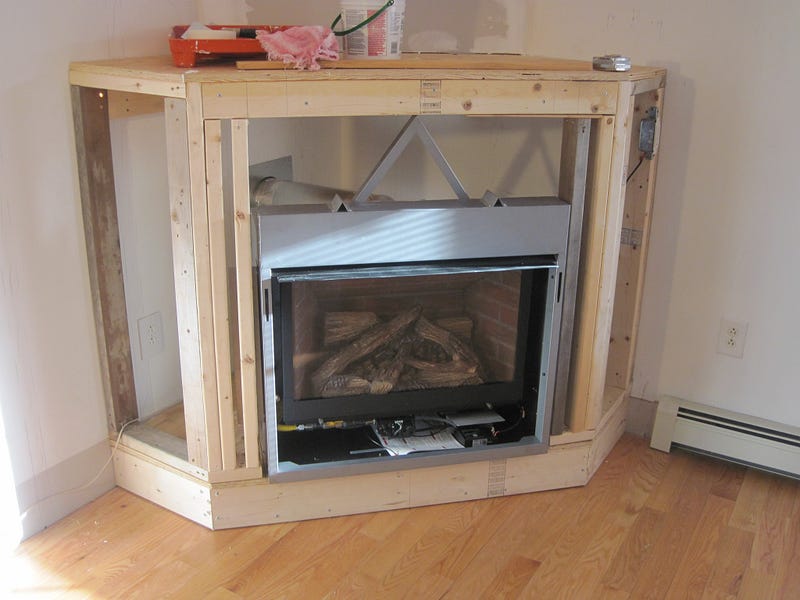
The installation is effectively complete at this point. Time to start closing it in and begin the finish work. The gas line is connected and has been inspected, and the vent ductwork has been installed and sealed.

Of note, this is a “zero clearance” fireplace that is designed such that it can be installed in close proximity to the framing and walls.

(Photo by Author, © Todd B Harrington)

Getting ready for some paint. This project is coming down the home stretch!

(Photo by Author, © Todd B Harrington)

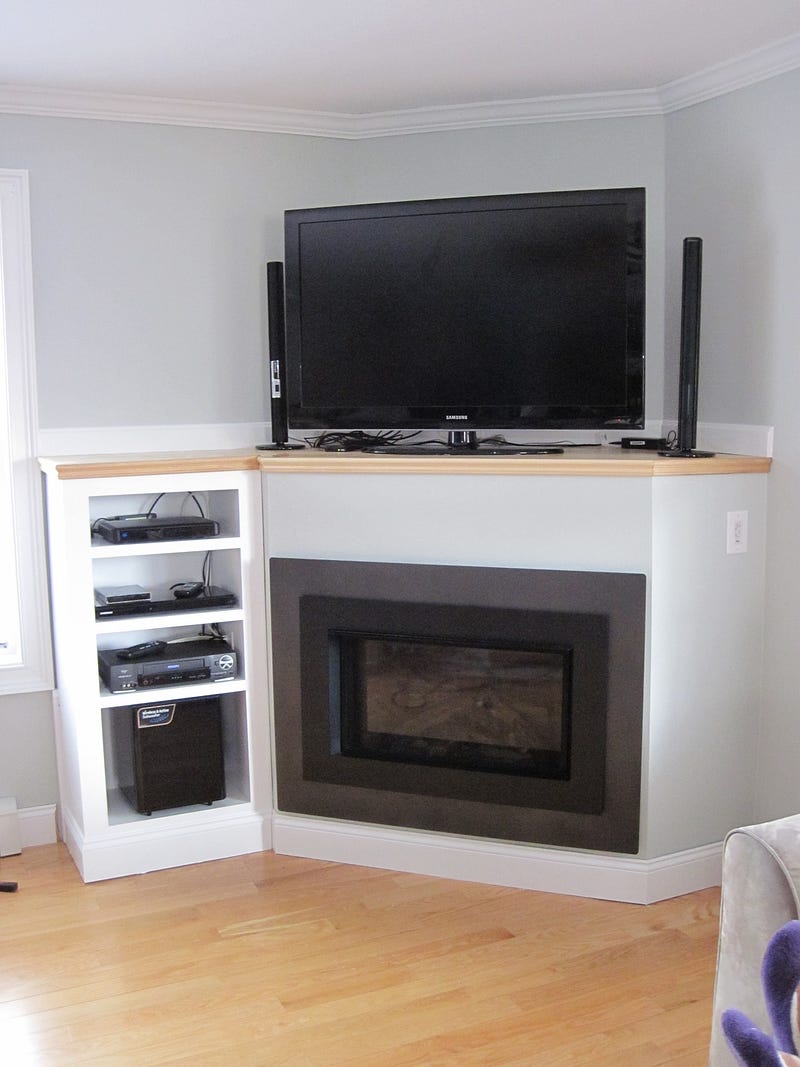
My son-in-law graciously helped out by building the attached bookshelf on the left. It is a nice add-on to handle the tech gear.

(Photo by Author, © Todd B Harrington)

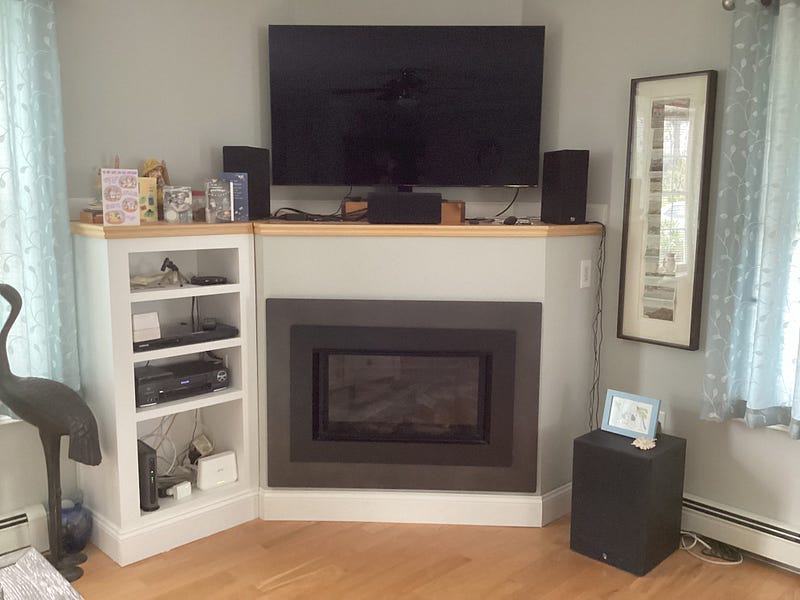
And here we are today!

Overall, this project took about five weeks to complete. It also included updating the living room with a fresh coat of paint.

Previously published DIY stories:

The Diy Diaries
DIY
DIY Projects
Renovations
Home Improvement
Recommended from ReadMedium