
Develop Sign-Up and Login for E-Commerce App using Java and Spring Boot
In this tutorial, we will build the backend of authentication for our app.
Note to the reader
Although I have built the entire application and wrote series of tutorials, which are quite popular and top in google result, which I am very proud of, (more than 130K views in medium alone)

top in google result
I later found some parts are missing from those tutorials and some tutorials are not relevant anymore. For example, in some tutorials, we used vanilla JS and also started to develop an android app, which we discarded later.
So, this is my attempt to redo the tutorials, deleting/editing some parts which are not relevant anymore and creating some tutorials which cover the missing pieces, so it will be very easy for the users to follow the tutorials.
Introduction
Authentication (Signup and login) is a very important part of eCommerce app. Previously, we have developed category and product APIs. In this tutorial, we will implement an authentication system from scratch.
First, we will configure MySQL for our project. Install MySQL in your local machine if you don’t have it already.
Live Demo
Frontend
https://infallible-swartz-b50174.netlify.app/
Backend
https://limitless-lake-55070.herokuapp.com/swagger-ui.html
Create a database
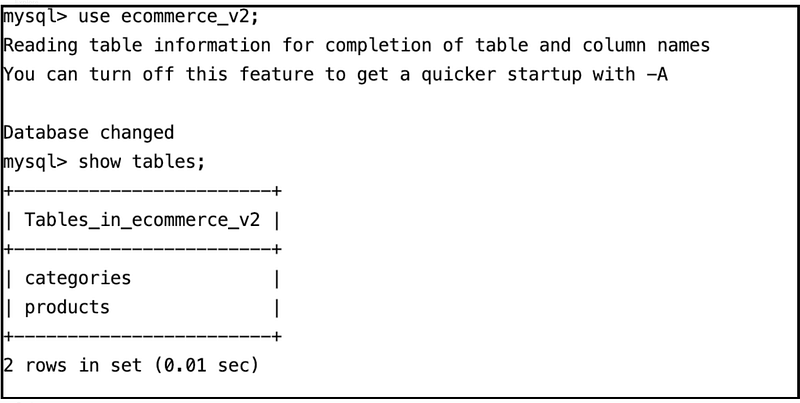
We will start by creating a database. Open a terminal and execute the command to create a new database
create database ecommerce_v2;Configure the app
Open pom.xml to add the dependency for MySQL
Now, open the application.properties file and replace the h2 configuration with MySQL configuration.
We are defining database name, username, password, and hibernate ddl mode as update.
Run the app#
If you run the app, you will see two tables are automatically created for us.
Create some data.#
Let’s hit the API to create some category and products.
In the swagger UI, let’s hit the category create API with this JSON.
Result#
We can open the terminal and see if we have the data.

Global exception handling
We will use @ControllerAdvice annotation to handle error in global level. A controller advice allows you to use exception handling techniques and apply them across the whole application, not just to an individual controller. You can think of them as an annotation-driven interceptor.
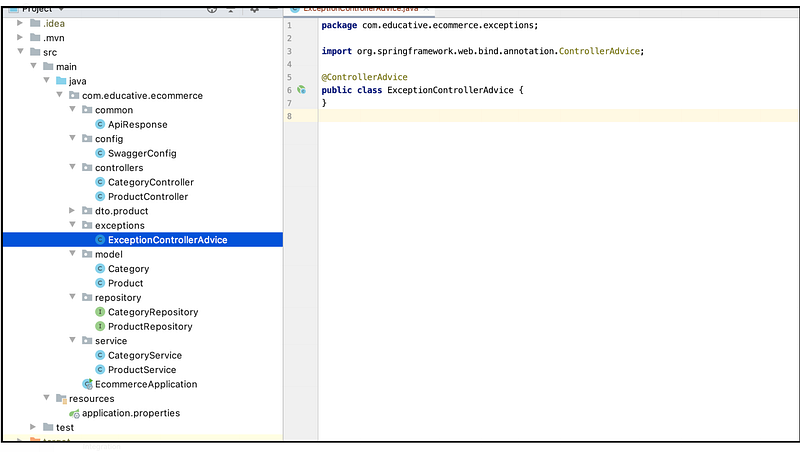
Create ExceptionControllerAdvice class
Let’s create a package exceptions and inside it create a class ExceptionControllerAdvice
CustomException class
Next, we will create a CustomException class in exceptions package.
And register it in ExceptionControllerAdvice class.
We will use it in our next chapters.
Code till now
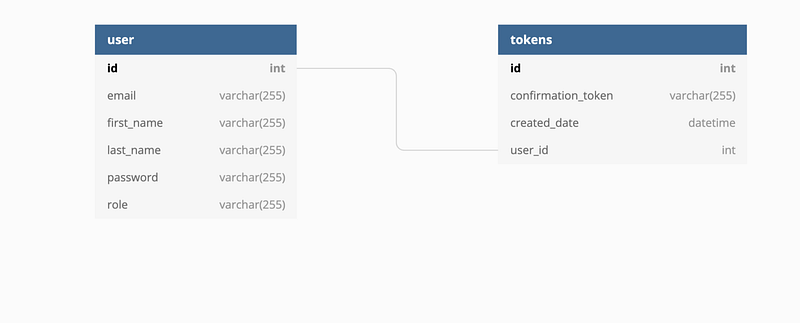
Database Design
SignUp Integration
We will start by creating a user entity and when users signup we will create a new user in database.
User entity
Let’s create a model User. It will have five fields
- id
- firstName
- lastName
- password
Repository#
Next, we will create a JpaRepository for users model.
Service#
Next, we will create a UserService class in Service package, which will autowire UserRepository.
Controller#
We will now create a UserController class in controller's directory, which will autowire UserService.
Signup API#
Now, as we have all the basic setup ready, we will start creating the APIs.
The API will take first name, last name, email and password as request body and check
- If user is already present, return an error response
- else save the user, and return a response that user has been successfully saved.
Let’s start coding that.
Signup DTO
Now, we know the DTO concept, we will create a DTO for signup. Create a package users inside dto package and create a class SignupDto inside it.
Response Dto
We will also create a SignUpResponseDto class to return after we successfully created a new user.
Now, we are ready to create our API for sign up. In UserController we will create the API, which will take SignupDto as request body and return SignUpResponseDto in case of success and throw CustomException in case of any error.
It will call signUp method in UserService. Let’s create that.
Service
The method will have the following steps.
- First, we will check if any have any user already having the email address. If yes, we return a custom exception
- Then we encrypt the password.
- We save user details along with encrypted password.
As you can see, you have to create a couple of methods
findByEmailin repository.hashPasswordin service
We will also declare a logger for logging errors for debugging the application.
Logger logger = LoggerFactory.getLogger(UserService.class);Hashing password
We will use, MD5 hashing algorithm to hash the password.
Authentication Token
After we log in, we will get a token from the API. This token will be the authentication token, and for every subsequent request, you have to send it with it.
In the backend, the token will be checked, and the corresponding user will be retrieved. If the user is not valid, an exception will be thrown.
Model
The model will have and, auto-incremented id field, a token field which will be randomly generated UUID, a created date field, and will have @OneToOne relationship with the user.
Repository
Next, we will create a corresponding repository. It will have two methods, to find the token by user or by token.
MessageStrings class
We will create a class to store the string for reusability. For example, if we want to change some error message, we just need to change in one place.
Let’s place it in config package.
Exception
Now, create a class to handle exceptions related to authentication
Service
Now, it is time to join all the pieces together. We will create the AuthenticationService which will autowire TokenRepository and use the above exception.
Generate token during sign up
Previously, we have created the sign-up method, now we will integrate the token generation while signing up.
Now, we have set the Authentication service, we are ready to log in the user and return a token in response, which can be used for subsequent login.

Request body
We will have a dto for request body for sign in and a dto for response, which are quite simple. SignInDto has two attributes, email and password.
Response
It will have two attributes, status and token
API design
We will create an API for /signin, which will take the request body, SignInDto and return the response body SignInResponseDto and it will call signIn method in service, which we will create next.
Service
Let’s first autowire AuthenticationService in the UserService, so that we can use getToken method defined in AuthenticationService, which return the authentication token for the user.
Final code till now
https://github.com/webtutsplus/ecommerce/tree/signin


