
Create Productivity App in Python from Scratch— Part 1
Python for time management. Pomodoro application.

Introduction
The pandemic is hitting hard. It is necessary to limit any physical contact with the “outside” world and to stay indoors as much as possible. If you have an opportunity to work from home, it is great. However, there is a price to pay as well.
Staying efficiently productive at home is not an easy task. A home environment is not a work environment. Assuming you are not living alone, you cannot just say bye to your kids/family for the next ~8 hours and leave the house for work. Often, the workplace is the same room where you rest, eat, cultivate a hobby, and sleep. Besides, staying indoors 24/7 can drive people nuts.
Overall, it is almost impossible to separate life from work during these turbulent times. But we, humans, are not capable of doing multiple tasks simultaneously. As a result, we have difficulties concentrating on work efficiently.
Here, I want to share with you one powerful productivity technique, called Pomodoro. This way helps you concentrate on one single activity at a time.
Also, I will tell you how to create it from scratch using Python. I will tell you why I decided to create this app myself and why reinventing this bicycle is worth doing, at least in my opinion. I want to encourage everyone to use Python in everyday life.
Pomodoro as Productivity App

The Pomodoro method is a time management technique that was developed by Francesco Cirillo in the late 1980s. This method uses a timer to break down the work into intervals, traditionally 25 minutes in length, separated by short 5-minute breaks. Later on, with a long 15-minute break once in a while.
In Italian, pomodoro means tomato. The technique was named after the tomato-shaped kitchen timer that Cirillo used as a university student.
My Pomodoro Frustrations
There are many free versions of this app out there. Grab any and start using it right away: push the button and start working. Still, not every version includes an option to record/store the number of sessions you have completed. In my view, tracking your progress is important — be it the number of hours you spend working or tracking your weight loss/gain.
Not every Pomodoro app has this option of saving or displaying the number of completed sessions. It happened, that the app I have been using did not have that option. Of course, it is not necessary to know how many Pomodoro sessions you have accomplished. However, I would like to know that number. Maybe, I take a look at that number at the end of the day, and it will make me feel a bit more accomplished. Or at the end of the week, I can see how many Pomodoro/working sessions I accomplished per day. Here we go, Ruslan_Frustrations += 1.
Moreover, at some point, I got bored with that one standard white background color of the app. So, I decided to check if there is an option to change it. Again, some apps might provide it. But it happened, that the app I have been using did not have that option and I did not check any other app at that point — up until I created my app …
Once more, does it make my work better/worse if I cannot change the background color? Of course, not. But I would like to have the possibility to change the colors in the app as I like. So, Ruslan_Frustrations += 1.
An Idea of Creating My App
As a result, I decided to create my Pomodoro app using Python. To sum up, here are a few reasons for this
- to have my own cool customizable-buttons-and-colors Pomodoro app
- to challenge my programming skills
- to increase my knowledge of Python down the road
- to have some fun as well
At this point, I would say that the last reason is not the least. Probably, I would not start/continue that project if it was not for fun. Now, I am even happier as I can share my knowledge and ideas with you.
Stay tuned because we are going to break down the project into small parts (similar to dividing the work into short intervals).
The plan of the project is the following:
- Create a user-friendly interface (GUI)
- Add the Pomodoro logic (countdown timer)
- Add the breaks between the work sessions
- Add the session numbers recorder
- Make a signal (sound/ring a bell) upon switching between the sessions
- The fun part: customize the colors and buttons (maybe)
It is hardly possible to fit all of these topics in one article with a reasonable level of detail. Depending on the length of this article, I will decide on how to break down the above-mentioned plan. But for a moment, let us break it down as follows:
- This part (Part 1) includes the fundamentals of our Pomodoro GUI — graphical user interface. And a brief intro to
classes. - Part 2 includes the Pomodoro logic (a timer, session switching, etc.)
- In Part 3 (the fun part), we will come back to the GUI part and see how we can modify/customize our app (buttons, colors, background, etc.)
Part 1
If you would like to learn the fundamentals of GUI in Python or brush up your knowledge a bit, I have prepared this article about GUI basics.
Quick Recap
Just in case, if you would like to skip all the previous tutorials I give you a quick recap on how to start using the Tkinter package for GUI in Python:
Note: Tkinter is pre-installed for Windows and macOS. The Linux users (including me) need to run the following commands to install the package:
For Python 3 sudo apt-get install python3-tk
For Python 2.7 sudo apt-get install python-tk
The usage of the Tkinter is a bit different for Python 2 and Python 3, so we will have to explicitly import the right package:
import sysif (sys.version_info.major == 3):
print('Python 3')
import tkinter as tk# for Python 3
from tkinter import messagebox
else:
print('Python 2')
import Tkinter as tk# for Python 2.7
import tkMessageBoxNow, we are on the same page. So let us start with the application layout.
Pomodoro App Layout
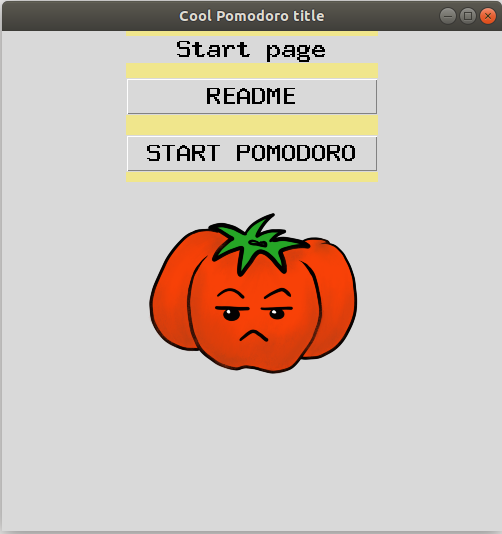
A little spoiler. By the end of this article, you will be able to create a GUI like:
Creating the Base
We are going to have two pages in our application. One will describe the app (like README). Another will contain the “meat” of the program, the logic of the Pomodoro count-down timer. Here, I will be using classes to separate the pages from each other.
We will have 4 classes:
- The application layout, that connects all the other frames. Such as an invisible master window
PomodoroApp. - The
Startingpage is the initial frame we will see upon entering the application. It contains the buttons to go to other pages. - The
READMEpage that contains some information about the application. - The
Pomodorotimer page that contains the main logic of the program (will be discussed in the next Part 2)
Creating the Pomodoro App:
- initialize the Tkinter window with
__init__similar toroot = tk.Tk(). We do not put any frame yet. - define a function
switch_framethat will switch between frames (pages).
class PomodoroApp(tk.Tk):
    def __init__(self):
        tk.Tk.__init__(self)
        self.frame = None
        #here, we will switch to the starting page (frame) as:
        #self.switch_frame(StartPage)
def switch_frame(self, frame_class):
new_frame = frame_class(self)
# checking if the current frame is not empty,
# we destroy it before switching to the next frame:
if self.frame is not None:
self.frame.destroy()
self.frame = new_frame
self.frame.pack()Note: Method
__init__is called a constructor method. This method allows the class to initialize the attributes of the class. It is called when an object is created from a class. Here, we create the window object (tk.Tk) to hold all the other frames.
A brief explanation of this piece of code. When calling the switch_frame() method of the PomodoroApp() class, we assign a new frame from that new class to a new_frame variable. Before replacing the current frame with a new one, we delete (destroy) the current frame if it is not empty (not None), otherwise, there is nothing to destroy. And in the end, we place a new frame with a familiar method .pack().
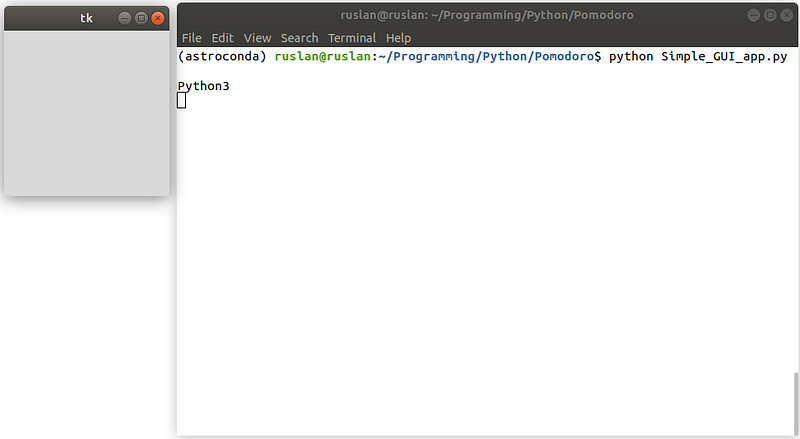
To call that class/app, we use the following commands:
app = PomodoroApp() # <- calling our main class
app.mainloop() # <- needed to keep the GUI running
We start our app by calling the python code.py from the terminal, as usual. We will see only an empty window for a moment. Because we did not load any frame yet. However, all the logic to switch between the frames is there already!
Note: The
selfrepresenting the instance of the class. It is used to call the functions/methods of the current class in comparison to calling the functions from the other classes.
Creating the Starting Page
Now, we can create another class called StartPage() representing our starting page, i.e., starting frame. To switch to the starting page we call self.switch_frame(StartPage) inside the __init__ method of the PomodoroApp() class.
But firstly, we need to create our StartPage() class:
class StartPage(tk.Frame):
    def __init__(self, master):
        tk.Frame.__init__(self, master, bg='khaki')
        tk.Label(self, text="Start page", font=('MathJax_SansSerif-Bold', 18, "bold")).pack(side="top", fill="x", pady=5)
A brief explanation of this piece of code. Here, we created
- A new frame with a chosen background color (
khaki). - A label saying that it is our “Start page”, with a chosen font parameters. You can play around with the size/style of the text. The .pack() method also has several parameters, such as
side,fillandpadyto place a label to the side, fill in the x-direction, and crate padding in the y-direction.
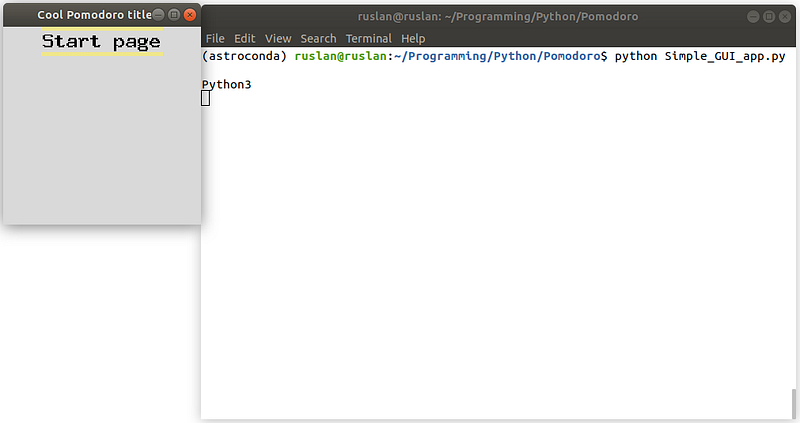
To show that starting page upon running the app, let us come back to our first class. We call a self.switch_frame(StartPage) method from thePomodoroApp(). Additionally, let us add a title and a custom size of the app:
class PomodoroApp(tk.Tk):
    def __init__(self):
        tk.Tk.__init__(self)
        self.title("Cool Pomodoro title") # <-- new line!
        self.geometry("250x250") # <-- new line!
        self.frame = None
        self.switch_frame(StartPage) # <-- new line!
As a result, we get our starting page
Adding Buttons
No, we can add two buttons to our StartPage class.
class StartPage(tk.Frame):
    def __init__(self, master):
        tk.Frame.__init__(self, master, bg='khaki')
        tk.Label(self, text="Start page", font=('MathJax_SansSerif-Bold', 18, "bold")).pack(side="top", fill="x", pady=5)
        tk.Button(self, text="README", font=('MathJax_SansSerif-Bold', 18, "bold"),
                  command=lambda: master.switch_frame(READMEPage)).pack(fill='x', pady = 10)
        tk.Button(self, text="START POMODORO", font=('MathJax_SansSerif-Bold', 18, "bold"),
                  command=lambda: master.switch_frame(PomodoroPage)).pack(fill='x', pady = 10)
Note: We use a
lambdafunction. It is called an anonymous function. These functions are usually the arguments that are passed to higher-order functions. It is useful to employ the lambda functions if they need to do some job only a few times in the code here and there. Because it is computationally cheaper to use these law-order functions.
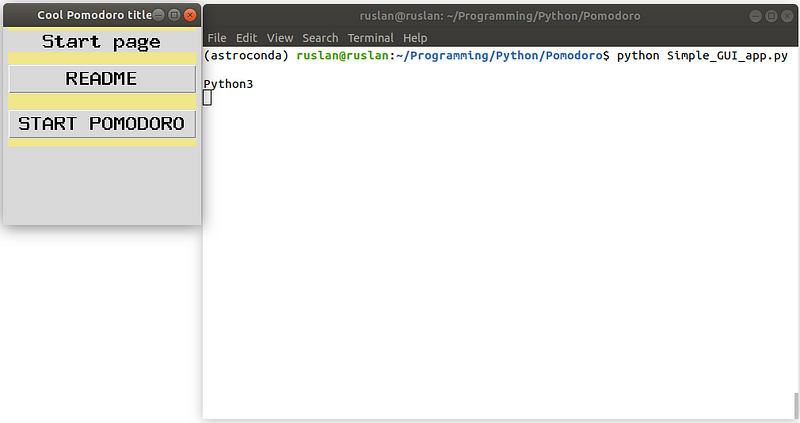
As a result, we have a visually-completed starting page! Bear in mind, the buttons are pointing out to the non-existing pages. We create these other pages in our next steps. But for a moment, let us enjoy the result of our hard work!
Adding README Page
We will start with the README page. We plan to have a button “Back to the main page” and a text describing the app. But of course, one can do whatever one’s heart desires. Because
Your app — your rules.
I give an example of what I did:
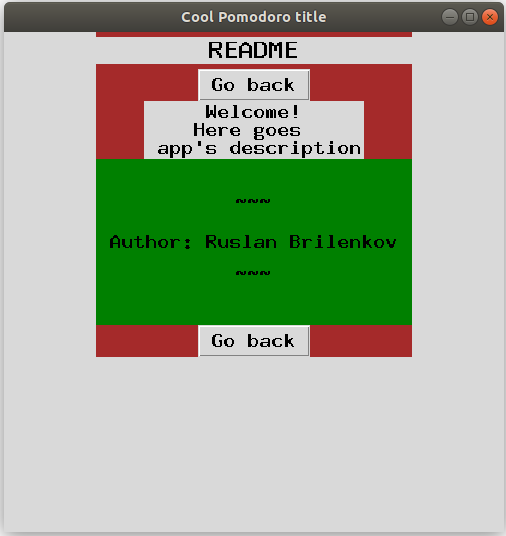
class READMEPage(tk.Frame):
    def __init__(self, master):
        tk.Frame.__init__(self, master)
        tk.Frame.configure(self,bg='brown')
        tk.Label(self, text="README", font=('MathJax_SansSerif-Bold', 18, "bold")).pack(side="top", fill="x", pady=5)

        tk.Button(self, text="Go back", font=('MathJax_SansSerif-Bold', 14, "bold"),
                  command=lambda: master.switch_frame(StartPage)).pack()

        text_for_label = "Welcome!\nHere goes \n app's description"
        text_for_contacts = " \n\n ~~~ \n\n Author: Ruslan Brilenkov \n\n ~~~ \n\n "

        tk.Label(self, text=text_for_label, font=('MathJax_SansSerif-Bold', 14, "bold")).pack()
        tk.Label(self, text=text_for_contacts, font=('MathJax_SansSerif-Bold', 14, "bold"), bg='green').pack(side="top", fill="both")

        tk.Button(self, text="Go back", font=('MathJax_SansSerif-Bold', 14, "bold"),
                  command=lambda: master.switch_frame(StartPage)).pack()
I hope, by now you can immediately grasp the code. Still, I would like to mention:
- we are adding two “Go Back” buttons to prevent endless scrolling in case our description becomes too long. These buttons are linked to switch to the starting page.
- the labels have the text describing the app and giving the Author’s contacts, etc.
As a result, we have a simple explanatory README page:
Bonus — a Tomato Image
We will add the final “Start Pomodoro” page in the next part (Part 2) of this tutorial. For a moment enjoy a bonus part — inserting an image into a label widget.
Note: We will be using Python Imaging Library (PIL). To install that package, write in the terminal the following: pip install pillow
Do not forget to import these two packages Image and ImageTk:
from PIL import Image, ImageTk
...
class StartPage(tk.Frame):
def __init__(self, master):
. # this part
. # is
. # the same
im = Image.open("pomodoro_image.png")
im_resized = im.resize((250, 200))
render = ImageTk.PhotoImage(im_resized)
img = tk.Label(self, image=render)
img.image = render
img.pack(fill='both')I have resized the image to 250x200 pixels to fit in the window. Resizing an image, in this case, is a matter of trial and error. The result looks like this:
In Conclusion
Fortunately for us, this journey is not over yet. While this has been our first leap to creating the Pomodoro GUI application from scratch, there are still things to do. In the next tutorial, we will be creating the main work/break timer logic and a few more things. So, stay tuned.
Overall, this exercise has been a great investment of my time, and I hope that it will be useful for you as well! Thank you for reading my article.
Are you curious about the emerging field of Prompt Engineering? Grab my new e-book! You will learn and master everything from fundamental concepts to practical tips and real-world applications. Additionally, you will receive a bonus of 300 prompts and some of the free resources to kick-start your AI-driven journey. With all this value packed into one e-book, what is the price? The cost of a cup of coffee! Do not miss out on this opportunity to take your skills to the next level!
Contact
I recently started a YouTube channel where I talk about different topics, including data science and AI news, research, and life in general among others. It is a steep learning curve for me but I invite you to check it out here.
Never miss a story, join my mailing list!


