
Basics of GUI in Python
Introduction to the Tkinter.

Intro
Python is my favorite programming language. It is easy to get around, versatile, yet powerful. Python is a great choice for both beginners and experts. There are numerous reasons for using Python. In my opinion, one of the main reasons is an enormous amount of open-source Python libraries, packages, and frameworks.
There are many articles describing the advantages of Python. For example, as was mentioned by Mindfire Solutions in 7 Important Reasons Why You Should Use Python article: “You can use Python for developing complex scientific and numeric applications. Python is designed with features to facilitate data analysis and visualization.”
I am using Python for my research a lot. Some of the applications are scientific computing, statistics, and advanced visualization. But in my free time, I enjoy creating mini-applications for various reasons. Some of them solve a particular problem, others just for fun. For example, recently I wrote a mini-app to track my weight with Python. Only imagine, how cool it would be to use this program from a user-friendly interface instead of running it from the terminal!
Similarly, you can upgrade your program to another level by adding a graphical interface. Be it a simple or complex application, you can improve it by creating a nice interface. Luckily, there is a possibility to do so by using various widgets (labels, buttons, frames, etc.). Here, we are going to talk about how anyone can create a graphical user interface (GUI) using Python.
I want to encourage everyone to use Python in day-to-day life.
So, let us make the idea of improving our programs by wrapping it up with a user-friendly graphical interface our motto for this article. I write this post to prepare you for a real project using GUI. So, stay tuned.
Let us Begin
What is the GUI?
The GUI stands for the Graphical User Interface. It is an interface that allows users to interact with apps or devices through graphical icons, buttons, sliders, etc.
GUI in Python
To create a graphical user interface in Python we will use a GUI package, called Tkinter. Of course, there are alternative GUI modules, such as PyGUI, PyGTK, wxPython, and PyQT.
I heard that the former package has a smaller number of widgets than the last ones. I cannot judge which GUI package is better. I chose Tkinter because it is a part of a standard Python library.
Note: Tkinter is pre-installed for Windows and macOS. The Linux users (including me) need to run the following commands to install the package:
For Python 3 sudo apt-get install python3-tk
For Python 2.7 sudo apt-get install python-tk
Introduction to Tkinter
The usage of the Tkinter is somewhat different for Python 2.7 and Python 3. In general, it would be better to show both alternatives.
As we know, Python 2 has retired since January 1st, 2020. Now, it is time for Python 3 to shine. So, there is no need to show how to use Tkinter for both versions of python. However, if you are still in the transitory stage from version 2 to 3, it is useful to know both ways. I will still show you some of my tricks.
Hello World from GUI
Importing the Package
First of all, we will import the system module sys to check our Python version. Depending on the version, we will import the Tkinter package:
import sysif (sys.version_info.major == 3):
print("Python 3")
import tkinter as tk# for Python 3
else:
print("Python 2")
import Tkinter as tk# for Python 2.7Now, we can use Tkinter as tk without even thinking which version of python we have. Another way of importing such a package (for lazy people) would be to use a try-catch block and to try to import both versions. If one does not work, we know that another will be imported without an error:
try:
    import tkinter as tk# for Python 3
except:
    import Tkinter as tk# for Python 2.7
I explained the basics of a try-catch block here if you would like to learn more about it.
Our First Window
Now, we need to create a window which is the root/base element. All the other widgets (labels, buttons, etc.) stay inside the root window. The window is similar to a container. Let us create an empty window called root.
Note: Bear in mind that the window will disappear in a blink of the eye if we do call the event loop
mainloop().
root = tk.Tk()#Call the event loop
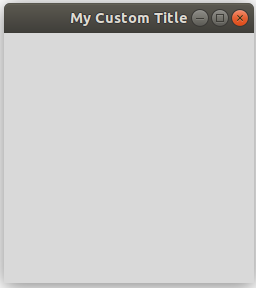
root.mainloop()As a result, we should get an empty tiny window somewhere on your screen. We can manually set the size of the root window with a geometry() method. Just put it before the mainloop() function. Let us also set a title for this window with (as you guessed) a title() function:
root.geometry("250x250")
root.title("My Custom Title")
This results in something like that:
Adding Labels
Now, we can start adding labels and buttons! Every beginner’s program starts with the greetings to the world, so let us also say “Hello World!” with our GUI program:
Note: To place a widget on a window/frame, we need to explicitly tell tkinter to do it by using either default
.pack()or.place(x=x, y=y)methods
The second method needs the coordinates (x, y) to place a widget. Point (x=0, y=0) is the top left corner of the window/frame. Let us see, how to use both methods:
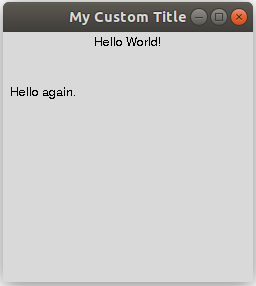
# Adding the labels inside a root window
label_1 = tk.Label(root, text="Hello World!")
label_1.pack()
label_2 = tk.Label(root, text="Hello again.").place(x=5, y=50)Note: We can save the line of code by applying method
.pack()or.place()directly after the correcponding widget. In the example above, I did this for the second labellabel_2.
As a result, we get something like that:
Adding Buttons
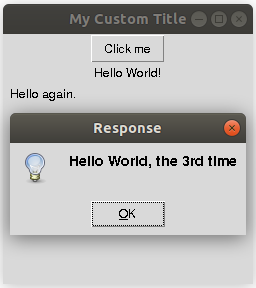
So far, we did not interact with our application. Now, it is time to add some interactivity! Let us create a button and add some functionality. For example, we can create a message box with the words “Hello World, the 3rd time”. To use a messagebox, we need to import it as follows:
from tkinter import messagebox # for Python 3
import tkMessageBox # for Python 2.7
To add a Button widget functionality, we need to define a function and pass it in the parameter command. We will call the function do_something:
def Do_Something_Button():
    '''
    the following line of code show messagebox
    '''
    messagebox.showinfo(title = 'Response', message = "Hello World, the 3rd time")
    #tkMessageBox.showinfo(title = 'Response', message = "Hello World, the 3rd time") # for Python 2.7
button = tk.Button(root, text = "Click me", command = Do_Something_Button).pack()Upon clicking the button, we see a popped up message such as follows:
Creating Frames
The final bit of information before we conclude this tutorial is the Frame widget. Frames are like containers for other widgets. The difference between the frames and the windows is that one window can have many frames.
The beauty of using frames and placing widgets on top of them is the organization of our widgets. We can move the whole bunch of related widgets together by moving only the frame to which they are assigned. Instead of positioning every single widget separately.
Additionally, we can keep the same window open and only switch between the frames. For example, we can destroy the current frame and create new frames on top instead. Let us briefly describe the general usage of frames.
We assign the frame in the same way as any other widget, i.e., assign it and place it on a window with a .pack() method, for example. To assign a widget to a particular frame, we use the master parameter of that widget. Remember to put this piece of code in between the root window and the mainloop():
frame = tk.Frame()
label = tk.Label(master=frame, text="Hello from Frame").pack()
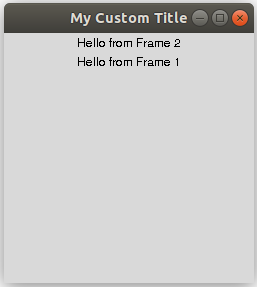
frame.pack()Let us run only one more example before we can start a real project using these widgets! Let us create two frames with two labels. And see how placing one frame on top of another affects the labels assigned to them:
frame_1 = tk.Frame()
label_f1 = tk.Label(master=frame_1, text="Hello from Frame 1").pack()
frame_2 = tk.Frame()
label_f2 = tk.Label(master=frame_2, text="Hello from Frame 2").pack()frame_2.pack()
frame_1.pack()The result should show the label_2 on top of label_1 because we have initialized (.pack()) the second frame_2 before the first frame_1:
Of course, there are many more widgets and features to talk about in the framework of the GUI and Tkinter package. But I consider it as extra information for a moment. Because, in the next article, we are going to talk about how we can create a productivity application using the widgets discussed here. So, stay tuned!
I hope you enjoyed reading this article and learned something new. If you are interested in using Python in your personal life, for example, how to track your weight using Python, you can check out my previous article. Likewise, if you are interested in applying Python knowledge to study the coronavirus from scientific medical papers, here is another article.
Are you curious about the emerging field of Prompt Engineering? Grab my new e-book! You will learn and master everything from fundamental concepts to practical tips and real-world applications. Additionally, you will receive a bonus of 300 prompts and some of the free resources to kick-start your AI-driven journey. With all this value packed into one e-book, what is the price? The cost of a cup of coffee! Do not miss out on this opportunity to take your skills to the next level!
Contact
I recently started a YouTube channel where I talk about different topics, including data science and AI news, research, and life in general among others. It is a steep learning curve for me but I invite you to check it out here.
Never miss a story, join my mailing list!


