Class Based Components in React.Js
How to Implement States and Lifecycle Methods in Your Web App

In my previous articles, I’ve extensively used functional components to create JSX elements in React. However, apart from using the functional component method, there is another way to materialize JSX components; they’re called class components.
In this article, we will discuss
- Why to use class components over their functional counterparts?
- How to create class components and utilize them in our React program.
Introduction
Why to use Class Components?
- To illustrate, let’s use an example. Here, we want to display the color of the car using functional components
function Car() {
return(
  <h1> Car Color : {props.color} </h1>
)
}
ReactDOM.render(<Car color="blue"/> , document.getElementById('root'))
This is a fairly basic functions and props example. However there’s just one problem : What if I want to change the value of the prop with the click of a button?
The answer is: you can use hooks in your functional components. However, during your career, you will be dealing with legacy code, so there will be days where you would be dealing with class components. To curb this problem though, we use a concept called states. These states are only accessible via the creation of class based components.
- One more advantage is lifecycle methods. They are basically functions which allow you to control what happens throughout the lifespan of an element, for instance, display a timer whenever an element is ‘born’ and so on and so forth.
In short, class based components give you extensive control over your element.
Basic Usage
To write a class component:
- First import the
Componentclass from"react"package:
import React,{Component} from "react"You can now use the React.Component capabilities in your app.
- Now you have to extend the properties of
React.Componentin your class. This is done through theextendskeyword.
import React,{Component} from "react"
import ReactDOM from "react-dom"
class MyComponent extends Component {
render() {
return(
<h1> Hello world </h1>
)
}
}
ReactDOM.render(<MyComponent/> ,document.getElementById('root'))The definition of the component is bolded. The steps are as follows:
MyComponentsimply inherits from theReact.Componentclass.- The
render()method is called to display the element into the browser.render()is essentially a lifecycle method. This is one of the few things that is new information in creating class based components.
This is the result:

Let’s move further to using props in class components.
How to Use Props in Class Components
In functional components, this is how you would implement props:
function MyComponent(props) {return(
<h1> {props.color} </h1>)
}
ReactDOM.render(<MyComponent color="function"/> , document.getElementById('root'))
However in classes,
class MyComponent extends Component {
render(){
return (
<h1> {this.props.color} </h1>
)
}
}
ReactDOM.render(<MyComponent color="class"/> , document.getElementById('root'))
Notice that
- In function components, it is
props.color - However in class components, it is
this.props.color
Note: This means that: when using props in class components, always use this keyword
This is the result:

What if you want to change a prop through code? This seems like a huge problem. The browser might throw an error if you type the following code:
this.props.color = 'yellow' //wrongThis is where a concept called states come in. Let’s move on to the next step.
Adding Local States to a Class
How do states and props differ?
In a React component, props are variables passed to it by its parent component. State on the other hand is still variables, but directly initialized and managed by the component.
Whenever the state is changed, the component that contains the state will re-render on the screen.
Basic Usage
To declare a state, you do the following:
- Step 1: Declare a constructor for your class component and use
super()
class MyComponent extends Component {
constructor(props) {
super(props)- Step 2 : Add properties and values to the
this.stateobject. This is to be done within your constructor
this.state = {
  property : 'value'
}
} //this marks end of constructor- Step 3 : To display the value of this property, use simple JSX.
render() {
  return(
  <h1> {this.state.property} </h1>
  )
That’s all there is to it. Finally, the code will look like this in the end,
This will be the output in the end:

Let’s move on to changing the state values
Event Handling To Change States Dynamically
As an example, let’s say that we want to change the text in a paragraph with the click of a button. As discussed, we can change states through scripting, so that’s what we’ll use.
Basic Usage: setState method
We will be reusing our previous state example.
There is a designated way to change states. To change state, we use this.setState() method. Let’s change the property property to 'hussain'
this.setState({property: 'hussain'})The above code line is right, however this snippet below is wrong, so avoid using this method:
this.state.property = 'hussain' //wrong
this.setState({property:'hussain'}) //right
To implement event handling,
- Create a method ,
handleClickand usesetState()method
handleClick() {
    this.setState({property:'hussain'})
}- You want to now tell React that
handleClickwill change state values. To do so, go to your constructor definition and write this in the end:
this.handleClick = this.handleClick.bind(this)- Let’s implement a button that will call
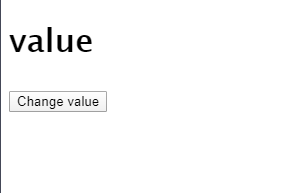
handleClickfunction. Do this in therendermethod:
<button onClick={this.handleClick}> Change value </button>This will be the code output:

Ultimately, the code will look like this:
Let’s say you want to change the values of the propertystate back and forth,
This is possible,
this.setState also takes in a callback function.
This function’s single parameter has all the previous values of the state.
Modify handleClick like so:
handleClick() {
    this.setState((previousState)=>{
      if(previousState.property==='value')
        return {property : 'hussain'}
      return {property: 'value'}
    })
}Explanation: The previousState variable contains the previous values of the state variables. This piece of code compares whether the value of property is value . If it fulfills this requirement, change the value of property to hussain . Otherwise, change it to value .
You can see the output in this GIF:
Exercise
As an exercise, I want you to
- Increment a value of a state variable with the click of a button.
- Display this state variable
Solution
We can
- Create a state variable,
numberand then write a function to incrementnumber - Call this function when a button is clicked
The code will be as follows:
The output of the code is demonstrated by this GIF:
Let’s say we want to control the element as it goes throughout its lifespan. For example, display a message when the element has rendered to the DOM and so on and so forth. This is explained in the next section.
Lifecycle Methods
As a professional developer, it’s common for you to have a multitude of elements in your app. Thus it’s very important to free up the resources when a component is destroyed. For example, when a textfield is deleted, you want to delete other buttons along with that textfield.
There are two terms you should know.
- Mounting : Whenever an element is ‘born’ or displayed to the DOM for the first time, it is mounted.
- Unmounting : Whenever an element is deleted off the DOM, it is unmounted.
Some notable methods are :
render(): Like getting dressed for the day. Executes when a component is displayed to the world. Executes multiple times when states are changed.componentDidMount(): This is like saying that the component is now born. It only runs once. In this method, you should fetch the data you need to correctly display, for example data from an API or a server.componentWillUnmount(): run just before the component is deleted. In this method, you can tear down your code before the component disappears. Useful if you want to remove all of the intervals associated to that component. It’s practical for preventing memory leaks.componentDidUpdate(): is invoked immediately after updating occurs. This method is not called for the initial render.
To show you an example, let’s reuse our code from our previous exercise in the previous section, where a number was being incremented every time a button was clicked.
To the MyComponent class definition, add the following two methods:
componentDidMount(){
console.log('component mounted');
}componentDidUpdate() {
console.log('component updated');
}Now add these lines to the render method
render() {
return(
  //.. other code
 {console.log('rendering')}
)
}
This means that whenever MyComponent starts up, updates or renders to the screen, the messages are displayed accordingly.
This is the output in the end:
Notice how the relevant information is displayed whenever the button is clicked.
Observe that render() is called multiple times, and that componentDidUpdate() is called whenever the component is updated.
Recap
- Converting a functional component with props to class component with props:
- To set states
- To change states:
componentDidMountruns whenever the component is first displayed to the DOMcomponentWillUnmountruns whenever the component is destroyedrenderis run multiple times whenever the component is first displayed, or updated.
Resources/Further Reading
- React State and Lifecycle
- React Component API (All lifecycle methods with descriptions are here)
- React State — W3Schools
- React Lifecycle — W3Schools
- The React State- Flavio Copes
Conclusion
This post covers all the basics you need to know about creating class based components in React. To dive more in depth, you should see the links provided above. Self study is essential if you want to become a skilled developer.Play with the code and deconstruct the examples. Just don’t give up.
In the end, I hope you’ve learned a bunch about this topic. Thank you so much for making it to the end! Have a great day.
Next post : How to Create Forms in React Here’s my previous post : A Guide to Props in React


