
Chapter 8: CSS Box Model
A Complete Frontend Developer Textbook for Beginners (2023 Edition)

This is the textbook version of Lesson 8 of 100 from the Udemy video course: A Complete Frontend Developer Course for Beginners
← Chapter 7: CSS Units of Length
Overview
This lesson covers the following HTML tags, CSS properties, and JavaScript commands for the first time:
HTML
None.
CSS
JS
None.
This lesson begins with this Codepen. Code along with me to increase retention!
Lecture
In the last lesson, we learned how to add dimensions to any sectioning tags.
<html>
   <head></head>
   <body>
      <header></header>
      <main></main>
      <footer></footer>
   </body>
</html>
In fact, we can add a width and a height to any HTML elements.
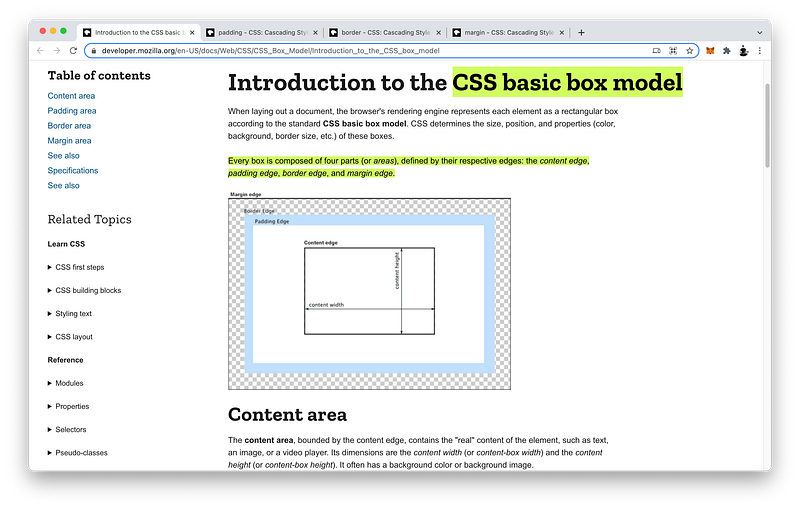
The reason this is possible is because per CSS, everything has a box around it.
CSS: elements = boxesBox Model: Primer
To let us have complete control over the design of these boxes around our HTML elements, we can also specify the padding, border, and margin.
Box Model: width x height + padding + border + marginLet’s demonstrate this with our header element:
header {

}
As usual, we can specify a width and a height:
header {
   width: 500px;
   height: 100px;
}
The area defined by these dimensions is officially known as the content.
width x height = contentTo see it, let’s make the background red:
header {
   width: 500px;
   height: 100px;
   background: red;
}
Around this content, we can specify a border.
Box Model: content + padding + border + marginThere are a few options. For now, let’s just make it solid.
header {
   width: 500px;
   height: 100px;
background: red; border: solid;
}In between the content and the border, we can also specify a padding.
Box Model: content + padding + border + marginLet’s make it 20px:
header {
width: 500px;
height: 100px;
background: red; border: solid;
padding: 20px;
}By default, the red background covers the content area, the padding, and the border.
background: content + padding + borderTo see this padding, we can use a special background property called background-clip and a value of content-box:
header {
width: 500px;
height: 100px;
background: red; border: solid;
padding: 20px;
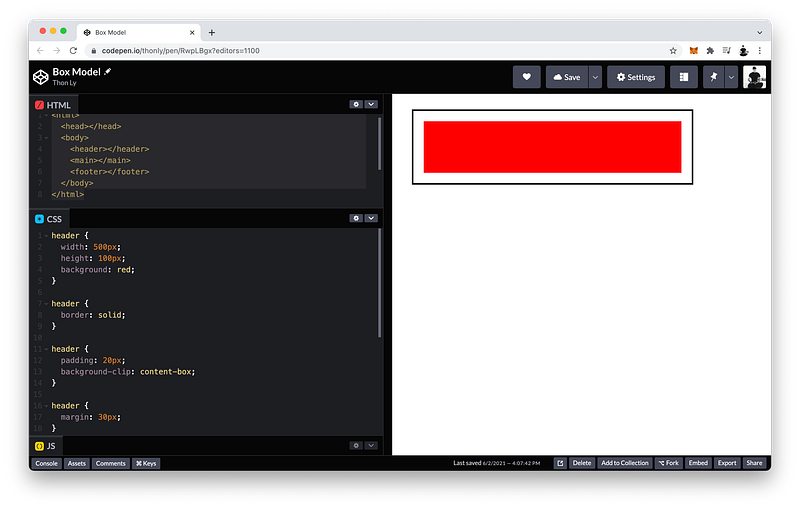
background-clip: content-box;
}This tells CSS to apply the red background only to the content area.
content-box => contentThus, this white area in between the border and the content is our 20px padding:
Finally, we can also specify the margin, which is an area that extends out from the border on all four sides.
Box Model: content + padding + border + margin Let’s make it 30px:
header {
width: 500px;
height: 100px;
background: red; border: solid;
padding: 20px;
background-clip: content-box;
margin: 30px;
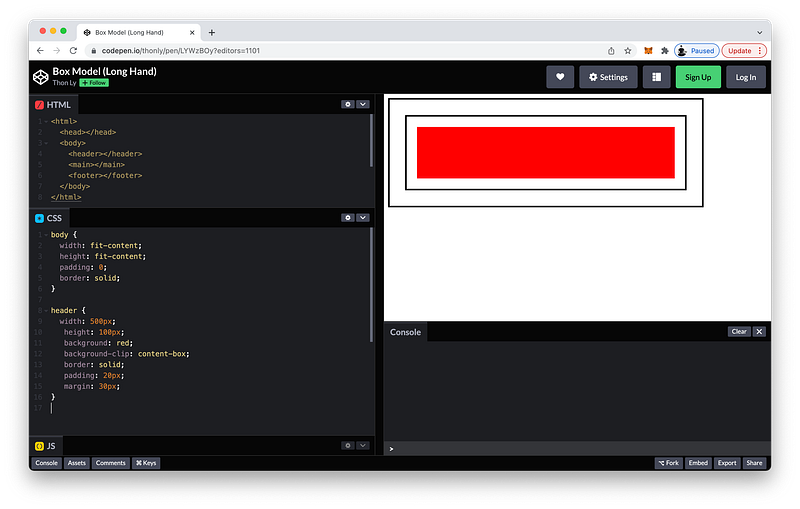
}The finished Codepen:
Box Model: Long Hand
Again, CSS renders every HTML element as a rectangular box with these 4 areas:
header {
width: 500px;
height: 100px;
background: red;
background-clip: content-box; padding: 20px;
border: solid;
margin: 30px;
}And this rectangular box is known as the Box Model.
Box Model: content (width x height) + padding + border + marginLet’s explore the padding, border, and margin in more detail.
First, let’s make the margin area more clear. To do this, we can make the parent of our header exactly the size of its children:
Dimension: Body = Header + Main + FooterBy setting:
- a width of
fit-content - a height of
fit-content - a padding of
0 - and a border of
solid
body {
width: fit-content;
height: fit-content;
padding: 0;
   border: solid;
}Since main and footer have no dimensions, this second white area is the 30px margin of our header:
Right now, all four sides of our margin are 30px:
header {
   margin: 30px;
}
If we want, we can make each side a different size. For example:
header {
   margin-top: 40px;
   margin-right: 30px;
   margin-bottom: 20px;
   margin-left: 10px;
}
Likewise, all four sides of our padding are 20px:
header {
   padding: 20px;
}
We can also make each side a different size as well:
header {
   padding-top: 10px;
   padding-right: 20px;
   padding-bottom: 30px;
   padding-left: 40px;
}
As for our border:
header {
   border: solid;
}
We have three options. We can adjust:
- the border-style
- the border-color
- and the border-width
For example:
header {
   border-style: dashed;
   border-color: blue;
   border-width: 15px;
}
Like margin and padding, we can also adjust each side of the border. For example:
header {
   border-top-style: solid;
   border-right-style: dashed;
   border-bottom-style: double;
   border-left-style: dotted;

   border-top-color: orange;
   border-right-color: yellow;
   border-bottom-color: green;
   border-left-color: violet;

   border-top-width: 10px;
   border-right-width: 15px;
   border-bottom-width: 20px;
   border-left-width: 25px;
}
The finished Codepen:
Box Model: Short Hand
In the last lecture, we learned how to adjust each side of our margin.
header {
   margin-top: 40px;
   margin-right: 30px;
   margin-bottom: 20px;
   margin-left: 10px;
}
If we can remember this order:
- top
- right
- bottom
- left
We can use this shorthand:
header {
   margin: 40px 30px 20px 10px;
}
From left to right, this is the top margin, the right margin, the bottom margin, and the left margin:
        top  right  bottom  left
margin: 40px 30px   20px    10px;
Likewise, we can use this shorthand for our padding as well:
header {
   padding-top: 10px;
   padding-right: 20px;
   padding-bottom: 30px;
   padding-left: 40px;
}
The shorthand:
header {
   padding: 10px 20px 30px 40px;
}
Again, from left to right, this is the top padding, the right padding, the bottom padding, and the left padding:
         top  right  bottom  left
padding: 10px 20px   30px    40px;
Of course, we can also use this shorthand for our border as well:
header {
   border-top-style: solid;
   border-right-style: dashed;
   border-bottom-style: double;
   border-left-style: dotted;

   border-top-color: orange;
   border-right-color: yellow;
   border-bottom-color: green;
   border-left-color: violet;

   border-top-width: 10px;
   border-right-width: 15px;
   border-bottom-width: 20px;
   border-left-width: 25px;
}
The shorthand:
header {
   border-style: solid dashed double dotted;

   border-color: orange yellow green violet;

   border-width: 10px 15px 20px 25px;
}
If the left value is missing:
header {
   margin: 40px 30px 20px;
}
It will take on the value of the right:
left value = right valueIf the bottom value is also missing:
header {
   margin: 40px 30px;
}
It will take on the value of the top:
bottom value = top valueAnd if the right value is also missing:
header {
   margin: 40px;
}
All sides will have the same value as the top;
all values = top valueThis also applies to:
- the padding
- the border-style
- the border-color
- and the border-width
Border also has one more shorthand.
If all sides have the same style, color and width:
header {
   border-style: solid;
   border-color: orange;
   border-width: 10px;
}
Which is the case here. We can simply rewrite this as:
header {
   border: solid orange 10px;
}
In any order.
If there is no width:
header {
   border: solid orange;
}
The default width is 3px.
If there is no color:
header {
   border: solid;
}
The default color is black.
The style is required.
The finished Codepen:
Summary
Per CSS, every element has a box around it.
This box is comprised of four areas:
- the content area
- the padding area
- the border area
- and the margin area
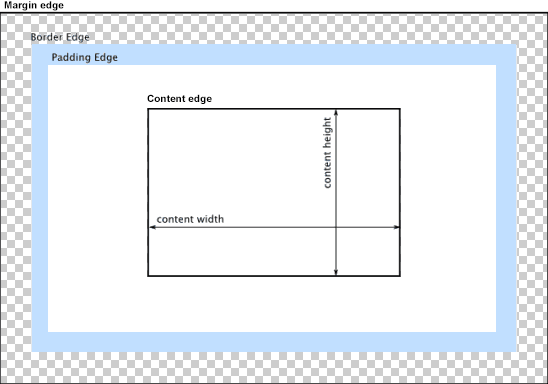
Box Model: Content + Padding + Border + MarginThe content is defined by the width and the height:
Content = Width x Height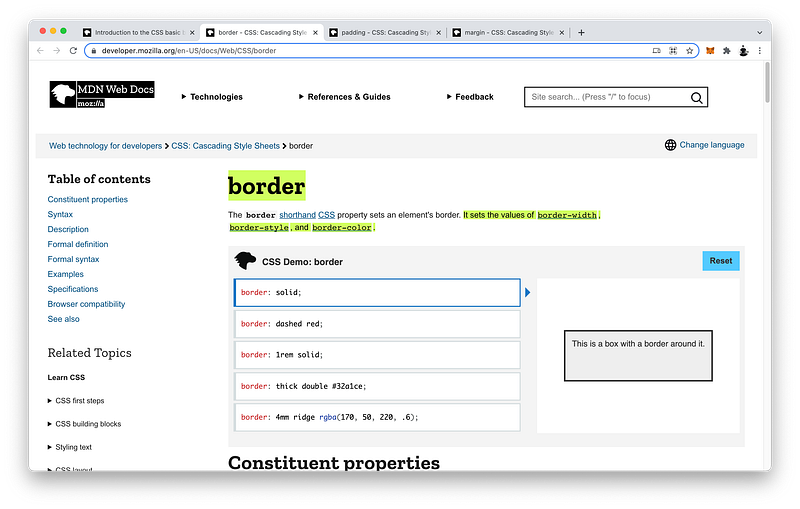
Box Model: Content + Padding + Border + MarginThe border is defined by border: style, color, and width:
Border = Style + Color + WidthEach of which can be defined further by top, right, bottom and left:
Style: Top + Right + Bottom + Left
Color: Top + Right + Bottom + Left
Width: Top + Right + Bottom + Left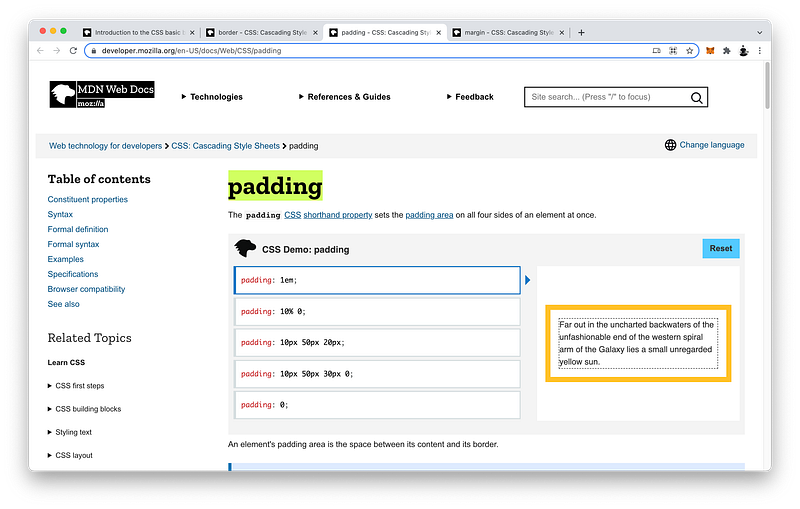
Between the content and the border is the padding:
Box Model: Content + Padding + Border + MarginWhich is defined by padding: top, right, bottom, and left:
Padding: Top + Right + Bottom + Left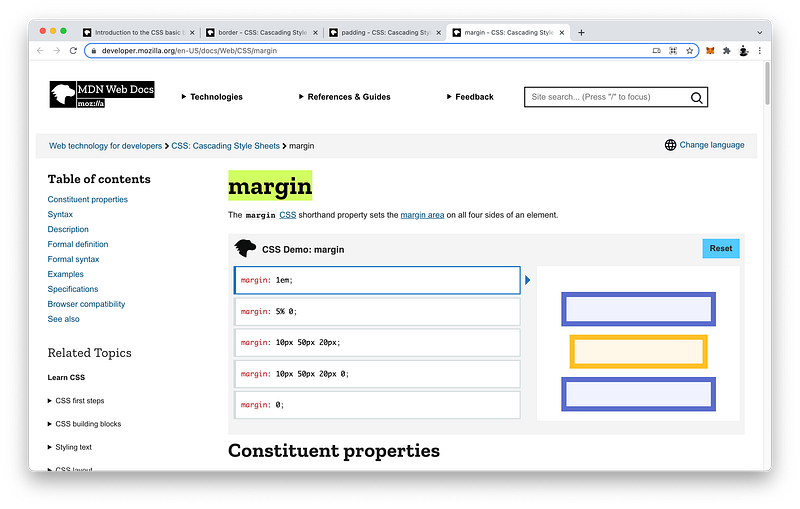
Extending out from the border is the margin:
Box Model: Content + Padding + Border + MarginWhich is defined by margin: top, right, bottom, and left:
Margin: Top + Right + Bottom + LeftIf we can remember this clockwise order, we can use the shorthand version starting from the top:
4 values: top right bottom leftWhen 4 values are specified, the values apply to the top, right, bottom, and left in that order (clockwise).
3 values: top right bottom [left]When only 3 values are specified, the first value applies to the top, the second value applies to the right and left, while the third value applies to the bottom.
2 values: top right [bottom] [left]When only 2 values are specified, the first value applies to the top and bottom, while the second value applies to the right and left.
1 value: top [right] [bottom] [left]When only 1 value is specified, that value applies to all four sides.
By default, the background property covers the content, padding, and border, but stops before the margin.
Background: Content + Padding + Border + Margin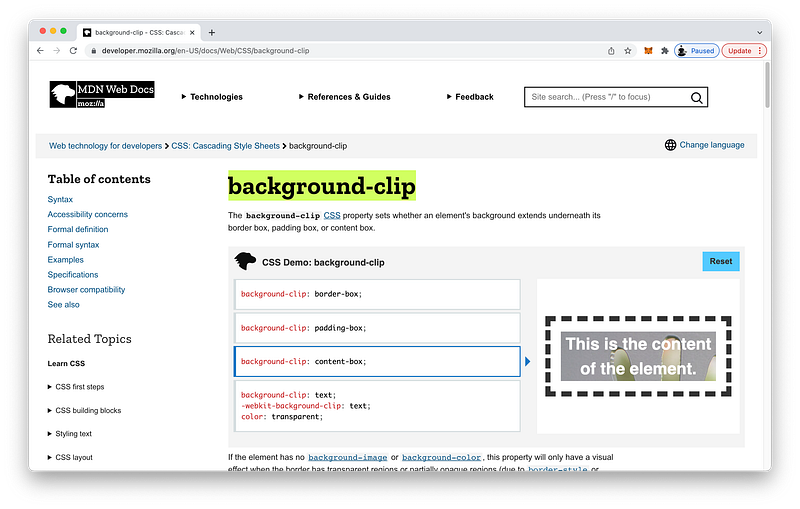
Setting background-clip to content-box makes the background cover only the content area.
Background: Content + Padding + Border + MarginConcept Quiz
Take my Programming Concept Quiz to check your understanding! For every correct choice, you will earn SW Coins which you can redeem for coupons towards the purchase of any of my Udemy courses!
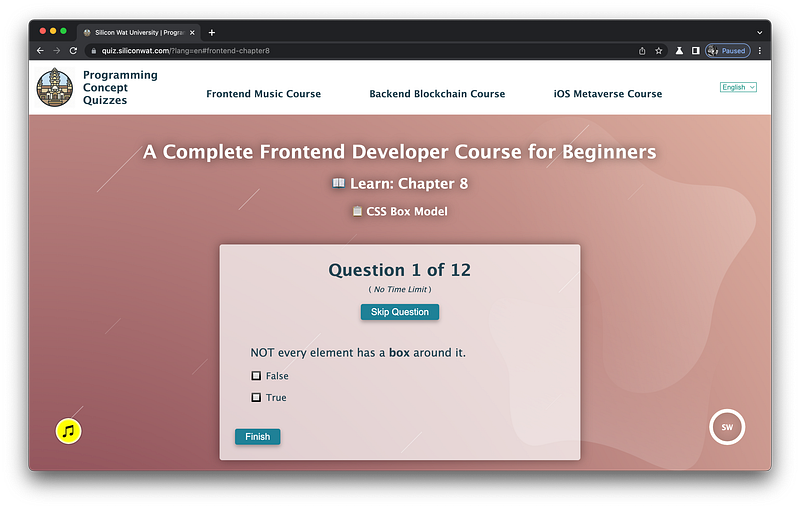
Sample Quiz Questions for Lesson 8:
Question 1:
NOT every element has a box around it.
- True
- False
Question 2:
Which area is NOT part of the Box Model?
- content
- padding
- box
- border
Question 3:
The content area is defined by the width and height.
- True
- False
Question 4:
Which is the correct order from the innermost area to the outermost area?
- content, border, padding, margin
- content, padding, margin, border
- content, padding, border, margin
Question 5:
background covers the content, padding, and border.
- True
- False
Question 6:
Setting background-clip to content-box makes the background cover only the content area.
- True
- False
Question 7:
The shorthand version follows which order?
- left, right, top, bottom
- top, bottom, left, right
- top, right, bottom, left
- top, left, bottom, right
Question 8:
Which is NOT correct?
- When only 1 value is specified, that value applies to all four sides
- When only 2 values are specified, the first value applies to the top and the bottom, while the second value applies to the right and left
- When only 3 values are specified, the first value applies to the top, the second value applies to the right and left, while the third value applies to the bottom
- When 4 values are specified, those values apply in the following order: top, left, bottom, right
Question 9:
For the border shorthand, the order of style, color, and width is important.
- True
- False
Question 10:
For the border shorthand, style is not required.
- True
- False
Question 11:
For the border shorthand, the default color is:
- white
- black
- transparent
Question 12:
For the border shorthand, the default width is:
- 0
- 1px
- 3px
→ Programming Concept Quiz for Chapter 8
Coding Exercises
Check out my Interactive Coding Exercises to put to practice what you have learned! There, you will also find interactive hints to help you understand each line of code. Likewise, for every correct solution, you will earn SW Coins which you can redeem for coupons towards the purchase of any of my Udemy courses!
→ Interactive Coding Exercises for Chapter 8
Syntax Flashcards
Review what you have learned by playing my Syntax Flashcard Game! These flashcards are designed to help you commit to memory all the new code syntaxes you learned in this lesson. Likewise, for every correct answer, you will earn SW Coins which you can redeem for coupons towards the purchase of any of my Udemy courses!
→ Syntax Flashcard Game for Chapter 8
Next Steps
Congrats on completing Unit 2: Lesson 3 of 13! 🎉
Unit 1: 100% Completed
Unit 2: 23% Completed
Unit 3: 0% Completed
Unit 4: 0% Completed
Unit 5: 0% Completed
Bonus Unit 6: 0% Completed
Bonus Unit 7: 0% Completed
Overall Progress: 8% Completed→ Join Remote Frontend Cohort Program
Next Lesson
Now that we know about the four areas that make up the Box Model, we are ready to learn about all the different dimensions they create. We already know that the width and height form the dimensions of the content area. But what about the dimensions that include the other three areas? In the next lesson, we will learn how to calculate these dimensions using JavaScript to complete our understanding of the Box Model and prepare us for animations in Unit 4!
→ Chapter 9: Box Model Dimensions
When you use my referral link above 👆 to become a Medium member, all proceeds will be donated towards the construction of the Silicon Wat Campus for children in Ukraine and Cambodia ❤️


.png)