
Chapter 10: Positioning Elements
A Complete Frontend Developer Textbook for Beginners (2023 Edition)

This is the textbook version of Lesson 10 of 100 from the Udemy video course: A Complete Frontend Developer Course for Beginners
← Chapter 9: Box Model Dimensions
Overview
This lesson covers the following HTML tags, CSS properties, and JavaScript commands for the first time:
HTML
None.
CSS
JS
- document.querySelector(“img”).offsetTop
- document.querySelector(“img”).offsetLeft
- document.querySelector(“header”).scrollTop
- document.querySelector(“header”).scrollLeft
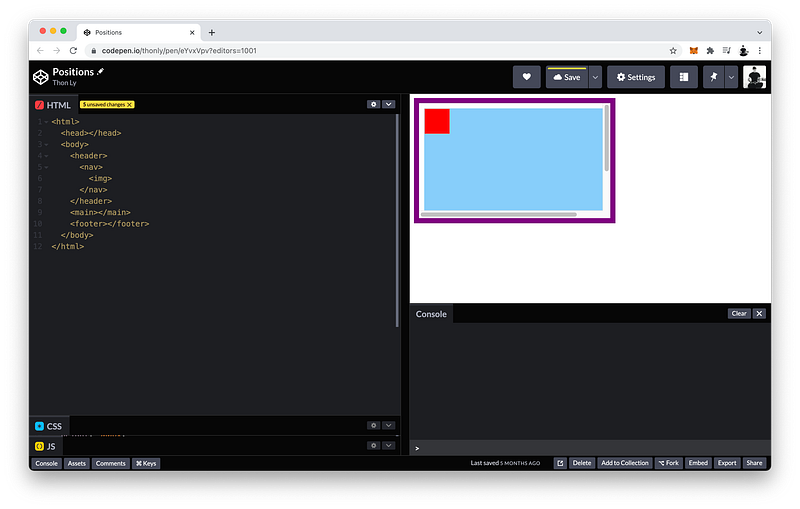
This lesson begins with this Codepen. Code along with me to increase retention!
Lecture
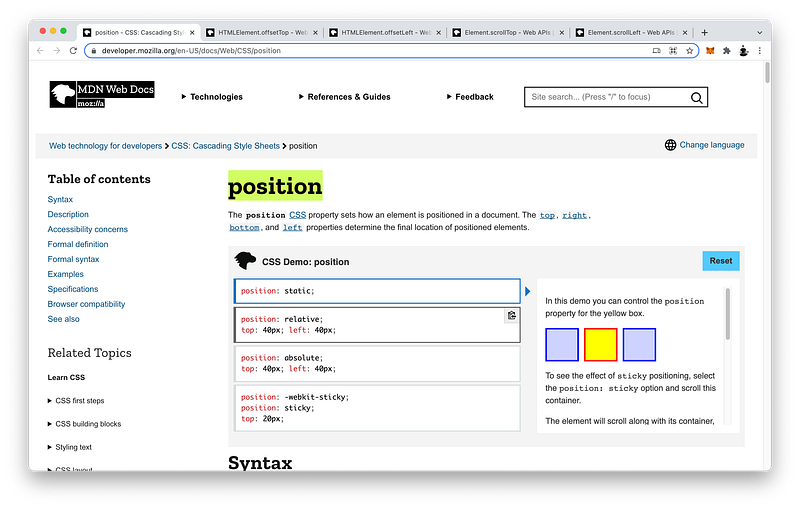
Per CSS, we can position our elements in a few different ways.
Let’s imagine that within our nav, we have an image element:
<html>
 <head></head>
 <body>
  <header>
   <nav>
    <img>
   </nav>
  </header>
  <main></main>
  <footer></footer>
 </body>
</html>
Let’s give this img element a width of 50px, a height of 50px, and a background of red:
img {
 width: 50px;
 height: 50px;
 background: red;
}
Position: Primer
By default, the position of our img element is static:
img {
 width: 50px;
 height: 50px;
 background: red;
 position: static;
}
This means it is positioned according to its placement in the HTML Tree.
If we want, we can make it relative to its current static position:
img {
 width: 50px;
 height: 50px;
 background: red;
 position: relative;
}
Then, we can decide how far from its previous top position. For example:
img {
 width: 50px;
 height: 50px;
 background: red;
 position: relative;
 top: 10px;
}
And how far from its previous left position. For example:
img {
 width: 50px;
 height: 50px;
 background: red;
 position: relative;
 top: 10px;
 left: 10px;
}
If we want, we can also make it stick to this new position even while we are scrolling.
To do this, change the position to sticky:
img {
 width: 50px;
 height: 50px;
 background: red;
 position: sticky;
 top: 10px;
 left: 10px;
}
Now try scrolling to see it in action!
Up and Down. Right and Left.
If we want, we can choose to take the img element out of its placement in the HTML Tree entirely, we can make it relative to its nearest positioned ancestor.
To do this, change the position to absolute:
img {
 width: 50px;
 height: 50px;
 background: red;
 position: absolute;
 top: 10px;
 left: 10px;
}img’s nearest ancestor is nav (parent) but it’s not positioned (static).
<html>
 <head></head>
 <body>
  <header>
   <nav>
    <img>
   </nav>
  </header>
  <main></main>
  <footer></footer>
 </body>
</html>
Therefore, CSS will look up the tree again. The next ancestor is header (grandparent) but it’s also static.
<html>
 <head></head>
 <body>
  <header>
   <nav>
    <img>
   </nav>
  </header>
  <main></main>
  <footer></footer>
 </body>
</html>
When CSS reaches the body without finding any positioned ancestor, it will position img relative to the body by default.
<html>
 <head></head>
 <body>
  <header>
   <nav>
    <img>
   </nav>
  </header>
  <main></main>
  <footer></footer>
 </body>
</html>
Finally, we can also take the img element out of its placement in the HTML Tree, and make it relative to the viewport instead.
To do this, change the position to fixed:
img {
 width: 50px;
 height: 50px;
 background: red;
 position: fixed;
 top: 10px;
 left: 10px;
}
If all this is still confusing, many more examples will be given in Unit 3.
Instead of how far from the top, we can decide how far from the bottom:
img {
 width: 50px;
 height: 50px;
 background: red;
 position: fixed;
 bottom: 10px;
 left: 10px;
}
Instead of how far from the left, we can decide how far from the right:
img {
width: 50px;
height: 50px;
background: red;
position: fixed;
bottom: 10px;
right: 10px;
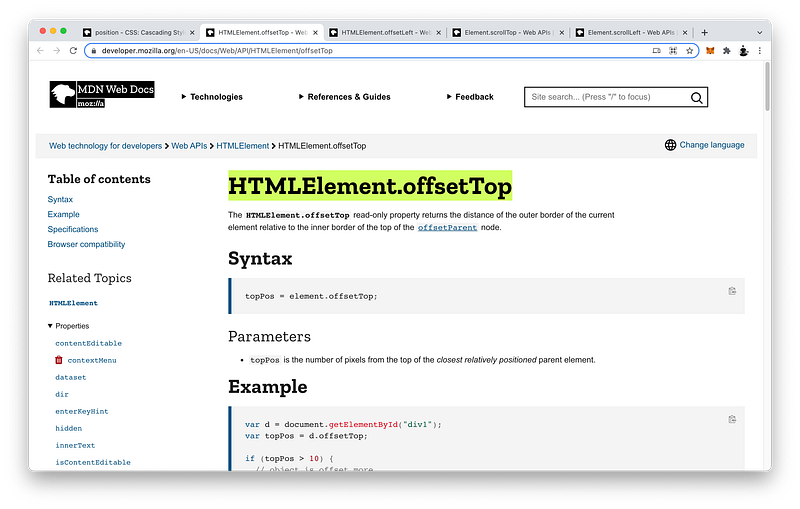
}If we want to know exactly how far the img is from the top of the viewport in pixels, we can write:
JS Window:console.log(document.querySelector(“img”).offsetTop)Hence:
Console Window:345
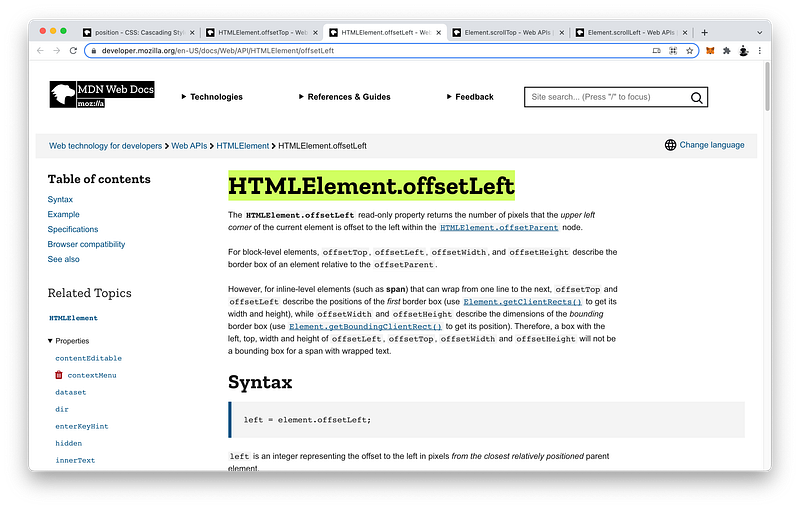
For exactly how far from the left of the viewport in pixels, we can write:
JS Window:console.log(document.querySelector(“img”).offsetLeft)Hence:
Console Window:641
Per CSS, the origin of the viewport is located at the top-left corner. In this vein, the offsetLeft and offsetTop form the (x, y) coordinates of an element’s origin (which is also at its top-left corner).
x: offsetLeft
y: offsetTop
For this reason, offsetRight and offsetBottom are not necessary (and do not exist) because they can be easily calculated indirectly:
offsetRight = innerWidth - offsetLeft
offsetBottom = innerHeight - offsetTop
The finished Codepen:
When an element’s position is not
static, it can overlap other elements. This stacking order is controlled by the z-index which we will study in detail in Lesson 15.
Position: Shorthand
We have just seen that when the position of an element is not static, the top, left, bottom, and right properties take effect:
img {
 width: 50px;
 height: 50px;
 background: red;
 position: absolute;
 bottom: 10px;
 right: 10px;
}
In our example, the top and left have the default value of auto:
img {
 width: 50px;
 height: 50px;
 background: red;
position: absolute; top: auto;
right: 10px;
bottom: 10px;
left: auto;
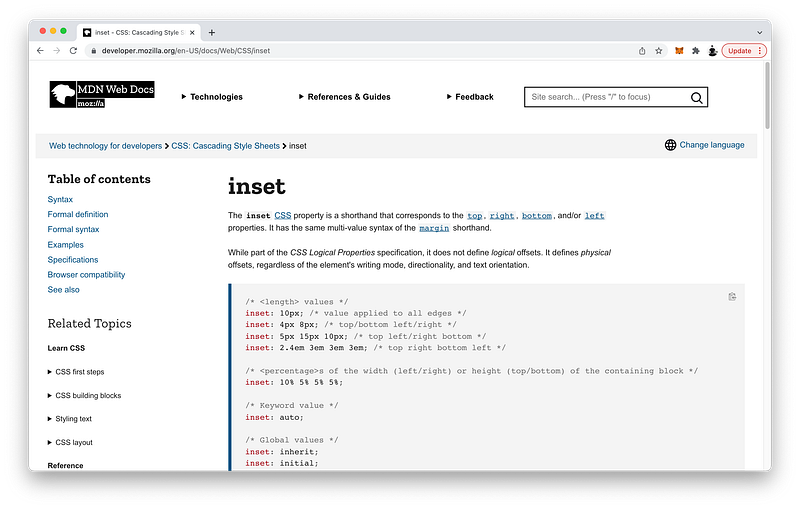
}If we can remember this clockwise order, we can rewrite it using the inset shorthand:
img {
 width: 50px;
 height: 50px;
 background: red;
 position: absolute;
inset: auto 10px 10px auto;
}In fact, this shorthand is exactly like the shorthand for padding, margin, and border-width!
Likewise, this means:
- if 1 value is specified: that value is applied to all sides
- if 2 values are specified: the first value applies to the top and bottom, and the second value applies to the right and left
- if 3 values are specified: the first value applies to the top, the second value applies to the left and right, and the third value applies to the bottom
- if 4 values are specified: those values apply to the top, right, bottom, and left, respectively
If we want a group of elements to belong together, we should make them all relative to the same corner of the ancestor container or viewport (e.g., top and left). Otherwise, resizing the viewport will cause them to move apart in unintended ways.
Scrolled Distance
In our example, the nav element overflows within the header:
<html>
 <head></head>
 <body>
  <header>
   <nav>
    <img>
   </nav>
  </header>
  <main></main>
  <footer></footer>
 </body>
</html>
As such, it is also possible to determine how far we have scrolled within the header.
To determine how far from the top (this distance here) in pixels, we can write:
console.log(document.querySelector(“header”).scrollTop)The Console is showing 0 because Codepen always refreshes when we write new code.
To determine how far from the left (this distance here) in pixels, we can write:
console.log(document.querySelector(“header”).scrollLeft)Similarly, scrollRight and scrollBottom do not exist because they can also be easily calculated indirectly:
scrollRight = scrollWidth - scrollLeft
scrollBottom = scrollHeight - scrollTop
The finished Codepen:
Summary
In this lesson, we learn five different ways to position any elements.
Position Primer
By default, the position is static:
position: static;This means it is positioned according to its placement in the HTML Tree.
If we want, we can choose to make its position:
position: relative;Which then allows us to decide how far from the top:
position: relative;
top: 40px;
And how far from the left:
position: relative;
top: 40px;
left: 40px;
of its default static position.
We can also choose to make its position:
position: sticky;Such that when we scroll, its position remains constant.
We can also choose to take its position out of the HTML Tree entirely, and make it relative to its nearest positioned ancestor instead by using:
position: absolute;Finally, we can also choose to take its position out of the HTML Tree, and make it relative to the viewport instead by using:
position: fixed;Again, when an element’s position is not
static, it can overlap other elements. This stacking order is controlled by the z-index which we will study in detail in Lesson 15.
And if positions are still confusing, many more examples will be shown in Unit 3.
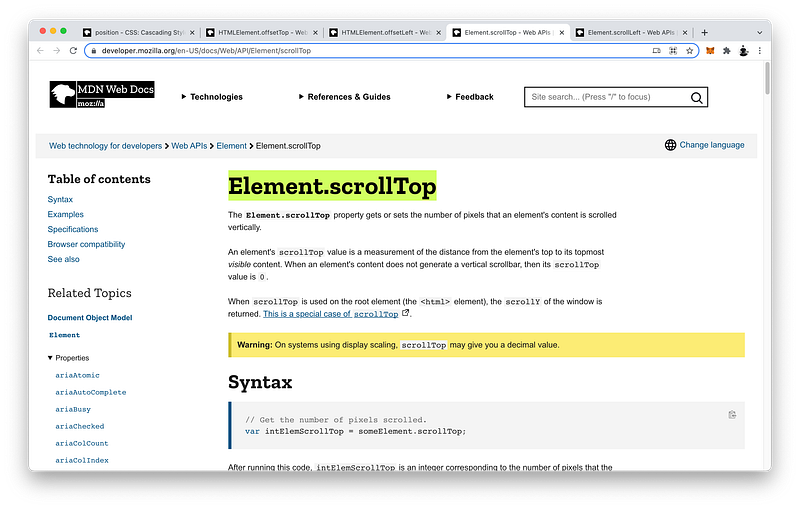
To get its exact distance from the top of the viewport, we can use offsetTop on the element:
To get its exact distance from the left of the viewport, we can use offsetLeft on the element:
Again, offsetBottom and offsetRight do not exist because they are redundant.
Basically, when the position of an element is not static, the top, right, bottom, and left properties take effect.
fixed, absolute, relative, sticky => top, right, bottom, leftIf not specified, their default value is auto.
If we can remember this clockwise order, we can use the inset shorthand which works exactly like padding, margin, and border-width.
inset: top right bottom leftThus:
- if 1 value is specified: that value is applied to all sides
- if 2 values are specified: the first value applies to the top and bottom, and the second value applies to the right and left
- if 3 values are specified: the first value applies to the top, the second value applies to the left and right, and the third value applies to the bottom
- if 4 values are specified: those values apply to the top, right, bottom, and left, respectively
Again, if we want a group of elements to move together even after resizing the viewport, we should make them all relative to the same corner of the ancestor container or viewport.
Scrolled Distance
Lastly, we can also determine how much has been scrolled.
To determine how far from the top, we can use scrollTop on the parent element:
Likewise, to determine how far from the left, we can use scrollLeft on the parent element:

Similarly, scrollBottom and scrollRight do not exist because they are redundant, too.
Concept Quiz
Take my Programming Concept Quiz to check your understanding! For every correct cboice, you will earn SW Coins which you can redeem for coupons towards the purchase of any of my Udemy courses!
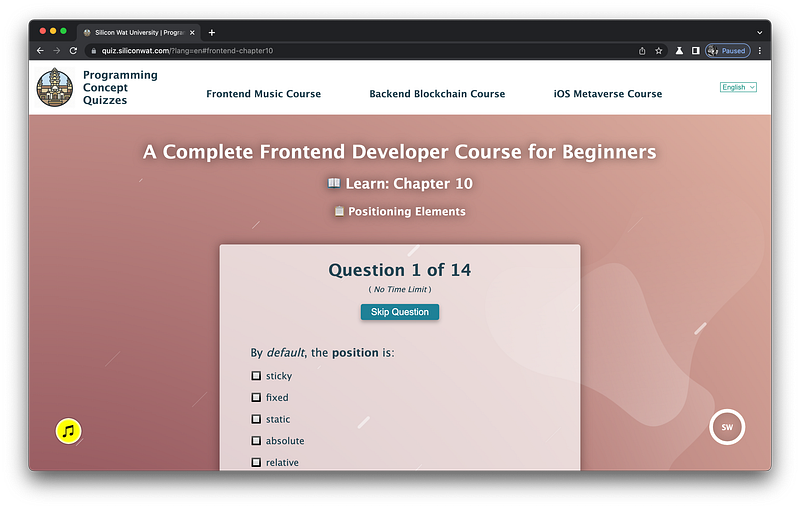
Sample Quiz Questions for Lesson 10:
Question 1:
By default, the position is:
- static
- relative
- sticky
- absolute
- fixed
Question 2:
Which is positioned according to its placement in the HTML Tree?
- relative
- absolute
- fixed
Question 3:
Which is NOT positioned according to its placement in the HTML Tree?
- static
- relative
- sticky
- absolute
Question 4:
A relative position is relative to:
- static position
- nearest ancestor
- viewport
Question 5:
An absolute position is relative to:
- static position
- nearest ancestor
- viewport
Question 6:
An fixed position is relative to:
- static position
- nearest ancestor
- viewport
Question 7:
To make an element stick to its current position while scrolling, we use:
- static
- relative
- sticky
- absolute
- fixed
Question 8:
To move an element from its default static position, we DO NOT use:
- top
- bottom
- left
- right
- center
Question 9:
The inset shorthand follows what order:
- top left bottom right
- top bottom left right
- left right top bottom
- top right bottom left
Question 10:
To determine how far an element is from the top of the viewport, we use:
- scrollTop
- offsetTop
Question 11:
To determine how far an element is from the left of the viewport, we use:
- scrollLeft
- offsetLeft
Question 12:
To determine how far we have scrolled from the top, we use:
- scrollTop
- offsetTop
Question 13:
To determine how far we have scrolled from the left, we use:
- scrollLeft
- offsetLeft
Question 14:
We use scrollTop and scrollLeft on the:
- parent
- child

→ Programming Concept Quiz for Chapter 10
Coding Exercises
Check out my Interactive Coding Exercises to put to practice what you have learned! There, you will also find interactive hints to help you understand each line of code. Likewise, for every correct solution, you will earn SW Coins which you can redeem for coupons towards the purchase of any of my Udemy courses!
→ Interactive Coding Exercises for Chapter 10
Syntax Flashcards
Review what you have learned by playing my Syntax Flashcard Game! These flashcards are designed to help you commit to memory all the new code syntaxes you learned in this lesson. Likewise, for every correct answer, you will earn SW Coins which you can redeem for coupons towards the purchase of any of my Udemy courses!
→ Syntax Flashcard Game for Chapter 10
Next Steps
Congrats on completing Unit 2: Lesson 5 of 13! 🎉
Unit 1: 100% Completed
Unit 2: 38% Completed
Unit 3: 0% Completed
Unit 4: 0% Completed
Unit 5: 0% Completed
Bonus Unit 6: 0% Completed
Bonus Unit 7: 0% Completed
Overall Progress: 10% Completed→ Join Remote Frontend Cohort Program
Next Lesson
In the next lesson, we will learn how to generate any color we can imagine! There are two major color systems: the RGB system and the HSL system. We will cover both as well as the HEX shorthand. Moreover, we will also learn how to add transparency to our colors which will help us make some really cool layering effects in Lesson 13!
→ Chapter 11: CSS Colors in RGB and HSL
When you use my referral link above 👆 to become a Medium member, all proceeds will be donated towards the construction of the Silicon Wat Campus for children in Ukraine and Cambodia ❤️