avatarYash Prakash

Free AI web copilot to create summaries, insights and extended knowledge, download it at here

4491

Abstract

e the file we’ll use to store the <i>last sent sticky messageID </i>which will then persist across different bot sessions.</p><blockquote id="9a93"><p><b><i>Hence, even if we stop the bot, the file will contain the last sent message’s ID which can then be used to delete the previous sticky message when the bot sends the next one.</i></b></p></blockquote><p id="3ff0">For the very first attempt, let’s take the <i>last sent sticky message’s</i> <b><i>ID</i></b> and paste it into the text file. Something like this:</p><figure id="9daf"><img src="https://cdn-images-1.readmedium.com/v2/resize:fit:800/0*HgeaX9x1cWr9p0Z0.png"><figcaption></figcaption></figure><p id="c096">Now, let’s complete our <code>if</code> block.</p><h1 id="9989">Reading from and Writing to files in Go</h1><p id="1562">We first want to read the last message <b><i>ID</i></b> from the file and delete that message.</p><p id="9df9">Let’s add that.</p><div id="1518"><pre><span class="hljs-keyword">if</span> m<span class="hljs-selector-class">.ChannelID</span> == <span class="hljs-string">"yourChannelId"</span> { <span class="hljs-keyword">if</span> persistentMessageID == <span class="hljs-string">""</span> { <span class="hljs-comment">// read the last message id from the file and then delete it</span> data, err_readfile := os<span class="hljs-selector-class">.ReadFile</span>(<span class="hljs-string">"lastTextSentDetails.txt"</span>) <span class="hljs-keyword">if</span> err_readfile != nil { fmt<span class="hljs-selector-class">.Println</span>(<span class="hljs-string">"Error in reading file: "</span>, err_readfile) } <span class="hljs-keyword">else</span> { persistentMessageID = <span class="hljs-built_in">string</span>(data) } }</pre></div><p id="1e65">So if the global variable <code>persistentMessageID </code>is an empty string, read from the file and store it in the variable.</p><p id="35c8">Now, we delete the message.</p><div id="3442"><pre><span class="hljs-comment">// delete the last message</span> <span class="hljs-keyword">err</span> := s.ChannelMessageDelete(<span class="hljs-string">"yourChannelId"</span>, persistentMessageID) <span class="hljs-keyword">if</span> <span class="hljs-keyword">err</span> != nil { fmt.Println(<span class="hljs-string">"Erorr in deleting the previous sticky message: "</span>, <span class="hljs-keyword">err</span>) }</pre></div><p id="efc8">Perfect! We have the deletion part done. Now, let’s get to the writing and sending part.</p><p id="6210">We first send a new sticky message to the channel:</p><div id="24a1"><pre><span class="hljs-comment">// send a new message to the bottom</span> messsage, <span class="hljs-keyword">err</span> := s.ChannelMessageSend(m.ChannelID, <span class="hljs-string">"Here is a nice little sticky message."</span>) <span class="hljs-comment">// if message wasn't sent due to some reason</span> <span class="hljs-keyword">if</span> <span class="hljs-keyword">err</span> != nil { fmt.Println(<span class="hljs-string">"Erorr in sending sticky message: "</span>, <span class="hljs-keyword">err</span>) }</pre></div><p id="41fd">Next, we store the <b><i>ID</i></b> of the new message sent in the global persistent variable:</p><div id="2b47"><pre>// store <span class="hljs-keyword">the</span> id <span class="hljs-keyword">of</span> <span class="hljs-keyword">the</span> <span class="hljs-built_in">new</span> message sent <span class="hljs-keyword">in</span> <span class="hljs-keyword">the</span> persistent <span class="hljs-built_in">variable</span> persistentMessageID = messsage.ID</pre></div><p id="7c87">And finally, we write this new message’s <b><i>ID </i></b>to the file:</p><div id="471e"><pre><span class="hljs-comment">// write persistentMessageID string to file</span> <span class="hljs-keyword">err</span> = os.WriteFile(<span class="hljs-string">"lastTextSentDetails.txt"</span>, []byte(persistentMessageID), <span class="hljs-number">0644</span>) <span class="hljs-keyword">if</span> <span class="hljs-keyword">err</span> != nil { fmt.Println(<span class="hljs-string">"Error writing to file: "</span>, <span class="hljs-keyword">err</span>) }</pre></div><blockquote id="5c9f"><p><i>In the <code>os.WriteFile()</code> function, you must notice that the </i><b>0644</b><i> code is present to ensure that we <b>overwrite</b> the string to file and not </i>append<i> it. That’s the key difference. For appending, we need to first open the file using

Options

the <code>OpenFile() </code>function and then use the flag <code>os.O_APPEND </code>with it to append to an existing file.</i></p></blockquote><p id="e02e">And there you go! We have a working <b>Sticky Bot</b> all ready to go!</p><p id="dffe">Let’s test it, shall we?</p><p id="375e">First stop the bot and restart it. See that the <b><i>ID</i></b> in the <code>lastTextSentDetails.txt </code>file changes.</p><p id="e7e9">Now, send a new message:</p><figure id="4edc"><img src="https://cdn-images-1.readmedium.com/v2/resize:fit:800/0*UHnwskkGbH1womgC.png"><figcaption></figcaption></figure><p id="d69a">turns into:</p><figure id="b5c8"><img src="https://cdn-images-1.readmedium.com/v2/resize:fit:800/0*4T3edY2iVzaK1iTZ.png"><figcaption></figcaption></figure><p id="3007">As we see, our bot is working as desired.</p><h1 id="a67b">A few parting words…</h1><p id="acbe">In this tutorial, we learned to create a Sticky Bot to help <i>“pin”</i> a message to the bottom of our channel. We learned quite a few concepts such as reading and writing to files with a bit of error handling on the side as well as a bit more into the inner workings of the <i>discordgo</i> library.</p><p id="e2de">If you want to explore a bit more yourself, you can read about reading and writing files in Golang from <a href="https://gobyexample.com/writing-files">here.</a></p><blockquote id="29dd"><p><i>If you want to check out the current bot code, you can check out the repository <a href="https://github.com/yashprakash13/Go-Basics/tree/main/discord_bot">from here</a>. :)</i></p></blockquote><h2 id="e378">And as always, if you enjoyed this tutorial, subscribe to read all of my articles from here:</h2><div id="b6c6" class="link-block"> <a href="https://ipom.medium.com/membership"> <div> <div> <h2>Join Medium with my referral link - Yash Prakash</h2> <div><h3>Read every story from Yash Prakash (and thousands of other writers on Medium). Your membership fee directly supports…</h3></div> <div><p>ipom.medium.com</p></div> </div> <div> <div style="background-image: url(https://miro.readmedium.com/v2/resize:fit:320/0*1kzuq2IW6ZGHEIE7)"></div> </div> </div> </a> </div><p id="ae79"><b>A few more articles from me that you may find interesting:</b></p><div id="fb8e" class="link-block"> <a href="https://readmedium.com/golang-development-utilities-you-should-know-d91915959616"> <div> <div> <h2>Golang Development Utilities You Should Know</h2> <div><h3>How to easily make use of simple yet meaningful development tools in your Go projects</h3></div> <div><p>medium.com</p></div> </div> <div> <div style="background-image: url(https://miro.readmedium.com/v2/resize:fit:320/1*YiIVie5M8m9z4HAi9agqAQ.png)"></div> </div> </div> </a> </div><div id="7dbc" class="link-block"> <a href="https://betterprogramming.pub/the-easy-python-auto-code-formatting-guide-e8300c82797b"> <div> <div> <h2>The Easy Python Auto-code Formatting Guide</h2> <div><h3>Set them up just once and write and auto-format your code upon commits — hassle-free with these tools.</h3></div> <div><p>betterprogramming.pub</p></div> </div> <div> <div style="background-image: url(https://miro.readmedium.com/v2/resize:fit:320/0*OHB1gLmQ0WkRpApw)"></div> </div> </div> </a> </div><div id="bdd1" class="link-block"> <a href="https://towardsdatascience.com/26-github-repositories-to-inspire-your-next-data-science-project-3023c24f4c3c"> <div> <div> <h2>26 GitHub Repositories To Inspire Your Next Data Science Project</h2> <div><h3>Start the new year with this inspired list of interesting code with libraries, roadmaps, and projects to bookmark</h3></div> <div><p>towardsdatascience.com</p></div> </div> <div> <div style="background-image: url(https://miro.readmedium.com/v2/resize:fit:320/0*rcW2nPEIQwD9p_AO)"></div> </div> </div> </a> </div></article></body>

Building a Golang Discord Bot- Part 2: Sticky Message Bot

Learn Golang with a real-world project

Photo by Marcus Dall Col on Unsplash

In the previous part of this series, we discussed the following:

  • Setting up Golang on your machine,
  • Setting up your project
  • Installing required libraries (including Discord Bot wrapper DiscordGo)
  • Setting up our new bot session, and finally
  • Reading and respond to simple messages through our bot

If you haven’t yet read it, then do so from here:

Here in this tutorial, we will learn and implement the following concepts:

  • How to send a message to a particular channel, and check if a message was sent in a particular channel
  • Retrieve and save messages in a text file through the os library and handle errors appropriately
  • Send and delete specific messages upon specific events, and finally,
  • Combine all of the above features to build a Sticky bot for a channel in our server

Hyped enough? Let’s get started! :)

What is a Sticky Message?

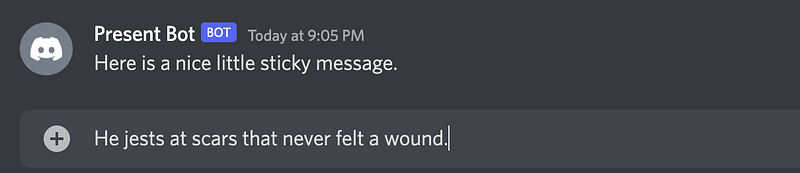
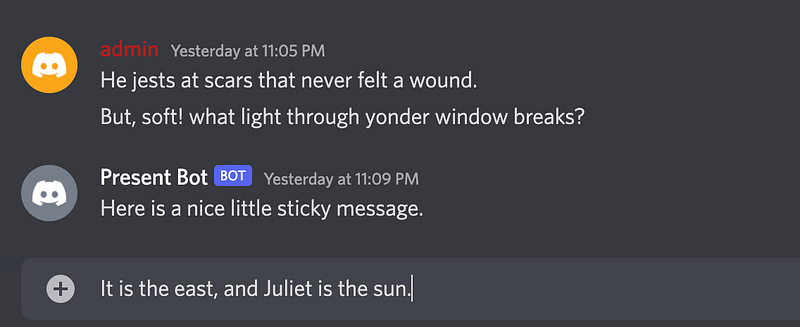
Consider this message from our bot at the bottom of a channel in our server.

Now, let’s write a new message and send it:

This is what happens when a sticky bot is enabled in the channel:

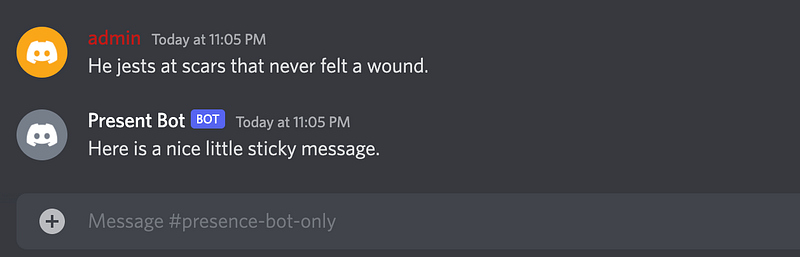
The following two things happens when we send a message:

  1. The bot deletes the previous “sticky” message
  2. The bot sends the new message in the channel, thus making sure that the message is always at the bottom of the channel, where it is always visible to any newcomer.

This is, in essence, the convenience of a sticky bot.

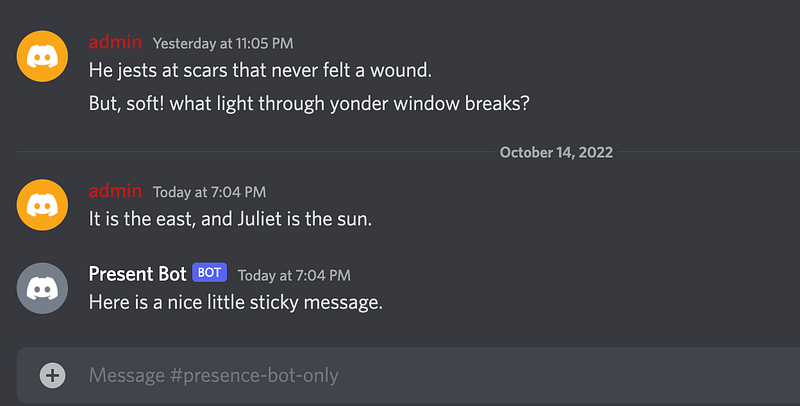
Let’s try sending another message:

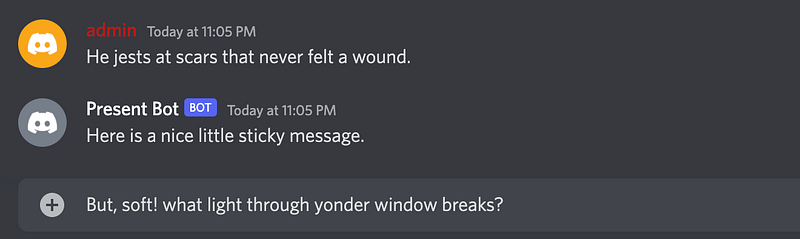
Here is what happens after we send the above message:

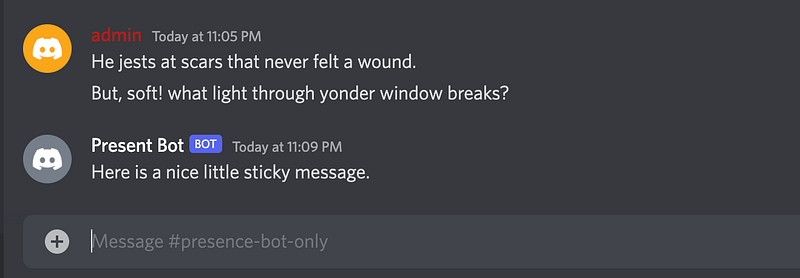
Neat, isn’t it? Now that we understand the purpose and usage of the bot, let’s get started on building it!

Components of a Sticky bot

When the bot sends a new message and erases the previous one send by it to avoid duplication, there is obviously a need for tracking the previous messages sent by it.

Let’s create a global variable to do the same.

var persistentMessageID string

Since we only want our bot to act “sticky” in a specific channel, we first fetch the channel ID from our discord server and use it in our messageCreate function. We open a new block in the function like so:
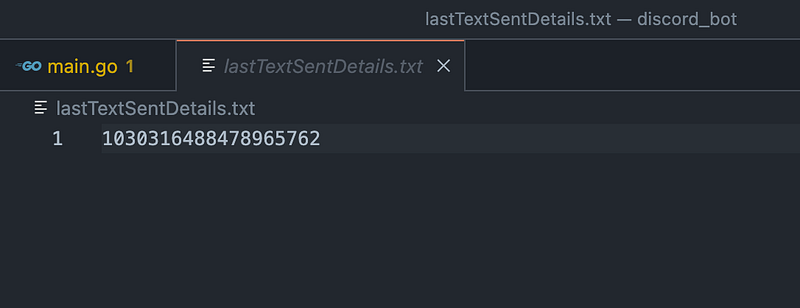
if m.ChannelID == "yourChannelId" {

Now, before we start writing this if block, we need to make a new file in the project directory called: lastTextSentDetails.txt. This will be the file we’ll use to store the last sent sticky messageID which will then persist across different bot sessions.

Hence, even if we stop the bot, the file will contain the last sent message’s ID which can then be used to delete the previous sticky message when the bot sends the next one.

For the very first attempt, let’s take the last sent sticky message’s ID and paste it into the text file. Something like this:

Now, let’s complete our if block.

Reading from and Writing to files in Go

We first want to read the last message ID from the file and delete that message.

Let’s add that.

if m.ChannelID == "yourChannelId" {
    if persistentMessageID == "" {
	// read the last message id from the file and then delete it
	data, err_readfile := os.ReadFile("lastTextSentDetails.txt")
	if err_readfile != nil {
		fmt.Println("Error in reading file: ", err_readfile)
	} else {
		persistentMessageID = string(data)
	}
    }

So if the global variable persistentMessageID is an empty string, read from the file and store it in the variable.

Now, we delete the message.

// delete the last message
   err := s.ChannelMessageDelete("yourChannelId", persistentMessageID)
   if err != nil {
	fmt.Println("Erorr in deleting the previous sticky message: ", err)
   }

Perfect! We have the deletion part done. Now, let’s get to the writing and sending part.

We first send a new sticky message to the channel:

// send a new message to the bottom
   messsage, err := s.ChannelMessageSend(m.ChannelID, "Here is a nice little sticky message.")
   // if message wasn't sent due to some reason
   if err != nil {
	fmt.Println("Erorr in sending sticky message: ", err)
   }

Next, we store the ID of the new message sent in the global persistent variable:

// store the id of the new message sent in the persistent variable 
   persistentMessageID = messsage.ID

And finally, we write this new message’s ID to the file:

// write persistentMessageID string to file
   err = os.WriteFile("lastTextSentDetails.txt", []byte(persistentMessageID), 0644)
   if err != nil {
       fmt.Println("Error writing to file: ", err)
   }

In the os.WriteFile() function, you must notice that the 0644 code is present to ensure that we overwrite the string to file and not append it. That’s the key difference. For appending, we need to first open the file using the OpenFile() function and then use the flag os.O_APPEND with it to append to an existing file.

And there you go! We have a working Sticky Bot all ready to go!

Let’s test it, shall we?

First stop the bot and restart it. See that the ID in the lastTextSentDetails.txt file changes.

Now, send a new message:

turns into:

As we see, our bot is working as desired.

A few parting words…

In this tutorial, we learned to create a Sticky Bot to help “pin” a message to the bottom of our channel. We learned quite a few concepts such as reading and writing to files with a bit of error handling on the side as well as a bit more into the inner workings of the discordgo library.

If you want to explore a bit more yourself, you can read about reading and writing files in Golang from here.

If you want to check out the current bot code, you can check out the repository from here. :)

And as always, if you enjoyed this tutorial, subscribe to read all of my articles from here:

A few more articles from me that you may find interesting:

Programming
Technology
Software Development
Artificial Intelligence
Python
Recommended from ReadMedium