
Building a Golang Discord Bot- Part 1: Setup
Learn Go development through a real world project

Welcome to this new series on learning software development in Golang. Beginning from this article, we will be going into the path of learning the Go programming language while building a real world project that we can later deploy on a server as a useful service.
So without further delay, let’s get started on the project!
But before that…
Make sure to go through my Go utilities article to set up your development environment nicely! 👇🏻
Setting up our Project and Dependencies
The focus of this project is upon building a utility discord bot that can do certain small but useful things within our server. But we can discuss about what those useful things may comprise of later, first, let’s see how to set up our project and install some of the libraries we will be using.
Go to your Go development folder on your local machine and enter:
mkdir discord_bot
cd discord_bot
We now want to initialize a new Go project in our root project folder:
go initThis now builds us a new go.mod file in our project directory. You’ll see that it contains the go version and the simple module path on your local machine like so:
module yashprakash13/Go-Basics/discord_botgo 1.19Now, let’s install the required libraries.
The first one is the Discord API wrapper library called Discordgo.
go get github.com/bwmarrin/discordgoInstall the library to deal with environment variables GoDotEnv:
go get github.com/joho/godotenvAnd lastly, do a Air init inside the project so that we can run our project with constant reloading:
If you’ve followed the guide I’ve mentioned earlier, you must know what I’m talking about.
air initThis creates a .air.toml file for us. Great, we are ready to go!
A simple ping-pong bot to start with
Your go.mod file should look somewhat like this now (excluding the repo path of course):
module yashprakash13/Go-Basics/discord_botgo 1.19require (
github.com/bwmarrin/discordgo v0.26.1
github.com/gorilla/websocket v1.4.2
github.com/joho/godotenv v1.4.0
golang.org/x/crypto v0.0.0-20210421170649-83a5a9bb288b
golang.org/x/sys v0.0.0-20201119102817-f84b799fce68
)The first thing you wanna do is go to discord developer portal and make yourself a new application:
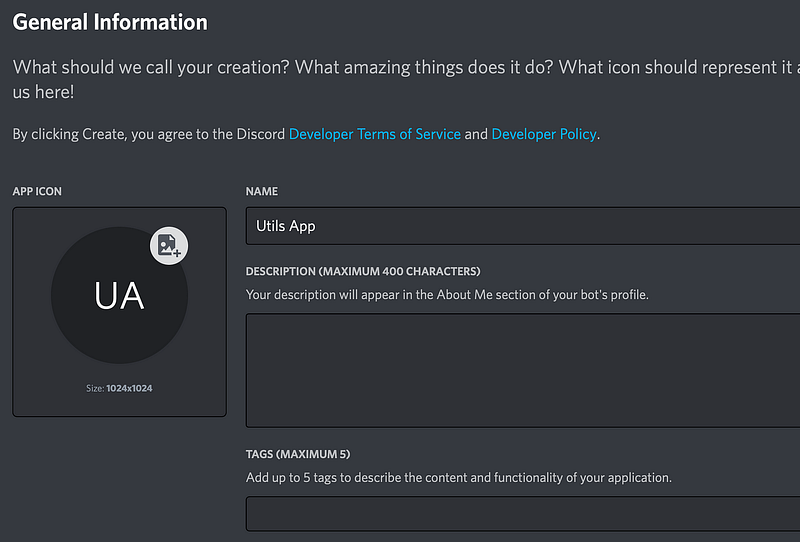
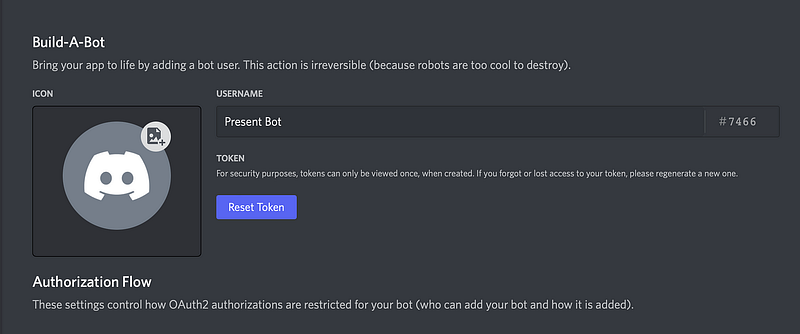
This is how it’ll look like when you make one. Then go the sidebar and make a new Bot.
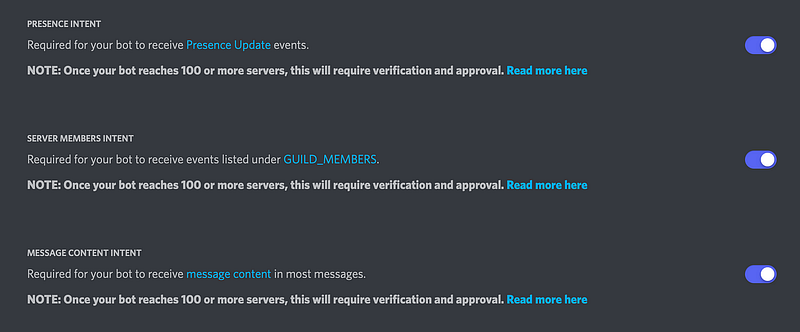
Now, enable the following intents for the Bot:
Finally, copy the Bot token and in your project directory, do:
touch .envPaste the Token in your .env file.
Also, invite your discord bot to a test discord server you should have for trying out the bot as we built it.
Now, let’s start our Go application with a main.go file.
touch main.goThe first thing we want to do is to define:
- the
package - the
initfunction - the
mainfunction
The main function is necessary as the program won’t run without it. The init function provides a great way to perform some actions before running our app, such as: reading our environment variable(s) from the disk.
So, let’s do that:
Protip: In VSCode, after enabling the Go extension, if you start typing the functions, you’ll get the imports handled by the extension. So there’s no need to type the imports by yourself.
Now let’s do the following:
- define our package
- make a Token variable to contain the bot token as a global variable
- read the bot token from the environment variable in the
initfunction
package mainvar Token stringfunc init() {
// load env variables
err := godotenv.Load()
if err != nil {
log.Fatal("Error loading .env file.")
}
}Note: I am not showing the imports for better readability.
Now, it’s time to make a new Bot in our main function.
In Discordgo, we have a concept of “sessions” for the bot. It is essentially is a type of client you want to create from the library. You can either create a Bot or an OAuth2 client.
So you define sessions a little differently for them:
- If the Token is for a bot, it must be prefixed with “Bot “
- If the Token is for an OAuth2 client, it must be prefixed with “Bearer “
func main() {
	Token = os.Getenv("TOKEN")
	// Create a new Discord session using the provided bot token.
	bot, err := discordgo.New("Bot " + Token)
	if err != nil {
		fmt.Println("Error creating Discord session,", err)
		return
	}
Now we need to register a “Handler” to read messages from the server our bot has permissions in.
// Register the messageCreate func as a callback for MessageCreate events.
	bot.AddHandler(messageCreate)
// We care about receiving message events.
bot.Identify.Intents = discordgo.IntentsGuildMessagesYou’ll see a read lined messageCreate here as that function hasn’t been defined by us yet.
And run the bot by the Open function.
// Open a websocket connection to Discord and begin listening.
	err = bot.Open()
	if err != nil {
		fmt.Println("error opening connection,", err)
		return
	}
Perfect! Now, remember, we also need a way to close this session safely for our bot to exit if we want it to exit.
We do that through the concept of Go signals.
Sometimes, in scenarios like this, we’d like our Go programs to intelligently handle Unix signals. For instance,
- Ctrl C in the terminal should make the bot session terminate : This means we need a SIGINT signal to be read by our Go program.
- We also want it to gracefully shutdown when it receives a
SIGTERMsignal. This is another UNIX to quit a command line process.
Here’s an excerpt from the wiki page on SIGTERM:
The SIGTERM signal is sent to a process to request its termination. This allows the process to perform nice termination releasing resources and saving state if appropriate. SIGINT is nearly identical to SIGTERM.
So here, we will handle signals in Go channels.
fmt.Println("Bot is now running.  Press CTRL-C to exit.")
	sc := make(chan os.Signal, 1)
	signal.Notify(sc, syscall.SIGINT, syscall.SIGTERM, os.Interrupt, os.Kill)
	<-sc
We first make a new channel called sc to signify that we want to listen to the OS signals. Next, we notify the signal for all the signals we want to listen to, namely: SIGINT, SIGTERM, and common Operating system interrupt and kill signals.
Next, what the unique code snippet <-sc does is that it halts the program from executing the next line(s) of code until one of those defined signals is received.
This is very important for us because immediately after this code, we define a way to close our Bot session:
// Close the discord bot session.
	bot.Close()
} // close main function
Now that we have done all of that, we can close our main function and start writing the messageCreate function to handle incoming messages on the discord server.
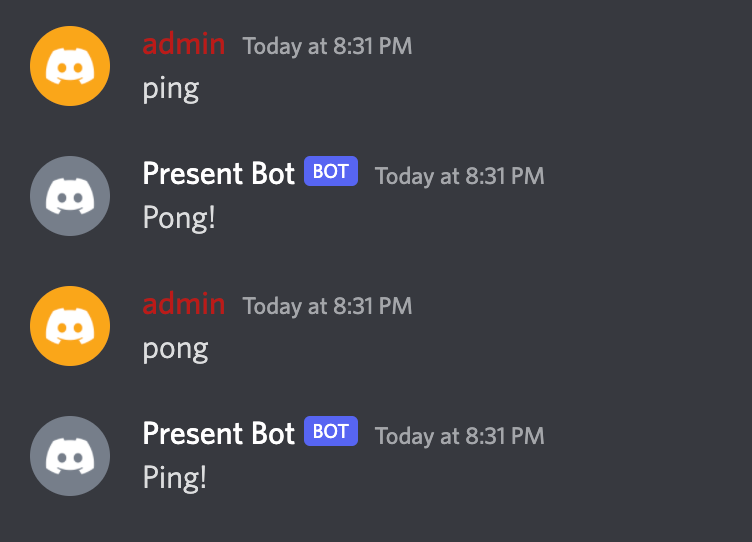
func messageCreate(s *discordgo.Session, m *discordgo.MessageCreate) {We want our bot to do the following:
- reply to ping messages with pong
- reply to pong messages with ping
- NOT reply to any of the messages sent by itself
Here’s the way to do that:
// Don't reply to self
	if m.Author.ID == s.State.User.ID {
		return
	}
	// If the message is "ping" reply with "Pong!"
	if m.Content == "ping" {
		s.ChannelMessageSend(m.ChannelID, "Pong!")
	}
// If the message is "pong" reply with "Ping!"
if m.Content == "pong" {
s.ChannelMessageSend(m.ChannelID, "Ping!")
}
}Great! So we reached the end of our coding session, (pun intended).
Let’s test our bot!
You can do either of the following in the terminal:
airor
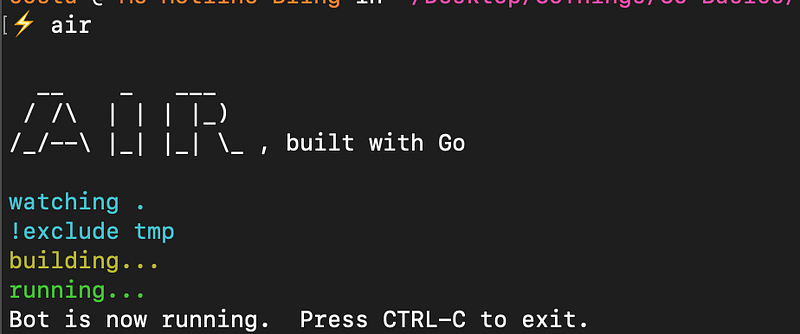
go run main.goI prefer air as it displays helpful colourful messages.
You should see the following:
You can test the bot in the server:
Now, if you do Ctrl-C, the bot will exit gracefully, with air.

A few parting words…
In this Part 1 of the series, we learned how to get started with writing a basic discord bot which sends messages. I hope you find this useful!
We will be exploring much more complex scenarios for our bot in the future parts of this tutorial series.
Until then, happy learning!
Explore the bot’s GitHub repository here.
Subscribe to medium to never miss any of my posts! 👇