
Apple Photos Is Underrated! Here Are 5 Things You Can Do With It — Digital Minimalism Series
Following my digital minimalism series on Medium, I wanted to write a story about Apple Photos because it is underrated. Features are often missed or taken for granted, especially those who don’t need advanced photo editing tools.
As a designer, I have learned about the importance of simplicity in design which is one of the reasons I admire Apple Photos. The app used to be a simple photo viewer with just a few options to tweak an image, but now, it comes with various advanced features.
I think the app is underrated due to the lack of proper advertisement for macOS users. Most photo editing apps advertise their editing feature within the first 10 seconds of opening their app. I haven’t seen Apple using this practice for their apps.
Once you learn what this app can do, you won’t spend money on similar third-party apps.
I will introduce five features you might not know about the Photos app in this story. Unfortunately, the Photos app on Mac is not the same one on your iPad or iPhone. I hope Apple unifies the app’s experiences all their platform.
1. Retouch Your Photo
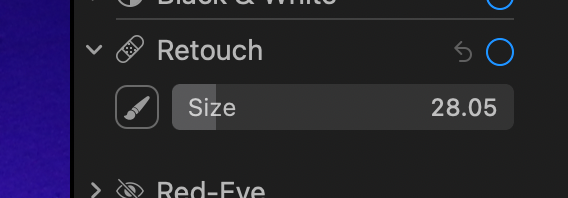
The photos we take can only satisfy our needs to a certain extend. Most people use third-party blemish editor apps to remove certain imperfections on the image. Did you know Apple Photos already has a built-in tool allowing you to remove unwanted spots on your photo perfectly?
All you need to do is click on the Edit button and look at the right sidebar for an item called Retouch. Select it and adjust your brush size, then click on places you want to retouch. The whole process is quick and straightforward.
2. Remove Red Eye
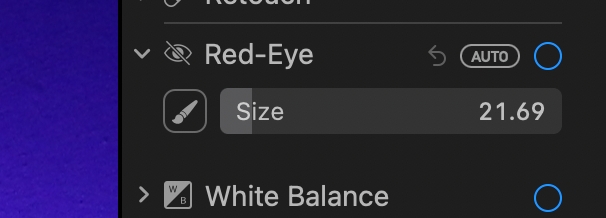
One of the annoying issues with taking a group photo is the residue of red color on your subjects’ eyes, especially when you are capturing an indoor shot with the flashlight turned on.
Nowadays, most cameras use artificial intelligence to remove red eyes upon processing the shot, but we still need a tool to remove the red-eye effect for many old photos.
Apple Photos has a built-in tool to help you with that. While editing the photo, look at the “Red-Eye” option, and after clicking on it, the app will quickly remove any red-eye on your image.
3. Adjust Color Curves
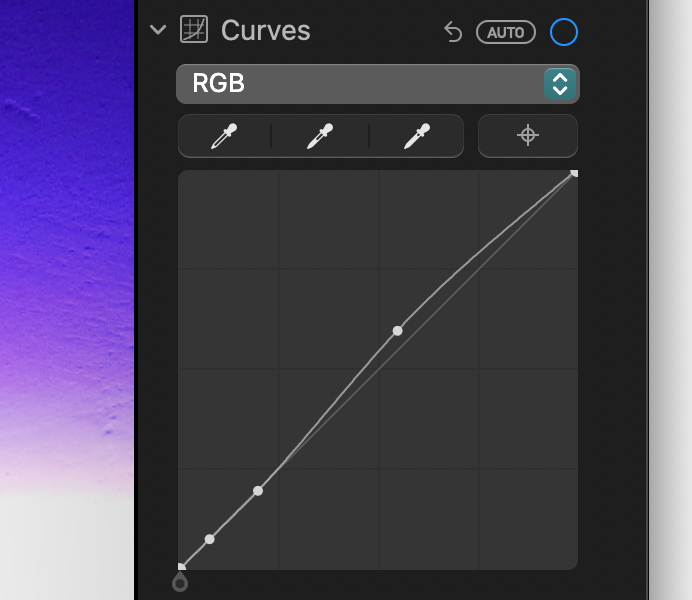
Many professional photo editors use color curves to adjust colors and contrast. The first time I found out about this option, it appeared scary and complicated, but it became a must-have feature for me once I learned about it and how the tool works.
Once learned, using Color Curves will become straightforward. Apple Photos provides a Color Curve adjustment tool as advanced as many professional photo editing apps out there.
I suggest reading the following tutorial to understand how you can use this tool to adjust an image’s black point, mid-tones, and white point.
4. Reduce Image Noise
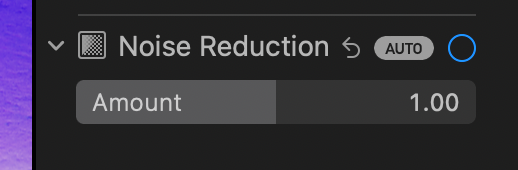
One of the worst issues with nighttime photography is the presence of noise. The lack of light source in low-light places forces the camera to capture a shot that doesn’t look good; This is primarily true for smartphone cameras as they heavily rely on the image signal processor chip to adjust the noise levels after taking a shot.
Of course, nowadays, most iPhones use AI for nighttime photography, resulting in much better nighttime shots. However, we need a tool to reduce noise for old photos, and Apple Photos can intelligently do that.
5. Increase Sharpness
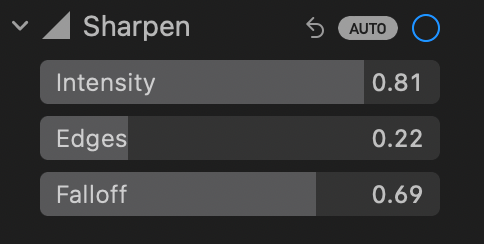
Every so often, our photos look tremendous but lack sharpness. Some photos have great dynamic range and don’t look over or underexposed, but some aspects require more clarity. That is when we adjust the Sharpness to make the image look more clear.
You can either choose the auto option and allow the app to automatically sharpen your image or manually adjust each slider to your preference.
Thank you for reading this story. I hope it was helpful and helped you save a few bucks by using the stock Apple Photos app instead of purchasing an expensive photo-editing app.
I hope you enjoyed reading this story. If you have any comments, and recommendations about scanning documents from an iPhone, let me know in the response section. I will be happy to read and talk about them.
I would appreciate it if you support me by becoming a Medium member using the link below:


