
Scenes, Subviews, and Tab Views
Build an App Like Lego, with SwiftUI — Tutorial 2
1. Introduction
Navigating a mobile app is fundamentally different from using a web browser. Customers love the simplicity and predictability of a mobile UI (user interface). They can move from one app to another while using the same navigation actions to switch between features, scroll through a list, drill down to something more specific, and so on.
In this Tutorial 2 of the series, we will learn how visual content is managed within other content, using “views”. We will introduce the “tab view”.
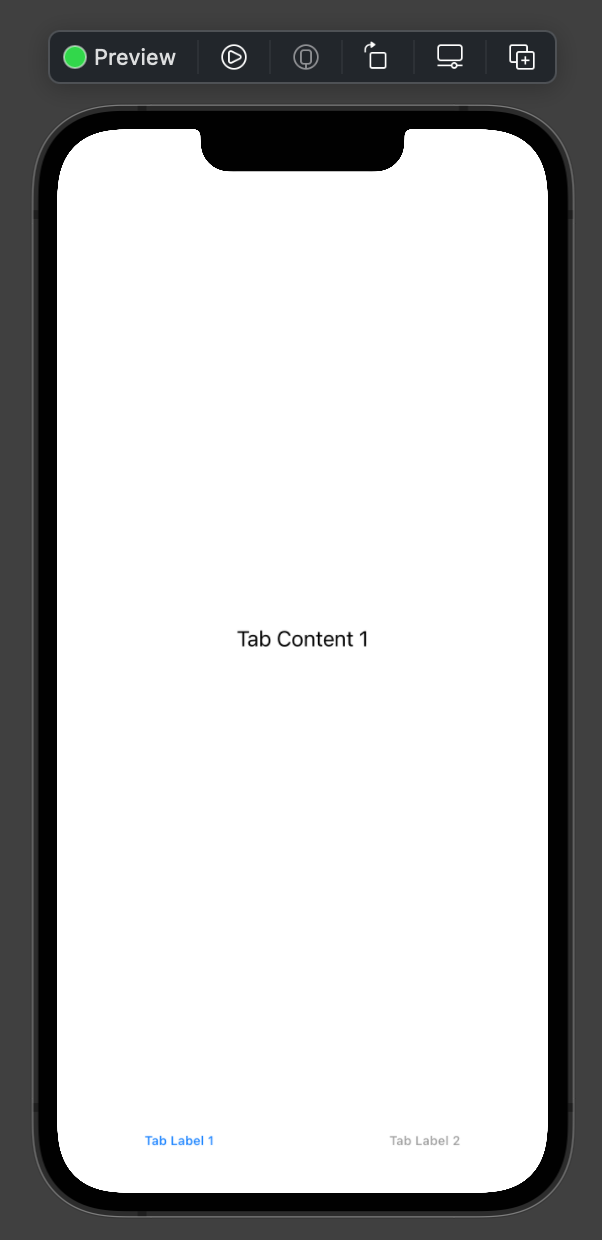
Recall that we’re aiming to build an app that looks something like this:
In Tutorial 1 we created a template app, with just one view that showed the text “News”. As shown above, we need to instead show a tab bar with three tab items (News, Products, and Chat), each of which has its own view content. We also need a navigation bar for each. Each scene needs a scrolling list.
Make sure that you have completed Tutorial 1 in this series. We’ll pick up here where the previous tutorial left off. Or, you can download the prepared project, ready to start this tutorial.
2. Scene and View
In order to assemble our app, we need to know the two terms used to describe our basic building blocks: “scene” and “view”.
- A view is a visual object, usually in a rectangular shape. It can be something small like a
Textobject, aSwitchorSlider, or something large like aScrollVieworTabView. - A scene is a view that occupies the whole screen or a panel in the screen (such as in a split view).
Informally, you may also hear people refer to a scene as a “page”, “window”, or “screen”. Technically, however, the iPhone has just had one physical “screen” and each app usually exists inside just one “window”.
3. Views Library
👉 In the Project Navigator, click on the ContentView.swift file to select it, if it’s not already selected.
👉 Near the top right of the Xcode window, click on the “Library” button which has a + icon.
The Library panel appears. Ensure that the first icon in it is selected to show you the Views library.
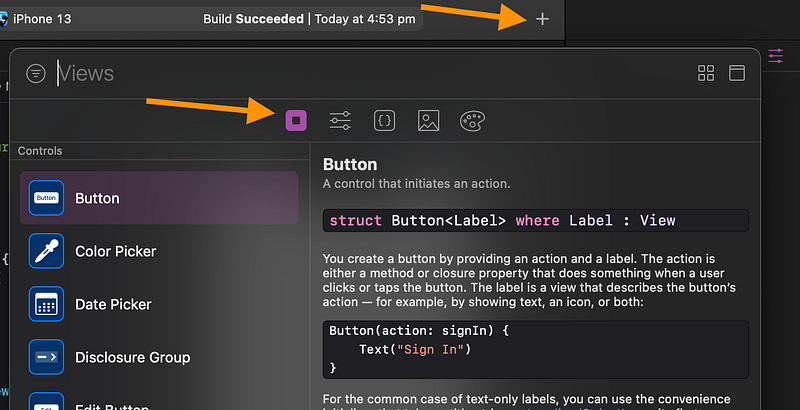
👁 You can see a long list of views, including Button, Color Picker, Date Picker and so on.
4. Add a TabView
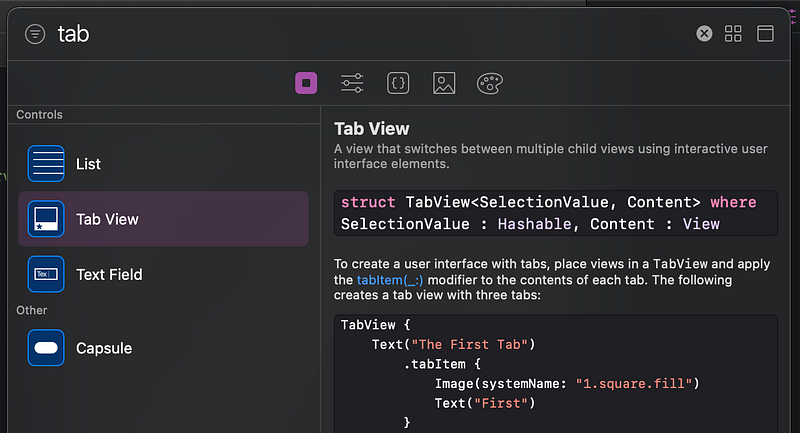
👉 In the search field at the top, type tab. Xcode shows just the views related to “tab”:
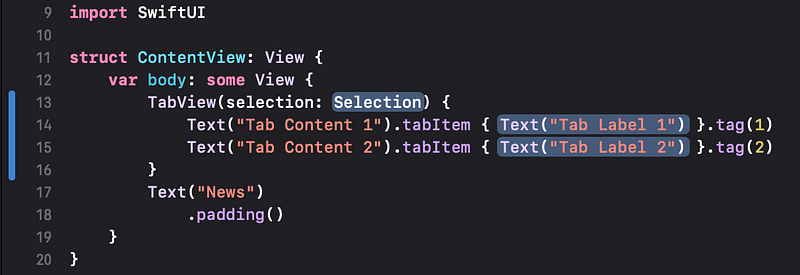
👉 Drag the Tab View from the Views Library into the code, between the var body line and the Text line. When Xcode makes a new empty line between them, release the dragged object.
👁 The dragged Tab View adds template TabView code, which contains two Text views.
👉 If your Mac’s screen is small, the code might soft wrap over more lines, making it harder to read. In that case, widen the code panel by dragging its vertical dividers, so the code looks similar to the above screenshot.
Dragging code from the Library has the same effect as just manually typing it. But dragging from the Library is obviously faster and more accurate.
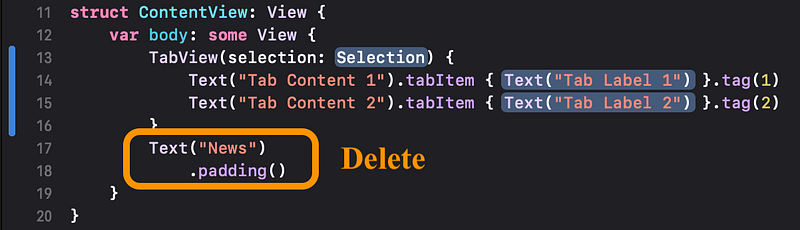
👉 We don’t want the old Text("News") anymore, so delete it and the .padding().
👁 After deleting, check that your code looks like this:
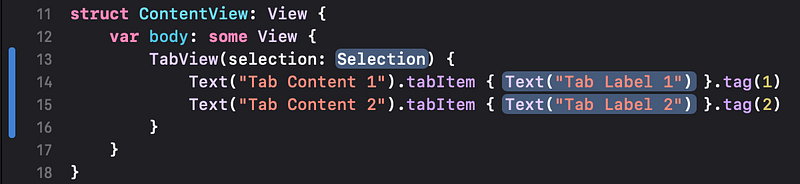
👁 Look at the preview panel. If it hasn’t refreshed, click on the Resume button and wait for it to update. You should see that the old "News" text is now replaced with a tab bar containing two tab items.
👉 In the code, change the quoted text of the two tabItems to News and Products respectively. You might need to double-click in the code to edit inside the quotes.
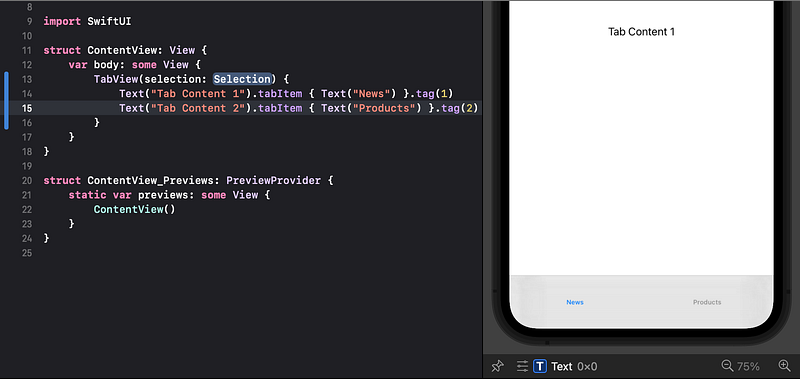
👁 Confirm that the preview shows the two tab items with the new text. If necessary, click on the Resume button to refresh it. If it shows any error, check that the code is correct.
5. Superview and Subviews
A view has a rectangular shape. A view may contain other views. The containing view is called the “superview” and the views within it are called its “subviews”.
For example, our TabView currently contains two Text subviews. Each of those Text subviews have a tabItem attached to it, which contains a Text label.
You can think of a superview as a large rectangular Lego block containing smaller Lego blocks as subviews. The subview blocks can only be placed within the rectangular bounds of the superview.
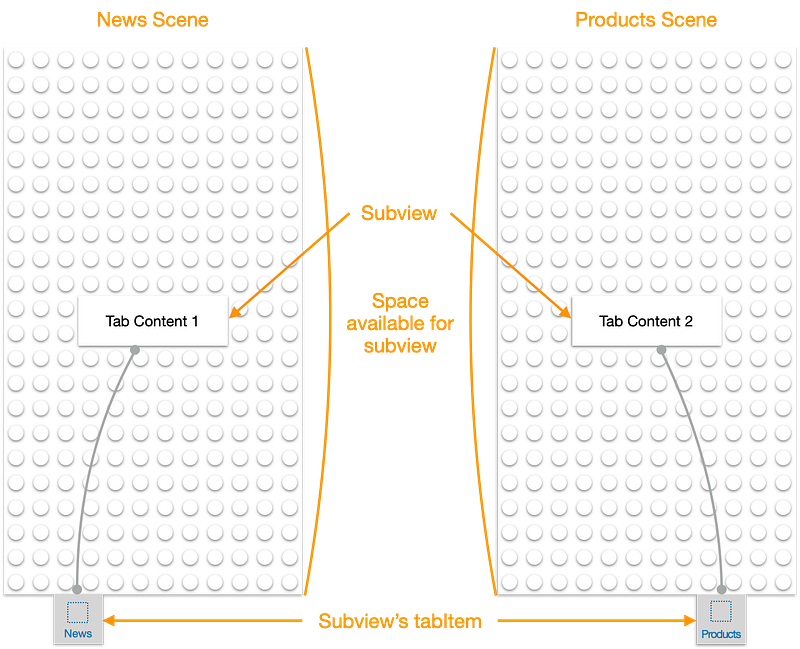
In the News scene, the Text subview is like a Lego block placed on top of the large rectangular scene’s view.
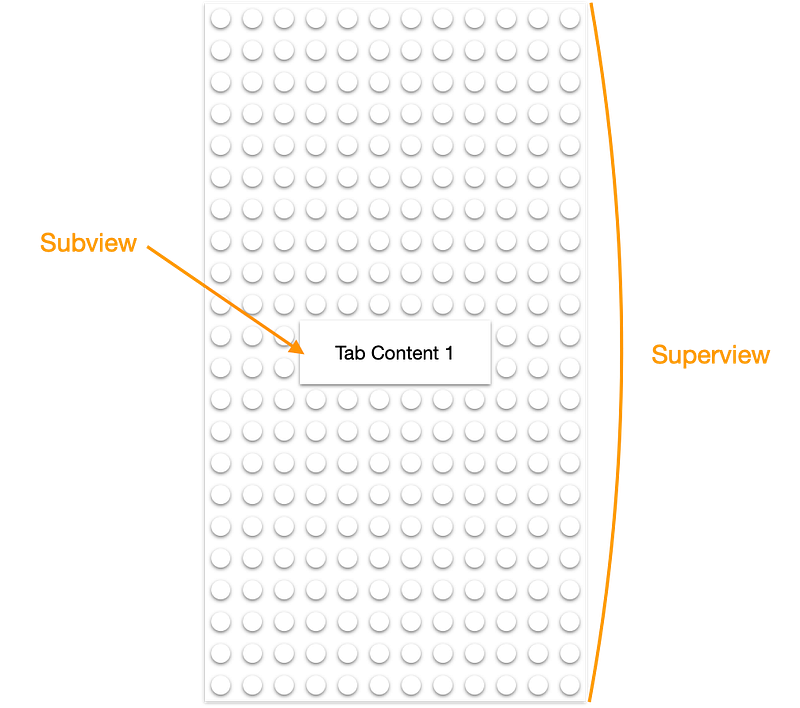
Some types of views don’t have subviews. For instance, you don’t add a subview in a Text view. In the Lego analogy, the Text views don’t have connecting studs on top of them, as you can see in the above diagram since they don’t accept subviews.
6. Tab View
👁 In the ContentView code, you can see a TabView containing two Text subviews. The TabView presents only one of its subviews at a time, depending on which tabItem is the current selection.
We can think of the TabView as a Lego base plate that provides a space for each subview and a tab bar at the bottom, which contains the tabItem label of each subview.
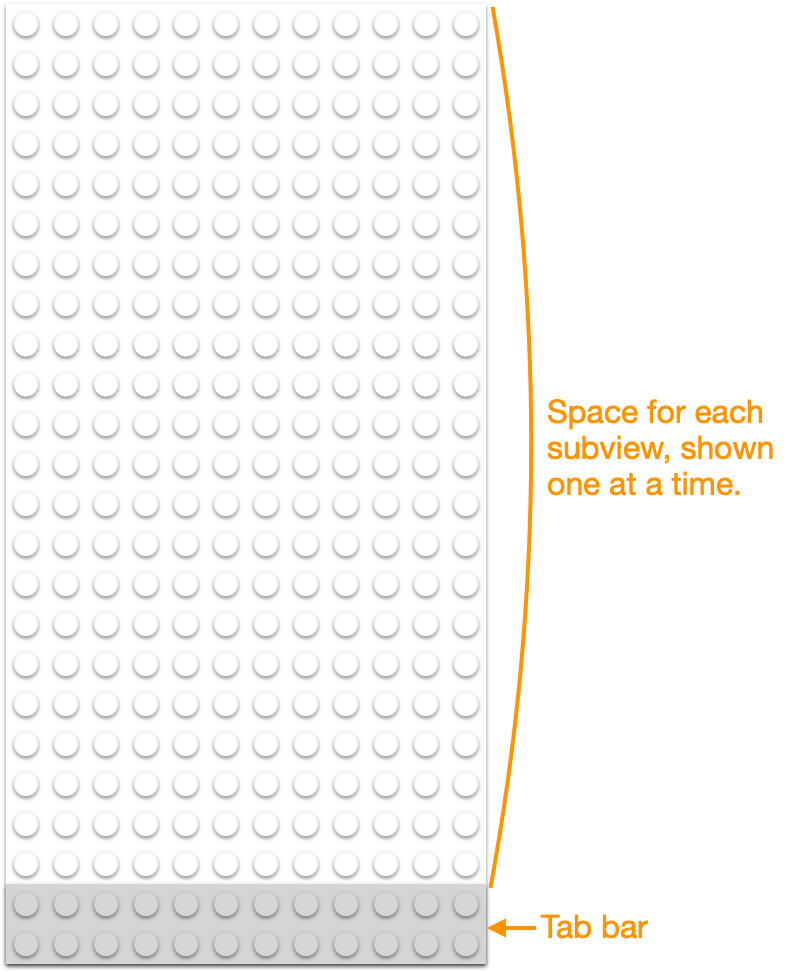
The TabView shows the currently selected subview in the top space. Each subview also provides its own tabItem label to appear in the TabView’s tab bar.
We can picture the News scene and Product scene as these Lego constructions, each with a view and a tabItem:
The TabView loads each subview when needed but shows the tabItem of all of the subviews at once.
For example, when the News tab item is selected, we can picture the composed tab view like this:
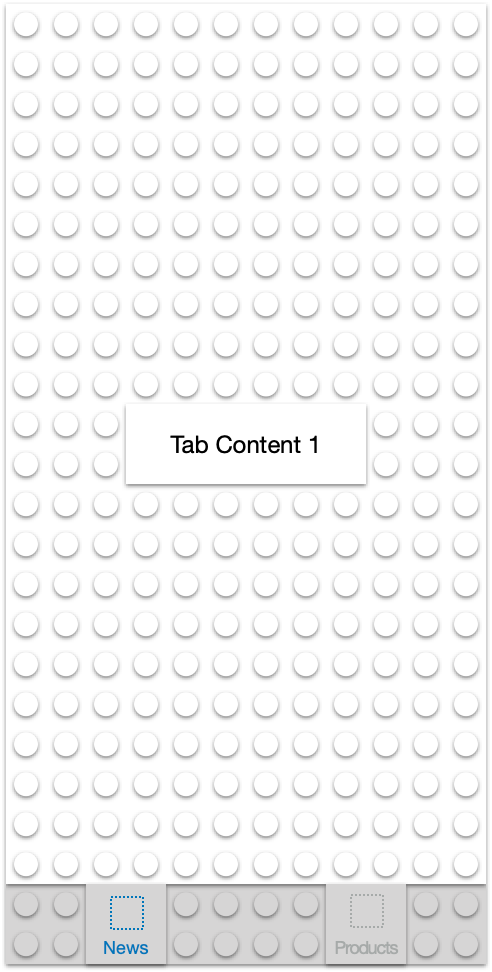
Note that the Products tab item is in the tab bar too but has a deselected gray color.
In summary, there are three parts to the tab view structure:
- The
TabView. It is responsible for showing the current scene’s view inside it and the tab bar (at the bottom). - The tab bar sits at the bottom of the screen. It contains all of the tab items and usually changes the color of the currently selected one.
- A
tabItem(containing text and/or icon) for each scene.
You can see that the News scene contains a tab item with the text News. The Products scene contains a tab item with the text Products. The TabView shows its tab bar containing all of the tab items.
7. Add a New Scene
Let’s add a new scene for “Chat”. This will provide a third view in the TabView with its own tabItem.
👉 Select the second tabItem line of code (such as by triple-clicking in that line). Copy it and paste it into a new line below it. In the new line, change both of the 2s to 3 and change Products to Chat.
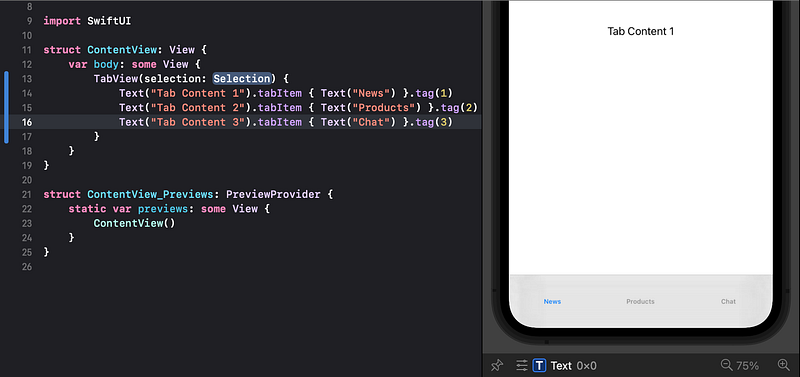
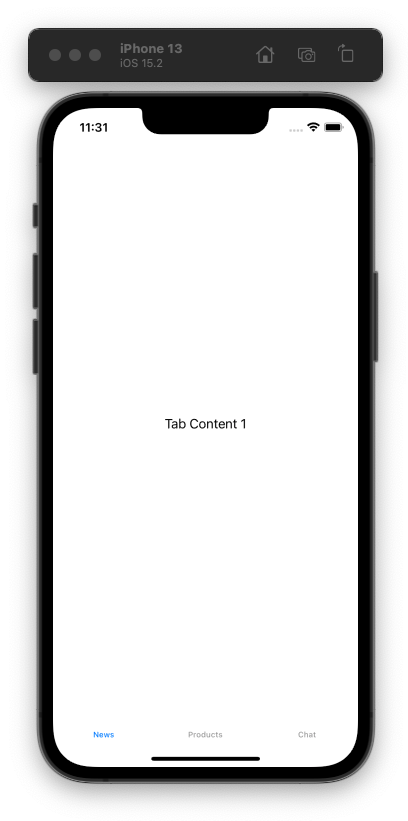
👉 Run the app (by clicking the Build and Run button in Xcode, as you did in Tutorial 1).
👁 Verify that the running app looks similar to the preview, showing three tab items. Use the mouse to tap/click on the Products and Chat tab items to switch the selected tab item and content in the tab view.
8. Commit Changes
Switch back to Xcode.
As we did in Tutorial 1:
- 👉 Choose
Commitfrom theSource Controlmenu. - 👉 Enter a description such as:
Added TabView with three tabItems - 👉 Click on the
Commitbutton.
9. Recap
In this Tutorial 2 we have:
- Discussed subviews in a superview.
- Added a new “Chat” scene to the tab view.
In Tutorial 3 we will continue modifying the scene flow using navigation views.
⁉️ If you have any questions or comments, please add a response below.
This series is released via Next Level Swift. Subscribe to keep updated and never miss a new Tutorial of this series!

We are always looking for talented and passionate Swift developers! Feel free to check out our writer’s section and find out how you can share your knowledge with the Next Level Swift Community!