
Navigation Views, Inside a Tab View
Build an App Like Lego, with SwiftUI — Tutorial 3

1. Introduction
At the end of Tutorial 2 the News, Products and Chat scenes appeared as tabs in a tab view. In this Tutorial 3, we will embed each of those scenes in their own navigation view, and add navigation titles.
Make sure that you have completed the previous tutorials in this series. We’ll pick up here where the last tutorial left off. Or, you can download the prepared project, ready to start this tutorial.
2. Navigation View
A navigation view presents a series of scenes, where tapping some button, cell, or link in the first scene navigates to the corresponding second scene, and so on. The second scene usually has a back button that returns to the first scene.
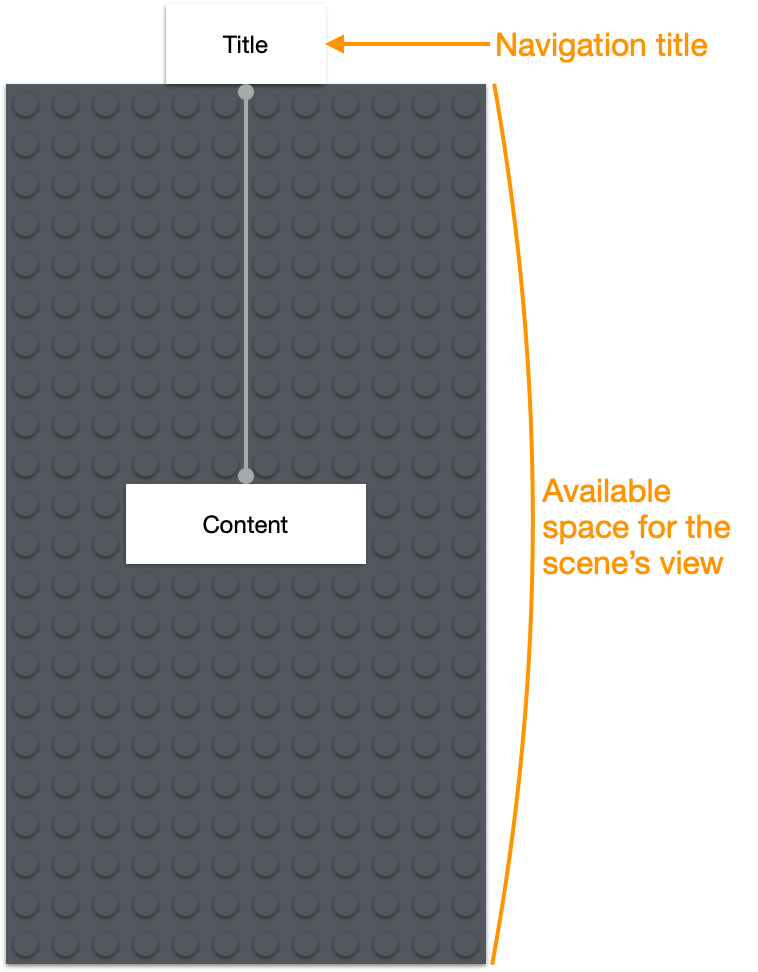
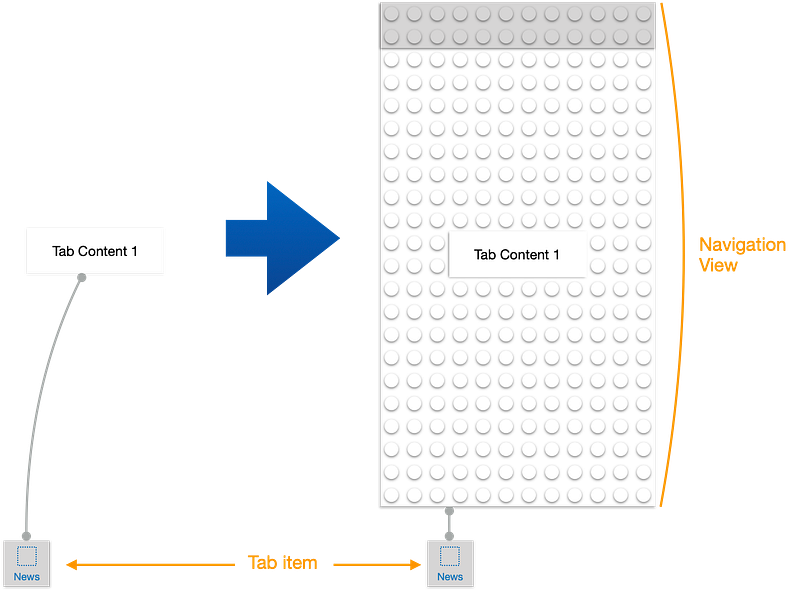
A navigation view is similar to the tab view that we discussed in Tutorial 2. It has a large space in which it shows the current child scene and a navigation bar (at the top) that shows the title of each child scene. Imagined as a Lego baseplate, it would look like this:

Like the tab view, the navigation view shows one child scene at a time. Each child scene can provide its own “navigation title” to appear in the navigation bar. Unlike the tab bar, the navigation bar only shows one navigation title at a time — the one belonging to the active child scene. Since the navigation title has the navigation bar mostly to itself, it can use the full width. The navigation bar can also contain some navigation bar items on the left and right, such as buttons, which we’ll discuss later. For now, we’ll just deal with the navigation title.
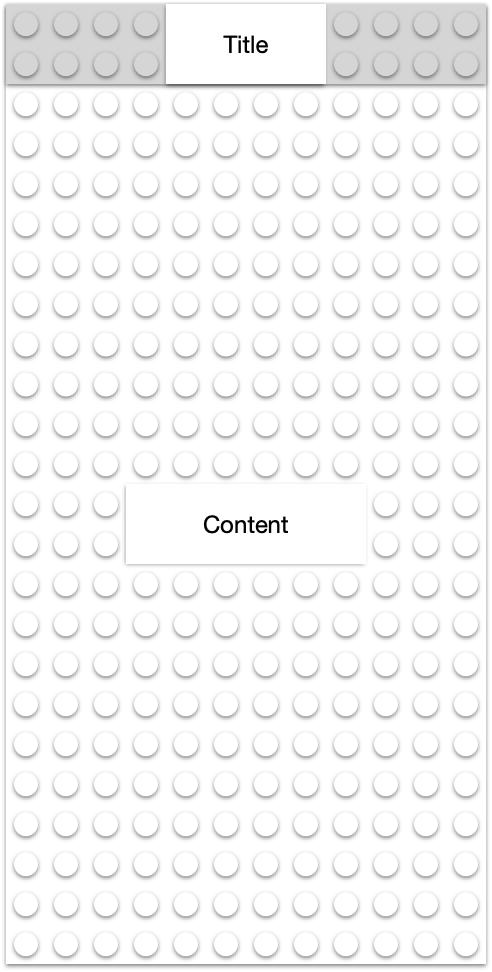
We can imagine a scene’s view and navigation title as Lego blocks:
When we put the child scene in the navigation view, it is like adding the scene’s Lego blocks (the content and title) onto the navigation view base plate. The navigation title appears on the navigation bar and the scene’s content occupies as much of the rest of the space as it needs.
In summary, the navigation view structure has three parts:
- The navigation view. It is responsible for showing the navigation bar (at the top) and the current child scene inside it.
- The navigation bar, which sits at the top of the screen. It contains the navigation title of the currently displayed scene within it.
- A navigation title for each scene, which appears inside the navigation bar when that scene is active.
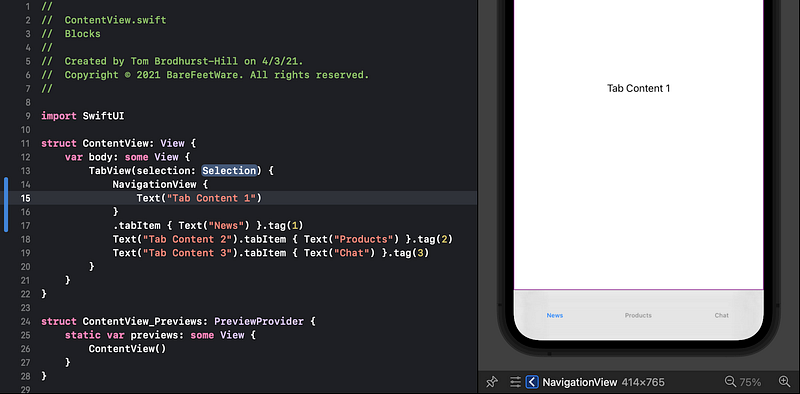
3. Add a Navigation View
Our News scene will eventually contain a list of news article summaries, where the user can tap a summary to navigate to a detailed scene for that article. For that, we will need to embed the News scene in a navigation view.
👉 Click on the + icon near the top right of the Xcode window, to show the Library again. Ensure that Views is selected and type nav to filter the list.
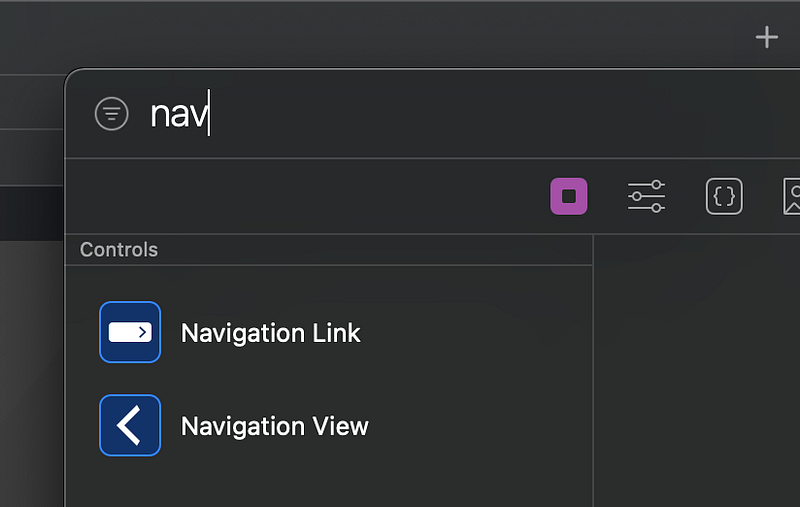
👉 Drag the Navigation View from the Library to be inserted just after the TabView line of code.
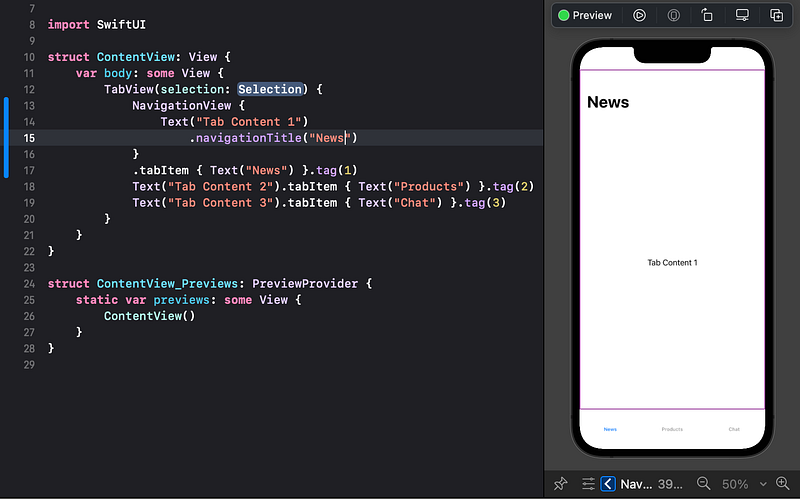
👁 Note in the preview that there are now four tab items, with the first one before News having no label. The new NavigationView is currently the first subview of the TabView, so it has become the first tab item.
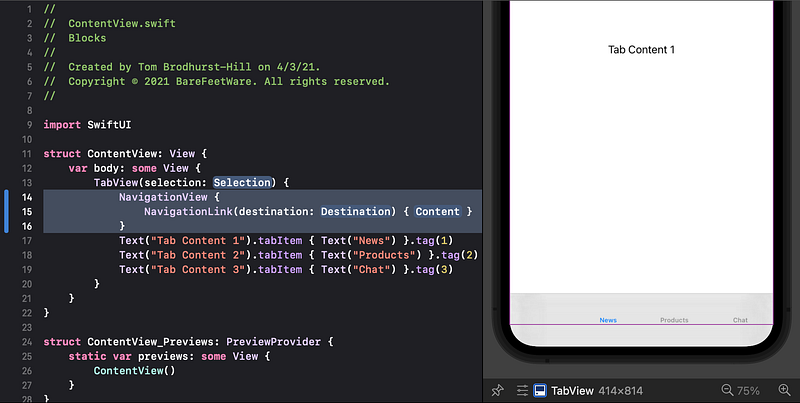
We need to move the first Text item into the NavigationView, replacing the default NavigationLink that came with the template code.
👉 Select the Text("Tab Content 1") code (not the .tabItem after it).
👉 Cut it (such as by selecting Cut from the Edit menu).
👉 Select the whole NavigationLink line of code. Paste over it.
👉 Edit if necessary so your code looks like this:
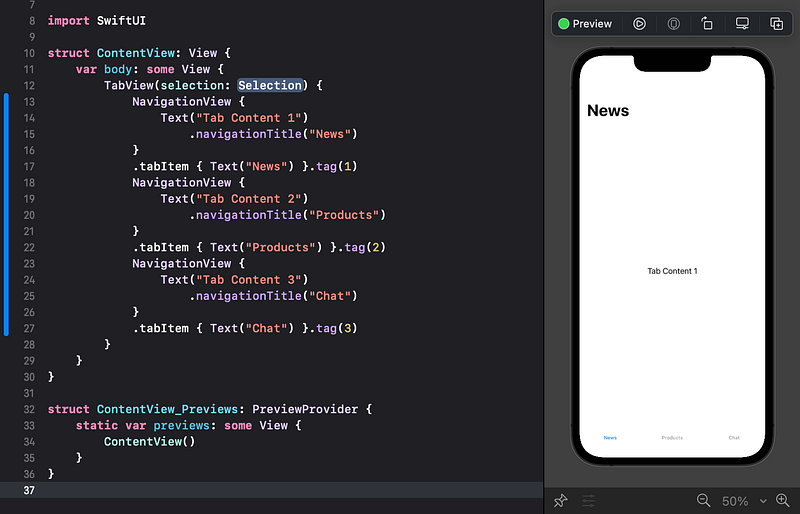
👁 Confirm that the preview now shows the original three tab items again. If necessary, refresh the preview by clicking the Resume button.
👁 Note that the .tabItem("News") is now attached to the NavigationView, instead of directly to the Text("Tab Content 1"). In Lego, this change looks like this:
Now we again have three scenes in the TabView. The first scene is a NavigationView, which itself contains the Text("Tab Content 1").
The preview doesn’t yet look any different to how it was before we added the NavigationView. That’s because there’s not yet any navigation title or navigation links in the scene. Let’s add a navigationTitle for the News scene.
In the same way that the tabItems must be inside the TabView that displays them, the navigationTitle must be inside the NavigationView that displays it.
tabItem and navigationTitle are “modifiers” of views. They modify an existing view to give it additional features.
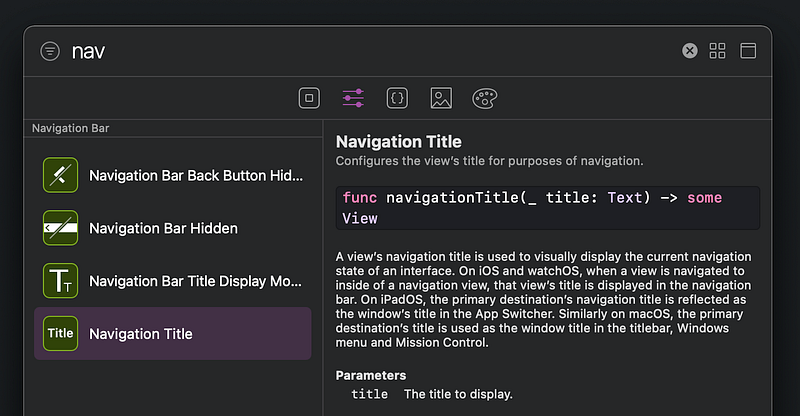
👉 Show the Library and select the Modifiers tab (the second icon that looks like slider controls). Type nav into the search bar and select the Navigation Title item in the list.
👉 Drag the Navigation Title into the code to insert a new line after the first Text line.
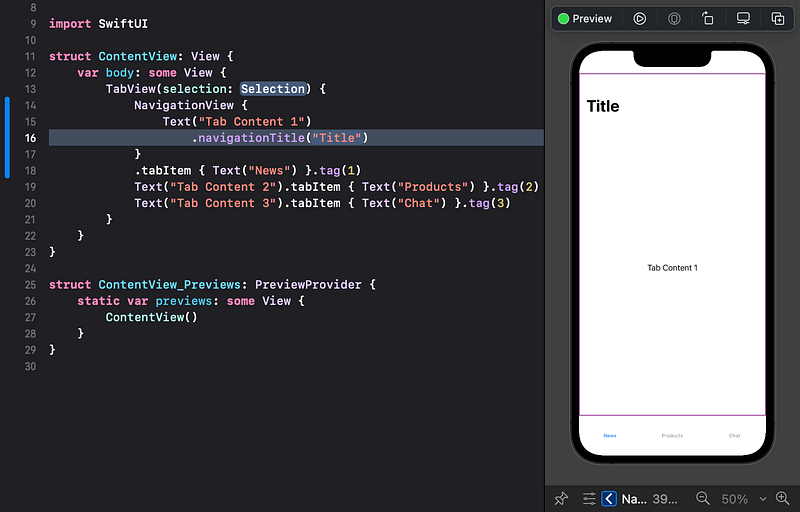
👁 The preview should show the Title at the top of the News scene, in the navigation bar.
👉 Change the "Title" to "News" and verify that it updates in the preview.
👉 Repeat the above process to add a NavigationView and navigationTitle to the Products and Chat scenes. You can drag from the library or copy and paste or type code — whatever you find easiest.
Notice that Xcode likes to indent the code a particular way. It is a handy way to check your code for any missing lines. You can apply Xcode’s indenting at any time by:
- In the
Editmenu, selectSelect All. Or usecommand-aon the keyboard. - In the
Editormenu, in theStructuresubmenu, selectRe-Indent. Or usecontrol-ion the keyboard.
👁 When you’re done, the code should look like below and the preview should refresh without any errors. If not, then meticulously check your code.
👉 When the code and preview show no errors, click the Run button to run the app in the simulator.
👉 Tap on each tab item and confirm that the selected tab switches to show the correct navigation title.
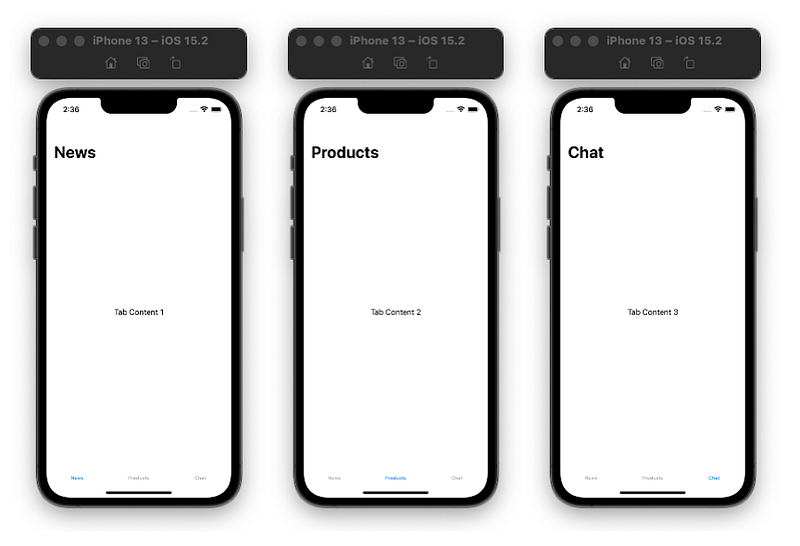
👁 Each scene is showing:
- The tab item label (
News,Products,Chat) in the tab bar, at the bottom. They have no icons yet. - The navigation bar, at the top. Each belongs to a navigation view.
- A navigation title for each scene, which appears in the navigation bar when that scene is active.
- A text view inside each tab item, showing placeholder “Tab Content” titles. We will soon replace each of those with a vertically scrolling list of content.
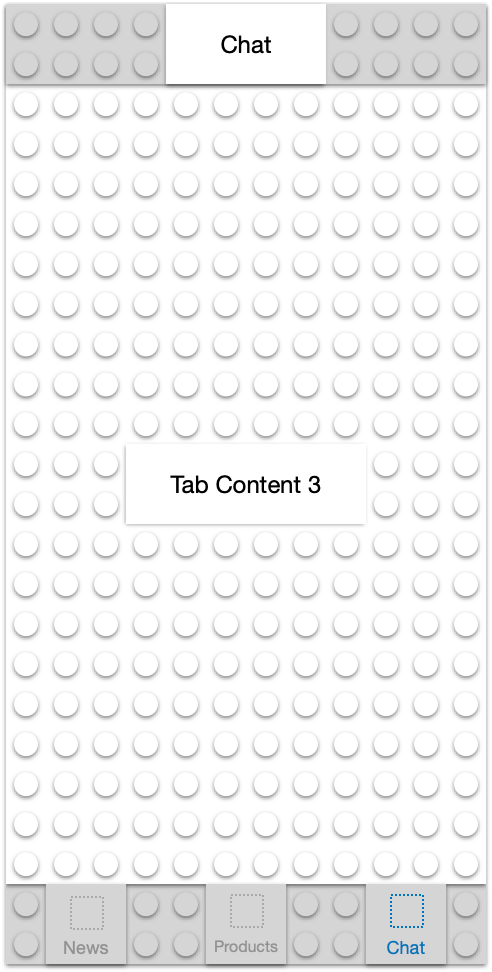
Notice that the tab bar and the navigation bar are both displayed. The tab view contains the navigation views, which each contain a navigation bar and one text view. We can picture it as these layers of Lego being added on top of each other. For example, when the Chat tab item is selected, the visible structure is like this:
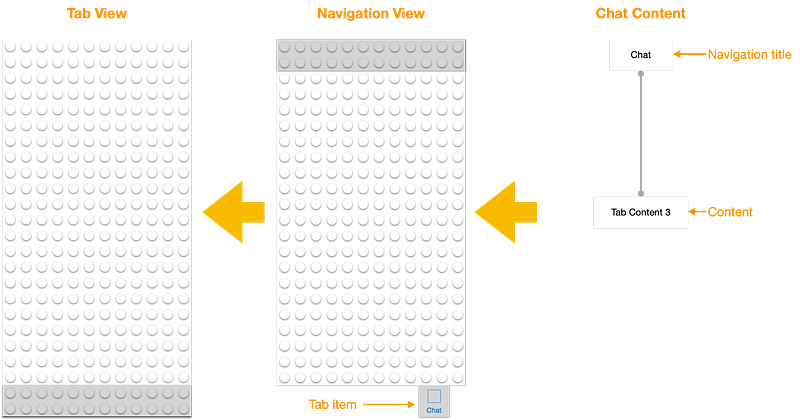
Added together, with the tab items of the other scenes, we get the composite of all of the scenes as:
4. Commit Changes
Switch back to Xcode.
As we did in Tutorial 1:
- 👉 Choose
Commitfrom theSource Controlmenu. - 👉 Enter a description such as:
Added navigation views and titles - 👉 Click on the
Commitbutton.
5. Next…
We’ve covered a lot in a short time. In this tutorial we have:
- Created three navigation views, each with a navigation bar.
- Set the navigation title of each navigation view.
- Embedded the navigation views in a tab view.
- Moved each tab item to be connected to a navigation view.
In Tutorial 4, we will introduce the Attributes inspector to modify content and color in the app.
⁉️ If you have any questions or comments, please add a response below.
This series is released via Next Level Swift. Subscribe to keep updated and never miss a new Tutorial of this series!

We are always looking for talented and passionate Swift developers! Feel free to check out our writer’s section and find out how you can share your knowledge with the Next Level Swift Community!


