
Create a Model and Mock Instances
Build an App Like Lego, with SwiftUI — Tutorial 11

1. Introduction
Broadly speaking, an app has two facets: model and view. A view is something you see or touch or otherwise interact with directly as a human. A model is something behind the scenes that stores data or calculates results.
A view’s job is to show visual layout, color, text, images, buttons, tab bar, and other controls on the device’s screen. A model contains the raw words, numbers, names of images, dates, any calculations, and business logic.
A model is like the bones and brain. A view is like the skin, eyes, and ears.
In this tutorial, we will build a model and mock data.
So far in our app, we have created only views, like NewsCell. At the end of the previous Tutorial 10 we refactored the NewsCell to expose properties that we can customize to create different NewsCell instances.
In this Tutorial 11, we will add a model called Article to contain the raw news article information. In the next tutorial, we will display those articles in news cells.
We’ll pick up here where the last tutorial left off. Ideally, you have completed the previous tutorials in this series. Or, you can download the prepared project, ready to start this tutorial.
2. Model Types
Swift stores words and names in a type called a String. A String is a model, which stores a “string” of characters, such as letters, numbers, spaces, and punctuation, to make a word, sentence, paragraph or longer. In contrast to a Text view, a String only stores the “string” of characters, not the visual characteristics like font, color, and size.
Swift stores dates and times in the Date type.
Numbers are usually stored as an Int if they are integers (whole numbers like 0, 1, 234, -78) or as Double if they can have a fractional component (like 0.78, 1.23 or -45.6).
3. Create the Model Code
Each news article will consist of a title, date, detail, and the name of two images. Let’s create an Article type to store this information for each article.
👉 In Xcode, use the File menu’s New File… command to create a new file called Article.swift, using the Swift File template.


👉 Type or paste the code below. It’s good practice to type in the code to familiarise yourself with Xcode’s editing and autocompletion features.
👁 Your Article code should look like this:
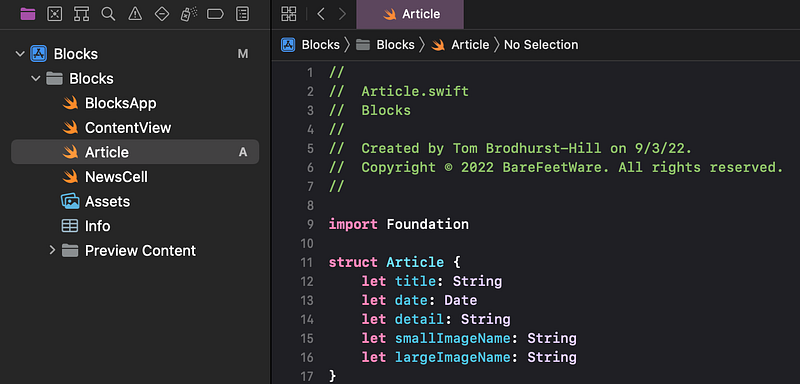
That’s it! We have created our first model.
ℹ️ For the curious, here’s a breakdown explanation of the code above:
import Foundationimports (into the app project) all of the foundation (fundamental) Swift types, such as dates. If we didn’t do this, Xcode’s compiler would complain that it Cannot find type ‘Date’ in scope.struct Articledeclares that we are creating a new type (specifically a “structure”) that we’ve decided to call “Article”.- Each
letdeclares a constant property of theArticle, that is set when anArticleis created, then not changed. - The word following
letsets the name of each property, such astitle,date,detail. We can use any wording we like, but we should follow the guidelines for naming Swift variables. - The colon (
:) tells Swift that the property name on the left is of the type on the right. For example, thetitleis aString, which means it will be a string of letters, numbers, spaces, whereasdatewill be the specialDatetype that stores the time and day in a year.
4. Create Mock Articles
In a completed app, we would source the news articles from the internet, by requesting them from a news server. Since we don’t have any network fetching functionality yet, we need to “mock” some model data that we can use to test our models. Mock data gives examples of what we expect in our finished app.
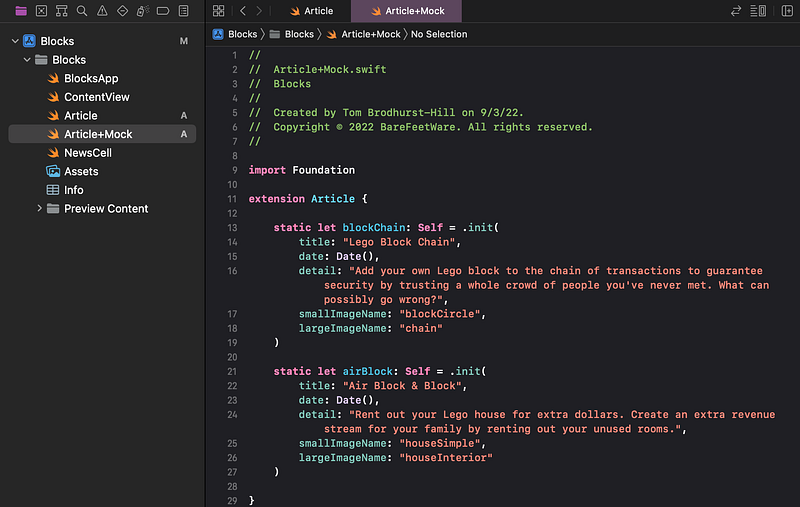
👉 Create another file, using the Swift File template. Call it Article+Mock.swift.
👉 Type in the code below. You might want to copy and paste the long quoted strings.
👁 When done, the code should look like this:
ℹ️ Don’t worry about understanding the code, but here is an explanation:
- The file is named
Article+Mock.swiftbecause it extends (or adds to) the functionality of thestruct Articletype that we already have. The+Mockin the name indicates the purpose of the extension in this file. We can have multiple files that extend the same type, each with a different+Purpose. extension Articleadds extra functionality to thestruct Articlethat we already created. In other words, it “extends”Articlewith more features. We could have just added this code in thestruct Articlecode, but keeping the mock values in a separate file is more easily maintainable.- Using
staticand: Selfdeclares the variable as an “instance of this type”. That just means that anywhere in the code that expects anArticle, we can just provide.blockChainor.airBlock. This makes it really easy to use these mock articles wherever we need them. - This code is all inside the
extension Article, which gives it the same context as if it was all insidestruct Article. This means that, in this context, Swift understands thatSelfmeansArticleand that.init(...)meansArticle(...). For example, we could have writtenstatic let blockChain: Article = Article(instead ofstatic let blockChain: Self = .init(, since they mean the same thing in this context. But the latter is more generic and reusable. - Each pair of parameters and argument provides a value for that property. For example,
title: "Lego Block Chain"sets the title property to the string"Lego Block Chain". - Recall from our earlier Tutorial 6 that we added a bunch of image files, including those named
houseSimpleandhouseInterior. If you like, you can have another look by selecting theAssets.catalogin the Project navigator. We are quoting those asset names here for the image names. Date()creates a new instance of a date. Since we have provided no properties in this instance ofDate, it will use its default value, which happens to be “right now” — that is, today, right this second, when the code runs.
👉 After entering all the code, test that it compiles by selecting Build from the Product menu. If there are any errors, fix them by checking that your code matches the above code.
5. Commit Changes
As you’ve done before:
- 👉 Choose
Commitfrom theSource Controlmenu. - 👉 Enter a description such as:
Created Article model and mock instances - 👉 Click on the
Commitbutton.
6. Next…
We have created a new Article model and a couple of mock instances.
Next, in Tutorial 12, we will extend the NewsCell view so it can display the data from the Article model.
See upcoming tutorials in the table of contents. Follow the author to be notified of more articles.
💬 If you have any questions or comments, please add a response below.
This series is released via Next Level Swift. Subscribe to keep updated and never miss a new Tutorial of this series!

We are always looking for talented and passionate Swift developers! Check out our writer’s section and find out how you can share your knowledge with the Next Level Swift Community!


