
Create a Model, Mock, and List of Cells
Build an App Like Lego, with SwiftUI — Tutorial 15
1. Introduction
A properly architected app is built from the blocks of a view, a model, and some kind of controller or presenter to inject the model into the view. Keeping the responsibilities separated makes the blocks reusable and more easily understood.
SwiftUI marks the end of the need for a “view controller”, which was a hallmark of the previous UIKit way of building apps. That is thankfully true. However, we still logically need some small piece of code to inject the model properties into a view, so I will refer to it here as the “controller” or “presenter”. In reality, this controller is just a simple small extension of the view that maps each model property into a view property.
In a later tutorial, we will also introduce the “view model”.
In the previous Tutorial 14, we created a ProductCell view. In this Tutorial 15, we will create a Product model and mock values to be shown in that view.
This is similar to when we created the Article model for the NewsCell. Refer back to the earlier tutorials if anything here seems unfamiliar.
We will pick up here where the last tutorial left off. Ideally, you have completed the previous tutorials in this series. Or, you can download the prepared project, ready to start this tutorial.
2. Extract Properties of a View
In Xcode, select the ProductCell.swift file that we created in the previous Tutorial 14.
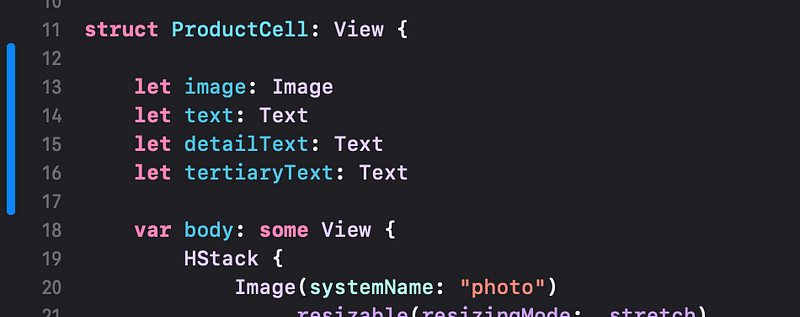
👉 Insert the following properties before the var body:
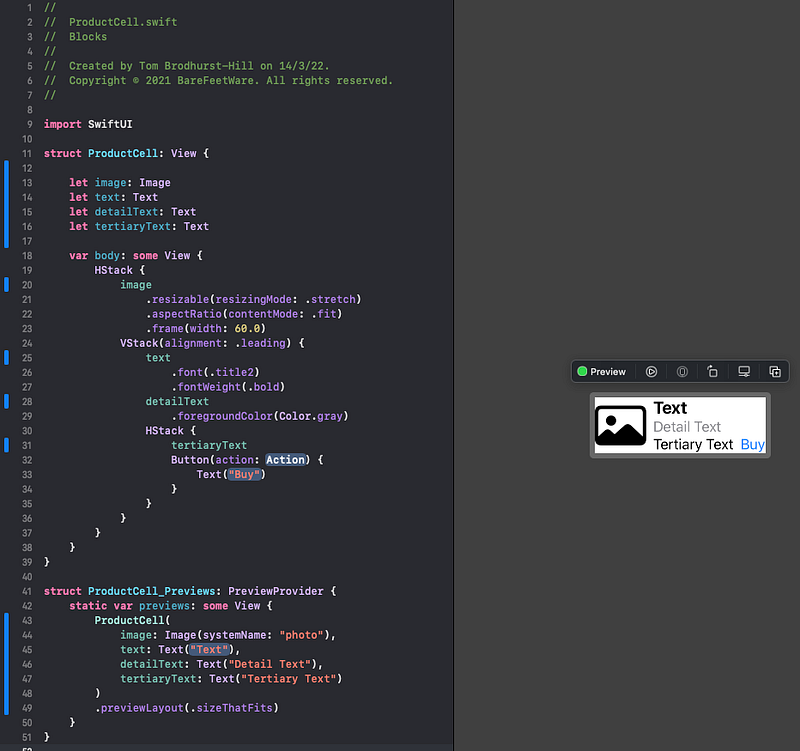
👁 Your code should look like this:
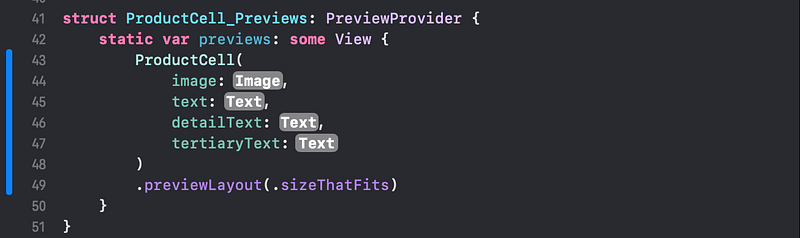
👁 Xcode now complains in the PreviewProvider code (at the bottom of the file) that the ProductCell() instance is missing arguments.

👉 Click on the stop icon in the error pop over to expand the detail. Click the Fix button.

👉 As we’ve done before (in Tutorial 10), insert returns (new lines) to move each parameter to its own line. Use the menu commands Edit Select All and Editor Structure > Re-Indent to tidy up the indenting, if needed.
👉 Replace each of the placeholders (Image and Text) in the PreviewProvider code with the copied placeholders from the var body. For example, replace Image with Image(systemName: "photo").
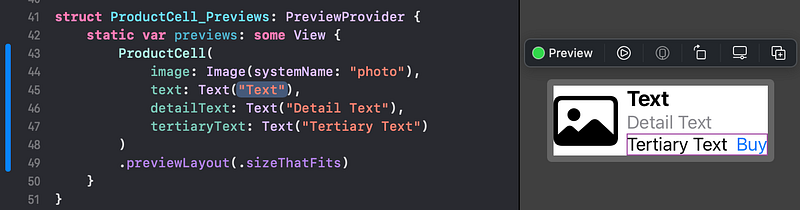
👁 Check that the code compiles without error and that the preview displays correctly.
👉 Replace each of the placeholder Image and Text views in the var body with the corresponding new property names. For example, replace Image(systemName: "photo") with image.
3. Product Model
👉 Create a new file, using the Swift File template. Name it Product.swift.

👉 Add the Product structure code below:
👁 Confirm that your code looks like this, with no errors:

4. Product Mocks
👉 Create a new Swift File named Product+Mock.swift.
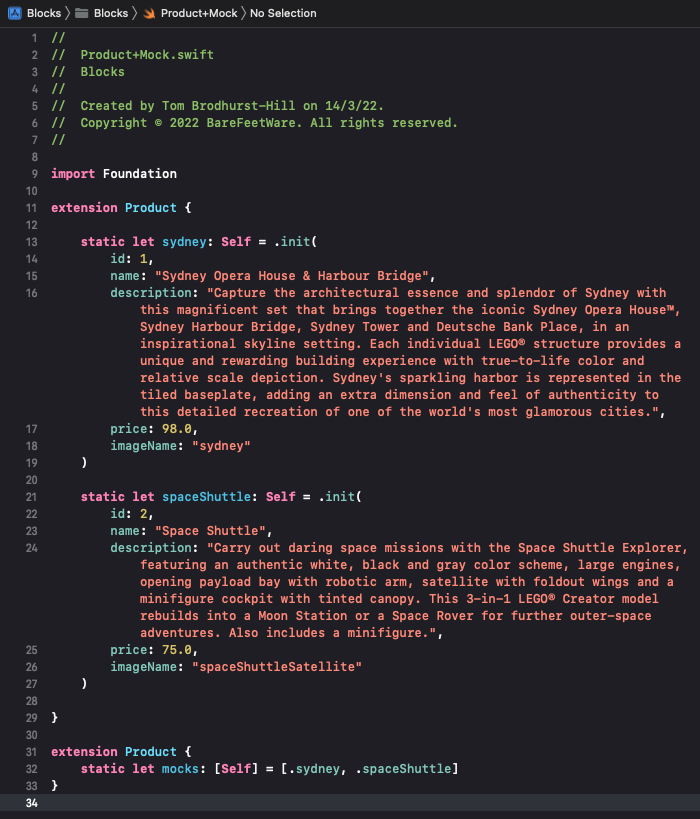
👉 Add the extension code from the following:
👁 Check that the code compiles without any errors, and looks like this:
5. Product Presenter
Now we have a Product model and a ProductCell view. We need to define how a Product's properties are presented in a ProductCell.
👉 Create a new SwiftUI View file, named ProductCell+Product.swift.
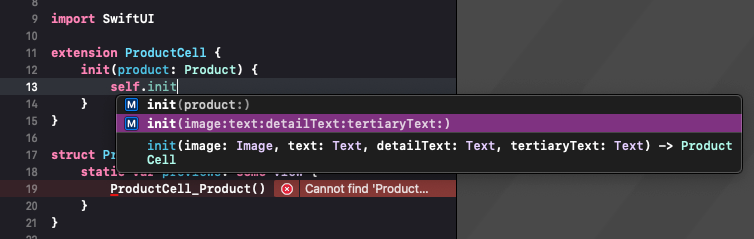
👉 Replace the struct ProductCell_Product.swift template code with the extension ProductCell below.
👁 As you’re typing, Xcode should offer autocompletions to make it easier, such as this one after typing init(:
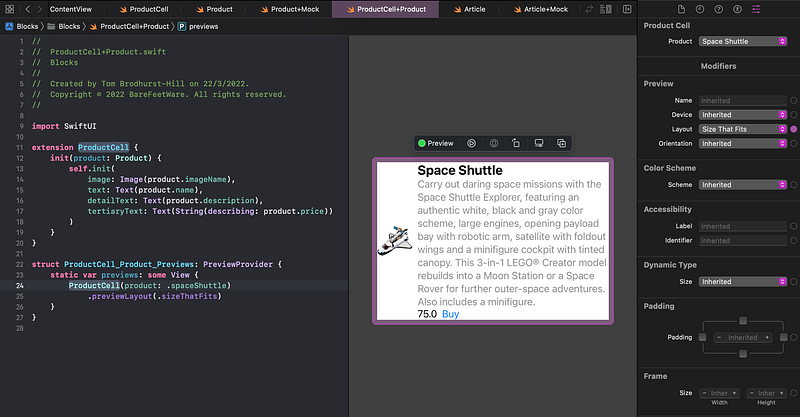
👉 In the var previews, replace the ProductCell_Product() template code with:
👁 Confirm that the code compiles and the preview shows as below:
6. List of ProductCells
We’re nearly there. We have a Product model, with a mocks array of sample data. We have a ProductCell view and a way to present a Product model in the cell.
Now we just need a scene to display the products in a list.
In the ContentView.swift file, we already have a placeholder scene for the products, complete with a navigation view. We just need to replace the placeholder Text("Tab Content 2") with a list of products.
👉 Switch to the ContentView.swift file.
👉 From the Views Library, drag a Navigation Link to insert a line above the Text("Tab Content 2") line of code.

👉 Delete the Text("Tab Content 2") line of code.
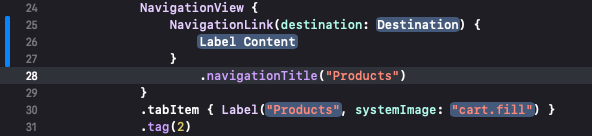
👉 Command click on the NavigationLink code. In the Actions popup menu, select Embed in List.
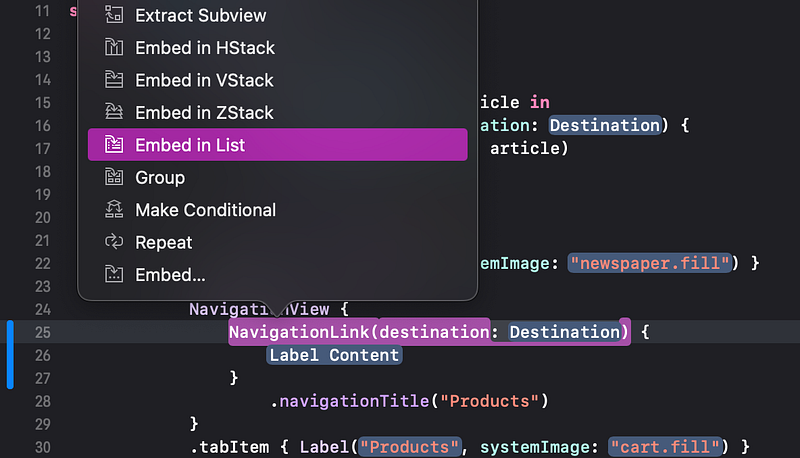
👁 Xcode wraps the NavigationLink in a List, as shown below.
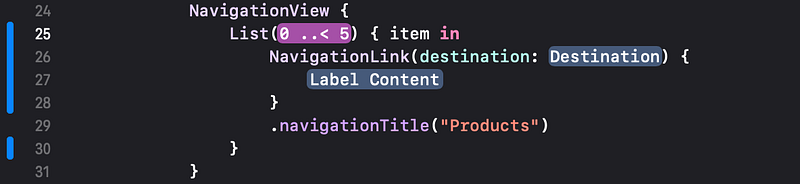
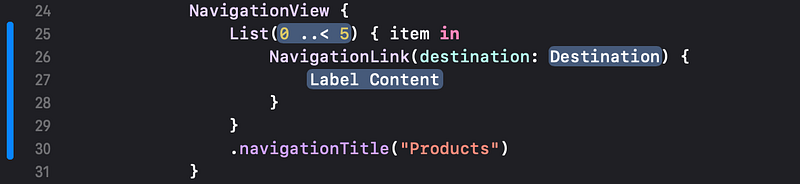
👉 Move the navigationTitle line of code down one line, so it is again just inside the NavigationView's closing }.
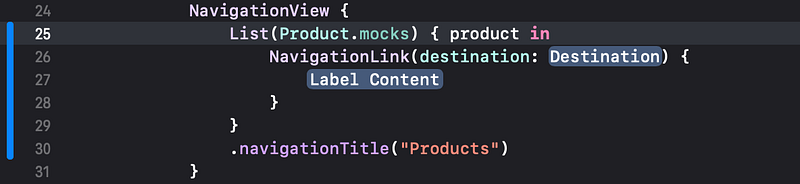
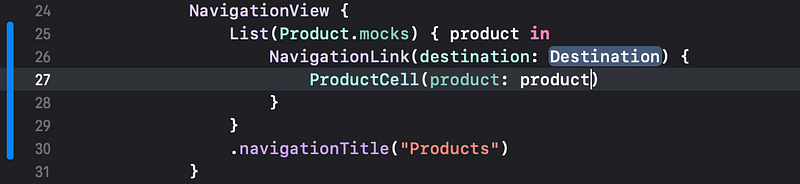
👉 Click on the 0 ..< 5 placeholder. Replace it with Product.mocks. Replace item with product.
👉 Replace the placeholder Label Content with the code below. Use Xcode’s autocompletion to reduce the need to type on the keyboard.
👉 Build and ensure there are no errors.
7. Live Preview
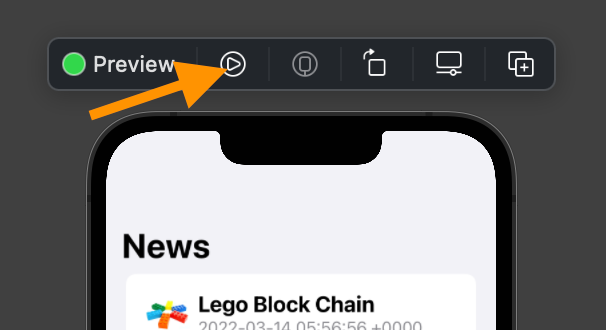
👉 In the preview, click the live preview button in the top, near left.
👁 After a few seconds, the preview is live, so we can test it.
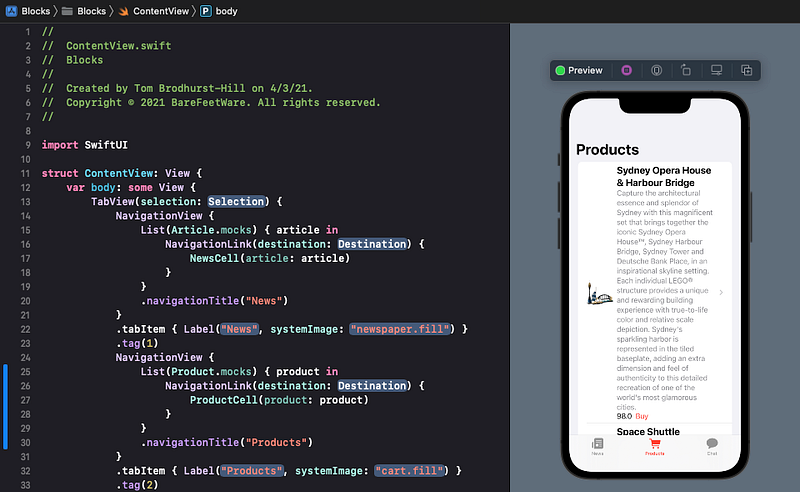
👉 Click on the Products tab item in the tab bar at the bottom.
👁 The preview shows the two products from the mocks array, in product cells.
👉 Run the app to double check that it’s all working correctly in the Simulator.
8. Commit Changes
When it’s all done and working, as you’ve done before:
- 👉 Choose
Commitfrom theSource Controlmenu. - 👉 Enter a description such as:
Product cells show product mock data - 👉 Click on the
Commitbutton.
9. Next…
Congratulations! The products list layout is complete. It is showing all the currently available products.
Next, in Tutorial 16, we will tidy up our file structure and introduce a view model to format the dollars and dates.
If you’ve been through the tutorial series to this point and would like to us to publish more, please add a comment below.
See upcoming tutorials in the table of contents. Follow the author to be notified of more articles.
💬 If you have any questions or comments, please add a response below.
This series is released via Next Level Swift. Subscribe to keep updated and never miss a new Tutorial of this series!

We are always looking for talented and passionate Swift developers! Feel free to check out our writer’s section and find out how you can share your knowledge with the Next Level Swift Community!


