
Learning Software Development
Upload to MavenCentral made easy for Android Library
Clarify and simplify the steps to upload to MavenCentral

It was announced that JCenter and Bintray are retiring soon. All new libraries update should be uploaded elsewhere. One of the places is MavenCentral. But how can we upload it there?
There are various tutorials out there, but the one I like most is from Steam: Publishing Android libraries to MavenCentral in 2021. It has all the detailed steps. There are some hiccups while following it (perhaps the steps have changed) but overall it’s great.
However, it was still too complicated for me. So I wrote this to simplify the steps required. There are many terms that are unfamiliar like Sonatype, Nexus, OSSRH. To make it clear, I wrote the below are article. This might be a good simple 4 minutes read before proceeding.
Requirement Compare to JCenter
If you have a library uploaded to JCenter before, you might know you need to register with Bintray and then write some Gradle script in your project to upload to JCenter.
For MavenCentral, we have few more things to do
- Need to file a ticket to request for account creation (not just sign up).
- Need to formally prove you actually have your domain (or Github) access.
- Need to set up an encryption tool GPG to enable signing for your upload.
Knowing all these in advance will help understand the process better.
Before we start the steps, let me create a simplified overview below
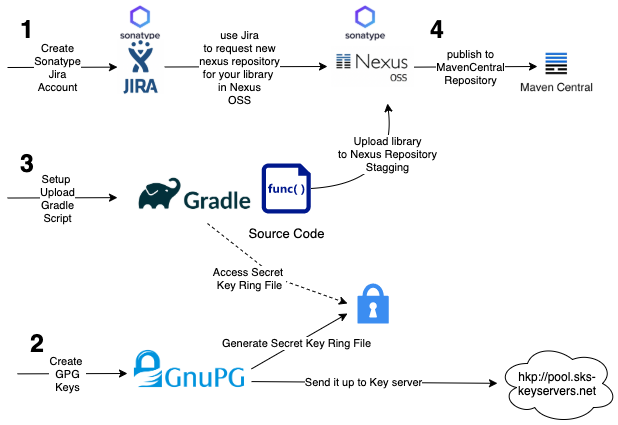
- You’ll need to signup for a JIRA account in Sonatype. Using the JIRA account, you can request your Nexus Repository for your respective library.
- Create your private and public keys using GPG prepare as part of the signing of your library.
- Set up the Gradle script in your project, which made your upload directly with a single Gradle command into Nexus Repository Stagging
- Moved your uploaded project library from Nexus Repository Stagging to MavenCentral. Done!
Let start with the detail now!
Setup Sonatype Account and Nexus Repository
1. Setup Sonatype JIRA Account
If you don’t have any Sonatype JIRA Account, set it up here.
2. File a JIRA to a new request Nexus Repository for your library
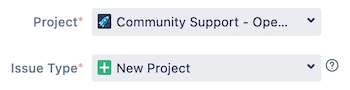
Then create a new JIRA Ticket with the Project and Issue Type as below
Community Support — Open Source Project Repository Hosting (OSSRH)
Then enter your project library info and the Group Id*.
Note the Group Id* you has to be something you need to prove you own later. It can be a github id or URL domain name you owned.
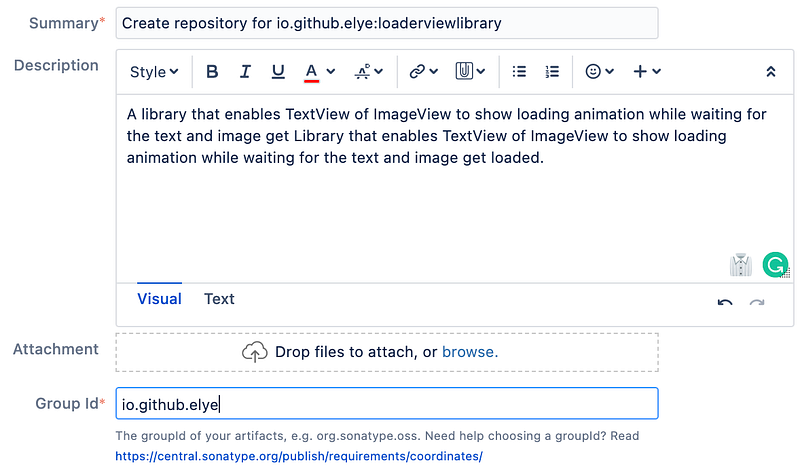
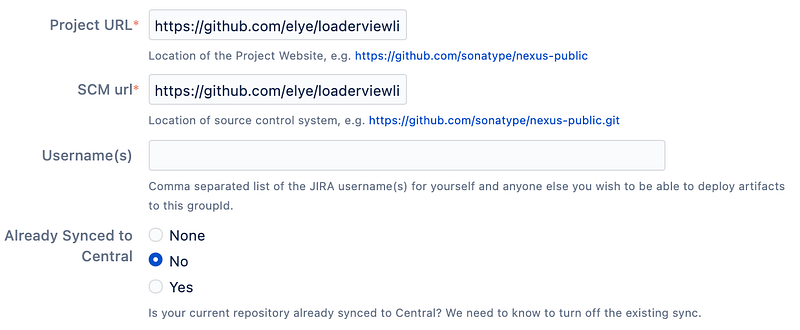
Then enter the respective URL e.g. Github repository for your project.
3. Prove that you own the domain or Github account
Wait for a few minutes, you’ll get a response as below.
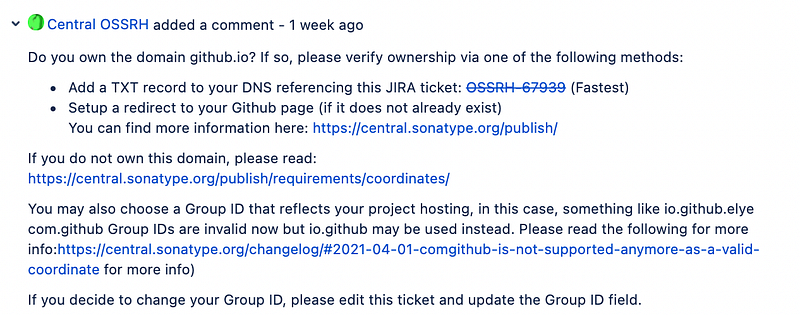
You’ll have to either prove you own the domain or the GitHub account. In my case, I’m asked to create a new repo based on the JIRA number.
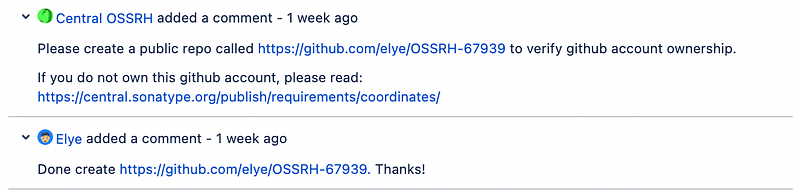
Then you’ll get the below response, which shows that your Nexus Repository for the library is ready.

You can view my JIRA case at https://issues.sonatype.org/browse/OSSRH-67939
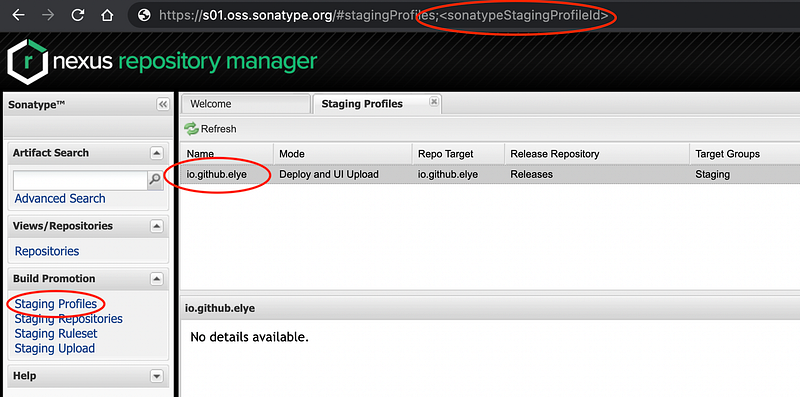
4. Access Nexus Repository Profile Id
Last, just to ensure we have access to Nexus Repository, get into https://s01.oss.sonatype.org/
After login, click Staging Profiles, then click on your library group id name. After that, look at the URL, you’ll get your sonatypeStagingProfileId. Remember this number for the use of the Gradle script step later.
Setup GPG Encryption Keys for Signing Purpose
First, you just download the GPG tool as guided in the article below.
1. Create a new GPG Keyset
Type the below command
gpg --full-gen-keyThen follow the default value mostly, except for
Please select what kind of key you want:
(1) RSA and RSA (default)
(2) DSA and Elgamal
(3) DSA (sign only)
(4) RSA (sign only)
(14) Existing key from card
Your selection? <Enter>RSA keys may be between 1024 and 4096 bits long.
What keysize do you want? (3072) 4096 <Enter>
Requested keysize is 4096 bitsPlease specify how long the key should be valid.
0 = key does not expire
<n> = key expires in n days
<n>w = key expires in n weeks
<n>m = key expires in n months
<n>y = key expires in n years
Key is valid for? (0) <Enter>
Key does not expire at allIs this correct? (y/N) y <Enter>GnuPG needs to construct a user ID to identify your key.Real name: My Name <Enter>
Email address: [email protected] <Enter>
Comment:You selected this USER-ID:
"My Name <[email protected]>"
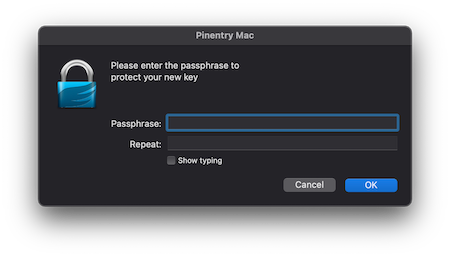
Change (N)ame, (C)omment, (E)mail or (O)kay/(Q)uit? O <Enter>After that, then you can enter the secret key. Remember this secret key and keep it well.
Then the key is generated e.g.
gpg: key B7988921E46259F6 marked as ultimately trusted
gpg: revocation certificate stored as '/Users/elisha.lye/.gnupg/openpgp-revocs.d/DC5A392E8998467776140C03B7988921E46259F6.rev'
public and secret key created and signed.
pub rsa4096 2021-05-02 [SC]
DC5A392E8998467776140C03B7988921E46259F6
uid My Name <[email protected]>
sub rsa4096 2021-05-02 [E]2. Upload the key to a keyserver
Now, you can upload your key to a keyserver. I use hkp://pool.sks-keyservers.net
gpg --keyserver hkp://pool.sks-keyservers.net --send-keys E46259F6Note: I have an issue uploading to keyserver in the Apple M1 device. The workaround can be found in this StackOverflow.
3. Generate the Secret Ring Key
Lastly, generate the secret key as below.
gpg --export-secret-keys E46259F6 > SecretRingKey.gpgRemember where you store this key as it will be needed in your Gradle script below.
Set up Gradle Script for Library Publishing
1. Add the nexus publish plugin
In the root project build.gradle file, add the below
buildscript {
    dependencies {
        classpath 'io.github.gradle-nexus:publish-plugin:1.1.0'
    }
}

apply plugin: 'io.github.gradle-nexus.publish-plugin'
2. Setup generic scripts
To simplify the Gradle script setup, just copy 2 Gradle files in
And add it to your project.
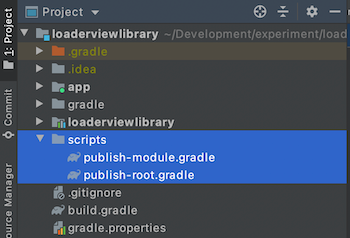
This provides all the basic setup to generate the Publishing Gradle tasks with the signing task.
3. Setup all the library info
In the library module build.gradle project, add the below to it. Don’t copy verbatim, instead modify according to your library info.
ext {
    PUBLISH_GROUP_ID = 'io.github.elye'
    PUBLISH_VERSION = '3.0.0'
    PUBLISH_ARTIFACT_ID = 'loaderviewlibrary'
    PUBLISH_DESCRIPTION = 'LoaderView Android SDK'
    PUBLISH_URL = 'https://github.com/elye/loaderviewlibrary'
    PUBLISH_LICENSE_NAME = 'Apache License'
    PUBLISH_LICENSE_URL =
     'https://github.com/elye/loaderviewlibrary/blob/master/LICENSE'
    PUBLISH_DEVELOPER_ID = 'elye'
    PUBLISH_DEVELOPER_NAME = 'My Name'
    PUBLISH_DEVELOPER_EMAIL = 'myemail@mail.com'
    PUBLISH_SCM_CONNECTION =
     'scm:git:github.com/elye/loaderviewlibrary.git'
    PUBLISH_SCM_DEVELOPER_CONNECTION =
     'scm:git:ssh://github.com/elye/loaderviewlibrary.git'
    PUBLISH_SCM_URL =
     'https://github.com/elye/loaderviewlibrary/tree/master'
}

apply from: "${rootProject.projectDir}/scripts/publish-module.gradle"
4. Setup all secret keys
Finally, set up all secrets in local.properties, which will not be stored in your Git Repo (for obvious reason).
signing.keyId=E46259F6 <The 8 Digit Public Key>
signing.password=<Secret Key>
signing.secretKeyRingFile=/<folder>/SecretRingKey.gpg
ossrhUsername=<SonatypeAccountName>
ossrhPassword=<SonatypeAccountPassword>
sonatypeStagingProfileId=<SonatypeStagingProfileId>
All this info is available from the steps above.
5. Upload your library onto Nexus Repository Staging
After all the above is set up, sync your project.
You can run the Gradle task, publishReleasePublicationToSonatypeRepository in your library module task, from the list of Gradle tasks as shown below.
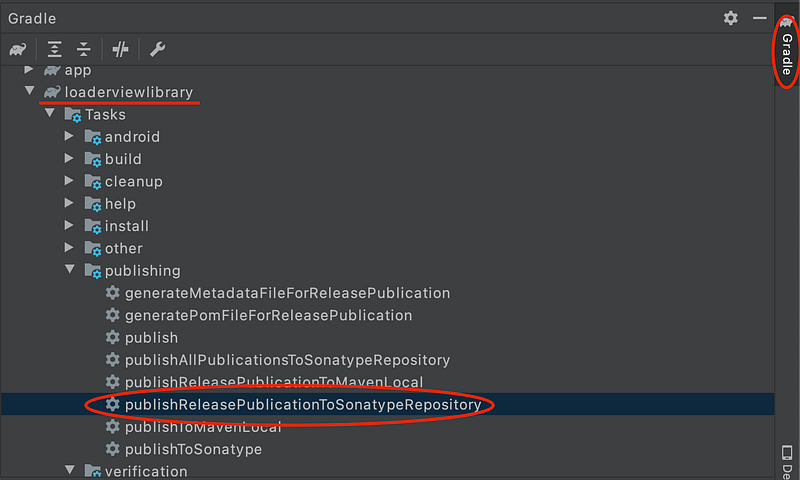
Optionally, you can also run
./gradlew <library module>:publishReleasePublicationToSonatypeRepository
If everything is successful, then you’ll see the below printed out.
> Task :loaderviewlibrary:generateMetadataFileForReleasePublication
> Task :loaderviewlibrary:generatePomFileForReleasePublication
> Task :loaderviewlibrary:publishReleasePublicationToSonatypeRepository
BUILD SUCCESSFUL in 14sIf you do have any access issue e.g. Forbidden 403 error, then file an Sonatype OSSRH JIRA case to get help. I file the case https://issues.sonatype.org/browse/OSSRH-67939 and waited after 3 days, then got it uploaded.
Move library from Nexus Staging to MavenCentral
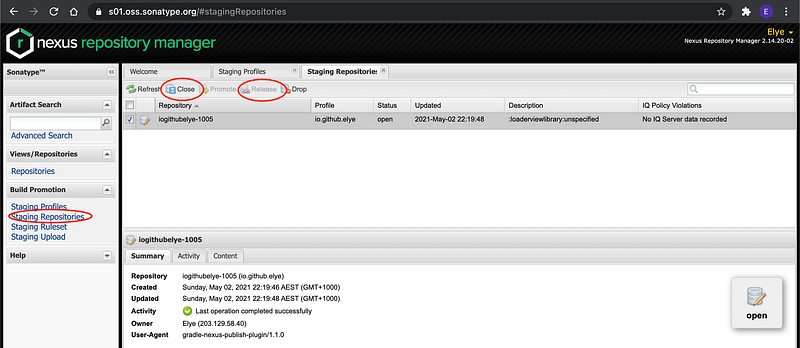
After uploaded access https://s01.oss.sonatype.org/ again.
- Then click onto Staging Repository and select the library
- Then click Close. You can close without any comment
- Then refresh if you don’t see any date.
- Click on the library again, and you’ll see Release enabled. Click on it to release it to MavenCentral (you can skip commenting).
After doing so, wait for few minutes (about 15 minutes), and you’ll find your library uploaded in MavenCentral. Check it in https://repo1.maven.org/maven2/
CONGRATS! It is up ready to be used.
Remember to update your initial JIRA Ticket
Finally, remember to comment on your initial JIRA to state that you have done uploaded your library up as I have done in
Bonus Feature
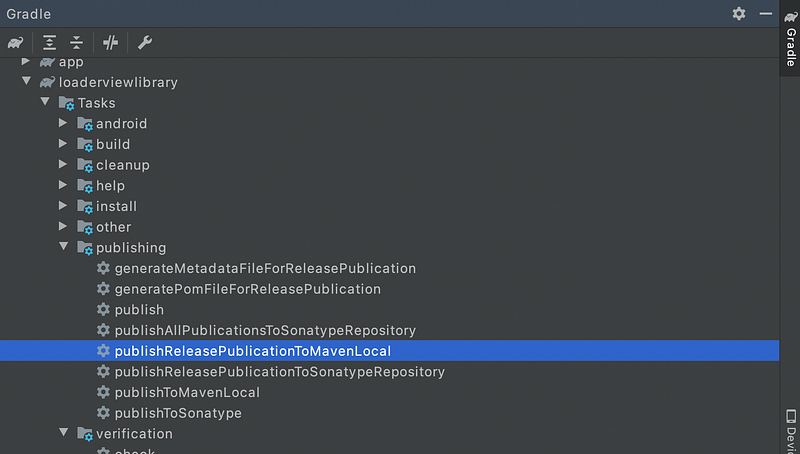
On top of the capability to upload your library to MavenCentral(), you can also upload your library to MavenLocal(), which helps testing work easier locally.
You just need to run the Gradle Task publishReleasePublicationToMavenLocal as shown below.
Hopes you had a good experience getting your library to MavenCentral.
Special thanks and credit goes to Marton B, who wrote this blog that clears up most of the part for me.


