
Unity — Sprite Animation
How we can animate sprites in Unity to bring our game to life.
Creating sprite animations in Unity is easy and intuitive. Let’s look at how to do it so we can bring our game to life!
Start With a Sprite
First, we need a sprite. In my current project, I have a powerup that gives the player a javelin when collected. Right now, I’m using a prototype sprite. But since I’ve got the powerup functionality finished, it’s a good time to change the sprite and animate it.
I found a sprite that I like, so now the powerup looks more appropriate, but it could still use some movement.

Creating a Movement Animation
Let’s start by making the powerup appear as though it’s floating in place.
Step 1: Create an Animator
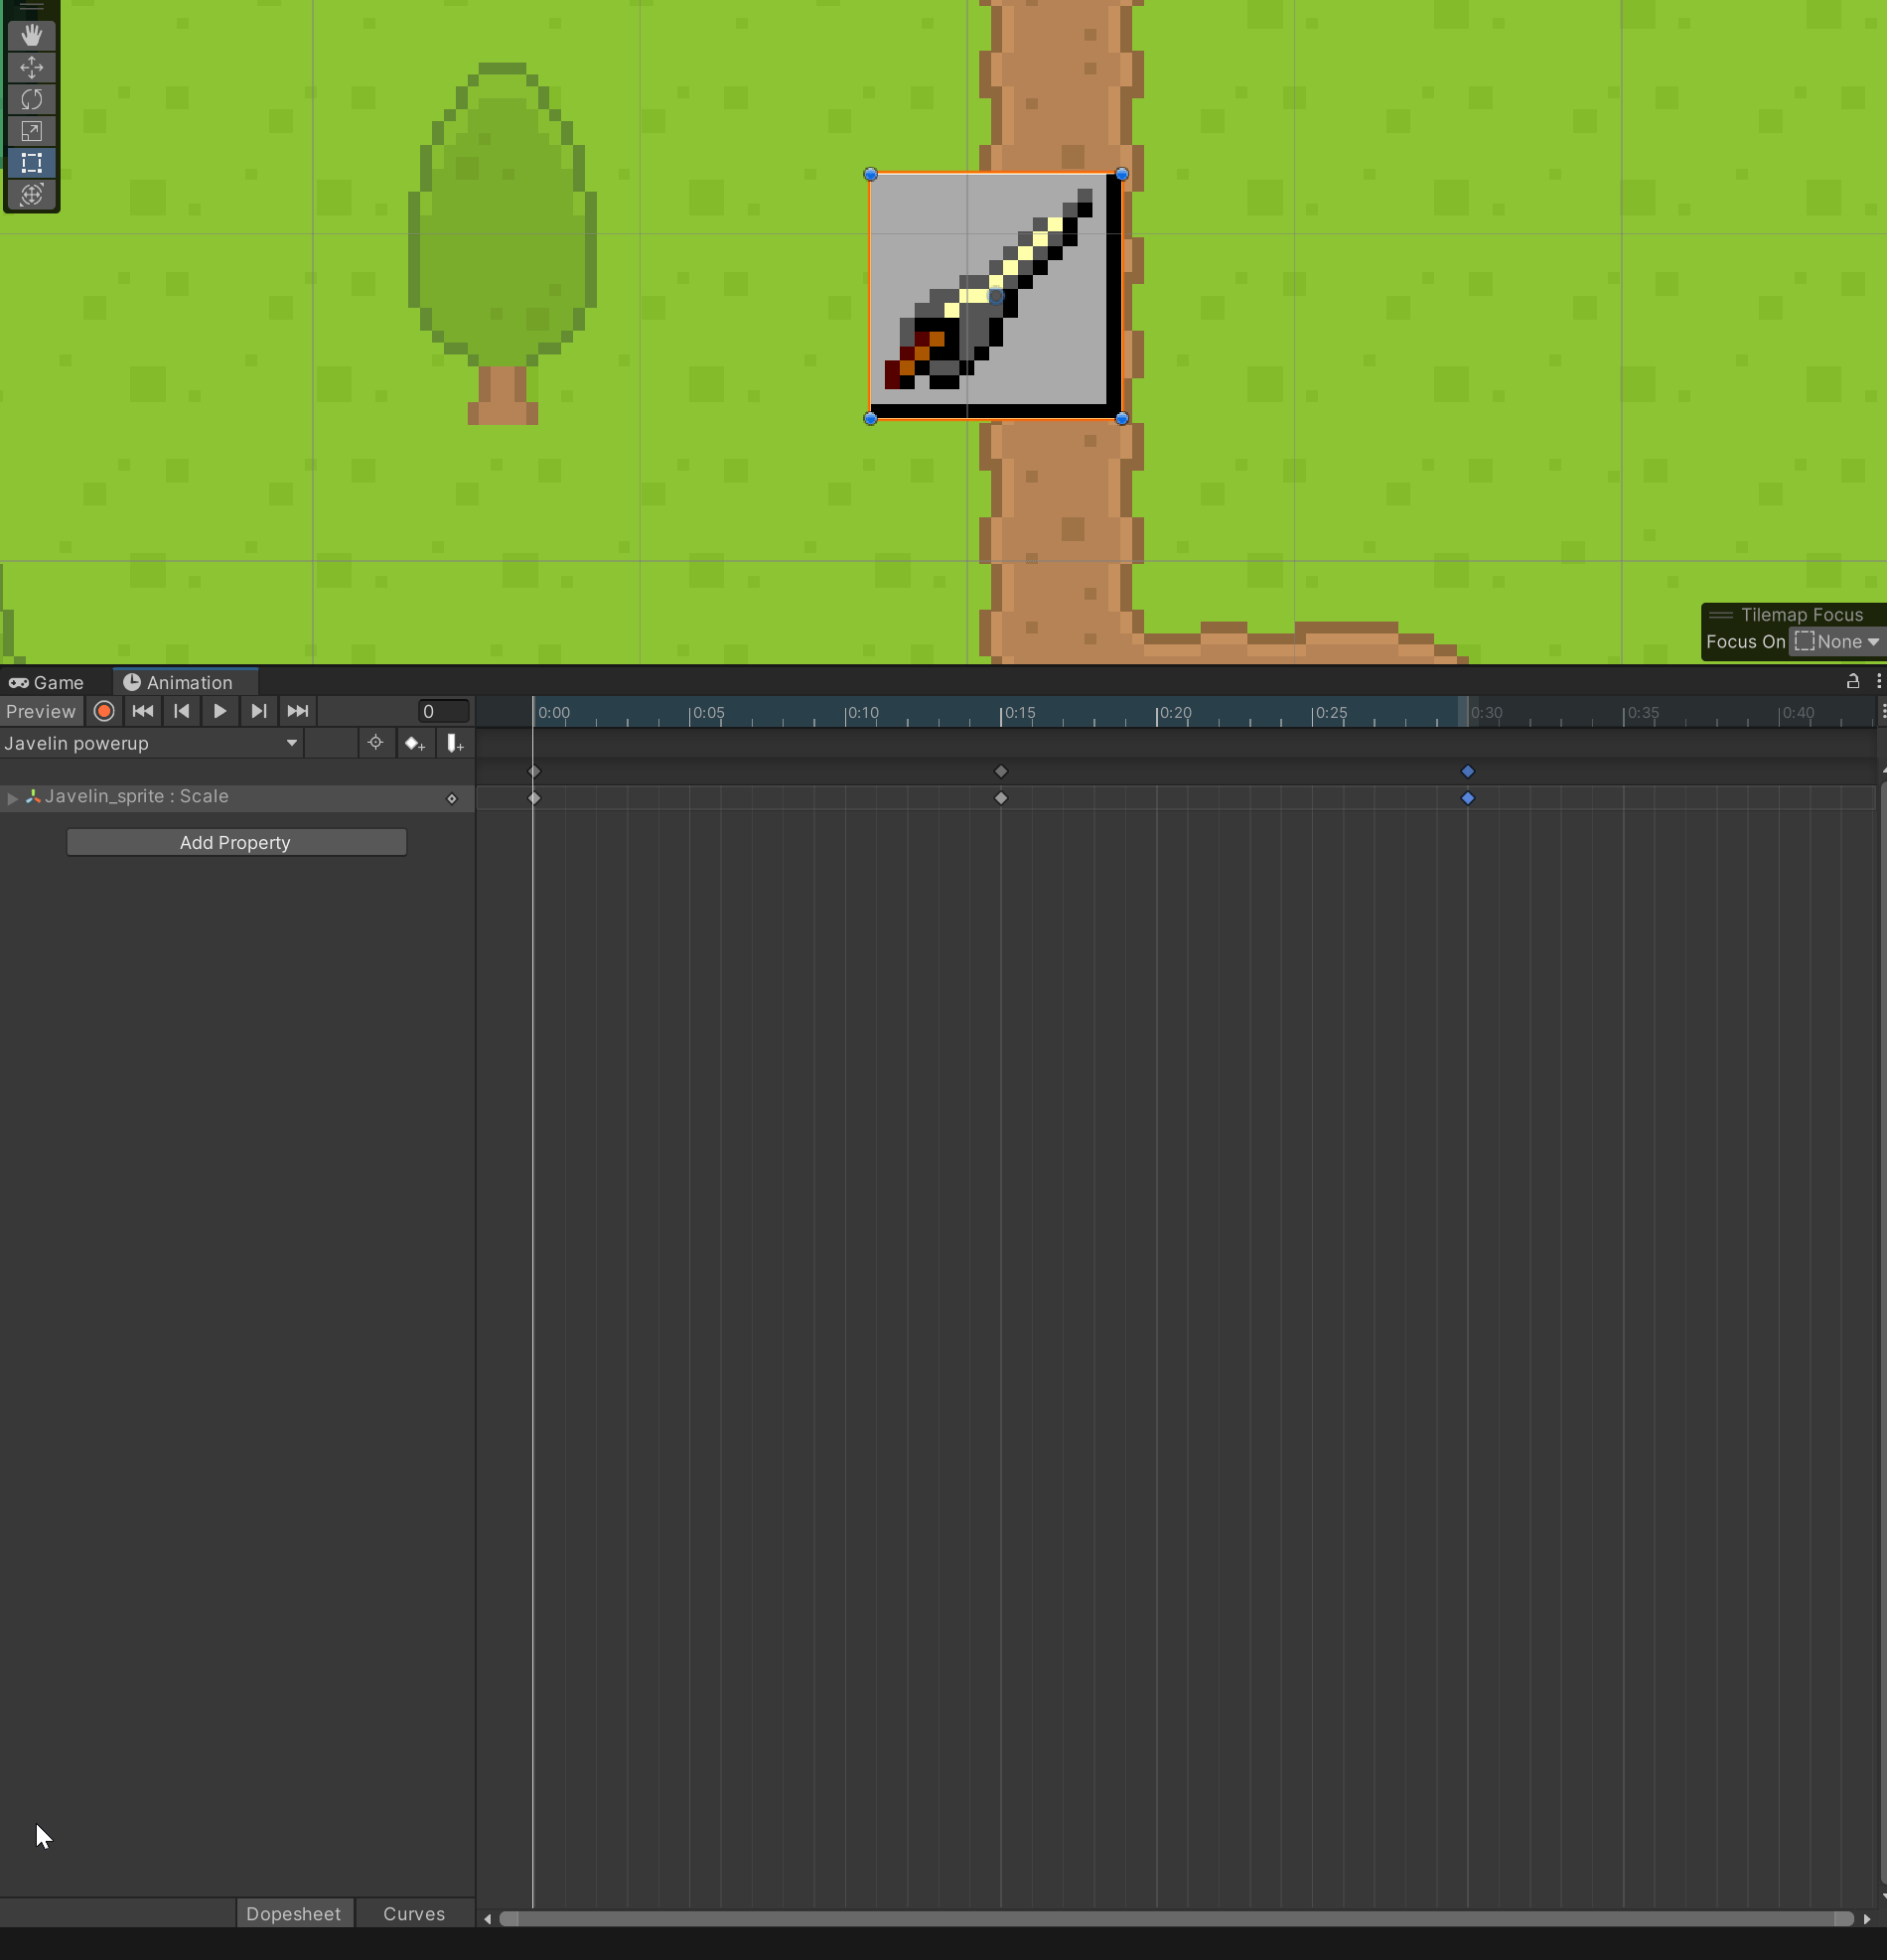
Open the Animation window by going to Window -> Animation -> Animation.

Now, select the sprite you want to animate in the Hierarchy. Then, in the Animation window, select Create.

Create an “Animation” folder in your project and store the new animation there. Now, with your sprite selected, the Animation window should look like this.

Step 2: Create the Keyframes
Now we can use the Animation window to create each keyframe of the animation. In the top-left of the Animation window, there is a red circle. This is the record button.

When this button is toggled on, almost anything we do to the gameobject while its selected is recorded as a keyframe.
So, we’ll toggle the record button, and then change the gameObject’s size to create the first keyframe.

Now, the scale property has been added to our Animation track. If we expand it, we can see each individual property that we can edit. In this case, these are the x, y, and z scale axes. Each has a value associated with each keyframe.

Now, we just drag the play head over, change the scale again, and a second keyframe will be created. Then we change the values to get our desired result.

Let’s preview the animation so far. We can press the play button or the space key.

We can see the animation looping and the sprite going from smaller to larger. But we want the sprite’s size to go from larger to smaller and back again, so we’ll add another keyframe to finish the animation. Since we want the size to return to normal, we can copy the first keyframe and paste it after the second.

Step 3: Refine the Animation
The animation is a bit too fast. To slow it down, we can simply highlight all the keyframes and then drag them to the right to increase the duration.
Now, to adjust the way the size oscilates, we can use the Curves feature. We access it by clicking on the Curves button at the bottom of the animation window.
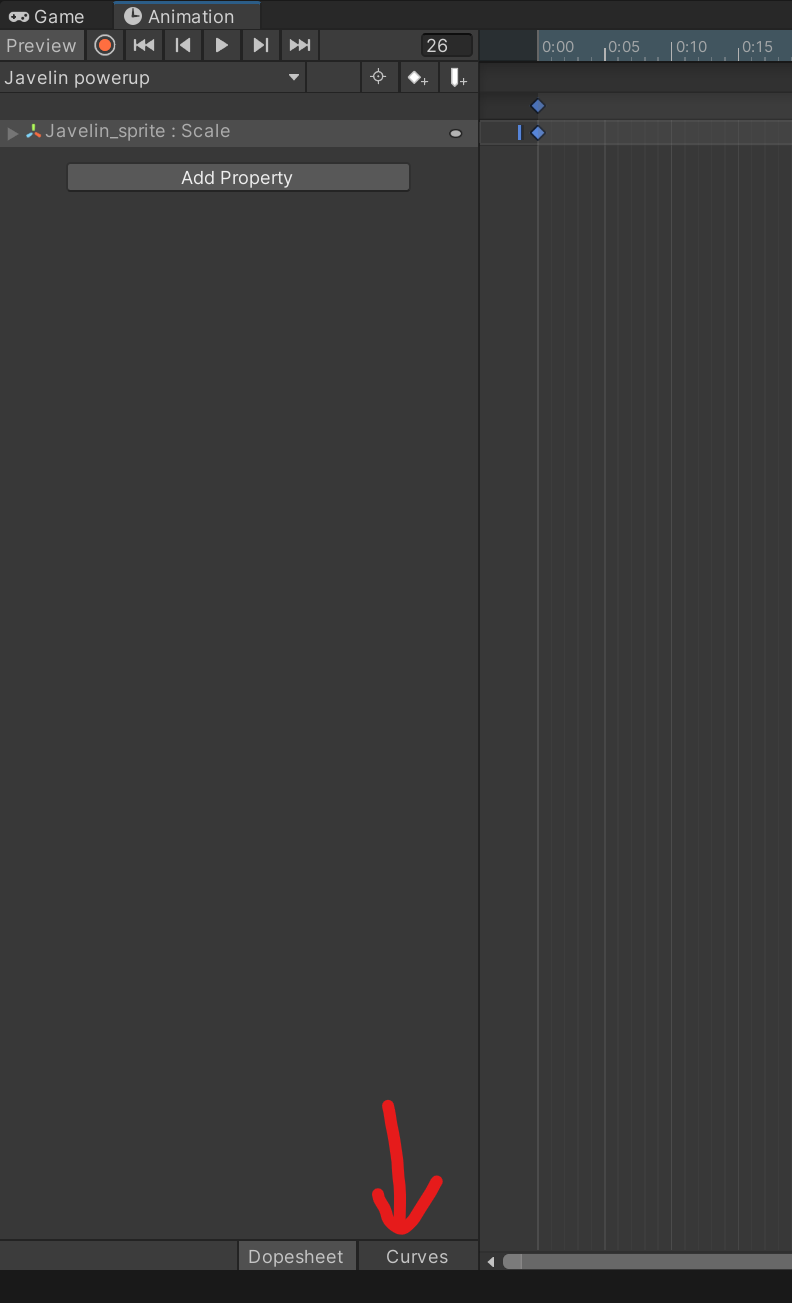
In this screen we can adjust the curves of the animation to change the way each keyframe leads to the next. (You may need to zoom in initially to adjust the curves.) We can also double-click to add new keyframes.
In this case, this allows us to achieve the effect of keeping the sprite larger for longer.

And now we have a result that looks great.
Animating with Multiple Sprites
We can also create animations with multiple sprites. This simply requires multiple individual sprites, or a sprite sheet.
I’m going to use a sprite sheet for my player and create an attack animation. First, I’ll import the sprite sheet and then slice it.

After we’ve sliced it, we have all the sprites individually under the same file.

Simply drag the sprites into the Animator window to create a keyframe for each. Then, we can adjust it to our liking.

Sprite sheet animations are a great, easy way to get your game animated quickly if you have the sprites already.
You can tweak your animations endlessly, and it’s quite fun. Plus, the more you get used to using the Curves view, the more control you’ll have over your animations. It just takes practice.


