
WRITING
The Super Easy Trick for Keeping Story Ideas Ready to Go
The Card Method lets you organize many articles in varying stages of completion — and it’s so easy!
“And what, you ask, does writing teach us? First and foremost, it reminds us that we are alive and that it is a gift and a privilege, not a right.”
― Ray Bradbury, Zen in the Art of Writing
One common trait among writers is that we all tend to have tiny squirrels living inside our heads. And they all have really great ideas. If you can’t get all of these ideas out of your head, it can make you a little nuts!
OK, enough with the squirrels; you get the gist. Ideas come and you do not have the time to flesh them all out. You need a writing system that works for you. I do it old-fashioned, cork-board style but with a modern twist.
I spent four years as a professional executive assistant. This work was very organized, efficient, and because we were a startup business within a larger international parent company, I had to devise a lot of these organizing methods on my own. Years after I left the company, they were still using my methods of organization. Now I apply that same knowledge to operating a full-time freelance writing business called Fiddleheads & Floss Writing Services, which became a full-time income within the first eight weeks of operation.
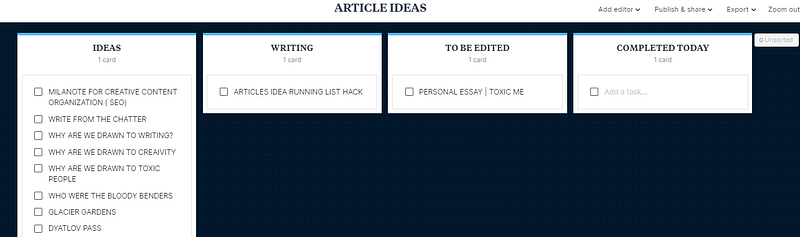
The Card Method for Organizing Writing Work
First, a system needs a platform, very much like your writing does. A place to store up all of your ideas until the time you sit to flesh them all out and find placement for each piece. The system is easy but you do need to decide your own how.
There are a few platforms and methods that will work with this idea-tracking method
- Milanote (I use this).
- Trello (I use this with a few of my private clients).
- Good old corkboard and thumbtacks.
- Whiteboard or junk journal/bullet journal spread.
- Sticky notes and your office wall.
- Excel spreadsheet or Google Sheets.
Prepare the following topics as your headings:
- IDEAS
- WRITING
- TO BE EDITED
- COMPLETED (TODAY, THIS WEEK, ETC.)
Optional are the following two categories, which apply if you pitch your work:
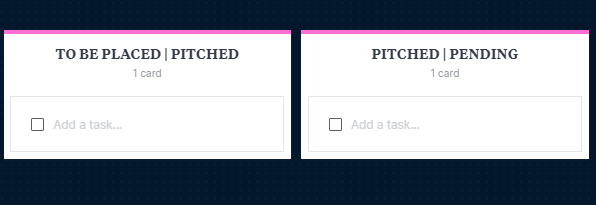
- TO BE PLACED | PITCHED
- PITCHED | PENDING
There are no wrong or right choices for your chosen platform or tool as long as you gravitate toward daily use of it. Milanote works wonderfully for me but Trello also is very user-friendly. The goal here is simple: you must be able to move a task over to the other columns as you work.
Write down your article ideas
They come in the car, in the shower, while you’re watching TV. Ideas sometimes come in big waves.
Write them down. Every single one. On whatever you can find. You don’t have to plan the title, just write down the core of the idea with enough words to later jog your memory. Toss these in a pile as you go about your day, or a cute little “ideas jar” and each day enter these onto your “WRITE” column.
For Milanote, I do this as a checklist entry. For Trello, create a card for your idea (which allows for great planning and tracking of research materials for your idea). For spreadsheets, a line. For sticky notes, Bullet Journals, and other mechanical methods, a physical paper entry. You could even do notecards for ideas.
The key: The entry must be movable. Or you must scratch it out and write it in the next column when the time comes.
These ideas are out of your head and waiting. They are pending articles. Pending stories and poems. When you are ready to write, pull an idea from your list and move it over to the “Writing” column.
Add articles to the Writing column
Whatever you plan to write today/this week, put these idea cards into the “WRITING” column, which simply means, these are the ones in progress. For my day, I select two or three or create a virtual card for a new article. It is so much easier to ignore all of the racing thoughts and ideas when you can put them on a card, file them over in the ideas column, so you can focus on the few smaller goals of your day.
Then for your articles, do a little planning, get them mapped out, and write!
- Headline analyzer — plan the headline.
- Choose a picture (Pixabay, Unsplash, Pexels).
- Mapping for your article.
- Write the body of the article.
An article could be in this category for several days or longer.
When an article has its bones and its flesh, move the card or sticky note over to the “TO BE EDITED COLUMN” and then leave it there.
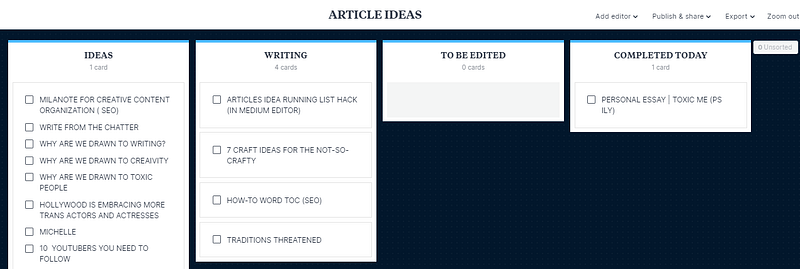
Note: In the picture above, the article you are currently reading was listed in the Writing column as I worked on it. Next to the article idea, I have added “in Medium editor” which tells me where the draft is located. This could say “Word document” or “Google Docs” or “In (Insert your blog name here) Drafts”, etc.
When I stepped away from this article for a bit, I added a bit more info so I would know exactly where to begin working on it at the next writing session:
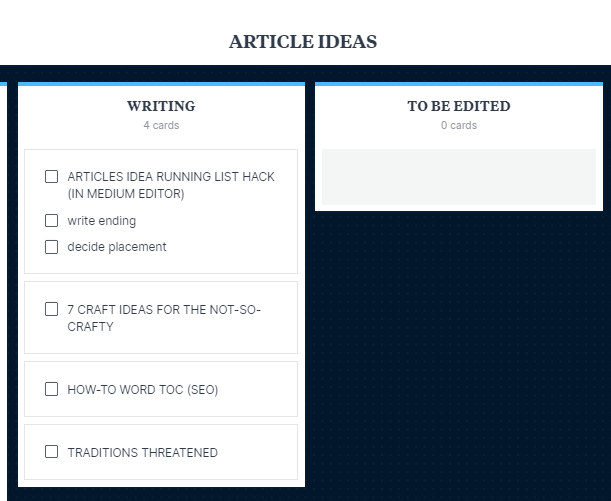
When the article is complete, I will right-click and lift that “card” to move it over to the “TO BE EDITED” column. In spreadsheets, copy and paste to move. For physical methods, move the actual sticky note or index card.
Add articles to the “To Be Edited” column when they are ready for proofreading
Let this article marinate for a few hours or even better, a day. While some articles are awaiting proofreading, you continue working on articles in the WRITING column.
But do step away from these TO BE EDITED cards long enough for the writing of it to muddy a bit in your mind. This allows fresh eyes for proofreading and editing.
THEN proofread, edit, and polish.
A second rest/edit period helps if you are prone to missing typos or need lots of time to see those areas that need editing for clarity.
- Spell check — always.
- Grammar (Hemingway is helpful if you are prone to sentence structure issues).
- Clarity/readability.
- Concision, ordering, flow.
- SEO polishing & metadata.
- Research for placement of the article.
When you are done in the “TO BE EDITED” Column, move the card over to “COMPLETED.” From here you can select completed articles when you are ready for publishing, pitching, or placement.
The “Completed Today” (Or DONE) column has a few purposes
- Keeps track of what you have completed for the day, Some people keep business records of their work or like to add them to a master list.
- These are ready for publishing.
- This is a running list of your recent work to self-promote on social media.
- This is a list of articles to monitor stats for the week.
- If you are keeping track of client articles in this manner, these can remain here until they are PAID.
You can always add a PROMOTE or PENDING PAYMENT column as well. Whatever works for you, but keep it simple so you will not have any extra steps that add up to more legwork. A system only works if you actually use it.
The “Pitching” columns
Pitching takes a lot of time if you think of the overall planning, pitching, and waiting. But this method of article tracking works great for pitching.
When you decide an article should be pitched rather than placed on a content platform such as Medium or News Break, or on your personal blog, then place the card in the TO BE PLACED | PITCHED column.
- Make a list of possible places to pitch it and link that information to these cards.
- When pitched, put the designated placement opportunity and pitch date, contact information, (etc.) with the card and move it over to the PITCHED | PENDING column. Make sure to notate the follow-up date. Leave these cards in place until follow-up or publishing is complete. If the article is rejected, pitch again to another magazine or place the article in the TO BE EDITED column for review (to see if it may need more work) and possible placement on a content site or blog.
The Takeaway
Writing is one of those fields where you have to spread yourself a bit thin. Creatives need to have time for the ideas to flow, time to create, and time to recharge. Using this proven system helps to keep those ideas flowing and organized so you can focus on the business of writing. Recharging? Carve out a little time for that too and you will not only find success as a writer but also joy.


