
The 6 Terminal Utilities That Save Me Serious Time and Simplify My Workflow

I’m always on the hunt for new terminal utilities that can make my life easier and improve my workflow. I’ve found out the hard way on more than a few occasions that for most generic applications, say like command line utilities or software libraries, developers long before me ran into the same problem and have already devised a solution. Similarly, a lot of software engineers have found ways to innovate and improve upon the existing shell built-in commands, taking the familiar tools we use everyday and making them faster, more aesthetically pleasing, and easier to use. In this article I hope to show you six new tools that will help economize your workflow, save precious time, and make your computing experience a little easier. Specifically, I’ll introduce each command line application, provide installation instructions, and present a brief introduction to using the utility in practice.
Table of Contents
· dust: A Lightning Fast, Modern Alternative to du · ripgrep: An Intuitive and Blazing-fast Alternative to grep · bat: The New-and-Improved cat · hyperfine: Benchmarking Made Easy · eza: An aesthetic alternative to ls · cheat: Terminal Utility Cheat Sheets on Demand · Summary
dust: A Lightning Fast, Modern Alternative to du
Out of the available du (disk usage utility) alternatives, such as dua, dutree, etc., dust is perhaps the best modern du alternative. dust functions exactly like du, but presents the output in an easy-to-read format, allowing you to quickly decipher how much memory each specific directory occupies. This utility is written using Rust (which is where the name derives: du + Rust = dust), making the underlying code extremely efficient, translating into time saved on your end. This utility can scan hundreds of GBs worth of data, produce a beautiful, intuitively organized tree structure of the directories and visually represent the disk usage per directory in a “bar graph” format in blazing-fast speeds.

A note on the output above: The different bar colors indicate the subdirectory structure in a visual manner, much like the tree structure shown on the left of the output. For example, the base directory (data) is shown at the bottom (opaque bar), which accounts for 100% of the total data. The second subdirectory also has an opaque bar (for bash/zsh there aren’t a whole lot of options to show color gradients), and each subdirectory underneath that one has a transparent bar which aligns with the end of the second subdirectory, thereby showing that those directories are nested within. This can be verified with the more traditional tree output on the left side of the screen¹.
To illustrate just how fast dust is, I benchmarked both du and dust using the built-in time command to see how quickly each algorithm took to determine the size of the contents of my external SSD. Both commands are provided below:
$ time du -sh /Volumes/data
$ time dust /Volumes/data
I executed both of these commands ten times and computed the statistics for each, which are tabulated below.

Comparing the real execution times in the table above, dust clearly outperforms the built-in du command — dust is, on average, 81% faster than du! Considering that dust also beautifully tabulates the disk usage in addition to calculating how much memory each directory contains, this utility is a winner.
¹Note that because this is an external drive, Macintosh OS creates two directories, .Spotlight-V100 and .Trashes, which facilitate the Spotlight search algorithm and keep track of files placed in the built-in trash for the external drive, respectively, these directories are unable to be read by dust (even with sudo; root-level is required to access these directories). Hence, the output Did not have permissions for all directories.
Installation instructions
You can install via your package manager of choice or by downloading the pre-compiled binary via their Releases page. Should you take the binary installation route, simply un-tar the archive and move the executable to your local binary installation directory:
$ tar -xvf <dust_v0.8.X*>.tar.gz && sudo mv dust_v0.8.X*/dust /usr/local/binFor package managers, follow the installation instructions below.
MacOS and Linux:
$ brew install dustYou can also install the dust crate via cargo, the Rust package manager (in the parlance of cargo, packages are called “crates”):
$ cargo install du-dustFor installation using this method and others, check out the installation instructions on the dust GitHub repository.
Usage
To simply get the size of each of the subdirectories, the basic dust command will suffice:
$ dust path/to/dirdust will automatically configure the depth of the tree it displays in the output based on the size of your terminal (i.e., for smaller/larger screens, dust will decrease/increase the depth), thereby preventing the output from being broken and requiring you to scroll up to view everything (tmux users will be particularly happy about this).
To omit the output containing the bar graph, add the -b flag to your command:
$ dust -b path/to/dir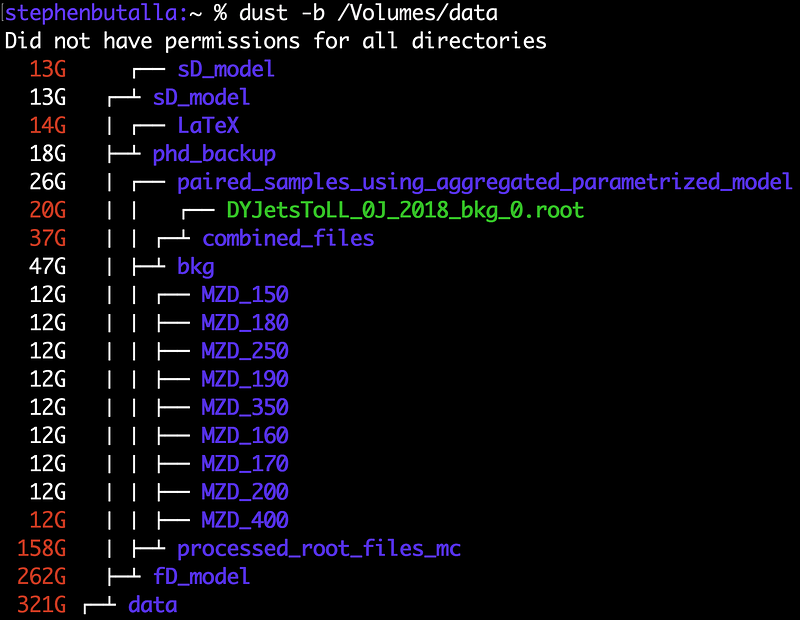
As noted, dust displays the as much of the directory tree as can be reasonably fit within the terminal dimensions. To show more files and/or directories, one can set the depth of the output using the --depth option (maximum of 3 levels):
$ dust --depth 2 path/to/dirripgrep: An Intuitive and Blazing-fast Alternative to grep
The speed of ripgrep alone sold me on switching to it as my full-time grep-like command; this speed is a direct consequence of the regular expression engine used, and by virtue of the fact that it is implemented in Rust. It also beautifully highlights the output, which is a major improvement over grep --color.
This is probably one of my favorite shell utilities. Not only is it shorter to type than grep, it’s easier to use and packed with more features. It is also much more intuitive; simply execute the command with no options and it will search all files in a given directory for the supplied string, i.e.,
$ rg '<phrase>' searches all files for the specific phrase in the base and each subdirectory relative to your current location. This can be done with grep -r, but it is significantly slower. An example command is shown below:
As I mentioned, the crowning feature of ripgrep is its extreme speed; it makes light work of scanning a large number of files scattered across multiple subdirectories, and can accommodate more complicated searches without sacrificing speed. This is a direct consequence of the regular expression (regex) engine used (which is implemented in Rust). The default regex algorithm searches for those files that you probably want searched and then examines passes those files through its regex engine. For instance, ripgrep passes over hidden and binary files (you can, of course, change this behavior by adding the --hidden and --binary options, respectively), and even reads your .gitignore files to find which ones to skip. Finally, walkdir, a directory iterator written in Rust, is another reason it can accomplish its regex matching tasks so quickly.
Andrew Gallant, one of ripgrep’s developers, performed extensive benchmarking tests in this blog post. Benchmarks for string literal searches were performed using grep, Universal grep (uvgrep), git grep, The Silver Searcher (ag), The Platinum Searcher (pt), and, of course, ripgrep. For almost all of the tests, ripgrep vastly outperforms every other tool. If ripgrep is bested by one of its rivals, the difference is ⪅ 10 ms, which is negligible. For a detailed look at ripgrep, a discussion on the benchmarking methodology, and the results of all 21 benchmarks, see Andrew Gallant’s blog post.
One final, minor point I’d like to add, is that compared to grep, which provides no highlighting by default (and the highlighting it does perform is the bare minimum when using the --color option), the output from rg is much easier to read and parse. The colors can also be tweaked to your preference using the --color option. For example, the magenta, green, and red are the default colors used to highlight the file name, line number, and the matched regular expression (regex), respectively. Each of these can be specified as an argument associated with the --color option, and ultimtately you can alias the command or make a shell function to enable that color scheme every time you execute the command. (For instructions on how to alias shell commands and write shell functions, see my articles here and here, respectively.)
Installation instructions
You can install via your package manager of choice or by simply downloading the pre-compiled binary via their Releases page. Should you take the binary installation route, simply un-tar the archive and move the executable to your local binary installation directory:
$ tar -xvf <ripgrep-14.*>.tar.gz && sudo mv ripgrep-14.*-aarch64-apple-darwin/rg /usr/local/binFor package managers, follow the installation instructions below.
MacOS and Linux:
$ brew install ripgrepYou can also install via cargo:
$ cargo install ripgrepFor installation using other methods (e.g., on other OSs), check out the installation instructions on the ripgrep GitHub repository.
Usage
To recursively search your current subdirectory, simply execute
$ rg '<phrase>'To change the highlighting colors of rg, use the color option:
--color '<type>:[fg/bg]:<color>'
For example, to make the matched expression highlighted in green instead of the default red, we would add --color 'match:fg:green' . If we also wanted to set the background color to yellow to make the matches stand out more, we’d append an additional color option to our ripgrep command: --color 'match:bg:yellow'. For the full command:
$ rg --color 'match:fg:green' --color 'match:bg:yellow' '<phrase>'Somtimes it’s easier to find files without a certain matched expression. In these cases, we’ll add the --files-without-match option:
$ rg --files-without-match 'phrase'For another detailed discussion on ripgrep, along with a set of extremely helpful command examples, see Marius Schulz’s article Fast Searching with ripgrep.
bat: The New-and-Improved cat
bat is a file concatenation and printing tool that significantly improves upon its predecessor (cat) through its multitude of options and similar command syntax. The syntax highlighting employed by bat really makes a difference when inspecting files. bat can also be integrated with git and other tools, such as fuzzy finder (fzf), find, fd, and even ripgrep.
I was skeptical of this one at first because cat, or the file concatenation (and printing) function, was plenty sufficient for my daily use. Or so I thought… bat, much like cat, is a file concatenation and printing tool that significantly improves upon its predecessor through its multitude of options while retaining a similar command syntax. The syntax highlighting employed by bat really makes all the difference when inspecting files. This advantage is further increased by the option to display non-printable characters (e.g., spaces, tabs, etc.), which makes it particularly useful for quickly debugging poorly formatted Python code on the fly. You can also use this tool to breathe life into your man pages by adding intelligent syntax highlighting! Using bat to display man pages is definitely one of my favorite features.
bat can also be integrated with git and other tools, such as fuzzy finder (fzf), find and fd, and even ripgrep. For information on interfacing bat with these utilities, see the Integration with other tools section on the bat GitHub.
Installation instructions
You can install via your package manager of choice, or by simply downloading the pre-compiled binary via their Releases page. Should you take the binary installation route, simply un-tar the archive and move the executable to your local binary installation directory:
$ tar -xvf <hyperfine-v1.*.*-x86_64-apple-darwin>.tar.gz && sudo mv hyperfine-v1.*.*-x86_64-apple-darwin/hyperfine /usr/local/binFor package managers, follow the installation instructions below.
MacOS and Linux:
$ brew install dustYou can also install via cargo:
$ cargo install --locked batFor installation using other methods (e.g., on other OSs), check out the installation instructions on the bat GitHub repository.
Usage
bat is basically cat when it comes to the command syntax. To view a file, simply execute the command:
$ bat path/to/fileTo exit bat, just hit q (since it really functions as a terminal pager).
Concatenating files is as simple as its implementation in cat: simply enter them as positional arguments and use the redirection operators > or >> to append or overwrite the target file, respectively. For example:
$ bat file0.txt file1.txt file2.txt > file_012.txtwhich concatenates the three text files file0.txt, file1.txt, and file2.txt, resulting in one large file, file_012.txt.
The fun begins with the extra features of bat: the first example we’ll review is the option to show all non-printable characters, like returns, tabs, spaces, etc. This is accomplished with the --show-all option:
$ bat --show-all path/to/file
If you want to add color to your man pages (which are displayed via a pager, which is a piece of software exclusively used for reading files and not modifying them), you can pipe them to bat. To accomplish this, you’ll need to export the environment variable MANPAGER, which you can simply enter on the command line (which will only be valid for the current shell session), or, you can add it to your shell’s profile or rc files:
export MANPAGER="sh -c 'col -bx | bat -l man -p'" 
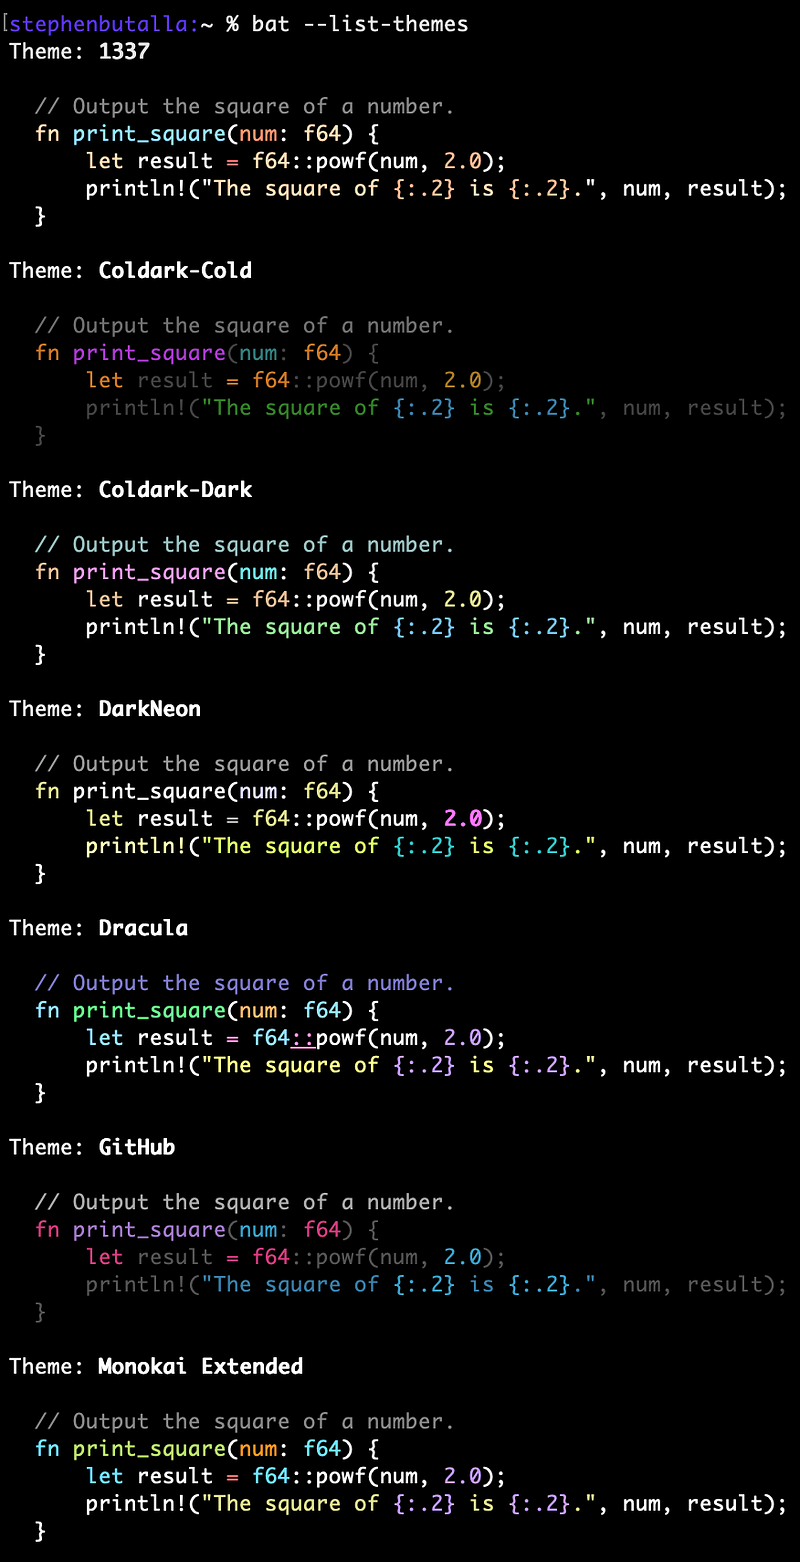
The syntax highlighting theme can also be changed; check out the 24 available themes using the --list-themes option; see examples of the first seven color palettes below:
To add more (or custom) themes, checkout the Adding new themes section on the bat GitHub, and to see more examples
hyperfine: Benchmarking Made Easy
hyperfine is a benchmarking tool for the command line (like time but much, much better). hyperfine solves the problem of manually benchmarking software execution times by automating the benchmark tests (with as many iterations as you want), producing some statistical output, and providing the ability to easily export the resulting data in a few different formats, thereby allowing quick plot production or even the computation of more advanced statistics.
While this may be more of a niche tool that might not see everyday use, it is pretty cool — and useful — especially for benchmarking compilation times using make, cmake, etc. hyperfine is a benchmarking tool for the command line (like time but much, much better). For example, the benchmarking I conducted to compare du and dust earlier in this article was manually performed using the built-in time command, which then required transferring the data to numpy arrays and computing the statistics displayed in the associated table. In total, this took about 20 minutes to perform. Not terrible, but certainly not the most efficient way of benchmarking command line utilities. hyperfine solves much of this problem by automating the benchmark tests (with as many iterations as you want), producing some statistical output, and providing the ability to easily export the resulting data in a few different formats, thereby allowing quick plot production or even the computation of more advanced statistics.
The example below shows the benchmarking of ripgrep, which is locating the search term "kde” within all of the files in the current directory:

Not too bad for an out-of-the-box program! As you can see, the statistical output isn’t extremely detailed, but it does provide the requisite information. The hyperfine GitHub repo has a nice collection of Python scripts to perform some plotting functions and statistical analysis which is a plus. You can also export the raw data to a .csv, .json, or even a Markdown file which you can then import and analyze using the language of your choice — a huge time saver!
There are also two additional functions of hyperfine which are worth mentioning: the --warmup and --prepare options. These different functions aid in controlling external variables that can affect the results of your tests. For example, the --warmup option pre-fills the data caches, “warming them up” so that the first test doesn’t consume unnecessary time to fill up those caches, which inappropriately skews the results. The opposite option, --prepare, empties the caches for each iteration of the command, essentially starting the process with a blank slate each time.
As a final note to this discussion, I wanted to quickly mention the etymological derivation of the name hyperfine. This moniker pays homage to the atomic clock, specifically the cesium radioactive standard, which is used as the internationally recognized definition (Système International, or SI). The name comes from the electron transition between the hyperfine levels (i.e., degernate energy levels within one of the quantum energy states of the atom) in the isotope Cs-133, which reliably occurs over 9 billion times a second, and is the reason why the cesium standard has been adopted.
Installation instructions
You can install via your package manager of choice, or by simply downloading the pre-compiled binary via their Releases page. Should you take the binary installation route, simply un-tar the archive and move the executable to your local binary installation directory:
$ tar -xvf <hyperfine-v1.*.*-x86_64-apple-darwin>.tar.gz && sudo mv hyperfine-v1.*.*-x86_64-apple-darwin/hyperfine /usr/local/binFor package managers, follow the installation instructions below.
MacOS and Linux:
$ brew install hyperfineYou can also install via cargo:
$ cargo install --locked hyperfineFor installation using other methods (e.g., on other OSs), check out the installation instructions on the hyperfine GitHub repository.
Usage
The basic command, much like time, is:
$ hyperfine <command>To control the level of iterations hyperfine performs in its benchmarking test, use the -r flag or --runs option. By default, hyperfine determines this for you, where a minimum is set on either the number of runs (10) or the total process time (3 seconds). But if you’re benchmarking multiple process separately, it’s a good idea to specify a fixed number of runs to eliminate the influence from this a priori uncertain quantity:
$ hyperfine --runs 50 <command>This option is particularly important, as with more runs, you can even out the statistical fluctuations, producing a more precise measurement. For example, see the GIF below which shows how the standard deviation (error quoted on the average) shrinks as more runs are performed:

To export the raw data (plus some computed statistics and metadata) to a .csv, .json, or .md file, simply add the --export-csv, --export-json, or --export-markdown options, followed by the file name, respectively. An example is provided below:
$ hyperfine --runs 500 --export-json benchmark_command.json <command>To perform a cache warmup before beginning the benchmark, add the --warmup option, followed by the number of iterations reserved for the warmup:
$ hyperfine --runs 500 --warmup 4 <command>(Don’t worry: If you don’t perform a warmup beforehand, hyperfine will warn you.)
For more advanced use cases, check out the Usage section on the hyperfine GitHub repository.
eza: An aesthetic alternative to ls
eza is a new-and-improved version of ls, and is a continuation of the exa project (exa is currently unmaintained). This utility is free from the bugs present in exa, contains security patches, and also has some new features not present in its predecessor. While ls does what it does well, it doesn’t shine like eza does. Just take a look at the output from the command:
$ eza --long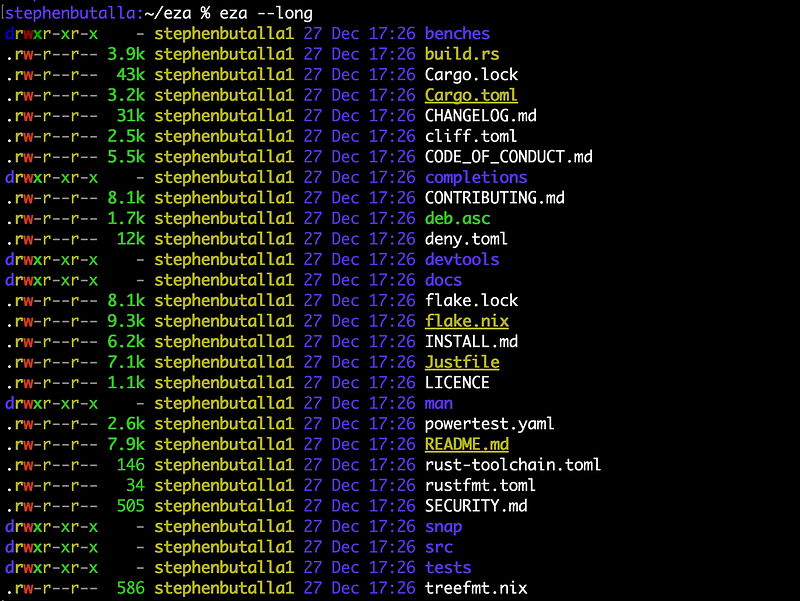
Perhaps my favorite feature of eza is the built-in tree output which can be used in conjunction with the long-display format:

While eza might not be as fast as tree, it does make up for this deficiency with its intelligent highlighting — everything is extremely easy to read, particularly when differentiating between the different file metadata.
Installation instructions
Installation options are, as of the time of this writing, currently limited to building from source or installing via your favorite package manager.
MacOS and Linux:
$ brew install ezaYou can also install via cargo:
$ cargo install ezaFor installation using other methods (e.g., on other OSs), check out the installation instructions on the eza GitHub repository.
Usage
The default eza command displays the directory contents in a grid format, similar to ls:
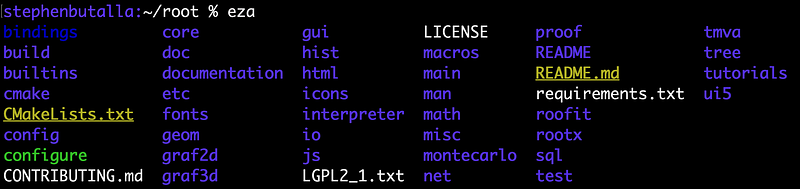
Personally, I prefer to see the file metadata, so I always use the --long option to display in a list format.
$ eza --long
To display all hidden files and directories, append the “all” flag, -a, to the command. Displaying the directory contents in a tree format is as easy as using the --tree option. However, to keep the output manageable (e.g., if you’re displaying the output in a directory with many nested directories and files), tack on the --level=N option, where N is the number of subdirectories to show. I’ve found the sweet spot to be N=2, but this is entirely up to you. An example command looks like:
$ eza --long --tree --level=2You can also easily sort the output by using the -s flag or the --sort option, appropriately supplying the sorting scheme after the flag:
$ eza --long -s <sorting_scheme>For example, to sort by descending alphabetical order, use the “name” sorting scheme:
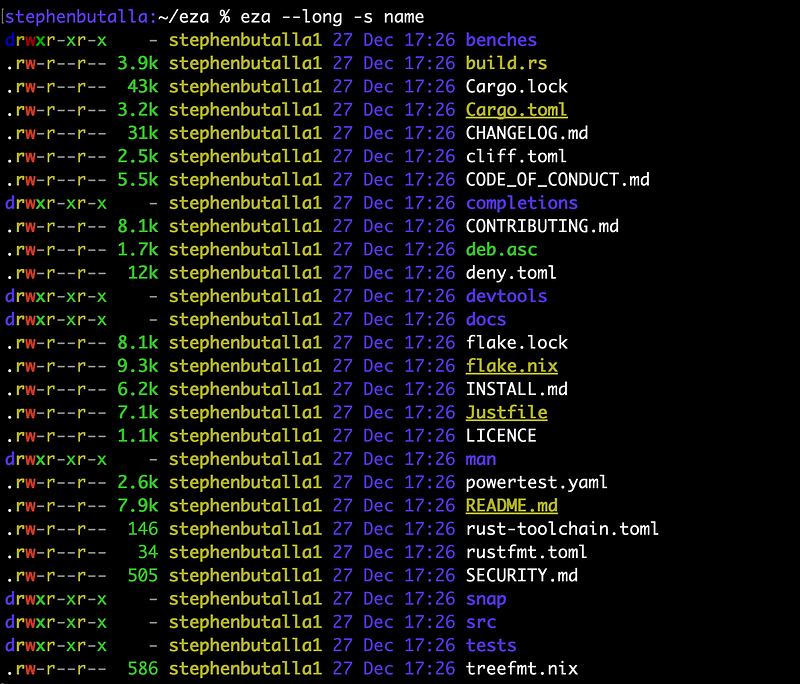
Sorting options include name; modification, creation, and access times; file extension; and file type, to name a few.
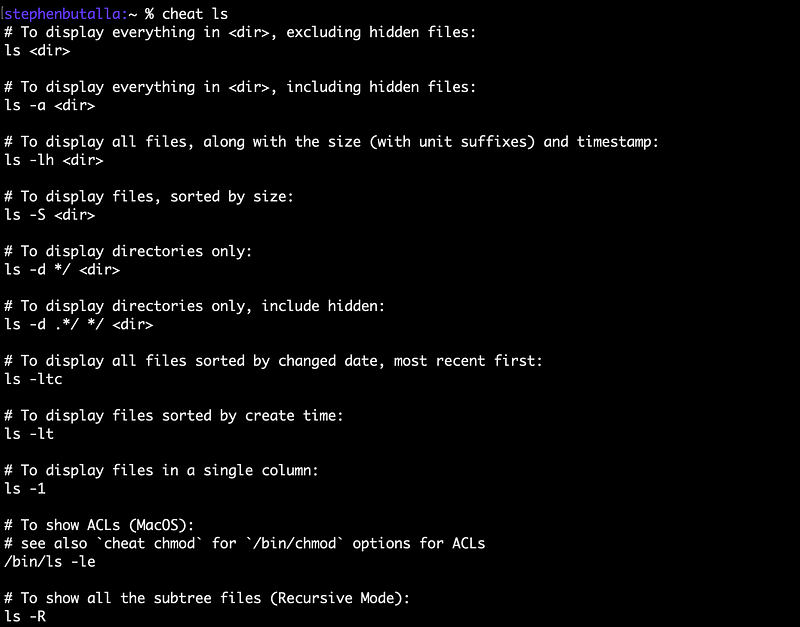
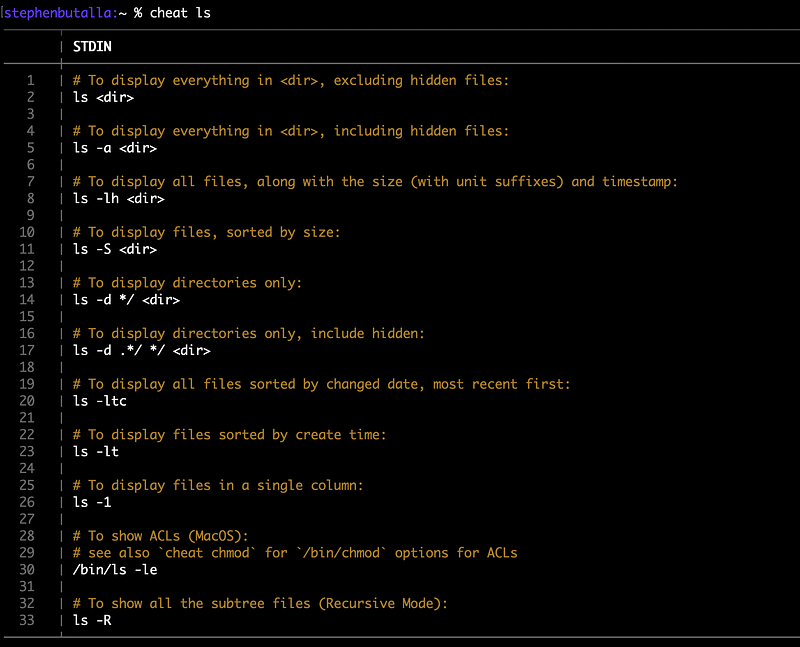
cheat: Terminal Utility Cheat Sheets on Demand
This lightweight, utilitarian command line tool let’s you view personal and community-created cheatsheets of terminal commands, and is one of those applications you should add to your toolbox, regardless of whether you think you need it — because when the need arises to look up those specific tar or rsync commands — and trust me, that need will eventually arise — you’ll appreciate the time you saved by finding the information directly in the terminal, instead of poring over the man page or interrupting your workflow by opening another browser tab and sifting through search results.
While I consult man pages frequently, sometimes I don’t have the time — or patience — to fully read through the text to find that one flag I’m looking for. cheat is the solution to this problem.
cheat is a command line utility that interfaces with and displays a cheatsheet for containing helpful information or recipes for the specific command line application you requested. This tool is much like tldr— one of the many terminal utilities I use often — which I discussed ad nauseum in one of my other articles. Where cheat shines, however, is that you can directly edit the cheatsheets and even create your own. You can, of course, do this with tldr, but you would need to become a contributor and submit a pull request on GitHub to do so. (You can also install tldr from source and edit the function entries directly, but at this point you might as well help contribute to the tldr repository.) I want to encourage those that do have the time for a small side project to contribute to tldr, but for those who don’t have the time (or just want a quick solution to this problem), I recommend cheat as the tool of choice.
The cheatsheets installed with cheat are from the open-source cheatsheets repository and number 280 in total. While this is enough to get you started, you can easily add your own cheatsheets via a simple cheat command which allows you to open and edit the sheet of your choice. I should mention here that tldr vastly outpaces cheat in terms of the number of entries for terminal utilities, with 3207 pages in total. However, these can be added to cheat
This lightweight, utilitarian command line tool is one of those that you should add to your toolbox, regardless of whether you think you need it — because when the need arises to look up those specific tar or rsync commands — and trust me, that need will eventually arise — you’ll appreciate the time you saved by finding the information directly in the terminal, instead of poring over the man page or interrupting your workflow by opening another browser tab and sifting through search results. For example, for most of my network-related tasks I use ifconfig, which is a legacy *Nix tool that has been largely replaced by ip. As such, while I’m making my transition to ip, cheat has really come in handy:

Installation instructions
You can either install the pre-compiled binary or install via your favorite package manager (this package is offered on less native package managers than the former utilities we’ve covered, so you may need to download via one of the alternative methods). For the former method, simply download the version of your choice from the Releases page on the cheat GitHub, unzip, make the file executable, and move it to your normal binary installation directory:
$ gunzip cheat-linux-<VERSION>.gz && chmod +x cheat-linux-<VERSION>
$ sudo mv cheat-linux-<VERSION> /usr/local/bin/cheat
MacOS and Linux:
$ brew install cheatThis package is also hosted in Google’s Go package repository, so you can simply install using go:
$ go install cheatFor more installation options check out the Installing page on the cheat GitHub.
Some setup instructions: The first time you fire cheat up you’ll be prompted to create two configuration files, and an additional question asking if you’d like to download the default cheatsheets created by the community. Answer yes for now, you’ll always be able to create your own custom cheatsheets later.
The default output is a little plain:
Let’s improve the output format by editing the cheat config file ~/.config/cheat/conf.yml with your text editor of choice. Change the following lines to:
# Should 'cheat' always colorize output?
colorize: true

# Which 'chroma' colorscheme should be applied to the output?
# Options are available here:
#   https://github.com/alecthomas/chroma/tree/master/styles
style: tango
Personally, I like the tango style because it offers a lot of contrast, but I encourage you to try all of the options listed in the chroma repository and find the one you like best. The changes made to the config file manifest themselves as shown below:

A good improvement for sure, but I think we can still make the output more readable. To do this, we’ll pipe the output of cheat to your pager of choice. You already know that I have go with my new favorite, bat. To change the pager, we again edit ~/.config/cheat/conf.yml and then set the pager to the absolute path to the bat binary (just the name of the executable also works).
# Through which pager should output be piped?
# 'less -FRX' is recommended on Unix systems
# 'more' is recommended on Windows
pager: /usr/local/bin/bat
This gives the output:
Not bad, huh?
The final modification I want to make is the default text editor used when changing the cheat sheets (i.e., the cheat -e <sheet_name> command). The default option is nano, but I’m a masochist, so I set my editor to vim:
# The editor to use with 'cheat -e <sheet>'. Defaults to $EDITOR or $VISUAL.
editor: vim
Usage
Now that everything has been set up, we can use cheat. To see the cheatsheet for the command of your choice, execute the following:
$ cheat <command>To edit a cheatsheet, use the -e flag:
$ cheat -e <command>which will open up the file in the text editor of your choice. This feature is extremely useful — I found that the default rsync cheatsheet lacked some of the more arcane features I covered in my rsync: The most underrated command for copying files, so I wanted to add these (my future self will thank me).
Finally, to list all of the cheatsheets available, and their respective paths, use the -l flag:
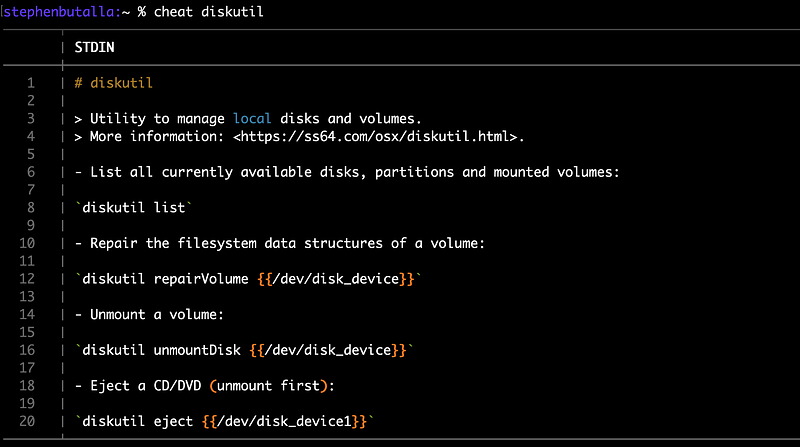
$ cheat -lAs I noted before, tldr has many more cheatsheets than cheat has, and for those of us who use macOS, all of the cheatsheets for the Apple-specific terminal utilities like diskutil, GetFileInfo, etc. are missing. cheat also lacks entries for many of the applications discussed in this article, such as eza, hyperfine, etc. I used the following “hack” to get the tldr-version of the OSX-specific cheatsheets in the meantime. My plan is to eventually update these sheets to match the cheat format (i.e., removing the Markdown syntax and formatting in the cheatsheet style), but that’s a problem for another day.
Note that this will change the default entries cheat has for pretty much all of the built-in utilities (e.g., top, gzip, etc.), to the tldr-defined pages. This can always be reverted, and I’ll show you a way to display the original cheatsheets if you choose to use this temporary fix.
Now, use this little Python script that I wrote which first clones the source for tldr from the GitHub repo (for simplicity, execute this script in your home directory; otherwise change the paths where necessary) to copy all of the tldr pages for the OSX-specific terminal utilities to your personal cheatsheet path:
from glob import glob
from subprocess import run

run(['git', 'clone', 'https://github.com/tldr-pages/tldr.git'])
tldr_pages_dir = '/Users/<username>/tldr/pages/osx/'

file_list = glob(tldr_pages_dir + '**') # get absolute paths for all tldr pages

cheat_personal_dir = '/Users/<username>/.config/cheat/cheatsheets/personal/'

for file in file_list:
    new_fname = file.split('.')[0].split('/')[-1]    # strip the absolute path and file extension
    run(['cp', file, cheat_personal_dir + new_fname] # copy the sheet

# run(['rm', '-r', 'tldr/']) # delete tldr source install (optional)
Place this in some file, script.py (editing the tldr_pages_dir and file_list paths appropriately), and then execute from your home directory:
$ python3 script.pyYou can now display the macOS-specific utility cheatsheets:
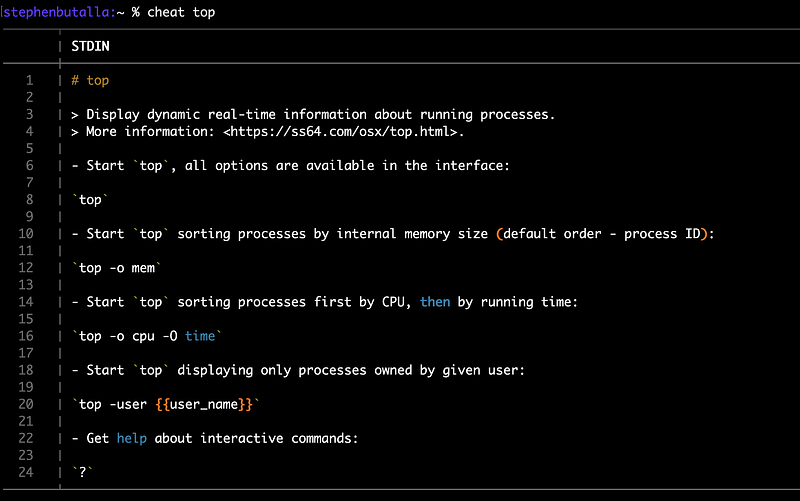
Note that for the shell built-in top has now defaulted to the tldr-version:
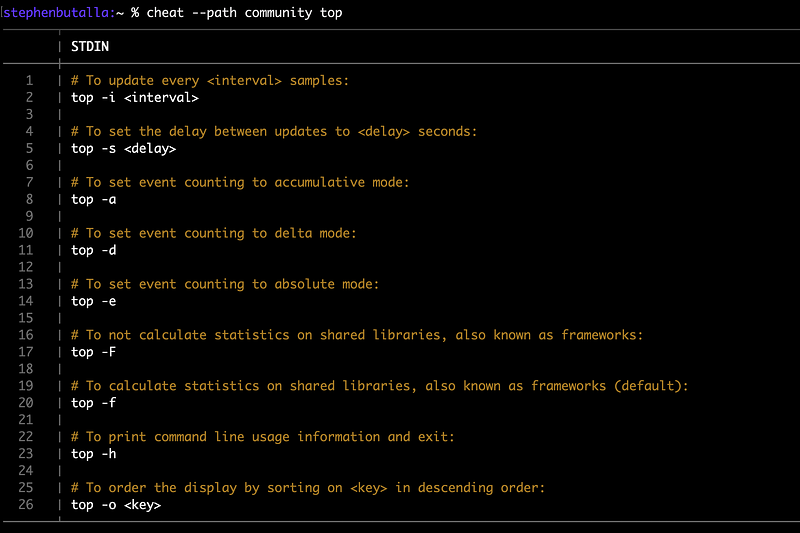
To change this, we can set the path to the community-defined cheatsheets using the --path option:
$ cheat --path community <utility>which reproduces the default output:
Summary
In this article we explored six different utilities for a variety of terminal applications, from du replacements to a tool that pulls up command line application cheatsheets. Below is a list of the tools, a short description, and links to the various GitHub repositories and brew formulae, so you can check out the source code, documentation, and the formulae specifics.
dust
Description: An extremely fast replacement for the disk usage utility, du.
GitHub: https://github.com/bootandy/dust
brew formula: https://formulae.brew.sh/formula/dust#default
ripgrep
Description: A lightning-quick grep alternative with better highlighting.
GitHub: https://github.com/BurntSushi/ripgrep
brew formula: https://formulae.brew.sh/formula/ripgrep#default
bat
Description: A modern, more beautiful version of cat.
GitHub: https://github.com/sharkdp/bat
brew formula: https://formulae.brew.sh/formula/bat#default
hyperfine
Description: A flexible benchmarking utility that provides some basic statistical analysis.
GitHub: https://github.com/sharkdp/hyperfine
brew formula: https://formulae.brew.sh/formula/hyperfine#default
eza
Description: An aesthetic and contemporary replacement for ls.
GitHub: https://github.com/eza-community/eza
brew formula: https://formulae.brew.sh/formula/eza#default
cheat
Description: Displays personal and community-created cheatsheets for terminal commands.
GitHub: https://github.com/cheat/cheat
brew formula: https://formulae.brew.sh/formula/cheat#default


