
Style Guide
What we expect from your submission, including how to format correctly and maximise your chances of distribution

Here at A Thousand Lives, we aim to get as many stories distributed as possible. If you don’t know, distribution is where Medium editor’s handpick stories to be shared amongst the appropriate topic pages. This was formally known as ‘curation.’ When this happens, you’ll likely experience an increase in views, readership, and ultimately, earnings.
Nobody knows all of the answers behind distribution. Still, we know that Medium editors are looking for a specific editorial standard that relies on appropriate formatting, accurate spelling and grammar, and ultimately, having a good takeaway for the reader.
If we pick you up on formatting, we’re not trying to be picky but want to maximise your chances of doing well on Medium. Sticking to this style guideline aims to increase your prospects of doing that.
Here are our handy tips for formatting and what we expect to see from your submissions.
Grammar, Spelling and Punctuation
Upon submitting your story, you should ensure it is the best possible standard, including correct grammar, spelling and punctuation. Make sure to read your story aloud to spot any grammatical errors you may have missed.
If you find errors in your work even after proofreading, try downloading the free version of Grammarly. You can install this into Google chrome, so it works automatically in the Medium editor. It can also be used in Google docs and Microsoft Word.
Book titles
If you are referencing a book in your story (which is highly likely), this should appear in the correct formatting. For example, harry potter and the goblet of fire should be written as Harry Potter and the Goblet of Fire. All titles of books should also be italicised, so the end product should look like this: Harry Potter and the Goblet of Fire.
English (United States) or English (United Kingdom)
Medium is an American company, and most writers here use the American spelling of English words. Evidently, it doesn’t matter what spelling you adopt, but we would like it to be consistent throughout your piece.
It would be best if you were not switching here and there between them both but stick to one or the other. Grammarly can also help detect this too.
Formating Your Articles
Although it may seem a little time consuming at first, Medium editors thrive off a correctly formatted article. Even if you’ve written the most amazing piece in the world, if it’s not correctly formatted, chances are, editors won’t give it a second glance.
Here are our top tips for formatting your articles.
Titles
All main titles should be formatted using title case.

If you’re not sure how to do this yourself, you can use a tool like this to convert your titles.
Coming up with a good title is one of the hardest parts of writing a story. However, they should aim to capture the reader’s attention, but not be too clickbaity or underdeliver. Medium (it appears) is gradually trying to move away from clickbait content to more evergreen articles.
That being said, some good phrases to include in your titles are:
- How to…
- X (a number) Books to Read…
- Why You Should…
Essentially how to’s, why’s, and numbers seem to do well for titles because they are active words and already imply the reader will get something out of reading your article.
Additionally, when you’re writing a book review, it’s best not just to write: Book Review: Midnight Sun as this doesn’t tell the reader anything other than what they already know. Instead, opt for something like Reading Midnight Sun Is the Perfect Return to Teenage Nostalgia.
Listicles are great and very reader-friendly. But try to stray away from generic titles such as 20 Books You Must Read Before You Die. Not only is this slightly clickbaity, but it’s also a bit bland. Try something like 10 Books to Read When you Are Going Through a Transitional Stage, as it’s slightly more nuanced.
Subtitles
Every article should include a sub-title formatted in sentence case (what I’m writing in now.) You write the subtitle in the box below the main title, but make sure it’s highlighted and formatted using the small ‘T’ in the Medium editor.

Subtitles are important as it’s one of the first things that readers see when they come across your article's preview. They should give enough information about the piece for somebody to get a flavour of the article, but not give away too much that they don’t end up clicking on it and reading the rest of the article.
In my experience, they’ve worked best when I directly address the reader or ask a question. However, it would be best to live up to your promises with the rest of your article, so you don’t come across as clickbaity. Here are some examples of my recently used subtitles.
Because to write, inspiration is key, and this selection of books may work for you too
Even the most avid fiction lover will find enjoyment from reading these
Headings
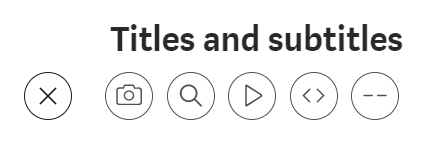
These should be used to divide up your piece of writing and should naturally occur when you change subject or move on to make a different point. They are formatted using the big ‘T’ in the Medium editor (see the screenshot below for the difference between headings and subheadings.)
In terms of length, ideally, they shouldn’t be longer than a sentence, as you can always use sub-headings to add in multiple sections.
You can format these using sentence case or title case. As long as it’s consistent throughout the piece, we don’t really mind.
Subheadings
If your story is not in a listicle format, with natural breaks in the text using main headings, we would advise dividing it up into readable chunks using subheadings where possible.
As many people read Medium on mobiles, using subheadings allows for more blank space to be created and ensures that smaller screens aren’t overcrowded with text. And the more reader-friendly the article is, the more likely it will be that they will stay on the page.
To create subheadings within an existing section, click on the small ‘T’ in the Medium editor by highlighting text in a new line.
Sub-headings should be formatted using sentence case.
Breaks
These are used in between headings to indicate a change of subject, rather like a paragraph does in an essay. Alternatively, they can be used instead of a heading in long-form writing.
They are found on the plus button in the Medium editor when you begin a new line. To insert a break, begin a new line in the editor and click on the furthest button on your right, which look like a dash. This will then create a break in your writing in the form of three dots.

Quotes
To insert quotes into your writing, copy and paste the text into the Medium editor. If you are directly quoting a book, person or any other piece of information, you need to format it correctly so the reader knows you are referencing something other than your own writing.
Please use the blockquote tool for this, not the pull quote. We prefer the former because it allows for a more seamless read.
The pull quote looks like this and can be found if you highlight your text and click on the speech marks button twice. It is a more indented version of the pull quote.
However, we would like you to use block quotes, and also provide a reference for the person, book, or whatever you are referencing where possible. You can simply turn it into a block quote, using the same editor, and add in a link like so — Violet Daniels (pretend there is a link with my name)
Quotes are a great asset to have in your articles, as it shows you’ve done your research and provides lots of knowledge for the reader. It’s crucial to format them correctly and provide a reference to sources where possible.
Images and Permissions
One of the main things that will slow us down from publishing your work is if you do not have an adequate image. Medium is pretty hot on images, and as a writer, you must have permission to re-use any image you find online. You can’t simply Google search, download an image and insert it into your article.
Under the creative commons licence, you have to have permission to re-use any images online and insert an attribution, linking back to the original source.
We suggest you use images from sites such as Unsplash or Pexels— these have a database full of images to use that is free. Alternatively, if you can’t find a suitable image, you can take your own.
All images used should be attributed. Simply insert an image into the editor, and write an appropriate caption underneath. Something along these lines will be fine:
- If it’s your own image — Image provided by the author, image acquired by the author, screenshot provided by the author, image created by the author using _ (insert software)
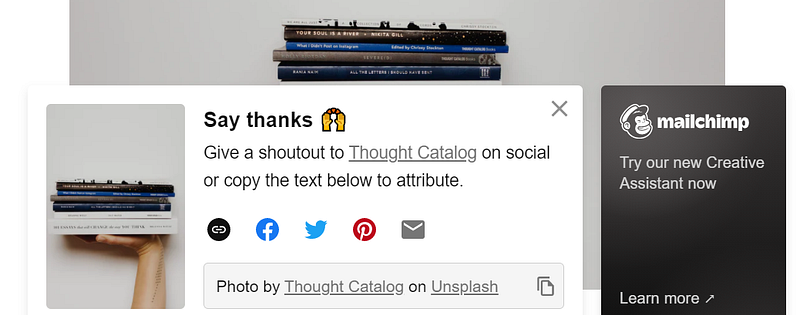
- Images that are free to re-use — Pexel and Unsplash have a pop up that automatically occurs when you download an image. Simply copy the attribution and paste it into the caption under your image.
Formating images
Having a featured image is non-negotiable, as this, alongside the title, will be the first thing that readers see when your article is published. Try to choose an image that isn’t overused but fits well with the ideas in your writing. Top tip — you can usually search by ‘newest’ on websites such as Unsplash, and these are less likely to be overused.
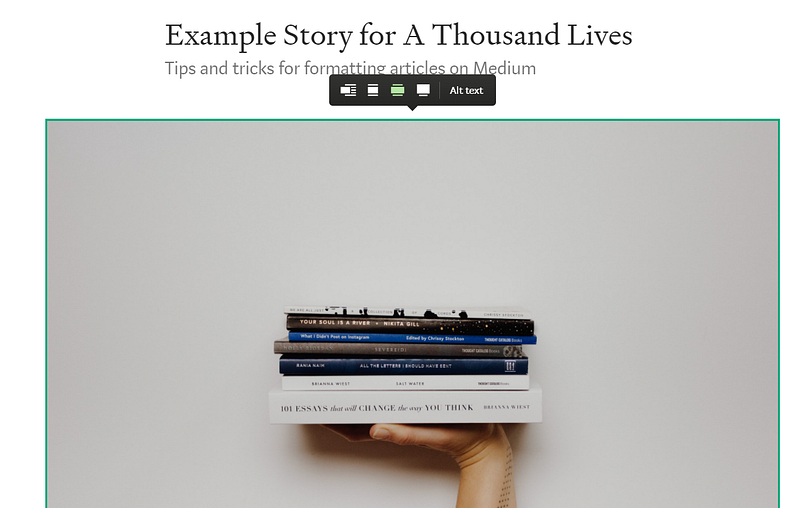
All featured images should be inserted directly below the sub-title and formatted using the second button from the right (I don’t know the actual name) on the editor tool. Just click on the image and select it from the panel, as shown by the highlighted button in green below.
Number of images
Having a featured image is a must, but it’s down to personal choice as to whether you add in any more images throughout your article.
However, we’d suggest having no more than an addition of 1–2 images as well as having a featured image. Too many images can sometimes clutter the page, which makes it longer to load and ultimately interferes with the reading.
Article Length
We suggest a story should be between 4–10 minutes long (800 words plus), but there is no formal limit on how long a story can be.
If you feel that your point can be expressed in fewer (or greater) words than this, feel free to submit, and we’ll review your piece.
Tags and SEO
Topic tags are an essential component of your article. These let Medium editors and readers know what your story is about and allow it to be distributed in the correct sections if Medium chooses. Additionally, using tags in your articles allows your work to be discovered by readers who don’t necessarily follow you but follow a certain topic.
For instance, if you wrote a book review and used the tag “Books”, then not only would your followers see it because they follow you, if Medium distributed it, it would appear in the books category. Using tags increases your readership and enhances distribution. You should include these in every story you submit to ATL:
- Books
- Reading
- Fiction/non-fiction
And then pick 2 others that best fit with your article. It’s best to use topic tags so that your work is distributed within the relevant sections. You can find these on the left-hand side of the Medium homepage.
How to insert tags
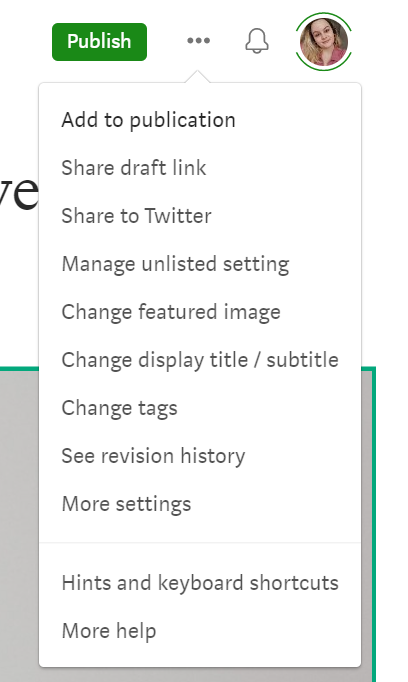
Tags can be added from two points in the Medium editor. When writing, they appear in the drop-down menu on the right-hand side, which appears when you click on the three dots. Simply click on ‘Change tags’ and type in the ones you want to use.
Alternatively, you can add tags by clicking on the publish or add to publication button that appears in green.
SEO title section
A lot of writers miss this out or do not know it’s there. I’m not going to claim to be an SEO expert or understand fully what it is — but I do know it’s essential for helping your article rank on Google and other search engines.
To fill in your SEO title, go to more settings on the drop-down menu and scroll down to the relevant section. It should include a brief, one-sentence description of your story using keywords. The Medium editor even offers guidance on word and character limits for this.
Topics We Love to Publish
If it’s about books, then chances are we’ll accept it, but take a look at our Write for Us page to find out specifics, or you can always discuss a potential idea or share a draft with us via email.
However, we would advise you to avoid writing on topics specifically about Medium as these will not get distributed, but if you feel it’s an important story you have to tell, then, of course, we’ll take a look.
Published and unpublished drafts
We give preference to unpublished drafts but will always consider drafts that have already been self-published.
We appreciate this is a long and extensive guide. Still, if we pick you up on any of these things, it’s not because we are being picky or don't want to publish your work, but we honestly want to work with you to increase your chances of getting distributed and increasing your readership.
Medium is constantly changing its algorithm, but we know that correct formatting and editorial standards are important to the platform. You can read more about their distribution standards here.
For further advice on story ownership, Medium guidelines and rules, affiliate links, and CTA (call to action), you can visit the following page.
Once you have ensured your article is correctly formatted, please go ahead and submit in the usual way if you are already added as a writer. If you’re not already a writer and would like to write for us, please leave a comment with your username on this post.
If you have any questions (about anything!), please feel free to reach out and get in touch.
We will update this page in due course as soon as Medium makes any changes to its own editorial guidelines.


