
Streamline Your Productivity with ChatGPT in Google Docs
A Beginner’s Guide to Crafting Your Own Google Docs Plugin in Just 6 Steps

In this guide, you’ll learn how to create your own AI plugin for use with Google Docs. To do this, we will use OpenAI’s language models, GPT-3.5 or GPT-4, which are powering ChatGPT. Let’s dive right in.
Step 1: Create a new document & name it
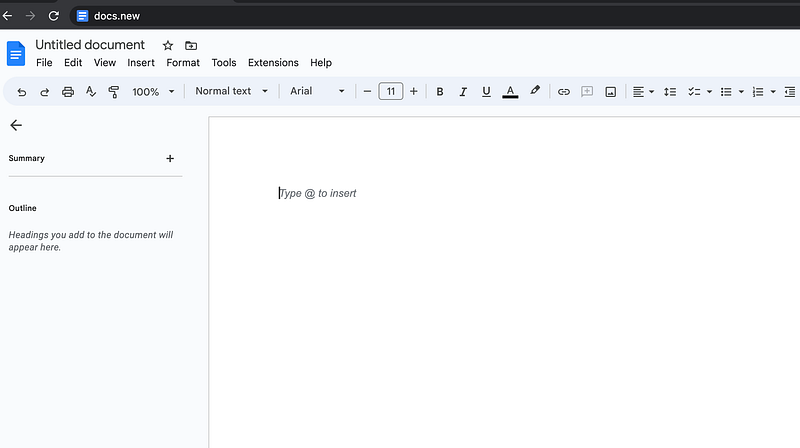
Create a new Google document or use a shortcut: type “docs.new” into your browser’s address bar.
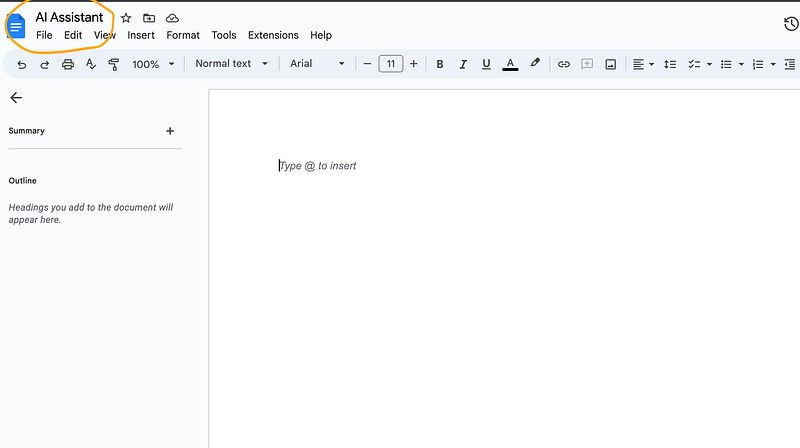
The AI plugin we are about to create will only work in this document, so name it in order to be able to find it again later (in this demo, I called mine “AI Assistant”).
Step 2: Create a new Apps Script & name it
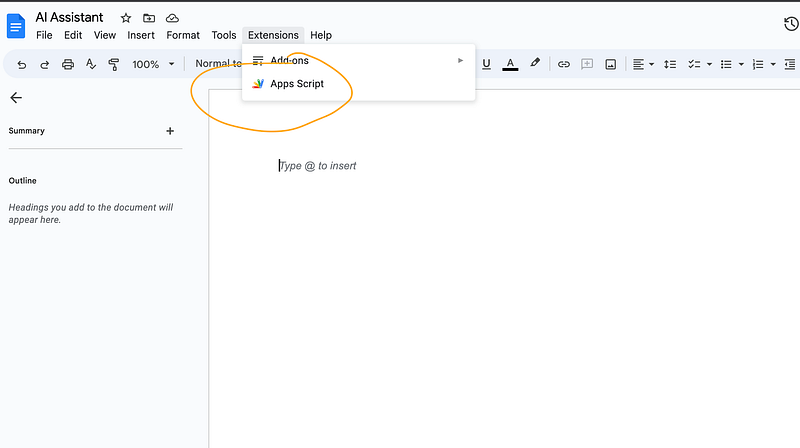
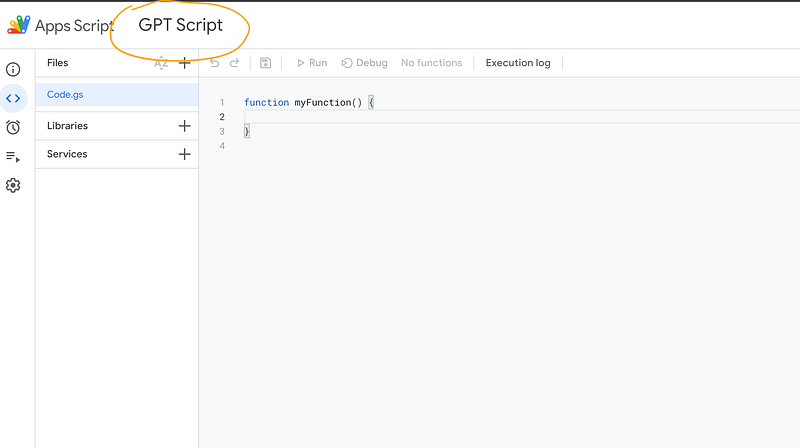
Navigate to “Extensions” > “Apps Scripts” and in the top left give your new Apps Script a name.
Apps Script is a scripting language that lets us automate tasks in Docs or Sheets.
Step 3: Add OpenAI API keys
In order to use OpenAI’s GPT 3.5 or GPT 4 (the models that are powering their ChatGPT interface), we need to add an API key to our Google App Script.
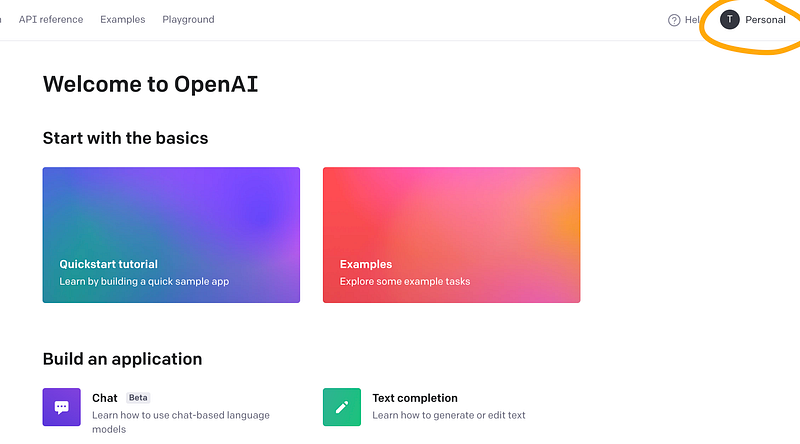
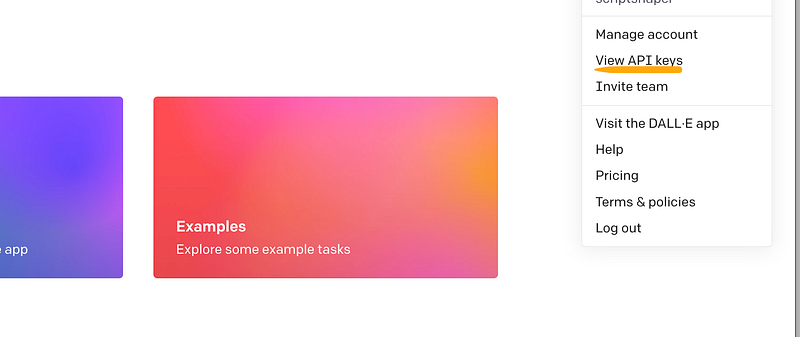
You can use an existing OpenAI API key or create a new one in your OpenAI account by navigating to “platform.openai.com”, clicking on “API keys” or “View API keys” in your account menu, and creating a new API key.
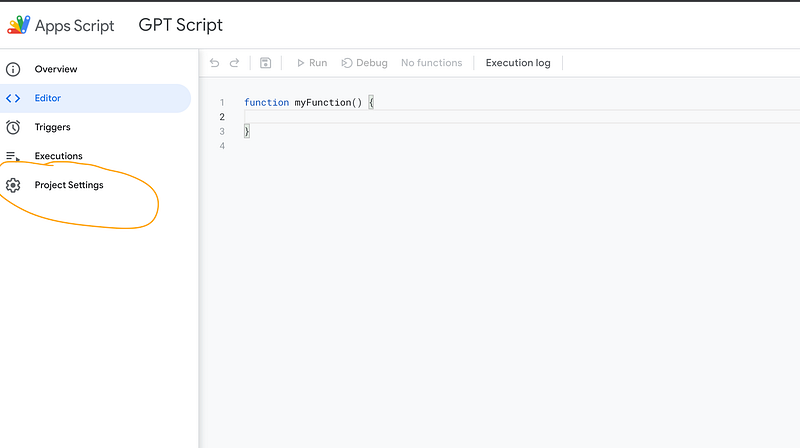
Once you have your OpenAI API key ready, navigate to “Project Settings” in your App Script …
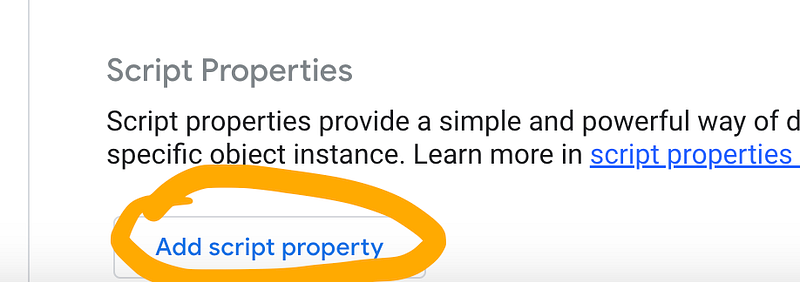
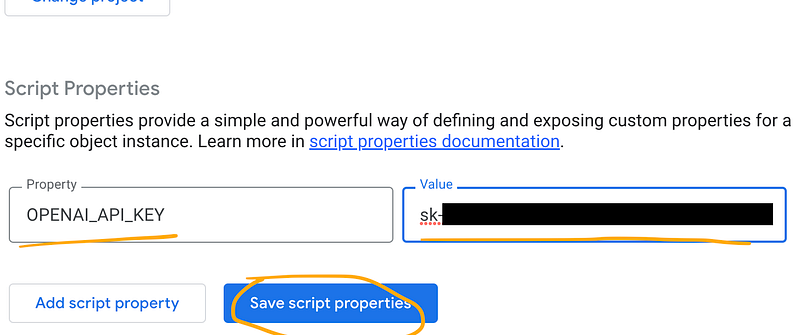
… and scroll all the way down to “Script Properties”, then click “Add script property”
Name the new property “OPENAI_API_KEY” and copy/paste your OpenAI API key into the “Value” field.
Step 4: Adding the script
Finally, navigate back to the App Script’s code editor (the “<>” symbol in the left menu) and click on “Code.gs”, the main script file we are now going to edit:
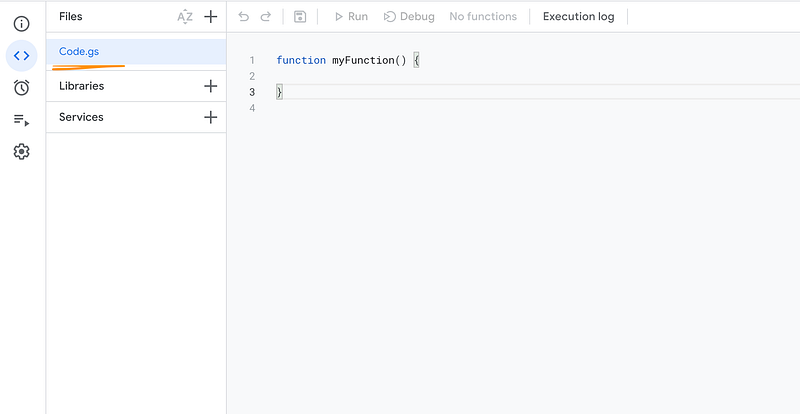
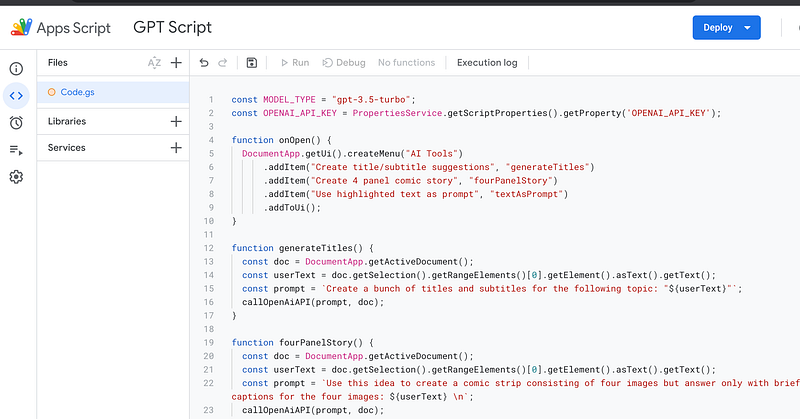
Replace the 3 lines of code in Code.gs with this:
const MODEL_TYPE = "gpt-3.5-turbo";
const OPENAI_API_KEY = PropertiesService.getScriptProperties().getProperty('OPENAI_API_KEY');

function onOpen() {
  DocumentApp.getUi().createMenu("AI Tools")
      .addItem("Create title/subtitle suggestions", "generateTitles")
      .addItem("Create 4 panel comic story", "fourPanelStory")
      .addItem("Use highlighted text as prompt", "textAsPrompt")
      .addToUi();
}

function generateTitles() {
  const doc = DocumentApp.getActiveDocument();
  const userText = doc.getSelection().getRangeElements()[0].getElement().asText().getText();
  const prompt = `Create a bunch of titles and subtitles for the following topic: "${userText}"`;
  callOpenAiAPI(prompt, doc);
}

function fourPanelStory() {
  const doc = DocumentApp.getActiveDocument();
  const userText = doc.getSelection().getRangeElements()[0].getElement().asText().getText();
  const prompt = `Use this idea to create a comic strip consisting of four images but answer only with brief image captions for the four images: ${userText} \n`;
  callOpenAiAPI(prompt, doc);
}

function textAsPrompt() {
  const doc = DocumentApp.getActiveDocument();
  const userText = doc.getSelection().getRangeElements()[0].getElement().asText().getText();
  const prompt = `${userText}`;
  callOpenAiAPI(prompt, doc);
}

function callOpenAiAPI(prompt, doc) {
  const body = doc.getBody();
  const temperature = 0.83;
  const maxTokens = 2060;
  const requestBody = {
    model: MODEL_TYPE,
    messages: [{role: "user", content: prompt}],
    temperature,
    max_tokens: maxTokens,
  };

  const options = {
    method: "POST",
    headers: {
      "Content-Type": "application/json",
      Authorization: "Bearer " + OPENAI_API_KEY,
    },
    payload: JSON.stringify(requestBody),
  };

  const response = UrlFetchApp.fetch("https://api.openai.com/v1/chat/completions", options);
  const responseText = response.getContentText();
  const json = JSON.parse(responseText);
  const generatedText = json['choices'][0]['message']['content'];

  Logger.log(generatedText);
  body.appendParagraph(generatedText.toString());
}
Your Code.gs file should now resemble the following:
Step 5: Save the script and run it
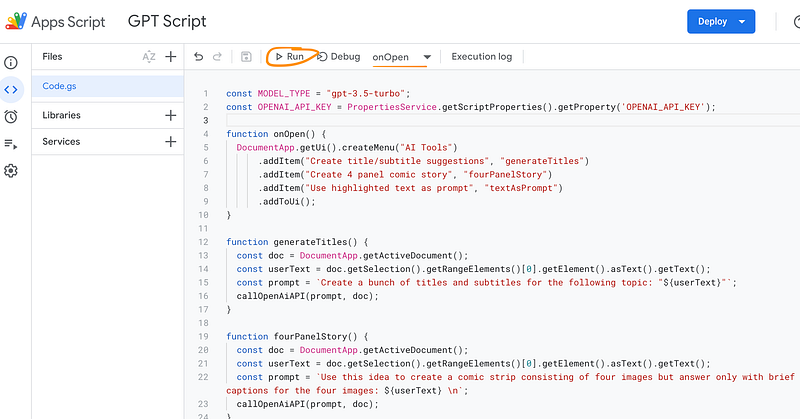
It’s time to save your work and test the script. Click the little 💾 item in the top menu to save the App Script.
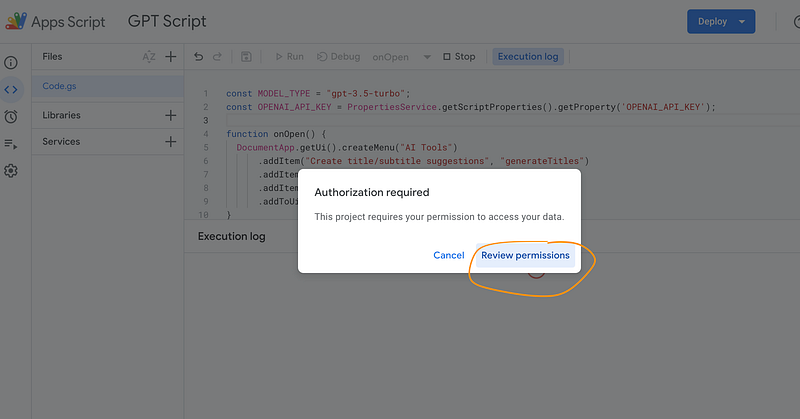
This will enable the “Run” button. Make sure that it says “onOpen” next to it (this is the function we want to run when the script starts). Click “Run”.
You will now be asked to review the permissions of the script. Since we will be calling an external service (the OpenAI server), Google asks us whether we trust this script and its external service.
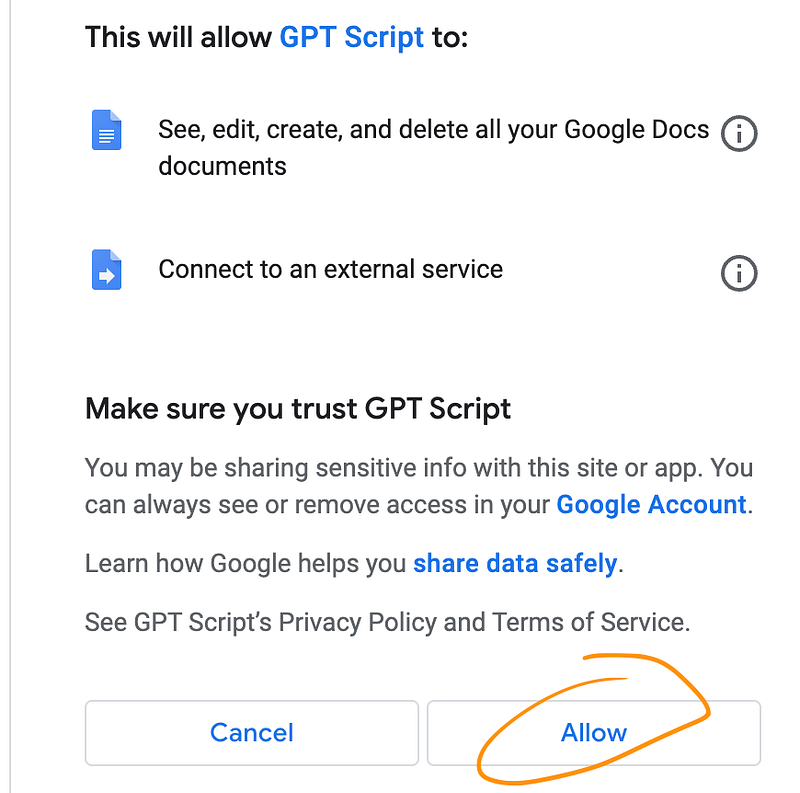
Since we do, click on “Advanced” and then “Go to [your script’s name] (unsafe)”. Log in with your account and click “Allow”.
The “unsafe” tag is Google’s default assumption here, it is safe to use (well, keep in mind that you will pay for text generations on a token basis: 1000 tokens generated by GPT 3.5 will cost $0.002, if you switch to GPT 4 then you’ll have to pay $0.06 for the same amount of tokens)

Step 6: Test the script and customize it
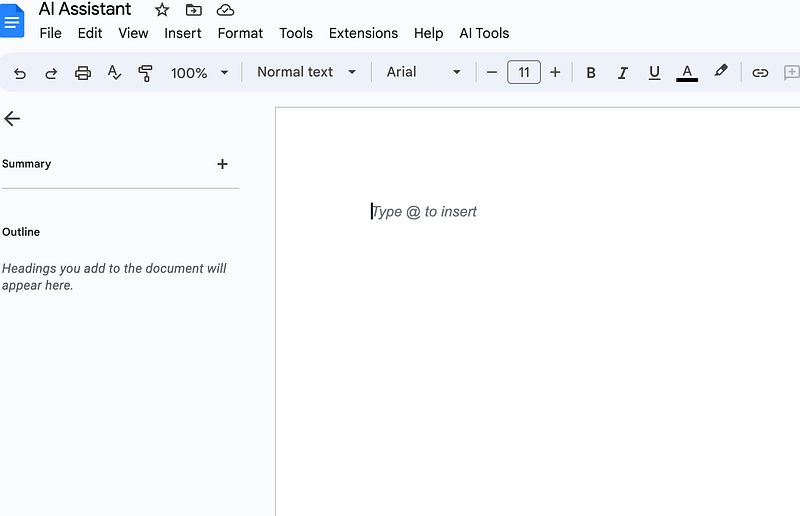
Once you reload your initial Google Doc, you will see a new menu called “AI Tools”.
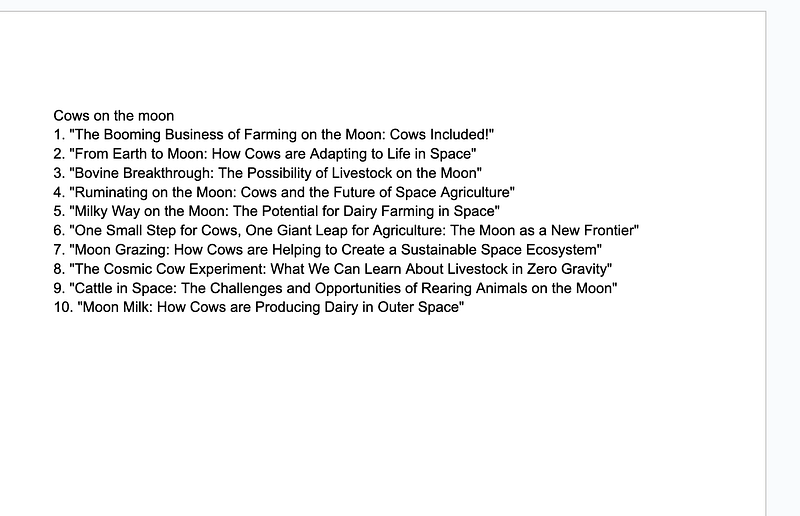
Three menu items showcase some of the possibilities you now have inside your Google Doc. If you highlight something and click one of the items the highlighted text will be processed accordingly.

Customization
Now, it’s time to change the script according to your needs. So, let’s have a look at the code real quick (navigate back to “Extensions” > “App Scripts” and choose the file we just worked with: “Code.gs”)
You will find a function called “onOpen” which is responsible for creating the new menu and the three menu items.
function onOpen() {
  DocumentApp.getUi().createMenu("AI Tools")
      .addItem("Create title/subtitle suggestions", "generateTitles")
      .addItem("Create 4 panel comic story", "fourPanelStory")
      .addItem("Use highlighted text as prompt", "textAsPrompt")
      .addToUi();
}
Each menu item has a corresponding function listed right next to the menu item’s name. For example, the menu item
“Create title/subtitle suggestions”
comes with a function called
“generateTitles”
If you scroll down a bit, you’ll see this function and how the underlying prompt is defined.
function generateTitles() {
  const doc = DocumentApp.getActiveDocument();
  const userText = doc.getSelection().getRangeElements()[0].getElement().asText().getText();
  const prompt = `Create a bunch of titles and subtitles for the following topic: "${userText}"`;
  callOpenAiAPI(prompt, doc);
}
In this case, whenever the menu item “Create title/subtitle suggestions” is clicked, the momentarily highlighted text area will be combined with this prompt and sent to OpenAI’s text completion model GPT 3.5.
Here’s the prompt alone:
Create a bunch of titles and subtitles for the following topic: "${userText}"The ${userText} part is the placeholder for the highlighted text from your Google Doc.
Now you can go on and change the menu name, its items, and the corresponding prompts.
Changing max tokens & temperature
You can also change the settings for your OpenAI API call here:
function callOpenAiAPI(prompt, doc) {
  const body = doc.getBody();
  const temperature = 0.83;
  const maxTokens = 2060;
  const requestBody = {
    model: MODEL_TYPE,
    messages: [{role: "user", content: prompt}],
    temperature,
    max_tokens: maxTokens,
  };
That’s it.
If you have any questions, feel free to comment on this article or reach out to me here on Medium or Twitter. Have fun exploring! 🚀
➡️ For more information about AI & Creativity, follow me on Twitter or Medium (use my referral link to get full access to all my articles and those of thousands of other writers).
➡️ If you like my content, why not leave a “clap” at the end of this article, so more people can see it?
Stay updated with the latest news and updates in the creative AI space — follow the Generative AI publication.