Spring Statemachine — Using Spring for Tracking State in Your Application.

Part Two Here.
Overview
Spring Statemachine (SSM) is a framework that can be used to implement a state machine in your SpringBoot applications. A state machine is computational model where there is a finite number of states and only one can be active at a time.
The state machine transitions from one state to another in response to an input event.
Often the concept of a state machine will be implemented during development and not during initial architectural design. This occurs when you notice in your code complicated loops with nested if-else statements or other branching logic. How do we know when we need a state machine? If you find any of the following patterns in your code then a state machine may be a good candidate.
- You are splitting multi-step or complex tasks into smaller tasks.
- Implementing boolean flags or enums to represent steps in a task.
- Having loops through larger if-else structures to check the before mentioned flags or enums.
If any or all of these are true then you may need to look at a state machine. If you are using Spring then SSM is a good candidate for solving this use case. Using this will help you.
- Prevent ugly multi layered decision statements.
- Formalize with type safety (enums) your workflow configuration.
- Modularize your workflow into transitions, actions, listeners and guards.
Glossary
- State Machine: this is the controlling entity that orchestrates a collection of states, regions, transitions and events. It has an Initial State, End State and a finite number of states that can be moved through in its definition.
- State: this represents a moment or situation which some condition is true.
- Transition: this is a relationship between a source state and a target state. How it moves from one state to a different state.
- Event: this is what a state machine uses to signal a state change.
- Region: a region is a related but not dependent part of a state machine. It contains states and transitions.
- Guard: boolean expression based on the value of state variables and/or event parameters. Can determine if a state transition should occur.
- Action: is behavior run during the triggering of the transition.
Our Use Case
We are going to implement a workflow for publishing an article. It follows a standard flow where the article stars unedited. Then the article is edited. Once editing is done it moves to review. From review it can be either rejected (which means it needs more editing) or can be published.
The Article Workflow can be depicted as follows:

We will look at in the following section how to implement this using SSM.
Implementation
The code for this can be found here.
Dependencies
The first part is we will take a standard SpringBoot application with Web, JPA and Lombok dependencies and add the SpringBoot Statemachine Starter dependency as follows.
First we need to declare the properties. Since we are using SpringBoot 3.x (3.1.5 as of time of writing) we will include the following version.
    <properties>
        <maven.compiler.source>17</maven.compiler.source>
        <maven.compiler.target>17</maven.compiler.target>
        <spring-statemachine.version>3.2.1</spring-statemachine.version>
    </properties>
and the following addition to the pom.
        <dependency>
            <groupId>org.springframework.statemachine</groupId>
            <artifactId>spring-statemachine-starter</artifactId>
        </dependency>
This will bring in the following dependencies into our project.
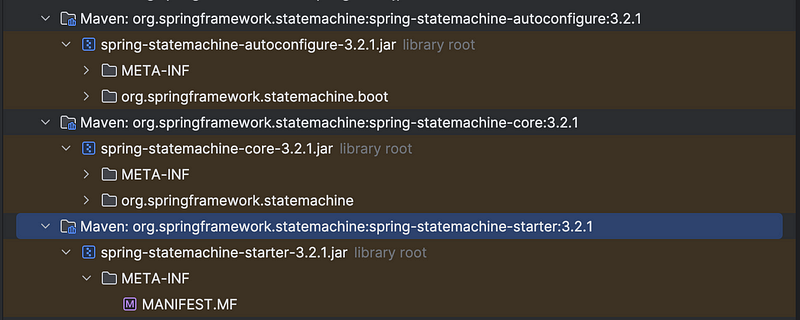
If you want to check for updated or more recent versions go to the Maven Repository. Type in your desired library, find it in the list and then check versions. This is how I determined to use 3.2.1 of the spring-statemachine-starter dependency.
Definitions
We are going to represent our possible states and events for transition using Java Enums. This is why it is important to sketch out your states using a diagram and assign valid names to your states and events before you begin coding. A UML diagram may be valuable, a description of the structure is outlined here.
Spring Statement machine can in fact read in a UML State Model created using Eclipse Papyrus framework using the spring-statemachine-uml dependency and a special UmlStateMachineModelFactory. This can be explored further here.
Once you have a diagram showing your workflow’s possible states and required events you can define the enum classes for these. For our purpose this is
public enum ArticleStates {
    UNEDITED_ARTICLE,
    EDITING_IN_PROGRESS,
    ARTICLE_IN_REVIEW,
    ARTICLE_PUBLISHED
}
and
public enum ArticleEvents {
    EDIT_ARTICLE,
    REVIEW_ARTICLE,
    REJECT_ARTICLE,
    PUBLISH_ARTICLE
}
These will provide the basis of our state machine configuration. We will also define a simple model class to represent our Article that is the target entity for which the state machine is being built. Since we will be persisting this to a database, we mark it with a JPA Entity annotation. Also, we defined our state column with the @Enumerated annotation and use our state enum class as type.
@Data
@Builder
@NoArgsConstructor
@AllArgsConstructor
@Entity
public class Article {

    @Id
    @GeneratedValue
    private Long id;

    @Enumerated(EnumType.STRING)
    private ArticleStates state;

    private String text;
}
since we have a define JPA Entity for our workflow target class, we will add a simple JPA Repository.
public interface ArticleRepository extends JpaRepository<Article, Long> {
}
Finally, following convention for future use we have a Data Transfer Object (DTO) defined for our entity class. This would be what is created from external interfaces whether REST or event messages.
@Data
@Builder
@NoArgsConstructor
@AllArgsConstructor
public class ArticleDto {

    private Long id;

    private ArticleStates state;

    private String text;
}
With that we can start to define our state machine configuration.
Configuration
The next part of our code we will review involves the configuration of the statement machine itself.
SSM allows defining a listener on our state machine configuration, this is extremely useful during development for logging the state transitions. This is defined as follows. Notice our enums are used throughout the code, this is a nice addition of providing type safety to our state machine.
public class Listener extends StateMachineListenerAdapter<ArticleStates, ArticleEvents> {
    @Override
    public void stateChanged(State<ArticleStates, ArticleEvents> from, State<ArticleStates, ArticleEvents> to) {
        System.out.println("state changed from " + offNullableState(from) + " to " + offNullableState(to));
    }

    @Override
    public void eventNotAccepted(Message<ArticleEvents> eventsMessage) {
        System.out.println("Error event not accepted " + eventsMessage);
    }

    private Object offNullableState(State<ArticleStates, ArticleEvents> s) {
        return Optional.ofNullable(s).map(State::getId).orElse(null);
    }
}
With the listener we can define our complete state machine configuration. I ask you to focus on the source, target and event fields for now. We will discuss the action and guard portion of the configuration in later sections of our article.
I want to highlight the use of the @EnableStateMachineFactory annotation which imports @Configuration related classes for building state machine factories. It provides you with more control, allows working with multiple statemachines within a single application and makes the StateMachineFactory class available for dependency injection as we will see later.
@Configuration
@EnableStateMachineFactory
@AllArgsConstructor
public class StateMachineConfig extends EnumStateMachineConfigurerAdapter<ArticleStates, ArticleEvents> {

    private final EditingAction editingAction;
    private final BeginEditAction beginEditAction;
    private final EditingCompleteAction editingCompleteAction;
    private final ReviewCompleteAction reviewCompleteAction;
    private final ArticleIdGuard articleIdGuard;

    @Override
    public void configure(StateMachineStateConfigurer<ArticleStates, ArticleEvents> states) throws Exception {
        states.withStates()
            .initial(ArticleStates.UNEDITED_ARTICLE)
            .states(EnumSet.allOf(ArticleStates.class))
            .end(ArticleStates.ARTICLE_PUBLISHED);
    }

    @Override
    public void configure(StateMachineTransitionConfigurer<ArticleStates, ArticleEvents> transitions) throws Exception {
        transitions
            .withExternal()
            .source(ArticleStates.UNEDITED_ARTICLE)
            .target(ArticleStates.EDITING_IN_PROGRESS)
            .event(ArticleEvents.EDIT_ARTICLE)
            .guard(articleIdGuard)
            .action(beginEditAction)
            .and()
            .withExternal()
            .source(ArticleStates.EDITING_IN_PROGRESS)
            .target(ArticleStates.ARTICLE_IN_REVIEW)
            .event(ArticleEvents.REVIEW_ARTICLE)
            .action(editingCompleteAction)
            .and()
            .withExternal()
            .source(ArticleStates.ARTICLE_IN_REVIEW)
            .target(ArticleStates.EDITING_IN_PROGRESS)
            .event(ArticleEvents.REJECT_ARTICLE)
            .action(reviewCompleteAction)
            .and()
            .withExternal()
            .source(ArticleStates.ARTICLE_IN_REVIEW)
            .target(ArticleStates.ARTICLE_PUBLISHED)
            .event(ArticleEvents.PUBLISH_ARTICLE)
            .action(reviewCompleteAction);
    }

    @Override
    public void configure(StateMachineConfigurationConfigurer<ArticleStates, ArticleEvents> config) throws Exception {
        config.withConfiguration()
            .autoStartup(true)
            .listener(new Listener());
    }
}
The first override defines the states, here we declare the start, the end and possible states that can be used within our state machine.
The second override defines the transitions. This goes back to where I explained having the proper state machine diagram becomes a major benefit to getting this correct. Within this section we define a source (the as-is state), the target (to to-be state) and the event that will trigger that transition.
For instance, we define that when our article is in the ArticleStates.UNEDITED_ARTICLE state, and it receives a ArticleEvents.EDIT_ARTICLE event it should transition to the ArticleStates.EDITING_IN_PROGRESS state. A clean and simple definition and I find more explainable and less error prone that a corresponding if .. else structure which would be done without SSM.
Also, if you refer back to our diagram earlier you will see four transitions defined, which equal the number in the configuration.
A state machine not only defines the flow, but we can implement code that is executed when that change in state takes place.
Actions
Actions are components that you can use to interact with a state machine. They can be run in multiple places in a state machine and its states lifecycle. In our case we have defined actions as part of the transition configuration.
I find creating dedicated classes for actions to provide the most clarity and reduce cluttering. In this way I can define an action as follows. The override takes the type-safe context parameter which is provided by the state machine itself when the action is invoked.
Within the context we define a header value that should be set by the initiator of the state machine. This value represents a unique id for the article we are tracking. We retrieve this value, then send a new event for the next event within the workflow to progress its state.
@Slf4j
@Component
public class BeginEditAction implements Action<ArticleStates, ArticleEvents> {

    @Override
    public void execute(StateContext<ArticleStates, ArticleEvents> context) {
        Long header = (Long) context.getMessageHeader(ArticleServiceImpl.ARTICLE_ID_HEADER);
        System.out.println("Doing action " + context.getTarget().getId() + " received article id " + header);

        context.getStateMachine().sendEvent(Mono.just(MessageBuilder.withPayload(ArticleEvents.EDIT_ARTICLE)
            .setHeader(ArticleServiceImpl.ARTICLE_ID_HEADER, header)
            .build())).doOnComplete(() -> System.out.println("Begin Edit Article handling")).subscribe();
    }
}
An example of special processing is done in our ReviewCompleteAction.java. In our state machine definition, you will remember we had two possible transitions, Successful and Reject. We setup some pseudo test code in our action to simulate this.
@Slf4j
@Component
public class ReviewCompleteAction implements Action<ArticleStates, ArticleEvents> {

    @Override
    public void execute(StateContext<ArticleStates, ArticleEvents> context) {
        Long header = (Long) context.getMessageHeader(ArticleServiceImpl.ARTICLE_ID_HEADER);
        System.out.println("Doing action " + context.getTarget().getId() + " received article id " + header);

        /*
        this is pseudo logic that will statistically publish every 8 out 10 times and reject 2 out
        of 10.
         */
        if (new Random().nextInt(10) < 8) {
            context.getStateMachine().sendEvent(Mono.just(MessageBuilder.withPayload(ArticleEvents.PUBLISH_ARTICLE)
                .setHeader(ArticleServiceImpl.ARTICLE_ID_HEADER, header)
                .build())).doOnComplete(() -> System.out.println("Review Successful handling complete")).subscribe();
        } else {
            context.getStateMachine().sendEvent(Mono.just(MessageBuilder.withPayload(ArticleEvents.REJECT_ARTICLE)
                .setHeader(ArticleServiceImpl.ARTICLE_ID_HEADER, header)
                .build())).doOnComplete(() -> System.out.println("Review Reject handling complete")).subscribe();
        }
    }
}
This will generate a random number between 0 and 9 and if the number is less than 8 it will accept the article and if it is greater than or equal to 8 it will reject it. Again, this is for our explanation only and these two outcomes would be split and triggered by external events coming into our state machine (e.g. a web interface an Editor or Proofer would press an accept or reject button).
I won’t include every other action in the code, they can be referred to in the accompanying text. But they all follow a similar pattern for implementing the action. Note that while our actions are simple, more complex logic can be implemented such as calling an external API and modifying or adding to the context through the header or payload.
Guard
A guard within a state machine is used to verify state and determine if a next transition can take place. In our configuration we included one guard as part of the initial transition. This will be used to make sure require information has been set when initializing the state machine. Specifically has the article id been set in the header which is required further processing. It returns a true or false depending on this being set.
@Component
public class ArticleIdGuard implements Guard<ArticleStates, ArticleEvents> {

    @Override
    public boolean evaluate(StateContext<ArticleStates, ArticleEvents> context) {
        boolean val = context.getMessageHeader(ArticleServiceImpl.ARTICLE_ID_HEADER) != null;
        System.out.println("Guard result is " + val);
        return val;
    }
}
If it returns false, the transition is not allowed and the state machine will remain in its current state.
Persisting State
State machines do not always run as we have implemented where transitions are synchronous and without delay. Transitions are often triggered from external events that may occur minutes, hours or even days after the last state was made active. For instance. in our article, when it is submitted for review the determination if the review was successful and there the article was published or it was rejected and requires more editing may take some time. Due to this, we need a mechanism to persist and retrieve our current state for an specific target entity (article). This can be done in various manners; we have chosen to implement this using a state interceptor.
@RequiredArgsConstructor
@Component
public class ArticleStateChangeInterceptor extends StateMachineInterceptorAdapter<ArticleStates, ArticleEvents> {

    private final ArticleRepository articleRepository;

    @Override
    public void preStateChange(State<ArticleStates, ArticleEvents> state, Message<ArticleEvents> message,
                               Transition<ArticleStates, ArticleEvents> transition, StateMachine<ArticleStates, ArticleEvents> stateMachine,
                               StateMachine<ArticleStates, ArticleEvents> rootStateMachine) {

        Optional.ofNullable(message).flatMap(msg ->
                Optional.ofNullable((Long) msg.getHeaders().getOrDefault(ArticleServiceImpl.ARTICLE_ID_HEADER, -1L))).
            ifPresent(articleId -> {
                Article article = articleRepository.getOne(articleId);
                article.setState(state.getId());
                articleRepository.save(article);
            });
    }
}
This retrieves our article id from the header value using the before defined repository, sets the new state, and then saves it. This is straight forward, now we need to define how the interceptor is configured.
Tying it all Together
With all of the configuration we have implemented we need a way to invoke our state machine. For this we define a service class that defines the different states and includes our the interceptor to ensure state is properly stored in the database. I like to define an interface first to match the required workflow steps. It also includes a method for creating a new article from an external one. We are passing the entity class, but this is often defined as a DTO.
public interface ArticleService {

    Article newArticle(ArticleDto articleDto);

    StateMachine<ArticleStates, ArticleEvents> beginEditing(Long articleId);

    StateMachine<ArticleStates, ArticleEvents> beginReviewing(Long paymentId);

    StateMachine<ArticleStates, ArticleEvents> publish(Long paymentId);
}
the associated implementation class is shown here.
@RequiredArgsConstructor
@Service
public class ArticleServiceImpl implements ArticleService {

    public static final String ARTICLE_ID_HEADER = "article_id";
    private final ArticleRepository articleRepository;
    private final StateMachineFactory<ArticleStates, ArticleEvents> stateMachineFactory;
    private final ArticleStateChangeInterceptor articleStateChangeInterceptor;

    @Override
    public Article newArticle(ArticleDto articleDto) {
        Article article = Article.builder()
            .state(ArticleStates.UNEDITED_ARTICLE)
            .text(articleDto.getText())
            .build();
        return articleRepository.save(article);
    }

    @Transactional
    @Override
    public StateMachine<ArticleStates, ArticleEvents> beginEditing(Long articleId) {
        StateMachine<ArticleStates, ArticleEvents> sm = build(articleId);

        sendEvent(articleId, sm, ArticleEvents.EDIT_ARTICLE);

        return sm;
    }

    @Transactional
    @Override
    public StateMachine<ArticleStates, ArticleEvents> beginReviewing(Long articleId) {
        StateMachine<ArticleStates, ArticleEvents> sm = build(articleId);

        sendEvent(articleId, sm, ArticleEvents.REVIEW_ARTICLE);

        return sm;
    }

    @Transactional
    @Override
    public StateMachine<ArticleStates, ArticleEvents> publish(Long articleId) {
        StateMachine<ArticleStates, ArticleEvents> sm = build(articleId);

        sendEvent(articleId, sm, ArticleEvents.PUBLISH_ARTICLE);

        return sm;
    }

    private void sendEvent(Long articleId, StateMachine<ArticleStates, ArticleEvents> sm,
                           ArticleEvents event) {
        Message<ArticleEvents> msg = MessageBuilder.withPayload(event)
            .setHeader(ARTICLE_ID_HEADER, articleId)
            .build();

        sm.sendEvent(Mono.just(msg)).subscribe();
    }

    private StateMachine<ArticleStates, ArticleEvents> build(Long paymentId) {
        Article article = articleRepository.getOne(paymentId);

        StateMachine<ArticleStates, ArticleEvents> sm = stateMachineFactory.getStateMachine(Long.toString(article.getId()));

        sm.stop();

        sm.getStateMachineAccessor()
            .doWithAllRegions(smInt -> {
                smInt.addStateMachineInterceptor(articleStateChangeInterceptor);
                smInt.resetStateMachine(new DefaultStateMachineContext<>(article.getState(), null, null, null));
            });

        sm.start();

        return sm;
    }
}
Our implementation follows the same pattern for each event handler method, it builds an Article using the build() method and gets a state machine object using the article id as the state machine identifier. It then sets the interceptor on our state machine and starts it.
Once this is done it sends an event related to that current step, making sure to set the article id in the header of the message passed in the event in the sendEvent() method.
Using this pattern, each handler method, such as beginEditing(Long articleId) is simple and can reuse these two methods for sending information to the state machine.
With this we are done with our implementation, but how can we test the state machine?
Testing
Testing can be done on our service class. In our test we will make sure the desired outcomes are processed depending on events as well as test our pseudo code for accepting or rejecting an article. This is done through a standard SpringBoot unit test.
@SpringBootTest
class ArticleServiceImplTest {

    @Autowired
    private ArticleRepository articleRepository;

    @Autowired
    private ArticleService articleService;

    private ArticleDto dto;

    @BeforeEach
    void setUp() {
        dto = new ArticleDto();
        dto.setText("Sample text");
    }

    @Transactional
    @Test
    void beginEditing() {

        Article newArticle = articleService.newArticle(dto);

        assertThat(newArticle.getState()).isEqualTo(ArticleStates.UNEDITED_ARTICLE);

        StateMachine<ArticleStates, ArticleEvents> sm = articleService.beginEditing(newArticle.getId());

        articleRepository.getOne(newArticle.getId());

        assertThat(sm.getState().getId()).isEqualTo(ArticleStates.EDITING_IN_PROGRESS);
    }

    @Transactional
    @RepeatedTest(10)
    void testFullFlow() {
        Article newArticle = articleService.newArticle(dto);

        System.out.println(newArticle.getState());
        assertThat(newArticle.getState()).isEqualTo(ArticleStates.UNEDITED_ARTICLE);

        StateMachine<ArticleStates, ArticleEvents> sm = articleService.beginEditing(newArticle.getId());

        assertThat(sm.getState().getId()).isEqualTo(ArticleStates.EDITING_IN_PROGRESS);

        sm = articleService.beginReviewing(newArticle.getId());
        assertThat(sm.getState().getId()).isEqualTo(ArticleStates.ARTICLE_IN_REVIEW);

        sm = articleService.publish(newArticle.getId());
        if (sm.getState().getId().equals(ArticleStates.ARTICLE_PUBLISHED)) {
            assertThat(sm.getState().getId()).isEqualTo(ArticleStates.ARTICLE_PUBLISHED);
        } else {
            assertThat(sm.getState().getId()).isEqualTo(ArticleStates.EDITING_IN_PROGRESS);
        }
    }
}
With this we have verified our state.
This was referred to in passing several times, but what we need in this unit test would be invoked through API and Event based messages as the state is progressed through human or machine interactions.
Summary
In this article we have seen a full implementation of a Spring Statemachine (SSM). We looked at the major components of a state machine such as actions, events, transitions, guards and how to interface with the state machine using listeners and interceptors.
Finally, a service class was implemented that tied it all together and we verified it with a unit test.
State machines for the right use case are extremely powerful and complexity reducing mechanisms to keep in your developer toolbox.
As always, the source for the article can be found in my Github repository here.
Enjoy the journey.
🔔 If you enjoyed this, subscribe to my future articles or view already published here. 🚀
📝 Have questions or suggestions? Leave a comment or message me through Medium.
Thank you for your support! 🌟


