
How to Create Telegram Bots Using Webhooks
It takes minimal coding to create your own Telegram bot. In fact, you don’t even need to have a code editor installed to start building one. By the end of this post, you’d have learned how to create your personal interactive telegram bot with just a Google Spreadsheet. The final product would be a bot that can reply to your messages. Something like this:
Before I hash out the step by step instructions, it’s important that you have a conceptual understanding of how your bot is going to work. To do so, we will touch on the the concept of webhooks and we will make frequent reference to Telegram Bot’s API documentation.
Nota bene: This post is part of a three point tutorial about Telegram bots (second part is here and third part still in the oven)
Quick intro to webhooks
There are two ways that apps integrate with each other — through polling and webhooks. When you place an online purchase and receive a message from your credit card app, that is app integration in action. When you transfer money from an app and receive an SMS for your OTP, that is app integration in action. Developers create a way for their apps to fetch data from each other because (1) it’s pretty cool and (2) it’s what many users want. For this reason, developers write instructions on how their app can send and receive data from other apps. But of course, they don’t make all their data available for fetching, they specify what type of data are okay to send and what their app can do if and when it receives data from another app. For Telegram, those instructions are written here.
Webhooks as fish hooks
Think of app integration as fishing. It’s like trying to fetch a fresh catch of fish only this time, your app is trying to fetch a fresh catch of data from another app. Now there are two ways you can fish — one, you throw a net over the water and check on it every set period to see if you’ve caught a fish or, two — you put a worm on a hook and wait until you feel the pull of a moving fish from the water. This is how API polling and webhooks work respectively. With API polling, an app checks in on another app every set period of time to see if there’s data available for fetching while with webhooks, an app just waits for data to be sent over to it. This data transfer is triggered by an event.
Wait, what are events?
Events are human triggered actions on an app. For example, clicking add to cart, sending messages to someone or going to a specific web page are all human triggered events. There are data attached to these events. For example, when you place an item on your cart — the timestamp, the item and the price are likely part of the data that gets generated from that event. On Telegram, when you send a message to a bot, the time stamp, your user ID, your message ID and your message are all part of the data that gets generated.
Requirements:
There are two things we need to create a bot using webhooks:
- An entry pass — we cannot just access data from another app just like that. Developers need a way to trace back who is accessing their apps from the back door. To do so, they give out unique keys to anyone who wishes to enter their apps outside the main user interface. I will show you how to obtain a key from Telegram in a minute.
- A loading dock — once we have access to another app, we can now start fetching data from it. But in order to do so, we need to have a loading dock or a place to receive that data. Our loading dock should be in the form of a web app URL. An app cannot unload any data to us if we don’t have a loading dock. From that dock, we can do whatever we want with the data. We can inspect it, manipulate it, ship it to another app or even send it back to its source app.
Here’s an image of a seaport to illustrate how webhooks work. First, a crane lifts a container from a ship and parks it on the loading dock. From there, whoever is controlling the seaport can choose to lift the container again and put it on another ship. Now imagine that the crane is the webhook and the two ships are two different apps while the loading dock is the webapp url. The webhook fetches the data from App 1 and sends it to a webapp url. From there, you can choose to send that data to App 2 or do whatever you want with it. That container is now yours to open, inspect or ship.

CREATING THE BOT
Now that you have a conceptual understanding of how webhooks work, we can now create the bot! There are six steps to follow:
Step 1: Obtain an entry pass
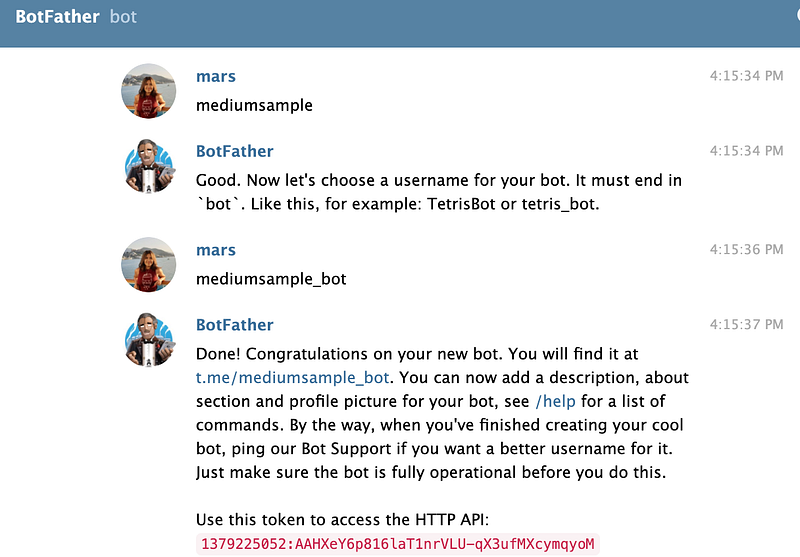
First thing’s first, we need an entry pass. In non-commercial apps this is something that may need to be manually asked from a developer but thankfully, there is a very easy way to get these entry keys or authorization tokens in Telegram. You ask them from Botfather!

Follow the steps to get your authorization token:
- Search for Botfather on Telegram. @ him at /@botfather
- Say hi to the Botfather (gotta pay respects)
- Send your bot name his way
- Bam! You got your authorization token 😃
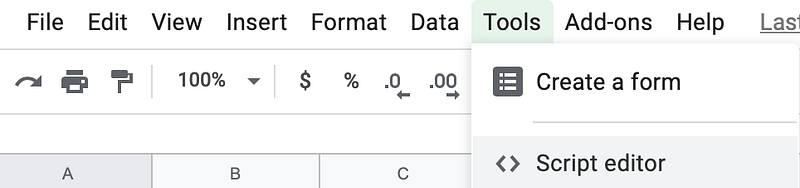
Step 2: Setup your Google Spreadsheet
Once we have the token, pull up an empty Google Spreadsheet and go to Tools > Script Editor. This is where we will be writing our code.
Step 3: Create a loading dock (webapp url)
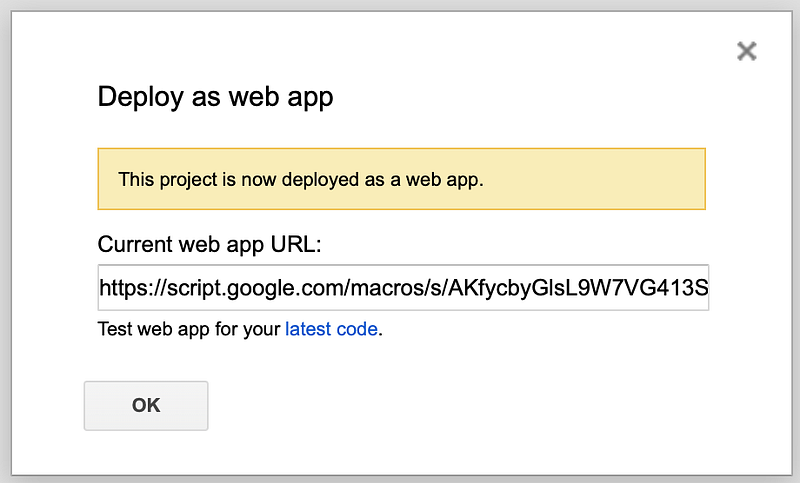
We need webapp url to receive the data from Telegram . Thankfully, Google provides a very easy way to publish web apps through its Script Editor. When we publish a script, we will get a unique webapp url. So go ahead and hit Publish on Google Spreadsheet’s Script Editor. Please note the drop down options on the image below. Every time you publish your work, the version should always be set as new, your email should be the one executing the app and anyone, even anonymous should be able to access it.
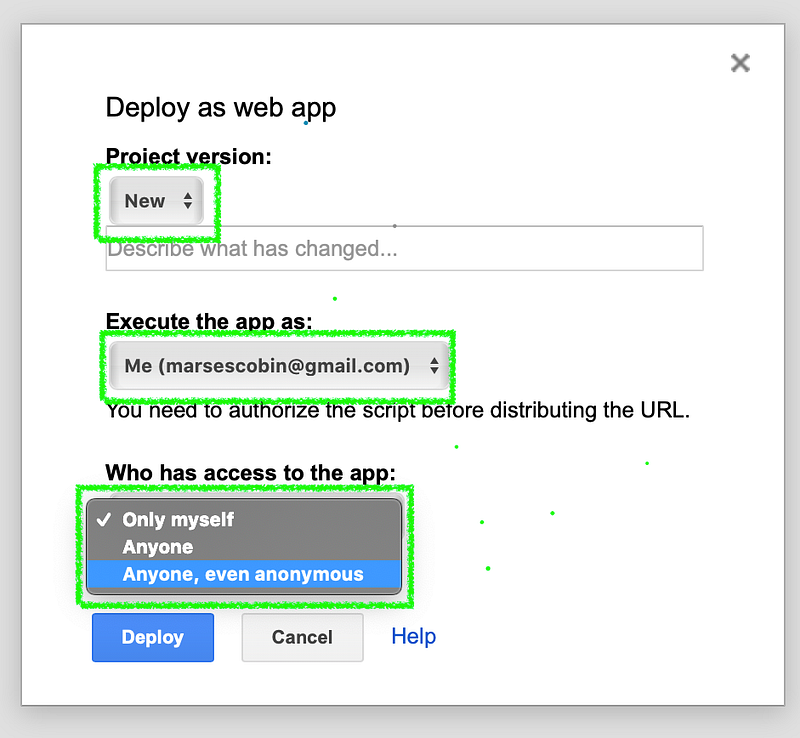
And now we have a webapp url! 😃
Step 4: Store all links in variables
Now that we have an entry pass and a loading dock, let’s build the webhook. According to the Telegram Bot API documentation, all queries to their API (App Programming Interface) must be presented in this form: https://api.telegram.org/bot<token>/METHOD_NAME It seems like we’re going to need this link every so often in our code. Let’s go ahead and store all the links we need in variables so we can easily refer to them later:
Step 5: Set up the webhook
To set up a webhook, let’s write a function that will allow us to fetch data from Telegram using the token we got from Botfather. This data should be sent directly to our webapp url. You may copy & paste the code below and hit publish when you’re done.
When you publish or deploy your code, you might be prompted to authorize your own app to access your data on Google:
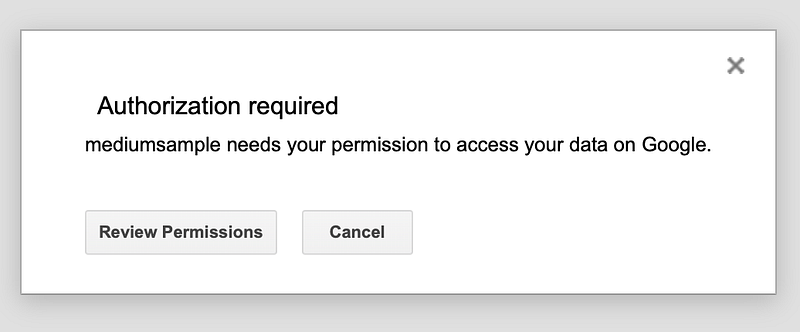
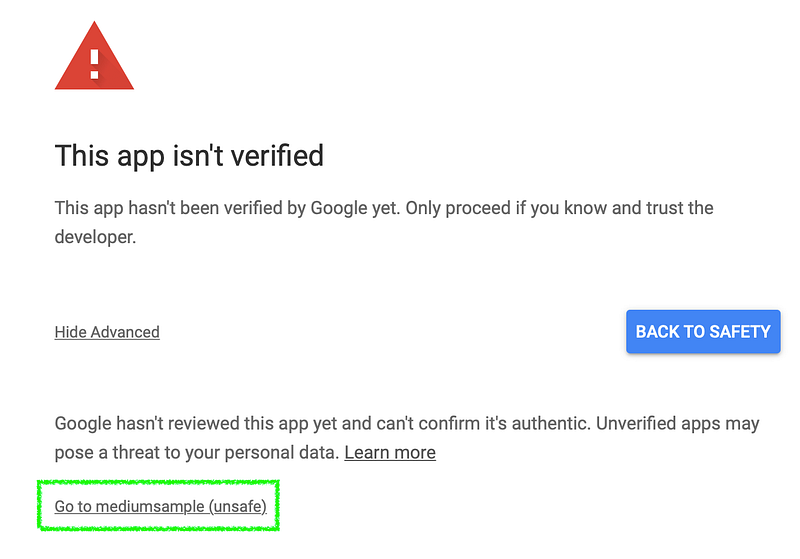
Just continue reviewing the permissions and authorizing it, life is too short to head back to safety:
Step 6: Set up the messaging
There are two things our bot needs to know before it can message someone:
- Who will it message? We need to give it a chat id.
- What should it say? We need to hand it a message to send.
Let’s write these requirements as parameters to our function. Feel free to copy & paste this code:
Step 7: Set up the POST requests
According to Telegram’s developers, all queries to their API must be served over an HTTPS request. They also mentioned they only support GET and POST requests. GET request means someone is trying to retrieve data while POST request means someone is trying to send data. This is the one concept in this tutorial that I don’t think I’ve mastered yet so I’ll quit pretending I know what I’m talking about and just link you to this article that helped me understand it better.
Anywho, the important thing to know is that you must write a function that can send a POST request to Telegram so you can send out a message every time a human talks to your bot. Feel free to copy & paste this code and I will explain what it does shortly:
We need this function because (1) this is our way of sending data to Telegram and (2) Google itself requires its Apps Script users (us) to include either a doGet or a doPost function when we’re publishing a web app. Here’s the written documentation for it. In this doc, Google also explained what the (e) argument in the function means. It represents the data that was created from a human generated event inside the app our webhook is connected to. In our use case, this e argument would contain all the data that gets created whenever a human sends a message to our Telegram bot. And that is where we will get the chat id of the user. Finally, all the ramblings earlier paid off 😃 .. (maybe?)
So here’s the story of our bot:
- When a user chats with our Telegram bot, that is an event. And that event generates data as represented by e.
- Our webhook auto-sends e to a webapp url.
- Once e lands on the webapp url, the webapp will want to send a POST request to Telegram. It will request Telegram to send a message back to the user.
- However, it cannot send the request with incomplete requirements. We need the chat id of the person we want Telegram to message and the message we want Telegram to send. The doPost function carries the message inside the variable text.
- The doPost function also carries the chat id but it first need to parse e to locate that data.
- Once located, it will now pass both requirements to Telegram with a sendMessage function. And that will trigger a message to be sent back to the user. Woo! Request complete. You now have a working bot:
In case you got lost along the way…
Here’s the full code:
Here’s a Youtube video too:
What’s next:
- Part 2 — how to store Telegram messages straight to Google Spreadsheet cells. I created a Trivia Bot as demo.
- Part 3 — how to create inline keyboard buttons on your Telegram bot. My remote team has personally used this to track attendance, performance and incentives. Still mustering the willpower to write a full blown tutorial but for the mean time, you may explore this article I wrote a year ago.
Stay tune.
P.S. Thanks to Wim for the foundational tutorial on Telegram Inline Keyboards. You may check it out on Wim’s Coding Tutorial for extra resources.


